- Подготовка сервера
- 2. Устанавливаем пакет компонентов Apache, MySQL, PHP (LAMP)
- 3. Устанавливаем phpMyAdmin
- 4. Устанавливаем FTP (для удобства работы с файлами)
- 5. Установка apache2-mpm-itk
- 6. Включение mod_rewrite (для возможности работы ЧПУ)
- Начало создания сайта
- 7. Создаём пользователя и каталога для работы с сайтами
- 8. Создаём виртуальный хост для сайта
- 9. Создаём базу данных MySQL
- На этом можно закончить. Полноценный хостинг для сайта готов.
- Install Ubuntu Server
- 2. Requirements
- 3. Boot from install media
- 4. Choose your language
- 5. Choose the correct keyboard layout
- 6. Choose your install
- 7. Networking
- 8. Configure storage
- 9. Select a device
- 10. Confirm partitions
- 11. Confirm changes
- 12. Set up a Profile
- 13. Install software
- 14. Installation complete
- 15. What next?
- Finding help
Подготовка сервера
2. Устанавливаем пакет компонентов Apache, MySQL, PHP (LAMP)
Символ ^ в конце обязателен — это часть команды
Во время установки MySQL будет выведен запрос на создание пароля root (это отдельный пароль администратора именно для SQL сервера, а не для основного администратора сервера).
Проверяем установку web-сервера http://[ip адрес сервера ubuntu] — должна отобразиться тестовая страница apache.
3. Устанавливаем phpMyAdmin
Необходимо выполнить следующие команды:
sudo ln -s /etc/phpmyadmin/apache.conf /etc/apache2/conf-available/phpmyadmin.conf
sudo a2enconf phpmyadmin
sudo /etc/init.d/apache2 reload
sudo apt-get install php-mbstring php-gettext
sudo phpenmod mcrypt
sudo phpenmod mbstring
sudo systemctl restart apache2
Проверяем доступность интерфейса http://[ip адрес сервера ubuntu]/phpmyadmin
4. Устанавливаем FTP (для удобства работы с файлами)
Во время установки будет предложено выбрать один из двух различных вариантов установки:
From inetd — демон ProFTPd будет работать из-под службы inetd.
Standalone — ProFTPd будет установлен как самостоятельный демон.
Рекомендую выбрать вариант Standalone, т.к. гораздо удобней работать с ProFTPd, как с отдельной службой.
После установки ftp сервер будет запущен и можно подключаться.
Однако, желательно его дополнительно настроить:
sudo nano /etc/proftpd/proftpd.conf
Раскомментировать значение RequireValidShell off и DefaultRoot ~
После настройки FTP нужно перезапустить:
5. Установка apache2-mpm-itk
Этот модуль нужен, чтобы сервер Apache мог рабтать с файлами сайта от имени владельца папки.
По умолчанию на директорию с файлами сайта распространяются права 755 и права 644 на все файлы. Это даёт права на запись файлов и папок только их владельцем. По этой причине при работе с файлами через FTP и Apache (например через интерфейс CMS) файлы будут сзданы от имени разных пользователей и возникают проблемы с их изменением или удалением. В решении именно этой проблемы и помогает данный модуль. Он указывает в настройках хоста каждого сайта от имени какого пользователя и группы будет работать Apache в указанной директории.
sudo apt-get install libapache2-mpm-itk
sudo a2enmod mpm_prefork
sudo a2enmod mpm_itk
sudo systemctl restart apache2
6. Включение mod_rewrite (для возможности работы ЧПУ)
Начало создания сайта
7. Создаём пользователя и каталога для работы с сайтами
( имя_пользователя — новый пользователь, от имени которого будут выполняться работы с сайтом. Это поможет разграничить права при работе с несколькими сайтами на одном сервере)
На предложение системы вводим пароль нового пользователя (дважды)
После создания пользователя размещаем отдельный каталог для сайта (например www), зайдя новым пользователем по FTP в домашний каталог, либо следующей командой:
sudo mkdir /home/имя_пользователя/www
sudo chown -R имя_пользователя : группа_пользователя /home/имя_пользователя/www/
(Т.к. в предыдущей команде, при создании пользователя для него не была указана существующая группа, то была автоматически создана группа с таким же именем, как имя пользователя. Т.е. в команде выше имя пользователя равно имени группы пользователя)
8. Создаём виртуальный хост для сайта
Создаём файл конфигурации виртуального хоста из варианта по-умолчанию
sudo cp /etc/apache2/sites-available/000-default.conf /etc/apache2/sites-available/новый_сайт.conf
Изменяем и дополняем следующие значения:
DocumentRoot /home/имя_пользователя/www
ServerName новый_сайт
ServerAdmin webmaster@localhost

AllowOverride All
Require all granted

AssignUserId имя_пользователя группа_пользователя
Включаем созданный виртуальный хоста и перезапускаем apache
9. Создаём базу данных MySQL
Необходимо зайти в кансоль управления mysql
При этом система запросит пароль root от mysql (именно от mysql, который задавался при установке LAMP). При удачном входе в кансоль mysql значение перед курсором сменится на mysql>. После этого создание новой базы sql и пользователя для управления ею можно выполнить одной командой:
create database имя_базы; GRANT ALL ON имя_базы.* TO ‘пользователь_базы‘@’localhost’IDENTIFIED BY ‘пароль_пользователя_базя_sql‘;
Для выхода из кансоли mysql нужно ввести команду
На этом можно закончить. Полноценный хостинг для сайта готов.
Дополнительно для удобства управления и контроля за сервером через WEB-интерфейс можно установить панель управления Webmin
Также дополнительно можно настроить параметры работы PHP («по вкусу» — например размер загружаемых фалов в параметре upload_max_filesize = 2M )
Install Ubuntu Server
Ubuntu Server is a variant of the standard Ubuntu you already know, tailored for networks and services. It’s just as capable of running a simple file server as it is operating within a 50,000 node cloud.
Unlike the installation of Ubuntu Desktop, Ubuntu Server does not include a graphical installation program. Instead, it uses a text menu-based process. If you’d rather install the desktop version, take a look at our Install Ubuntu desktop tutorial.
This guide will provide an overview of the installation from either a DVD or a USB flash drive.
For a more detailed guide on Ubuntu Server’s capabilities and its configuration, take a look at our the Community Ubuntu Server documentation.
2. Requirements
You’ll need to consider the following before starting the installation:
- Ensure you have at least 2GB of free storage space.
- Have access to either a DVD or a USB flash drive containing the version of Ubuntu Server you want to install.
- If you’re going to install Ubuntu Server alongside data you wish to keep, ensure you have a recent backup.
See the server guide pages for more specific details on hardware requirements. We also have several tutorials that explain how to create an Ubuntu DVD or USB flash drive.
3. Boot from install media
To trigger the installation process, perform the following:
- Put the Ubuntu DVD into your DVD drive (or insert the USB stick or other install media).
- Restart your computer.
After a few moments, you should see messages like those shown below on the screen…

Most computers will automatically boot from USB or DVD, though in some cases this is disabled to improve boot times. If you don’t see the boot message and the “Welcome” screen which should appear after it, you will need to set your computer to boot from the install media.
There should be an on-screen message when the computer starts telling you what key to press for settings or a boot menu. Depending on the manufacturer, this could be Escape , F2 , F10 or F12 . Simply restart your computer and hold down this key until the boot menu appears, then select the drive with the Ubuntu install media.
4. Choose your language
After the boot messages appear, a ‘Language’ menu will be displayed.

As the message suggests, use the Up , Down and Enter keys to navigate through the menu and select the language you wish to use.
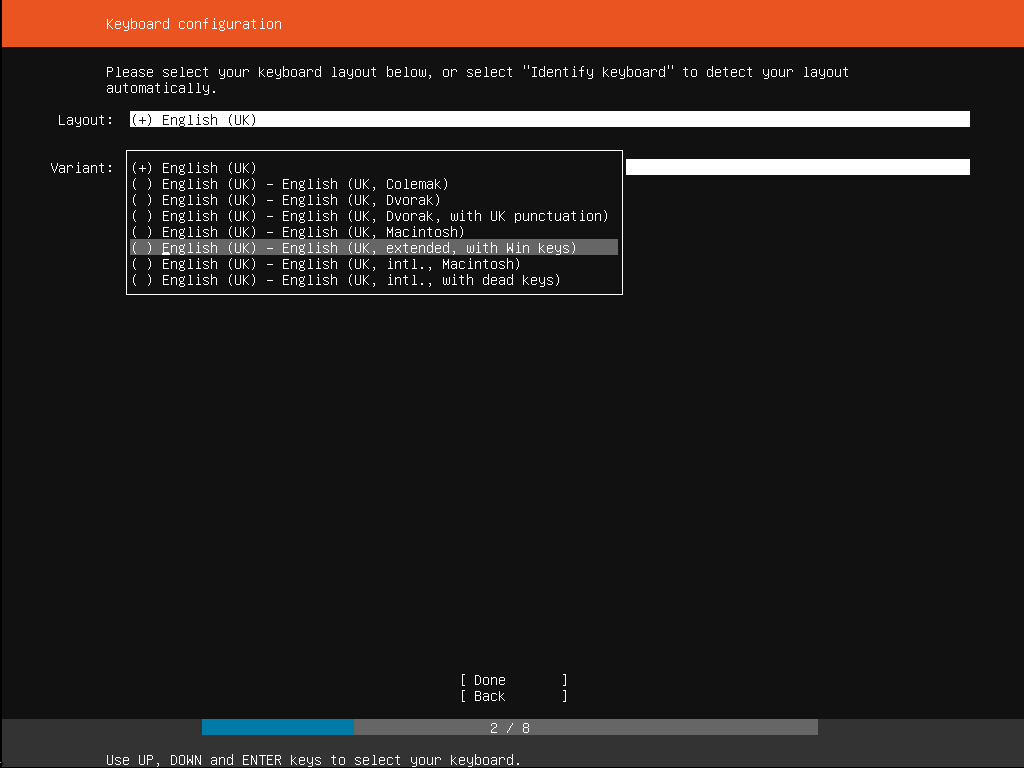
5. Choose the correct keyboard layout
Before you need to type anything in, the installer will next display a menu asking you to select your keyboard layout and, if applicable, the variant.

If you don’t know which particular variant you want, just go with the default — when Ubuntu Server has been installed you can test and change your preferences more easily if necessary.
6. Choose your install
Now we are ready to select what you want to install. There are three options in the menu:
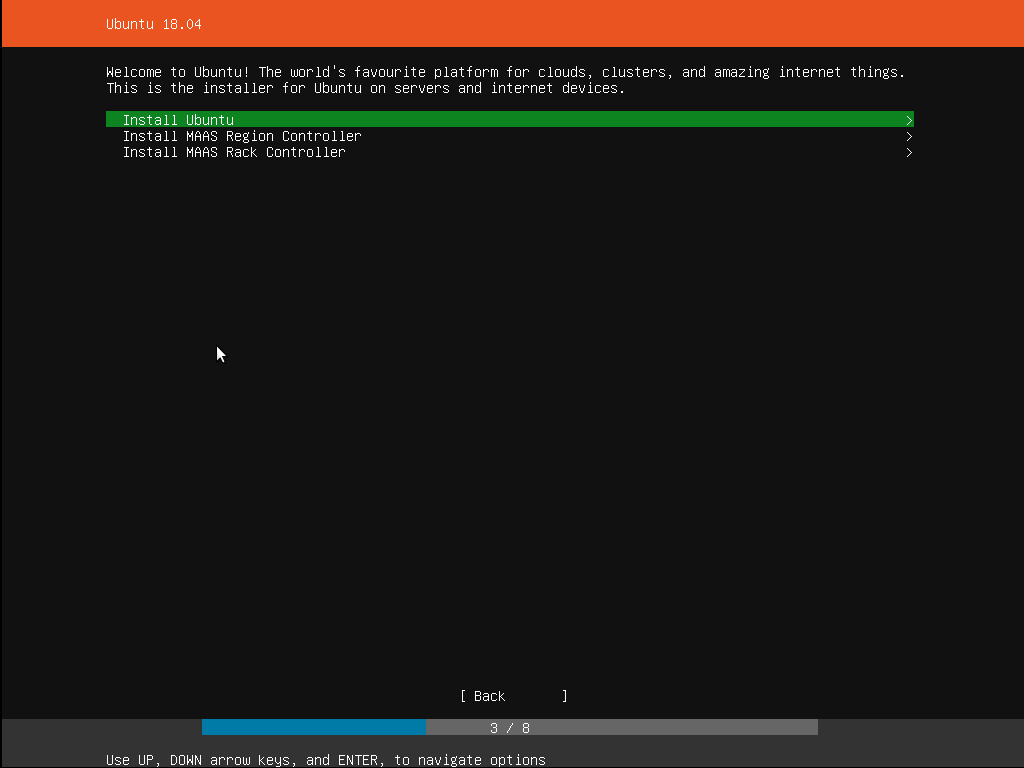
The bottom two options are used for installing specific components of a Metal As A Service (MAAS) install. If you are installing MAAS, you should check out the MAAS documentation for more information on this! The rest of this tutorial assumes you select the first option, Install Ubuntu .
7. Networking
The installer will automatically detect and try to configure any network connections via DHCP.

This is usually automatic and you will not have to enter anything on this screen, it is for information only.
If no network is found, the installer can continue anyway, it just won’t be able to check for updates. You can always configure networking after installation.
8. Configure storage
The next step is to configure storage. The recommended install is to have an entire disk or partition set aside for running Ubuntu.

If you need to set up a more complicated system, the manual option will allow you to select and reorganise partitions on any connected drives.
Note that Ubuntu no longer requires a separate partition for swap space, nor will the automated install create one.
9. Select a device
This menu will allow you to select a disk from the ones detected on the system.

To help identification, the drives will be listed using their system ID. Use the arrow keys and enter to select the disk you wish to use.
10. Confirm partitions
With the target drive selected, the installer will calculate what partitions to create and present this information…
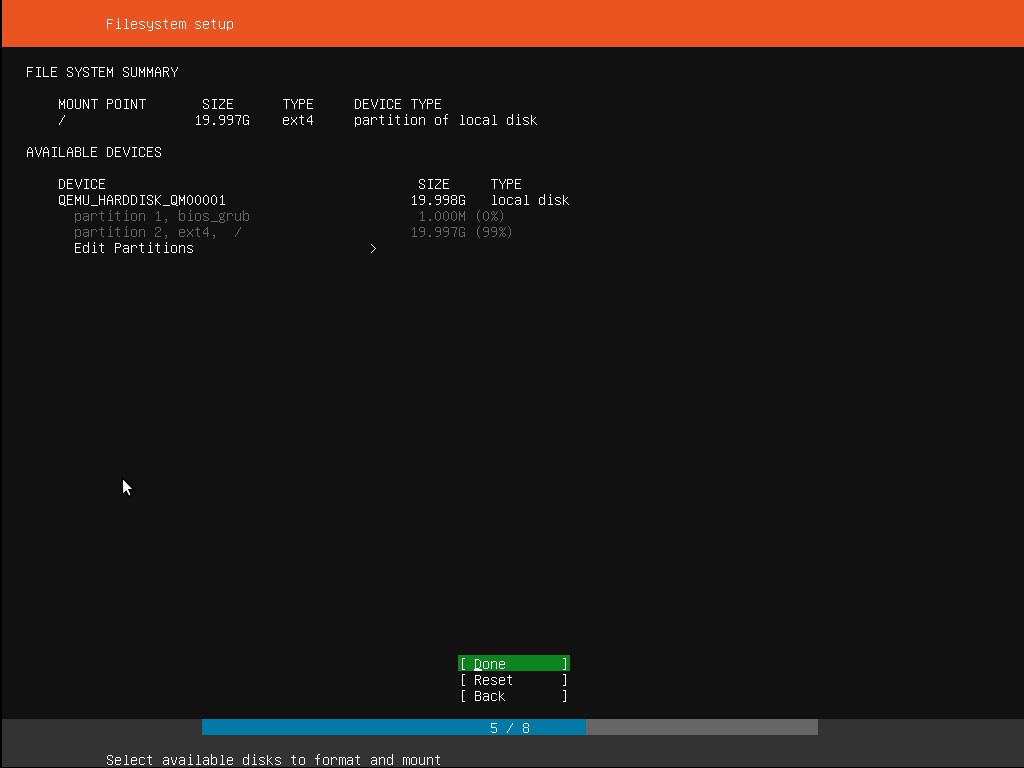
If this isn’t what you expected to see (e.g., you have selected the wrong drive), you should use the arrow keys and enter to select Back from the options at the bottom of the screen. This will take you back to the previous menu where you can select a different drive.
It is also possible to manually change the partitions here, by selecting Edit Partitions . Obviously you should only select this if you are familiar with how partitions work.
When you are happy with the disk layout displayed, select Done to continue.
11. Confirm changes
Before the installer makes any destructive changes, it will show this final confirmation step. Double check that everything looks good here and you aren’t about to reformat the wrong device!

There is no “Undo” for this step, once you confirm the changes, the indicated devices will be overwritten and any contents may be lost
12. Set up a Profile
The software is now being installed on the disk, but there is some more information the installer needs. Ubuntu Server needs to have at least one known user for the system, and a hostname. The user also needs a password.

There is also a field for importing SSH keys, either from Launchpad, Ubuntu One or Github. You simply need to enter the username and the installer will fetch the relevant keys and install them on the system ready for use (e.g. secure SSH login to the server).
13. Install software
Once you have finished entering the required information, the screen will now show the progress of the installer. Ubuntu Server now installs a concise set of useful software required for servers. This cuts down on the install and setup time dramatically. Of course, after the install is finished, you can install any additional software you may need.

14. Installation complete
When the install is complete, you will see a message like this on the screen.

Remember to remove the install media, and then press enter to reboot and start the server. Welcome to Ubuntu!
15. What next?
With Ubuntu Server installed, you can now carry on and build that file-server or multi-node cluster we mentioned!
If you are new to Ubuntu Server, we’d recommend reading the Server Guide.
You can also check out the latest on Ubuntu Server, and what others are using it for on the Ubuntu Server pages.
Finding help
The Ubuntu community, for both desktop and server, is one of the friendliest and most well populated you can find. That means if you get stuck, someone has probably already seen and solved the same problem.
Try asking for help in one of the following places:
Alternatively, if you need commercial support for your server deployments, take a look at Ubuntu Advantage.