- How to Install and Configure Linux NTP Server and Client
- I. Configure NTP server
- 1. Install NTP Server
- 2. Setup Restrict values in ntp.conf
- 3. Allow Only Specific Clients
- 4. Add Local Clock as Backup
- 5. Setup NTP Log Parameters
- 6. Start the NTP Serrver
- II. Configure NTP Client to Synchronize with NTP Server
- 7. Modify ntp.conf on NTP Client
- 8. Start the NTP Daemon
- 9. Check the NTP Status
- 10. Set Local Date and Time
- How to Install NTP Server and Client on Ubuntu
- Testing Environments
- Install & Configure NTP Server on Ubuntu 18.04 Server
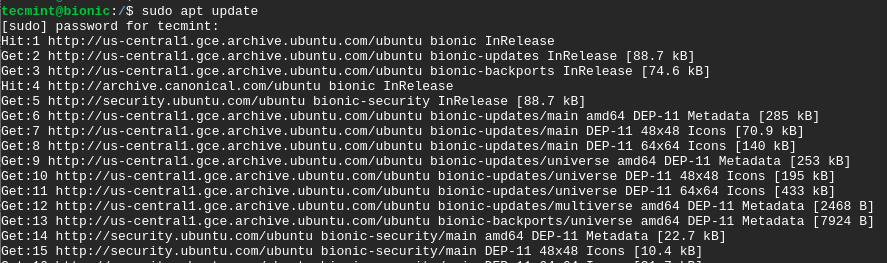
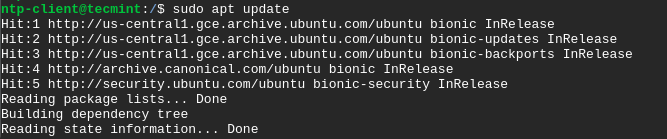
- Step 1: Update System Repositories
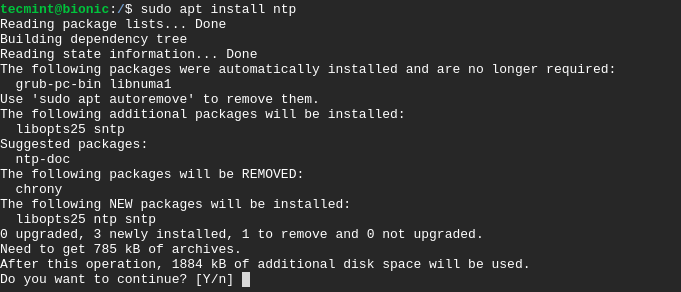
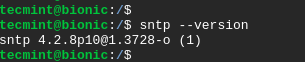
- Step 2: Install NTP Server on Ubuntu 18.04
- Step 3: Configure NTP Server Pools on Ubuntu 18.04
- Install & Configure NTP Client on Ubuntu 18.04 Client
- Step 1: Update System Repositories
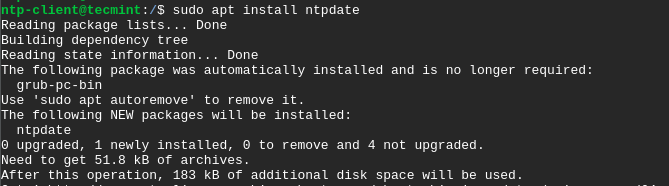
- Step 2: Install Ntpdate on Ubuntu 18.04
- Step 3: Verify Client Time Sync with NTP Server
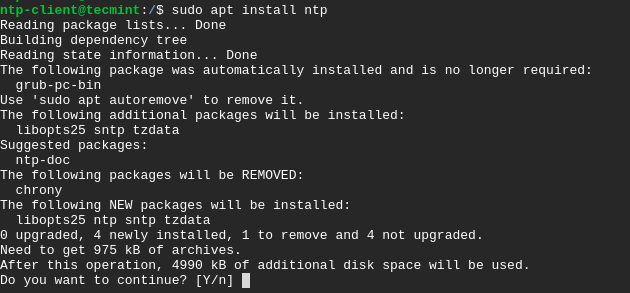
- Step 4: Install NTP Client on Ubuntu 18.04
- Step 5: Configure NTP Client on Ubuntu 18.04
- Step 6: Verify the NTP Time Synchronization Queue
How to Install and Configure Linux NTP Server and Client
NTP stands for Network Time Protocol. It is used to synchronize the time on your Linux system with a centralized NTP server. A local NTP server on the network can be synchronized with an external timing source to keep all the servers in your organization in-sync with an accurate time.
I. Configure NTP server
1. Install NTP Server
First, install NTP package on your server using the appropriate package management tool that is available on your Linux distro. For example, on RedHat or CentOS, use yum to install ntp as shown below:
2. Setup Restrict values in ntp.conf
# Permit time synchronization with our time source, but do not # permit the source to query or modify the service on this system. restrict default kod nomodify notrap nopeer noquery restrict -6 default kod nomodify notrap nopeer noquery
The first restrict line allows other clients to query your time server. This restrict line has the following parameters
- noquery prevents dumping status data from ntpd.
- notrap prevents control message trap service.
- nomodify prevents all ntpq queries that attempts to modify the server.
- nopeer prevents all packets that attempts to establish a peer association.
- Kod – Kiss-o-death packet is to be sent to reduce unwanted queries
The value -6 in the second line allows forces the DNS resolution to the IPV6 address resolution. For more information on the access parameters list, Please refer to documentation on “man ntp_acc”
3. Allow Only Specific Clients
To only allow machines on your own network to synchronize with your NTP server, add the following restrict line to your /etc/ntp.conf file:
restrict 192.168.1.0 mask 255.255.255.0 nomodify notrap
If the localhost needs to have the full access to query or modify, add the following line to /etc/ntp.conf
4. Add Local Clock as Backup
Add the local clock to the ntp.conf file so that if the NTP server is disconnected from the internet, NTP server provides time from its local system clock.
server 127.127.1.0 # local clock fudge 127.127.1.0 stratum 10
In the above line, Stratum is used to synchronize the time with the server based on distance. A stratum-1 time server acts as a primary network time standard. A stratum-2 server is connected to the stratum-1 server over the network. Thus, a stratum-2 server gets its time via NTP packet requests from a stratum-1 server. A stratum-3 server gets its time via NTP packet requests from a stratum-2 server, and so on.
Also stratum 0 devices are always used as reference clock.
5. Setup NTP Log Parameters
Specify the drift file and the log file location in your ntp.conf file
driftfile /var/lib/ntp/ntp.drift logfile /var/log/ntp.log
driftfile is used to log how far your clock is from what it should be, and slowly ntp should lower this value as time progress.
6. Start the NTP Serrver
After setting up appropriate values in the ntp.conf file, start the ntp service:
II. Configure NTP Client to Synchronize with NTP Server
7. Modify ntp.conf on NTP Client
This setup should be done on your NTP Client (Not on NTP-server)
To synchronize the time of your local Linux client machine with NTP server, edit the /etc/ntp.conf file on the client side. Here is an example of how the sample entries looks like. In the following example, you are specifying multiple servers to act as time server, which is helpful when one of the timeservers fails.
server 0.rhel.pool.ntp.org iburst server 1.rhel.pool.ntp.org iburst server 2.rhel.pool.ntp.org iburst server 3.rhel.pool.ntp.org iburst
iburst: After every poll, a burst of eight packets is sent instead of one. When the server is not responding, packets are sent 16s interval. When the server responds, packets are sent every 2s.
Edit your NTP.conf to reflect appropriate entries for your own NTP server.
prefer: If this option is specified that server is preferred over other servers. A response from the preferred server will be discarded if it differs significantly different from other server’s responses.
8. Start the NTP Daemon
Once the ntp.conf is configured with correct settings, start the ntp daemon.
You will see the NTP will slowly start to synchronize the time of your linux machine with the NTP Server.
9. Check the NTP Status
Check the status of NTP using the ntpq command. If you get any connection refused errors then the time server is not responding or the NTP daemon/port is not started or listening.
# ntpq -p remote refid st t when poll reach delay offset jitter ============================================================================== *elserver1 19.168.1.1 3 u 300 1024 377 1.225 -0.071 4.606
10. Set Local Date and Time
The ntpdate command can be used to set the local date and time by polling the NTP server. Typically, you’ll have to do this only one time.
Your jitter value should be low, else check the drift from the clock in the driftfile. You may also need to change to some other NTP server based on the difference. This command synchronizes the time with your NTP server manually.
After this initial sync, NTP client will talk to the NTP server on an on-going basis to make sure the local time reflects the accurate time.
You can also use the following command to get the current status of ntpd.
# ntpdc -c sysinfo system peer: thegeekstuff.com system peer mode: client leap indicator: 00 stratum: 4 precision: -23 root distance: 0.00279 s root dispersion: 0.06271 s reference ID: [19.168.1.1] reference time: d70bd07b.f4b5cf2b Wed, Apr 30 2014 15:41:47.955 system flags: auth monitor ntp kernel stats jitter: 0.000000 s stability: 0.000 ppm broadcastdelay: 0.000000 s authdelay: 0.000000 s
How to Install NTP Server and Client on Ubuntu
Network Time Protocol, commonly referred to as NTP, is a protocol that’s responsible for synchronizing system clocks in a network. NTP refers to both the protocol and the client system alongside the server programs residing on the networked systems.
In this guide, we will show you how to install NTP server and client(s) on Ubuntu 18.04.
Testing Environments
This guide aims at accomplishing the following:
- Installing and configuring NTP server on Ubuntu 18.04 server.
- Installing NTP client on Ubuntu 18.04 client machine and ensure that it is synched by the Server.
Install & Configure NTP Server on Ubuntu 18.04 Server
Below is a step-by-step procedure of installing the NTP server and making the necessary modifications to achieve the desired time synchronization in the network.
Step 1: Update System Repositories
To start off, let’s begin by updating the system packages as shown.
Step 2: Install NTP Server on Ubuntu 18.04
With system packages already installed, install NTP protocol on Ubuntu 18.04 LTS by running.
When prompted, type Y and hit ENTER to complete the installation process.
To confirm that NTP protocol has been successfully installed, run the command.
Step 3: Configure NTP Server Pools on Ubuntu 18.04
By default, NTP protocol comes with default NTP pool servers already configured in its configuration file as shown below in the /etc/ntp.conf file.
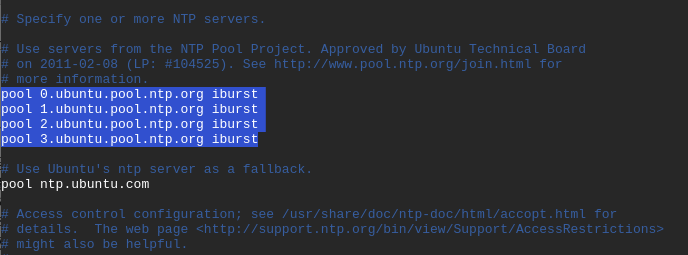
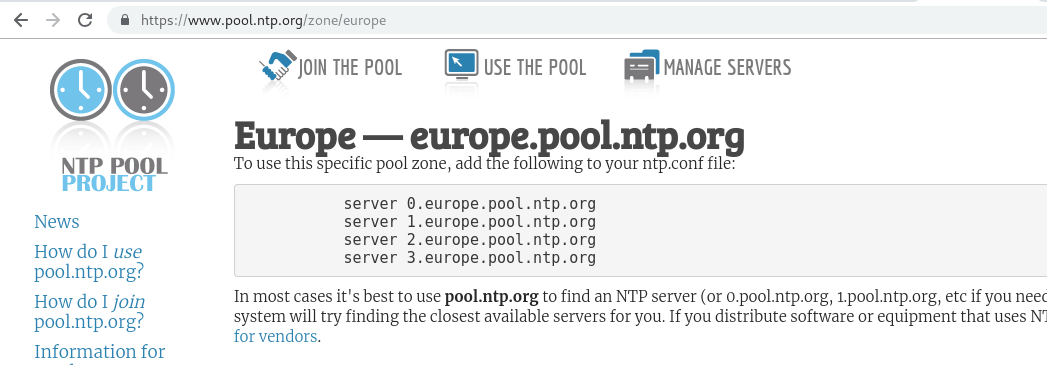
These usually work just as fine. However, you may consider changing to NTP server pools closest to your location. The link below directs you to a page where you can select your most preferred NTP pool list.
https://support.ntp.org/bin/view/Servers/NTPPoolServers
In our example, we will use the NTP pools located in Europe as shown.
To replace the default NTP pool servers, open the NTP configuration file using your favorite text editor as shown.
Copy and paste the NTP pool list in Europe to the configuration files as shown.
server 0.europe.pool.ntp.org server 1.europe.pool.ntp.org server 2.europe.pool.ntp.org server 3.europe.pool.ntp.org
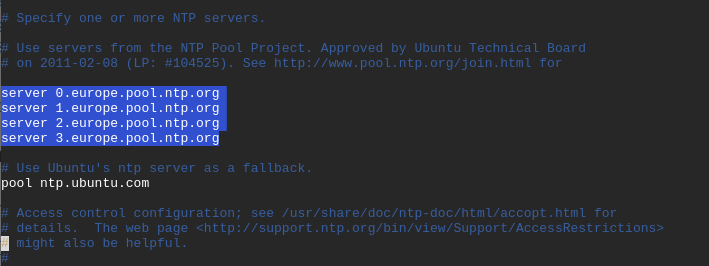
Next, save and quit the text editor.
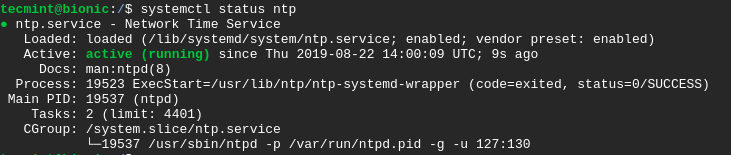
For the changes to take effect, restart the NTP service and verify its status using the commands.
$ sudo systemctl restart ntp $ sudo systemctl status ntp
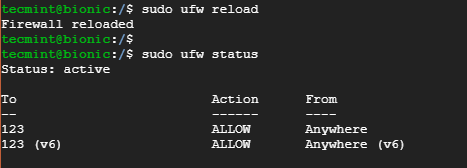
If UFW firewall is enabled, we need to allow NTP service across it so that client machines can access the NTP server.
$ sudo ufw allow ntp OR $ sudo ufw allow 123/udp
To implement the changes, reload the firewall as shown.
To verify the changes made execute the command.
Perfect! we have successfully set up our NTP server on Ubuntu 18.04 LTS system. Let’s now set up NTP on the client system.
Install & Configure NTP Client on Ubuntu 18.04 Client
In this section, we shall install and configure a NTP client on Ubuntu 18.04 client system to be synchronized by the Ubuntu 18.04 NTP Server system.
Step 1: Update System Repositories
To start off, update the system by running.
Step 2: Install Ntpdate on Ubuntu 18.04
ntpdate is a utility/program that quickly allows a system to synchronize time and date by querying an NTP server.
To install ntpdate run the command.
For the client system to resolve the NTP server by hostname, you need to add the NTP server’s IP address and hostname in the /etc/hosts file.
Therefore, Open the file using your favorite text editor.
Append the IP address and hostname as shown.

Step 3: Verify Client Time Sync with NTP Server
To manually check if the client system is in sync with the NTP server’s time, run the command.
$ sudo ntpdate NTP-server-hostname
In our case, the command will be.
A time offset between the NTP server and the client system will be displayed as shown.

To synchronize the client time with the NTP server, you need to turn off the timesynchd service on the client system.
$ sudo timedatectl set-ntp off
Step 4: Install NTP Client on Ubuntu 18.04
Next, you need to install NTP service on the client system. To achieve this, issue the command.
Press Y when prompted and hit ENTER to proceed with the installation process.
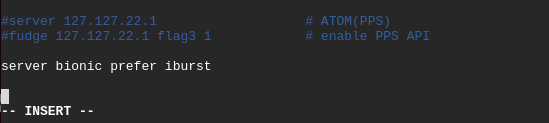
Step 5: Configure NTP Client on Ubuntu 18.04
The objective in this step is to use the NTP server earlier configured to act as our NTP server. For this to happen we need to edit the /etc/ntp.conf file.
Append the line below where bionic is the NTP server’s hostname.
server bionic prefer iburst
Save and exit the configuration file.
For the changes to come into effect, restart the NTP service as shown.
$ sudo systemctl restart ntp
Step 6: Verify the NTP Time Synchronization Queue
With the client and NTP server insync, you can view the sync details by executing the command.
Sample Output
remote refid st t when poll reach delay offset jitter ============================================================================== bionic 71.79.79.71 2 u 6 64 377 0.625 -0.252 0.063
This brings us to the end of this guide. At this point you have successfully configured the NTP server on Ubuntu 18.04 LTS and configured a client system to be synchronized with the NTP server. Feel free to reach out to us with your feedback.