- Install Ubuntu Server on Raspberry Pi in Headless Mode and SSH Into It
- Things You Will Need:
- Downloading Ubuntu Server 20.04 LTS Image for Raspberry Pi:
- Flashing Ubuntu Server 20.04 LTS Image to MicroSD Card:
- Configuring Wi-Fi Connectivity:
- Powering on the Raspberry Pi 4:
- Finding the IP Address of your Raspberry Pi 4:
- Accessing the Ubuntu Server 20.04 LTS Remotely via SSH:
- Conclusion:
- About the author
- Shahriar Shovon
- How to Install Ubuntu Server 22.04 LTS on Raspberry Pi 4
- How to Install Ubuntu Server 22.04 LTS on Raspberry Pi 4
- Setting Up WiFi on Ubuntu Server
- Accessing the Ubuntu Server from Laptop or PC
- Adding a Desktop Environment
- Conclusion
- About the author
- Awais Khan
Install Ubuntu Server on Raspberry Pi in Headless Mode and SSH Into It
![]()
Ubuntu is an open-source operating system. It is based on Debian GNU/Linux operating system. Ubuntu is a great operating system for your IoT projects on the Raspberry Pi 4.
In the headless setup of Ubuntu on Raspberry Pi 4, you don’t need a keyboard, a mouse, and a monitor. You can directly access the Ubuntu operating system installed on your Raspberry Pi 4 remotely via SSH.
In this article, I am going to show you how to install Ubuntu Server 20.04 LTS on your Raspberry Pi 4 in headless mode and configure SSH access. So, let’s get started.
Things You Will Need:
To follow this article, you need the following things:
- A Raspberry Pi 4 single-board computer
- A USB Type-C power adapter for your Raspberry Pi 4
- A 16 GB or 32 GB microSD card
- A laptop or a computer for flashing the Ubuntu Server image on the microSD card and accessing your Raspberry Pi 4 via SSH
- Raspberry Pi Imager or Balena Etcher installed on your laptop or computer for flashing the Ubuntu Server image on the microSD card.
If you need any assistance on installing Raspberry Pi Imager on your Linux operating system, check my article How to Install and Use Raspberry Pi Imager.
If you need any assistance on installing Balena Etcher on your Linux operating system, check my article Install Etcher on Linux.
In this article, I will use Raspberry Pi Imager for flashing the Ubuntu Server operating system image on the microSD card. You can use Balena Etcher if you want.
Downloading Ubuntu Server 20.04 LTS Image for Raspberry Pi:
To install Ubuntu on Raspberry Pi 4, you need to download the Ubuntu Server 20.04 LTS image for Raspberry Pi.
The Ubuntu Server 20.04 LTS Raspberry Pi image is available on the official website of Ubuntu.
Visit the official website of Ubuntu from your favorite web browser.
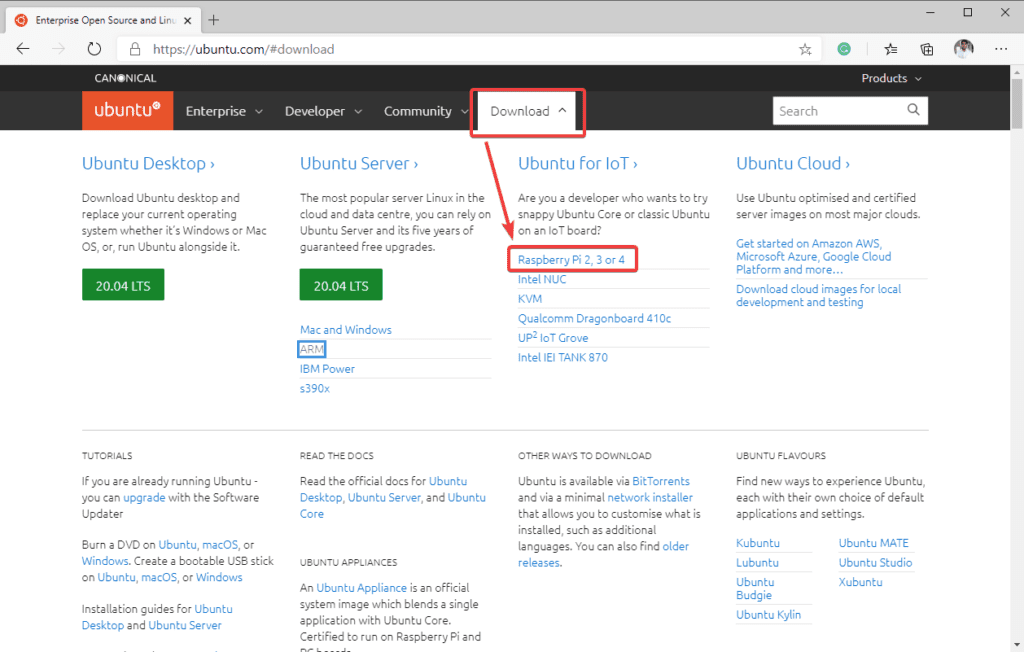
Once the page loads, click on Download and click on Raspberry Pi 2, 3, or 4 from the Ubuntu for the IoT section as marked in the screenshot below.
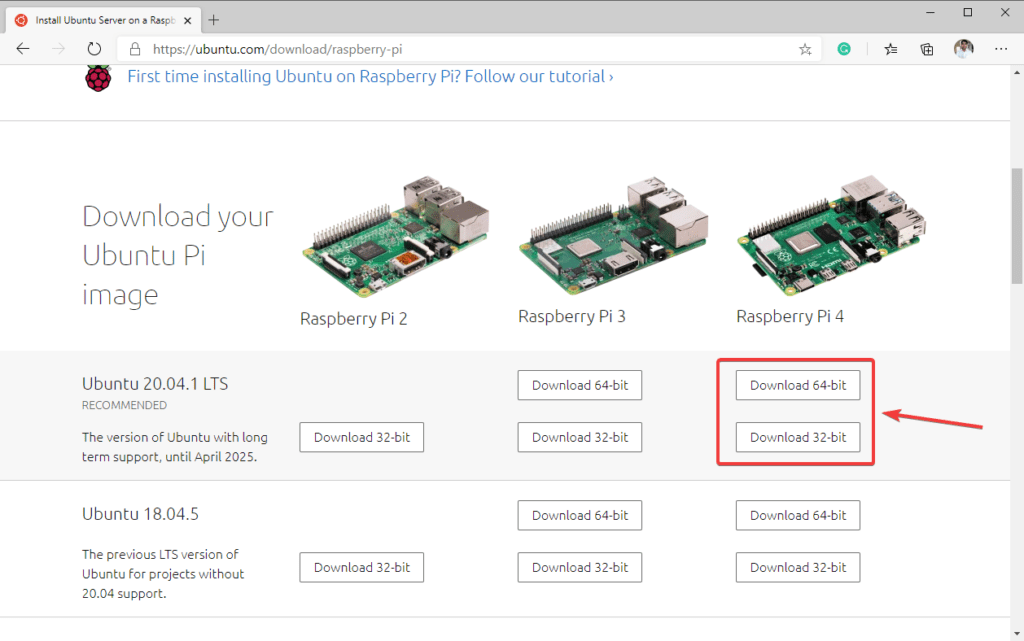
Once the page loads, scroll down a little bit and click on either the Download 64-bit or Download 32-bit button from the Ubuntu 20.04.1 LTS section as marked in the screenshot below.
If you’re using the 2GB or 4GB version of Raspberry Pi 4, then download the 32-bit Ubuntu 20.04 LTS image.
If you’re using the 8GB version of Raspberry Pi 4, then download the 64-bit Ubuntu 20.04 LTS image. Otherwise, you won’t be able to use the full 8GB RAM of your Raspberry Pi 4. A 32-bit operating system can address only 4GB of RAM.
Your browser should start downloading the Ubuntu Server 20.04 LTS image for Raspberry Pi shortly.
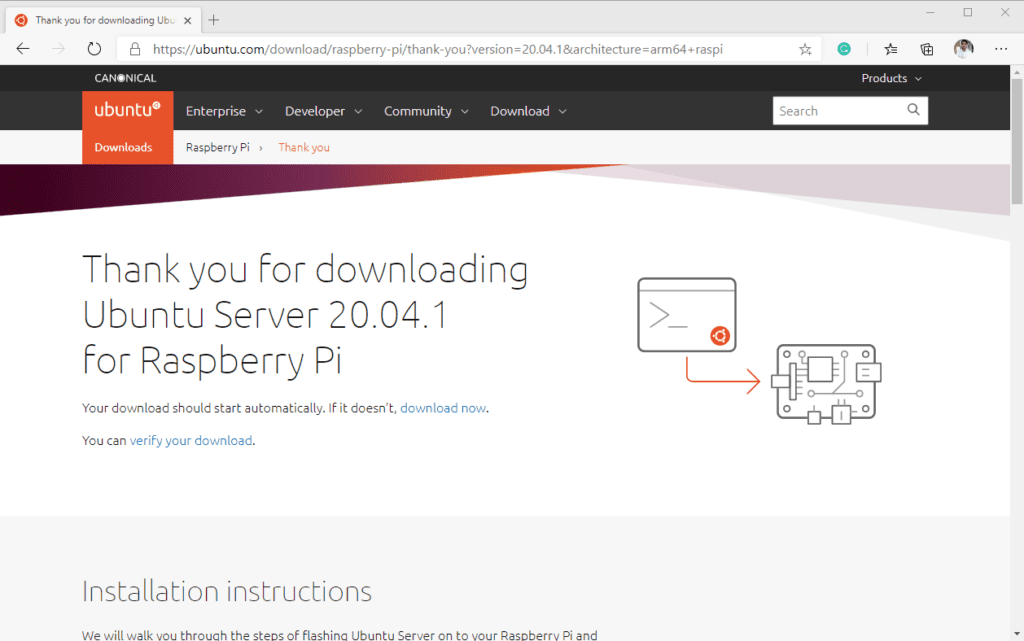
Once your browser prompts you to save the Ubuntu Server 20.04 LTS image for Raspberry Pi, select the location where you want to save the image, and click on Save.
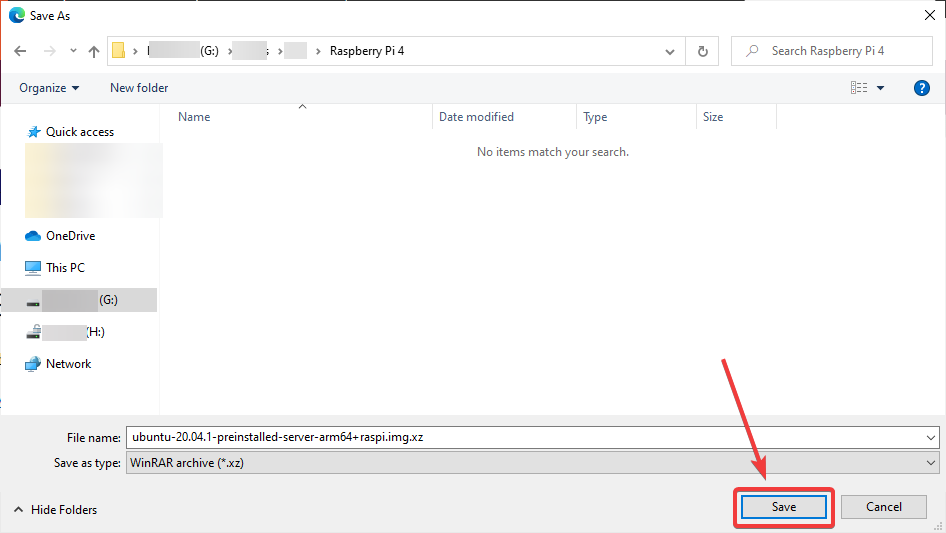
Your browser should start downloading the Ubuntu Server 20.04 LTS image for Raspberry Pi. It may take a while to complete depending on the speed of your internet connection.

Flashing Ubuntu Server 20.04 LTS Image to MicroSD Card:
Once the Ubuntu Server 20.04 LTS image is downloaded, you can use Raspberry Pi Imager to flash the Ubuntu Server 20.04 LTS image to the microSD card.
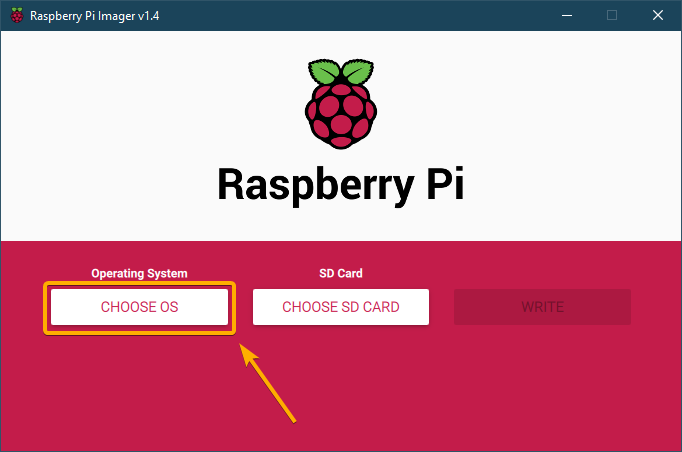
Insert the microSD card on your computer. Then, open the Raspberry Pi Imager and click on CHOOSE OS.
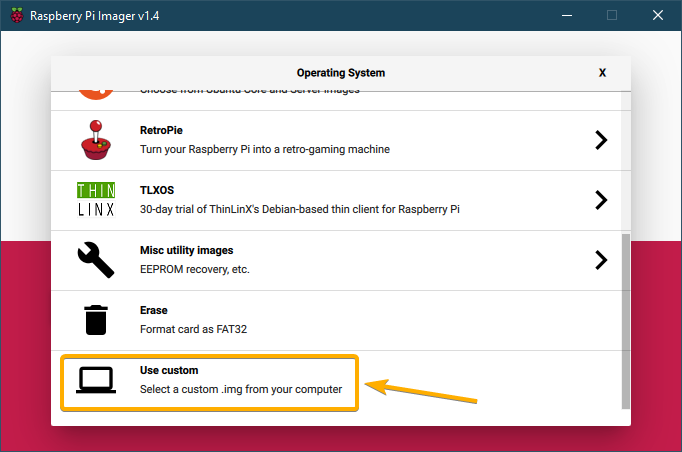
Scroll down a little bit and click on Use custom.

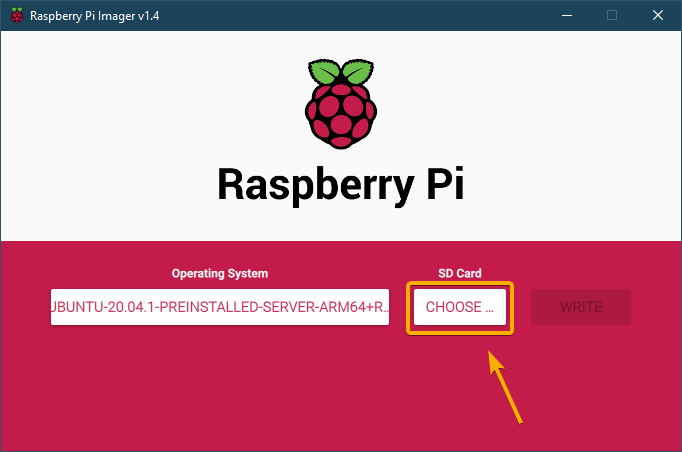
Select the Ubuntu Server 20.04 LTS image that you’ve just downloaded and clicked on Open.
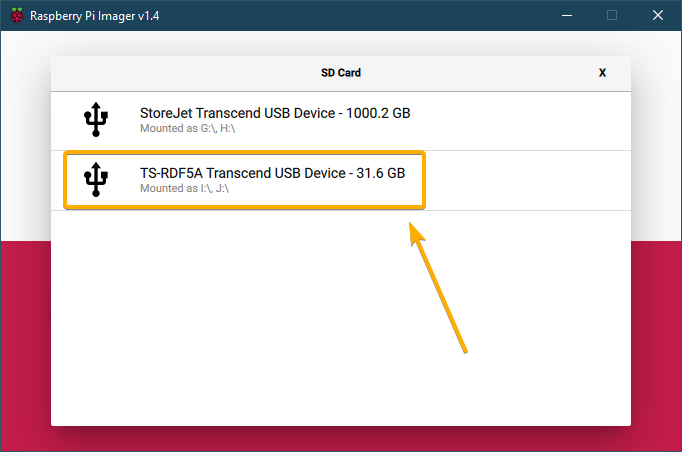
The Ubuntu Server 20.04 LTS image should be selected. Click on the CHOOSE SD CARD button as marked in the screenshot below.
Click on the microSD card from the list that you want to flash the Ubuntu Server 20.04 LTS image.
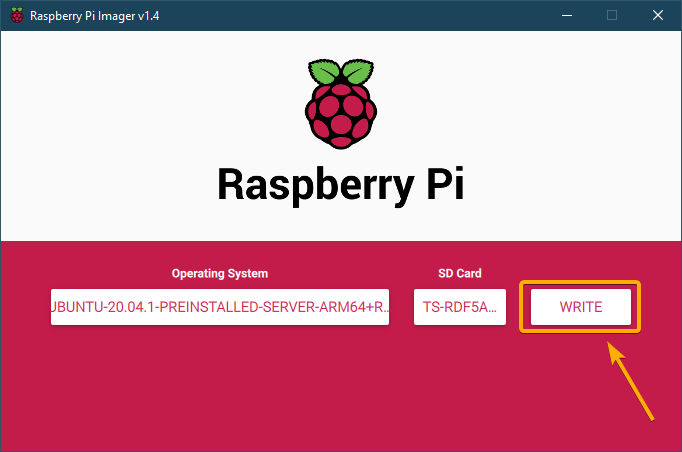
To write the Ubuntu Server 20.04 LTS image on your selected microSD card, click on WRITE.
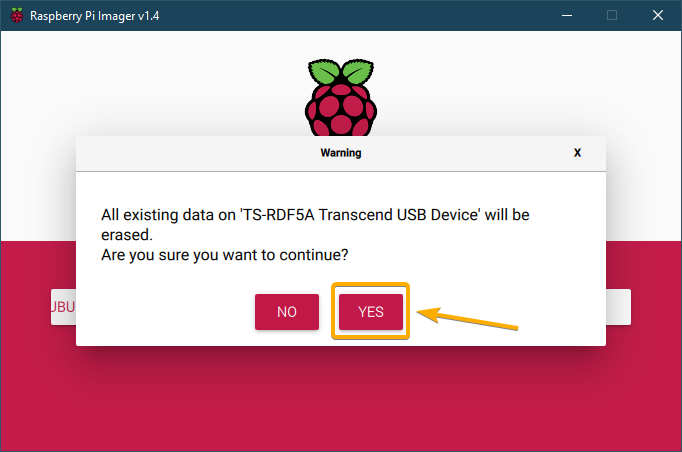
To confirm the operation, click on YES.
This will remove all the existing data from the microSD card and copy the Ubuntu Server 20.04 LTS image file to the microSD card.
Ubuntu Server 20.04 LTS image is being flashed on the microSD card. It may take a while to complete.

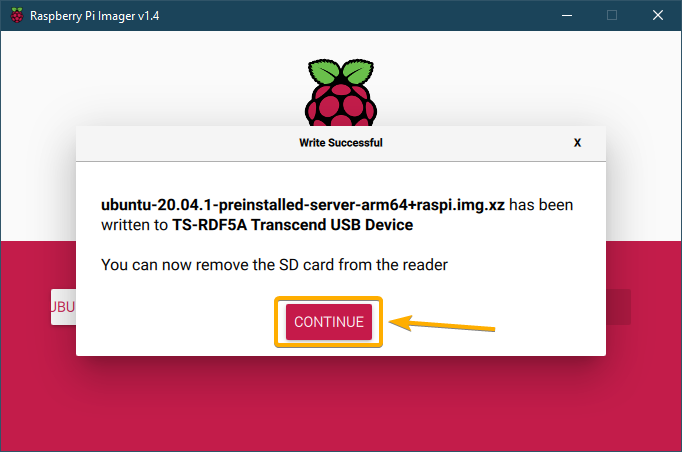
Once the Ubuntu Server 20.04 LTS image is flashed on the microSD card, click on CONTINUE and close Raspberry Pi Imager.
Configuring Wi-Fi Connectivity:
NOTE: If you want to use Wi-Fi for network connectivity on your Raspberry Pi 4, then this section is for you. If you want to use a wired connection, then you can skip this step.
For the headless configuration of Ubuntu Server 20.04 LTS, you must configure the network (Wi-Fi or wired).
To do that, eject and re-insert the microSD card on your computer. You should see a boot partition as you can see in the screenshot below.
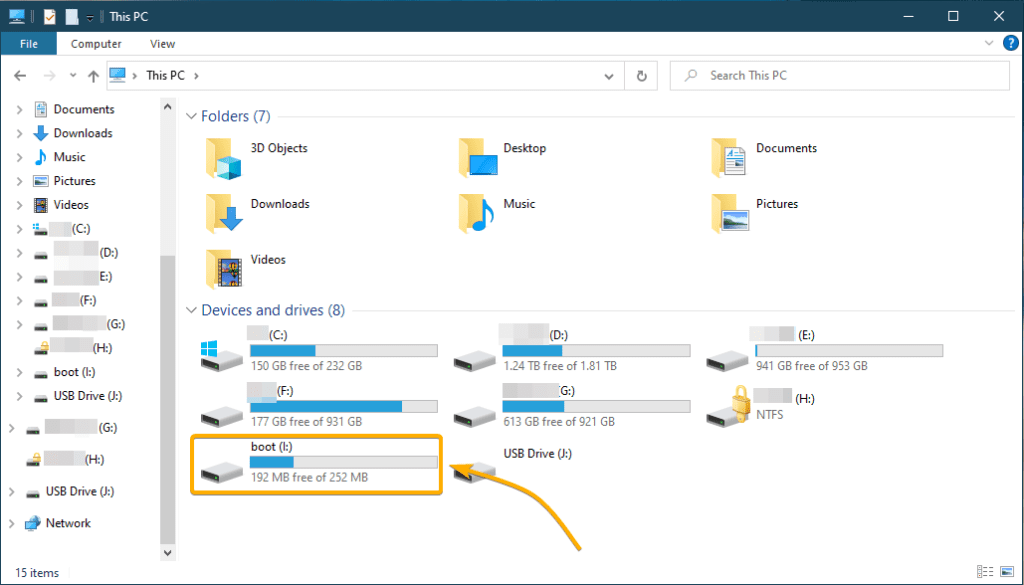
You should find a network-config file in the boot partition.
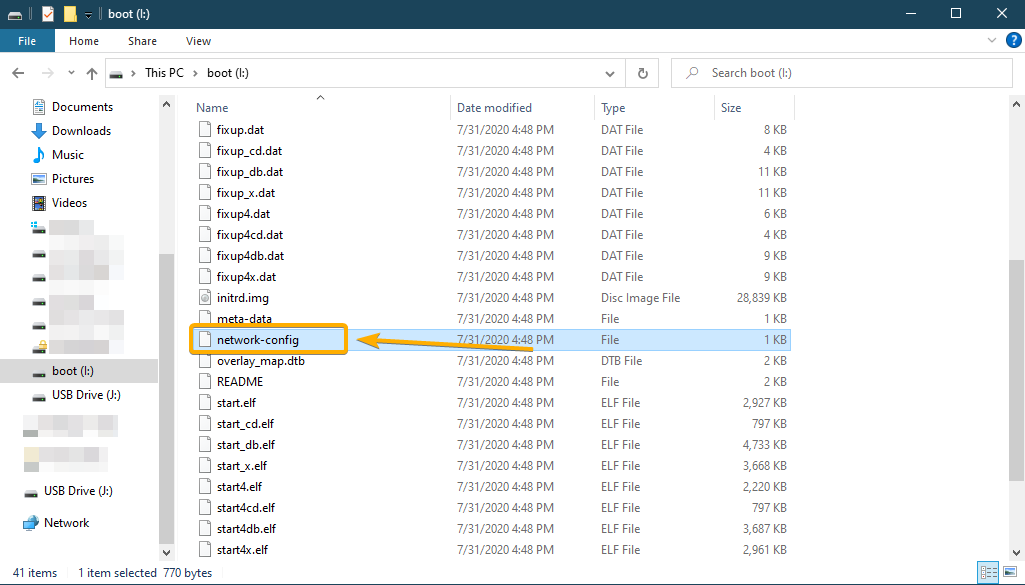
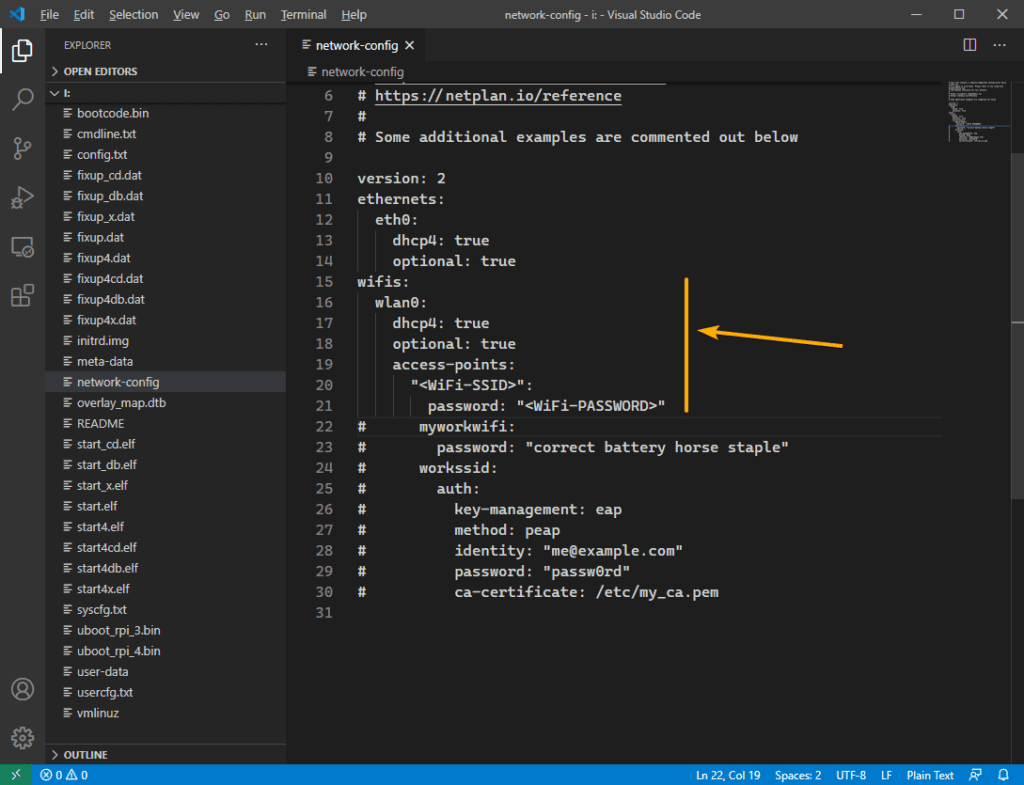
Open the network-config file in a text editor. The file should have the following contents by default.

Remove the # character from the marked lines (to uncomment the code). Then, change the and with the SSID and password of the Wi-Fi network you want to connect to.
Once you’re done, save the network-config file.
Powering on the Raspberry Pi 4:
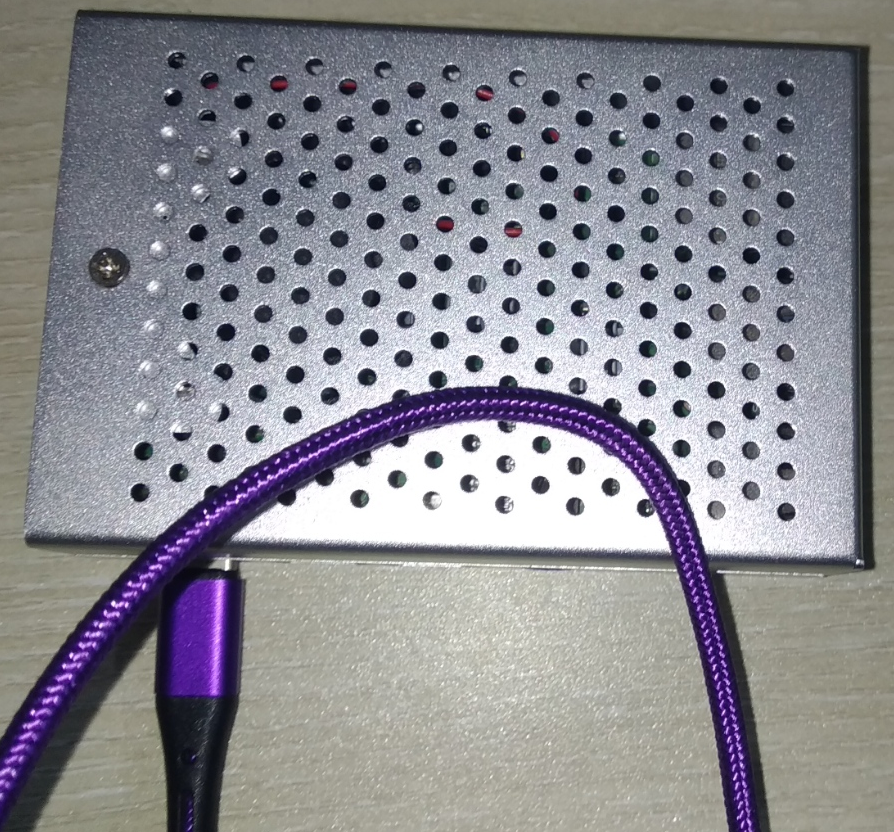
Connect the microSD card and the USB Type-C power cable on the Raspberry Pi 4.
If you want to use a wired network, connect the RJ45 network cable to the Ethernet port of the Raspberry Pi 4 as well.
Once you’re done, power on the Raspberry Pi 4.
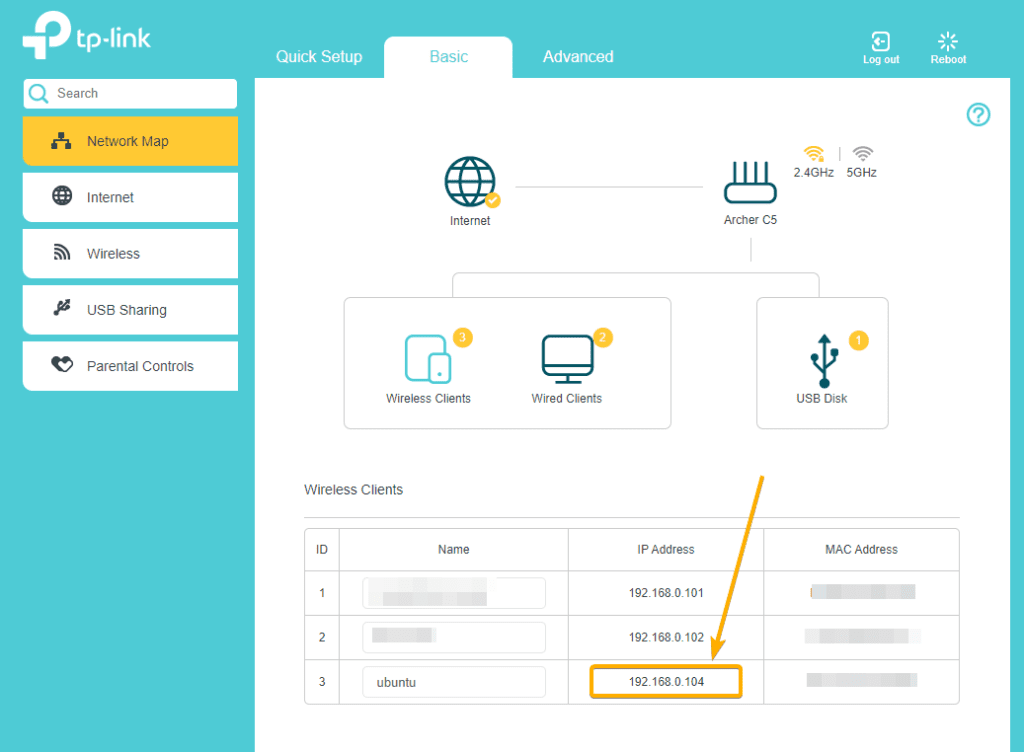
Finding the IP Address of your Raspberry Pi 4:
Login to your Router’s admin panel from a web browser and you should find the IP address of your Raspberry Pi 4 that is assigned to it via the DHCP server running on the Router of your home network.
As you can see, the IP address of my Raspberry Pi 4 is 192.168.0.104. It should be different in your case. So, make sure to replace it with yours from now on.
Accessing the Ubuntu Server 20.04 LTS Remotely via SSH:
To remotely access the Ubuntu Server 20.04 LTS operating system running on your Raspberry Pi 4 via SSH, run the following command:
![]()
To accept the fingerprint, type in yes and press .

The default password is ubuntu. Type in ubuntu and press .

The first time you log into Ubuntu Server 20.04 LTS on your Raspberry Pi 4, you will be asked to change the default password ubuntu.
Type in ubuntu and press .
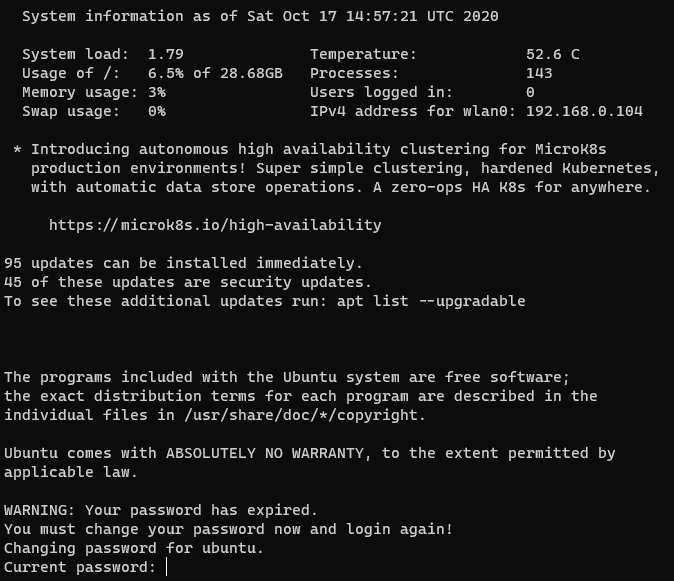
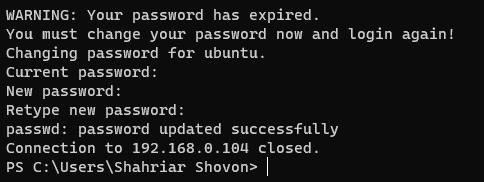
Type in a new password and press .
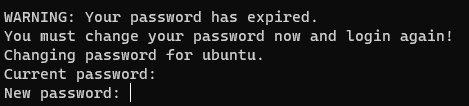
Retype the password and press .

The password should be changed and the SSH session should be closed.
You can SSH into your Raspberry Pi 4 again with the following command:
![]()
Type in the new password and press .

You should be logged into the Ubuntu Server 20.04 LTS operating system installed on your Raspberry Pi 4.
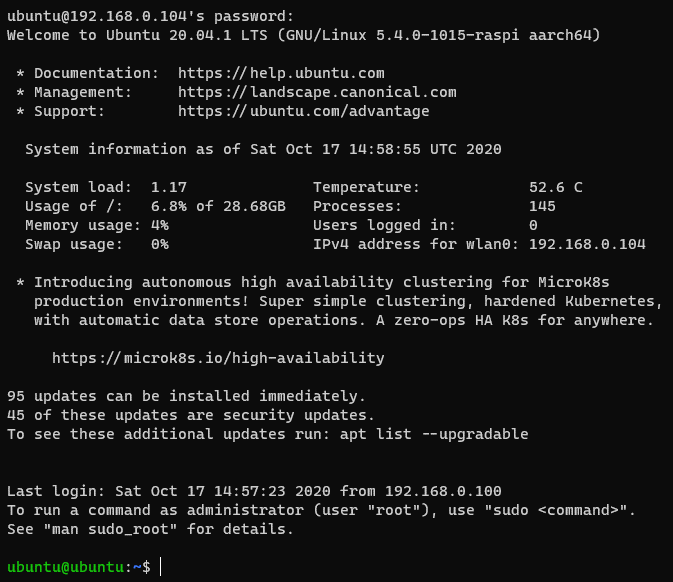
As you can see, I am running Ubuntu 20.04.1 LTS on my Raspberry Pi 4.

Now, you can run any command you want on your Raspberry Pi 4 remotely via SSH.
Conclusion:
In this article, I have shown you how to install Ubuntu Server 20.04 LTS on your Raspberry Pi 4 in headless mode (without a monitor, a keyboard, and a mouse connected to your Raspberry Pi 4). I have also shown you how remotely manage your Raspberry Pi 4 via SSH.
About the author
Shahriar Shovon
Freelancer & Linux System Administrator. Also loves Web API development with Node.js and JavaScript. I was born in Bangladesh. I am currently studying Electronics and Communication Engineering at Khulna University of Engineering & Technology (KUET), one of the demanding public engineering universities of Bangladesh.
How to Install Ubuntu Server 22.04 LTS on Raspberry Pi 4
![]()
Ubuntu Server 22.04 LTS is the latest Ubuntu series released on April 21, 2022 that has long term support till 2032. It includes cloud images for Amazon Web services, Google Cloud and Microsoft Azure. All these services are incorporated with the advanced security updates. The latest series further includes the OpenSSL 3.0 that makes the cryptography more purposeful and secure. Having the advantage of running the Ubuntu server on all platforms, it would be fair enough to say that this operating system will be an ideal fit for your Raspberry Pi device.
This tutorial will provide you with the quick approach to install Ubuntu Server 22.04 LTS on Raspberry Pi 4.
How to Install Ubuntu Server 22.04 LTS on Raspberry Pi 4
To install Ubuntu Server on Raspberry Pi follow the below mentioned steps:
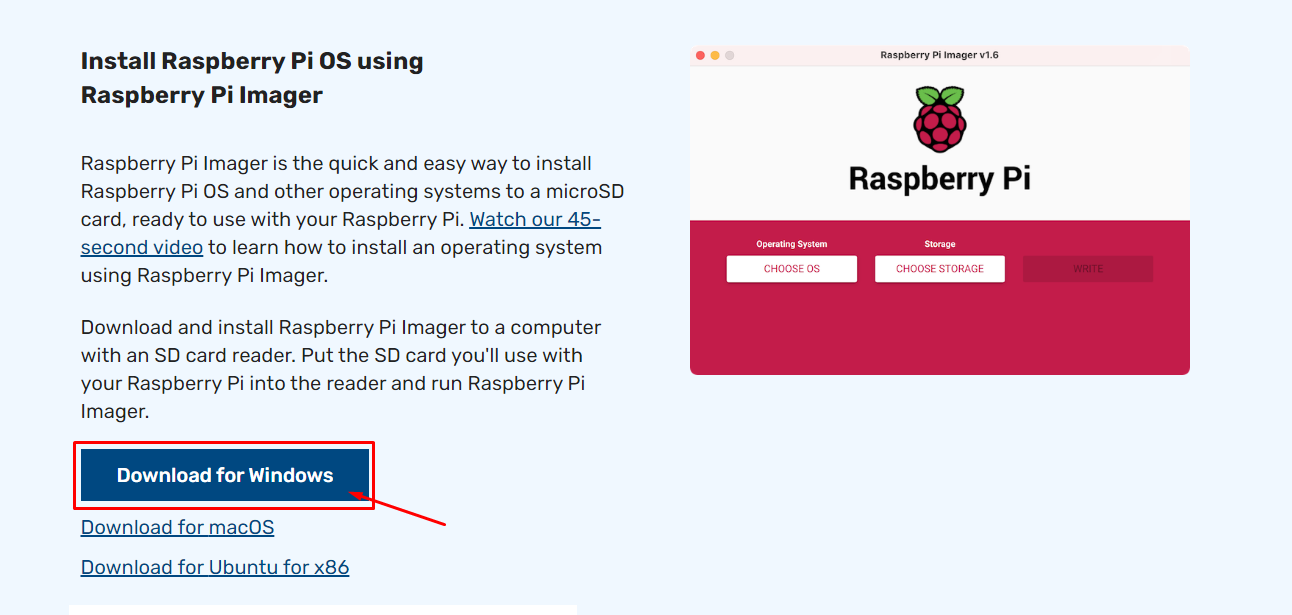
Step 1: Download Raspberry Pi Imager from the website.
Step 2: Install the Imager on your system desktop.
Step 3: Insert USB or SD card Storage into the system.
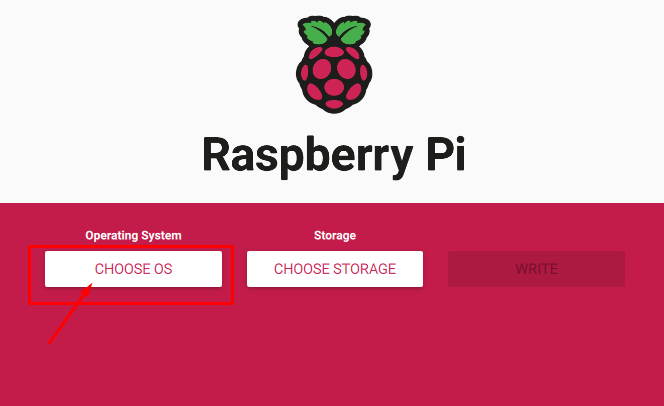
Step 4: Open the Imager and pick the “CHOOSE OS” option.
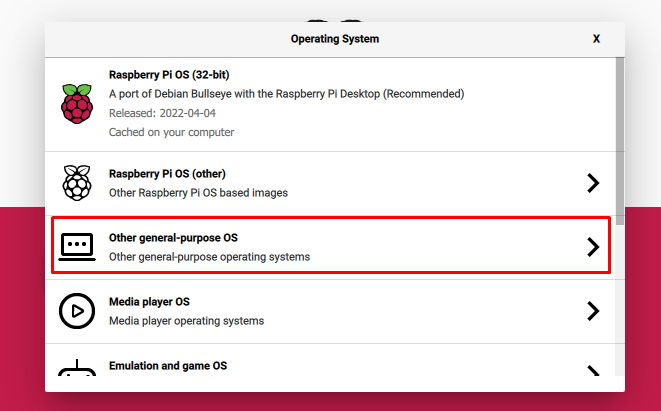
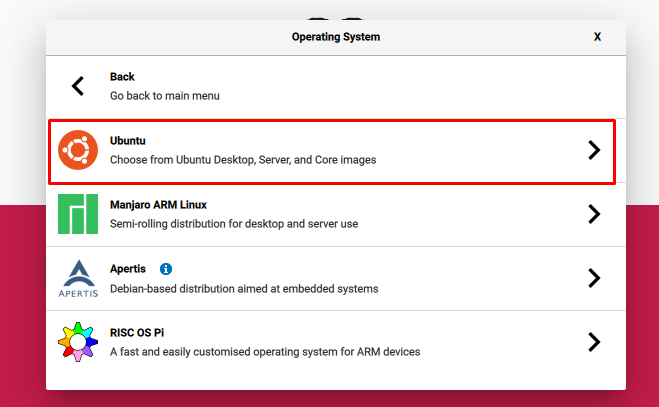
Step 5: Go to the “Other general-purpose OS” option.
Step 6: Select the “Ubuntu” option.
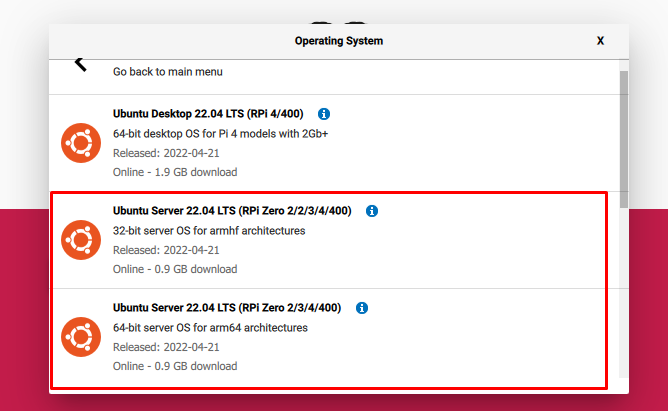
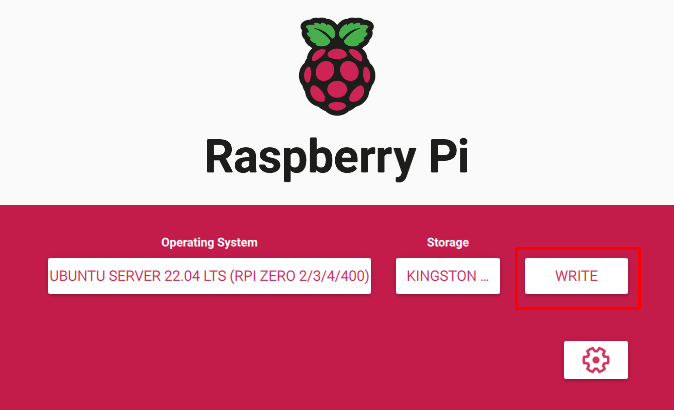
Step 7: Select any Ubuntu 22.04 Server from the below options. In our case, we select the 64-Bit version.
Step 8: Next, pick the “CHOOSE STORAGE” option.
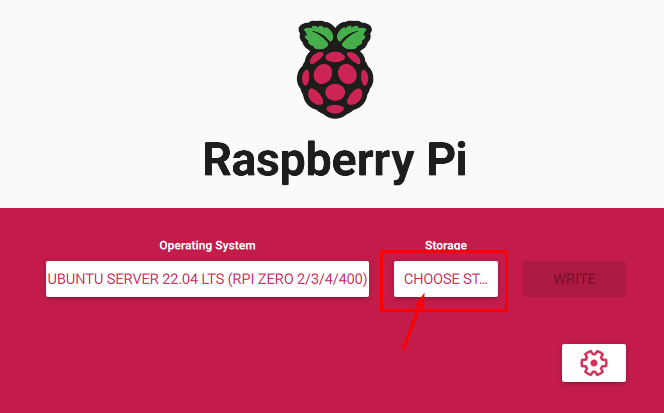
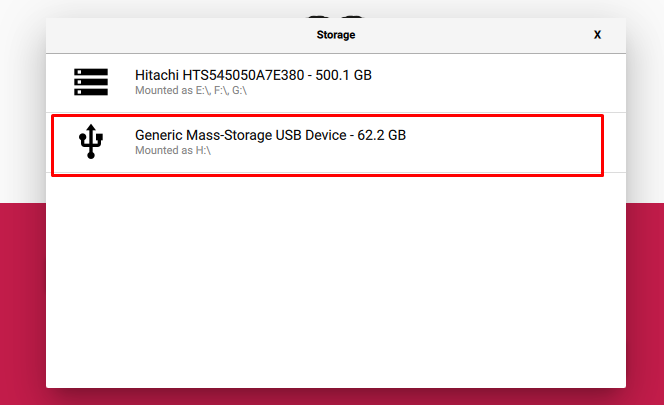
Pick USB or SD card storage. Here, we are using USB storage.
Step 9: Click on the “WRITE” option.
Step 10: Select “YES” option to format the USB or SD card storage.
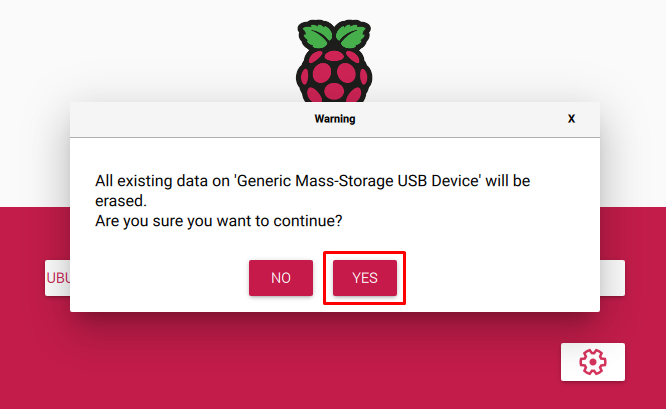
This begins the writing process.
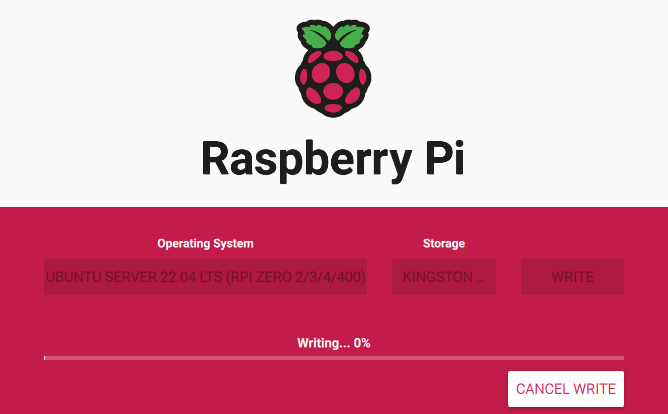
Wait for a while till you see an onscreen window where you will be advised to remove the SD card from the card reader.
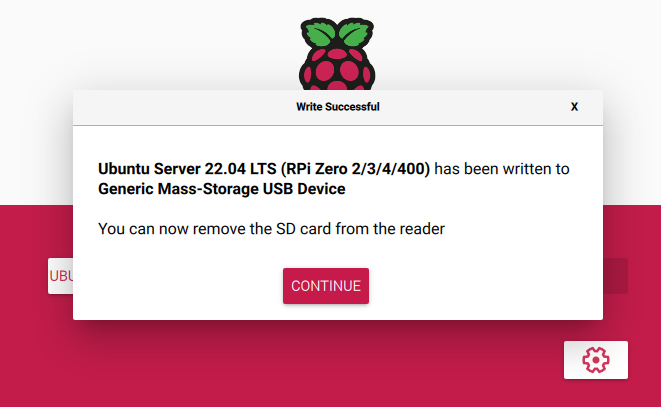
Step 11: Turn on the Raspberry Pi device and insert the SD card after 5 seconds.
Step 12: Wait till the black login screen appears where you will be asked to enter the ubuntu login details. Use login and password as “ubuntu”.

Setting Up WiFi on Ubuntu Server
This phase is crucial as it will allow you to access your Ubuntu server from another device. To setup WIFI on Ubuntu server, issue the following command to identify the name of network interfaces:

Then find the netplan configuration file run the below-mentioned command:

The above file “50-cloud-initi.yaml” is the configuration file for setting up internet on Ubuntu server. To open the configuration file, issue the below-given command:
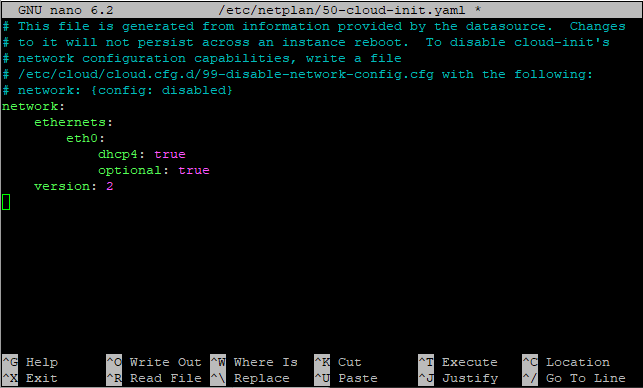
Now add the following script in the file right below the “version: 2” line.
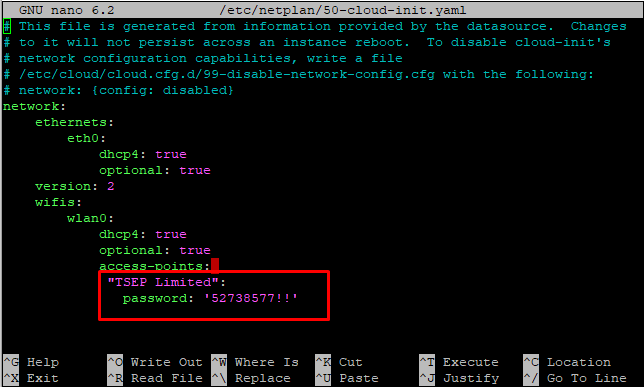
Make sure to use the proper indentation same as the one shown above as improper indentation will cause an error to load the file. Save the file using “Ctrl+X”, add “Y” and press Enter.
Next, use the following command to connect to the wireless interface.

Accessing the Ubuntu Server from Laptop or PC
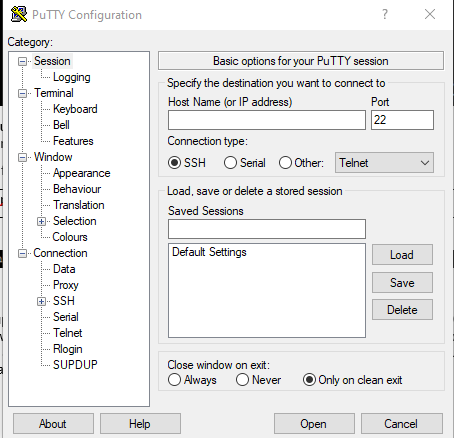
After setting up the WIFI on the Ubuntu server, it’s now time to use the server from Laptop or PC. For this purpose, you will need PuTTY utility for accessing the Ubuntu terminal on Laptop or PC. You can download the application from the website and then use the following steps to access the Ubuntu server terminal.
Step 1: Open the application after successfully installing it on your desktop.
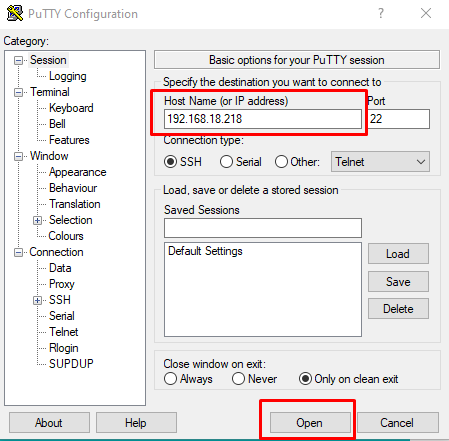
Step 2: Add the hostname of your Ubuntu server. To find the hostname,run the following command:

The above highlighted IP is the host IP address of our Ubuntu server. We can now use this IP address in the hostname section of PuTTY and then click on the “Open” button.
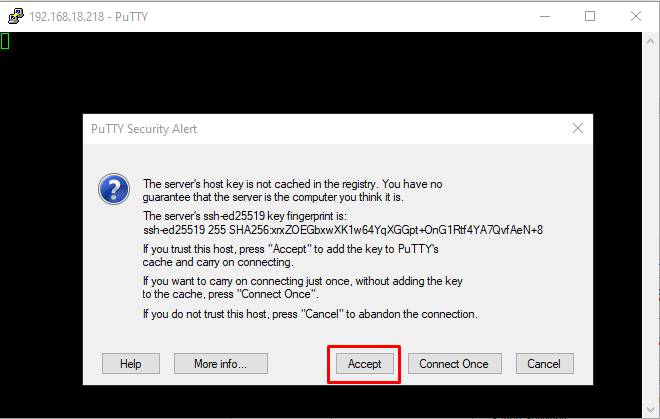
Step 3: Choose the “Accept” option.
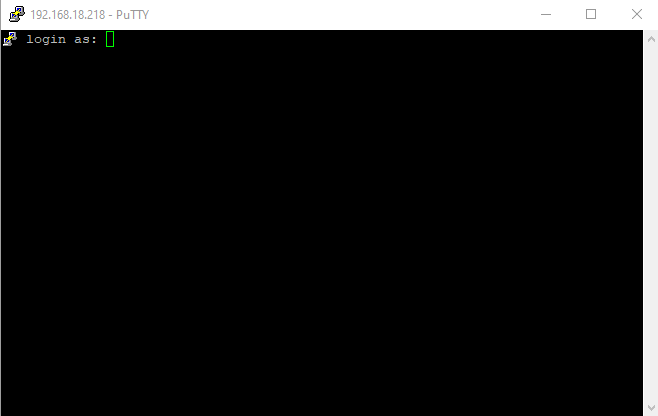
Use login as “ubuntu” and enter password as “ubuntu”.
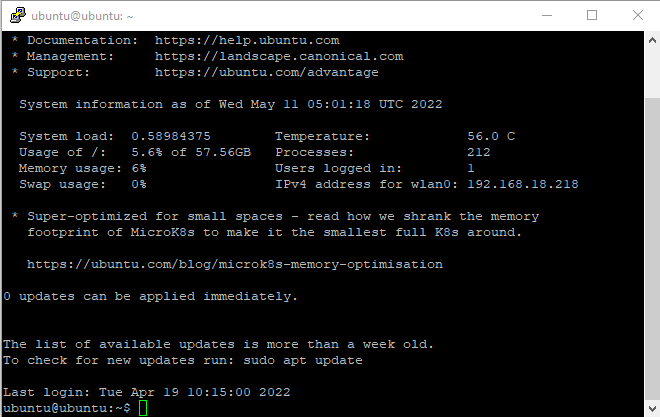
This successfully connects you to the Ubuntu server‘s terminal and you can now be able to use the terminal right onto your desktop.
Adding a Desktop Environment
If you want to add a desktop environment for Ubuntu server, you can use the following command to install xubuntu desktop environment which is pretty lightweight as it uses the Xfce environment:

You can also install other desktop environments as well using the link for guidance.
During the installation, you will also see an on-screen window for configuring the display manager .
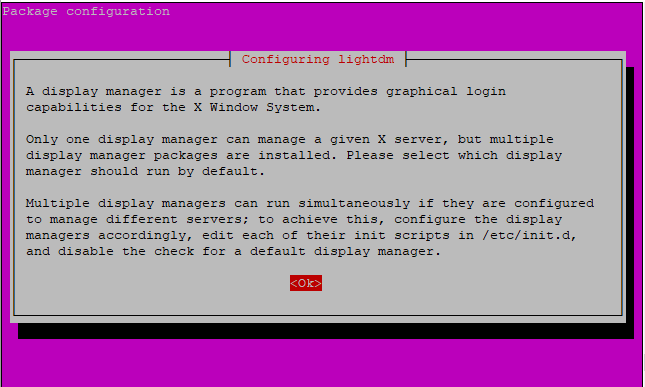
Press Enter to proceed. Then, choose the default display manager. Pick the one according to your choice.
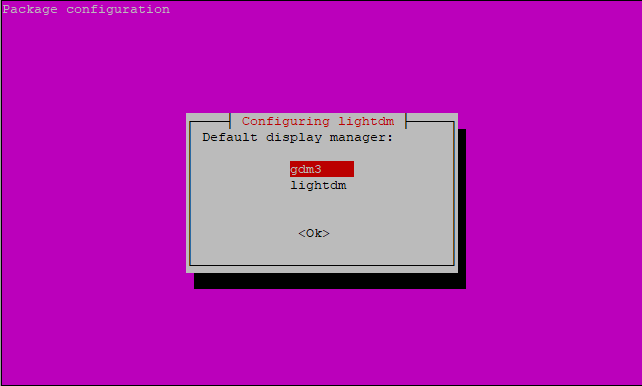
This begins the installation again, waits till it completes and then reboot your Raspberry Pi to view the desktop environment.
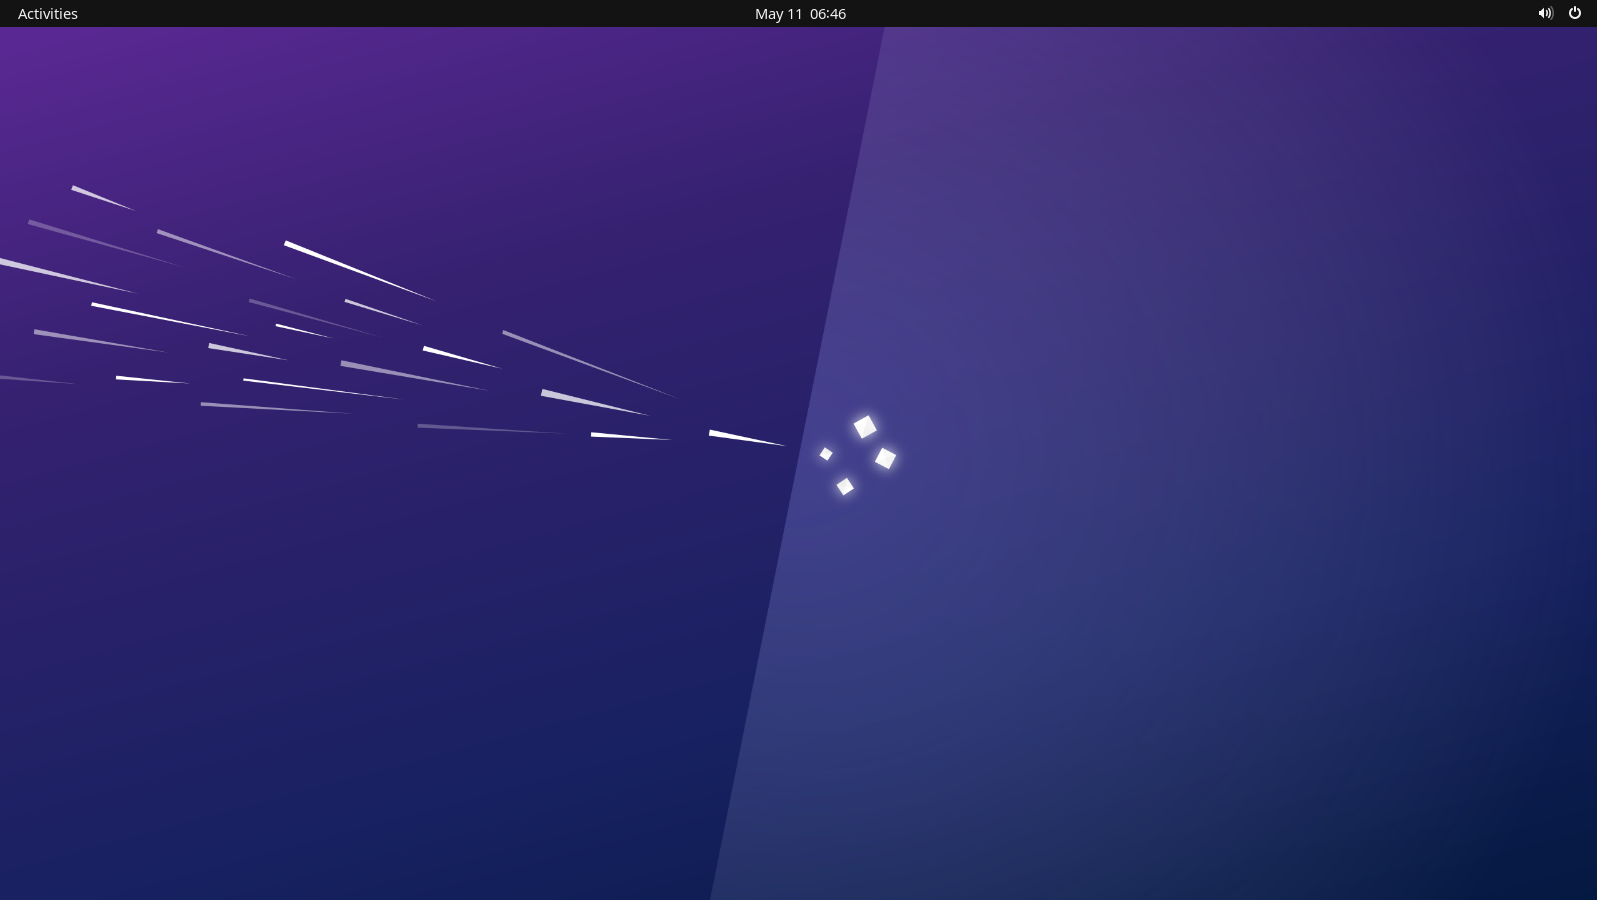
To find the applications, Go to the “Activities” option at the top left corner of the desktop.
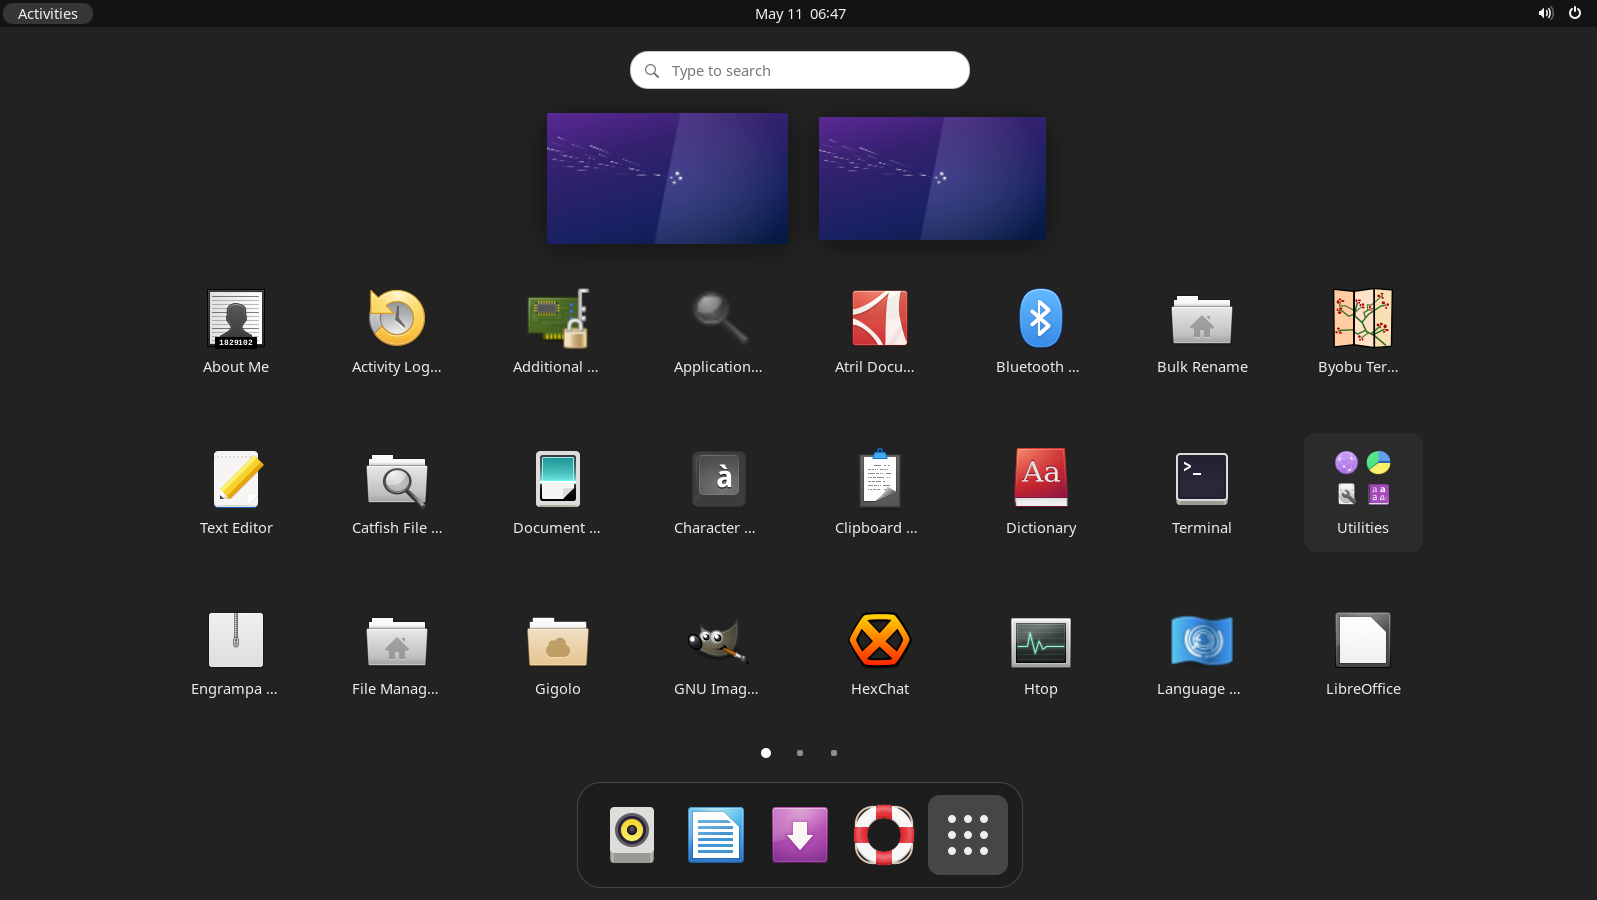
Now, you can install several applications with ease because you have perfectly set up the Ubuntu desktop environment through the Ubuntu server. This completes the setup process of Ubuntu Server on Raspberry Pi.
Conclusion
Ubuntu Server 22.04 LTS is a lightweight and open-source platform which includes the latest security updates and long-term support. It is well suited for your Raspberry Pi device because of utilizing low memory resources. The above installation guide will assist you in installing Ubuntu Server on Raspberry Pi devices so that you can access the device terminal on Laptop or PC through PuTTY or can install a desktop environment to easily use the graphical interface of the operating system.
About the author
Awais Khan
I’m an Engineer and an academic researcher by profession. My interest for Raspberry Pi, embedded systems and blogging has brought me here to share my knowledge with others.