- Sharing Files between Ubuntu 20.04 and Windows Systems with Samba
- 1.1 Accessing Windows Resources from the GNOME Desktop
- 1.2 Samba and Samba Client
- 1.3 Installing Samba on an Ubuntu System
- 1.4 Configuring the Ubuntu Firewall to Enable Samba
- 1.5 Configuring the smb.conf File
- 1.5.1 Configuring the [global] Section
- 1.5.2 Configuring a Shared Resource
- 1.5.3 Removing Unnecessary Shares
- 1.6 Creating a Samba User
- 1.7 Testing the smb.conf File
- 1.8 Starting the Samba and NetBIOS Name Services
- 1.9 Accessing Samba Shares
- 1.10 Accessing Windows Shares from Ubuntu
Sharing Files between Ubuntu 20.04 and Windows Systems with Samba
Although Linux has made some inroads into the desktop market, its origins and future are very much server-based. It is not surprising therefore that Ubuntu has the ability to act as a file server. It is also extremely common for Ubuntu and Windows systems to be used side by side in networked environments. It is a common requirement, therefore, that files on an Ubuntu system be accessible to Linux, UNIX and Windows-based systems over network connections. Similarly, shared folders and printers residing on Windows systems may also need to be accessible from Ubuntu based systems.
Windows systems share resources such as file systems and printers using a protocol known as Server Message Block (SMB). In order for an Ubuntu system to serve such resources over a network to a Windows system and vice versa it must, therefore, support SMB. This is achieved using technology called Samba. In addition to providing integration between Linux and Windows systems, Samba may also be used to provide folder sharing between Linux systems (as an alternative to NFS which was covered in the previous chapter).
In this chapter we will look at the steps necessary to share file system resources and printers on an Ubuntu system with remote Windows and Linux systems, and to access Windows resources from Ubuntu.
1.1 Accessing Windows Resources from the GNOME Desktop
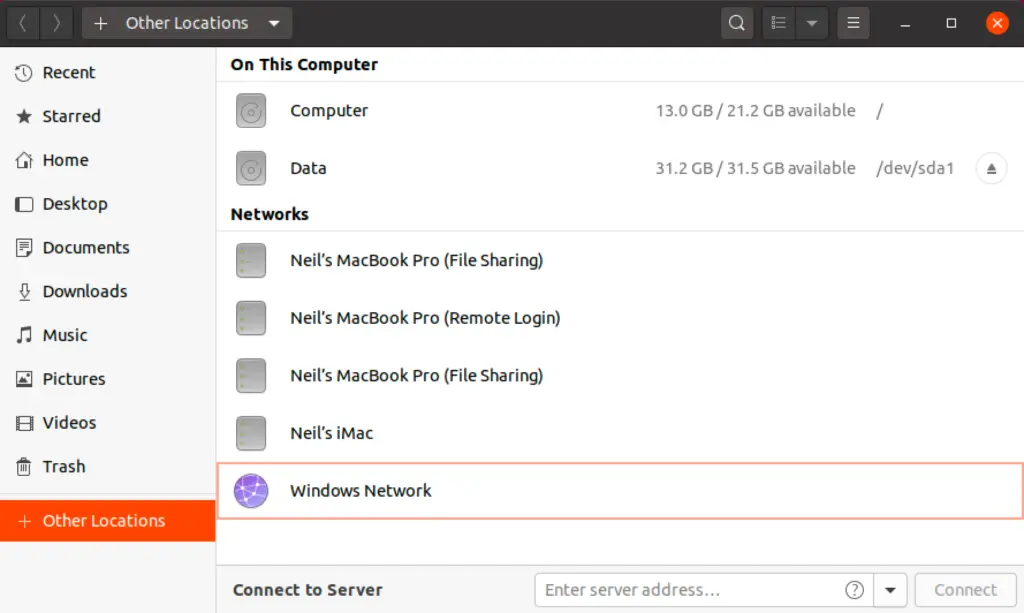
Before getting into more details of Samba sharing, it is worth noting that if all you want to do is access Windows shared folders from within the Ubuntu GNOME desktop then support is already provided within the GNOME Files application. The Files application is located in the dash as highlighted in Figure 23-1:
![]()
Once launched, select the Other Locations option in the left-hand navigation panel followed by the Windows Network icon in the main panel to browse available windows resources:
1.2 Samba and Samba Client
Samba allows both Ubuntu resources to be shared with Windows systems and Windows resources to be shared with Ubuntu systems. Ubuntu accesses Windows resources using the Samba client. Ubuntu resources, on the other hand, are shared with Windows systems by installing and configuring the Samba service.
1.3 Installing Samba on an Ubuntu System
The default settings used during the Ubuntu installation process do not typically install the necessary Samba packages. Unless you specifically requested that Samba be installed it is unlikely that you have Samba installed on your system. To check whether Samba is installed, open a terminal window and run the following command:
# apt -qq list samba-common samba smbclient
Any missing packages can be installed using the apt command-line tool:
# apt install samba-common samba smbclient
1.4 Configuring the Ubuntu Firewall to Enable Samba
Next, the firewall currently protecting the Ubuntu system needs to be configured to allow Samba traffic.
If you are using the Uncomplicated Firewall (ufw) run the following command:
Alternatively, if you are using firewalld, run the firewall-cmd command as follows:
# firewall-cmd --permanent --add-port= # firewall-cmd --reload
Before starting the Samba service a number of configuration steps are necessary to define how the Ubuntu system will appear to Windows systems, and the resources which are to be shared with remote clients. The majority of these configuration tasks take place within the /etc/samba/smb. conf file.
1.5 Configuring the smb.conf File
Samba is a highly flexible and configurable system that provides many different options for controlling how resources are shared on Windows networks. This flexibility can lead to the sense that Samba is overly complex to work with. In reality, however, many of the configuration options are not needed by the typical installation, and the learning curve to set up a basic configuration is actually quite short.
For the purposes of this chapter we will look at joining an Ubuntu system to a Windows workgroup and setting up a directory as a shared resource that can be accessed by a specific user. This is a configuration known as a standalone Samba server. More advanced configurations such as integrating Samba within an Active Directory environment are also available, though these are outside the scope of this book.
The first step in configuring Samba is to edit the /etc/samba/smb.conf file.
1.5.1 Configuring the [global] Section
The smb.conf file is divided into sections. The first section is the [global] section where settings can be specified that apply to the entire Samba configuration. While these settings are global, each option may be overridden within other sections of the configuration file.
The first task is to define the name of the Windows workgroup on which the Ubuntu resources are to be shared. This is controlled via the workgroup = directive of the [global] section which by default is configured as follows:
Begin by changing this to the actual name of the workgroup if necessary.
In addition to the workgroup setting, the other settings indicate that this is a standalone server on which the shared resources will be protected by user passwords. Before moving on to configuring the resources to be shared, other parameters also need to be added to the [global] section as follows:
[global] . . netbios name = LinuxServer . .
The “netbios name” property specifies the name by which the server will be visible to other systems on the network.
1.5.2 Configuring a Shared Resource
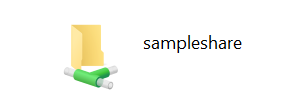
The next step is to configure the shared resources (in other words the resources that will be accessible from other systems on the Windows network). In order to achieve this, the section is given a name by which it will be referred to when shared. For example, if we plan to share the /sampleshare directory of our Ubuntu system, we might entitle the section [sampleshare]. In this section a variety of configuration options are possible. For the purposes of this example, however, we will simply define the directory that is to be shared, indicate that the directory is both browsable and writable and declare the resource public so that guest users are able to gain access:
[sampleshare] comment = Example Samba share path = /sampleshare browseable = Yes public = yes writable = yes
To restrict access to specific users, the “valid users” property may be used, for example:
valid users = demo, bobyoung, marcewing
1.5.3 Removing Unnecessary Shares
The smb.conf file is pre-configured with sections for sharing printers and the home folders of the users on the system. If these resources do not need to be shared, the corresponding sections can be commented out so that they are ignored by Samba. In the following example, the [homes] section has been commented out:
. . #[homes] # comment = Home Directories # valid users = %S, %D%w%S # browseable = No # read only = No # inherit acls = Yes . .
1.6 Creating a Samba User
Any user that requires access to a Samba shared resource must be configured as a Samba User and assigned a password. This task is achieved using the smbpasswd command-line tool. Consider, for example, that a user named demo is required to be able to access the /sampleshare directory of our Ubuntu system from a Windows system. In order to fulfill this requirement we must add demo as a Samba user as follows:
# smbpasswd -a demo New SMB password: Retype new SMB password: Added user demo.
Now that we have completed the configuration of a very basic Samba server, it is time to test our configuration file and then start the Samba services.
1.7 Testing the smb.conf File
The settings in the smb.conf file may be checked for errors using the testparm command-line tool as follows:
# testparm Load smb config files from /etc/samba/smb.conf rlimit_max: increasing rlimit_max (1024) to minimum Windows limit (16384) WARNING: The "syslog" option is deprecated Processing section "[printers]" Processing section "[print$]" Processing section "[sampleshare]" Loaded services file OK. Server role: ROLE_STANDALONE Press enter to see a dump of your service definitions # Global parameters [global] dns proxy = No log file = /var/log/samba/log.%m map to guest = Bad User max log size = 1000 netbios name = LINUXSERVER obey pam restrictions = Yes pam password change = Yes panic action = /usr/share/samba/panic-action %d passwd chat = *Enter\snew\s*\spassword:* %n\n *Retype\snew\s*\spassword:* %n\n *password\supdated\ssuccessfully* . passwd program = /usr/bin/passwd %u security = USER server role = standalone server server string = %h server (Samba, Ubuntu) syslog = 0 unix password sync = Yes usershare allow guests = Yes wins support = Yes idmap config * : backend = tdb [printers] browseable = No comment = All Printers create mask = 0700 path = /var/spool/samba printable = Yes [print$] comment = Printer Drivers path = /var/lib/samba/printers [sampleshare] comment = Example Samba share guest ok = Yes path = /sampleshare read only = No
1.8 Starting the Samba and NetBIOS Name Services
In order for an Ubuntu server to operate within a Windows network both the Samba (SMB) and NetBIOS nameservice (NMB) services must be started. Optionally, also enable the services so that they start each time the system boots:
# systemctl enable smbd # systemctl start smbd # systemctl enable nmbd # systemctl start nmbd
Before attempting to connect from a Windows system, use the smbclient utility to verify that the share is configured:
# smbclient -U demo -L localhost Enter WORKGROUP\demo's password: Sharename Type Comment --------- ---- ------- print$ Disk Printer Drivers sampleshare Disk Example Samba share IPC$ IPC IPC Service (demo-server2 server (Samba, Ubuntu)) Officejet_Pro_8600_C7C718_ Printer Officejet_6600_971B9B_ Printer Reconnecting with SMB1 for workgroup listing. Server Comment --------- ------- Workgroup Master --------- ------- WORKGROUP LINUXSERVER
1.9 Accessing Samba Shares
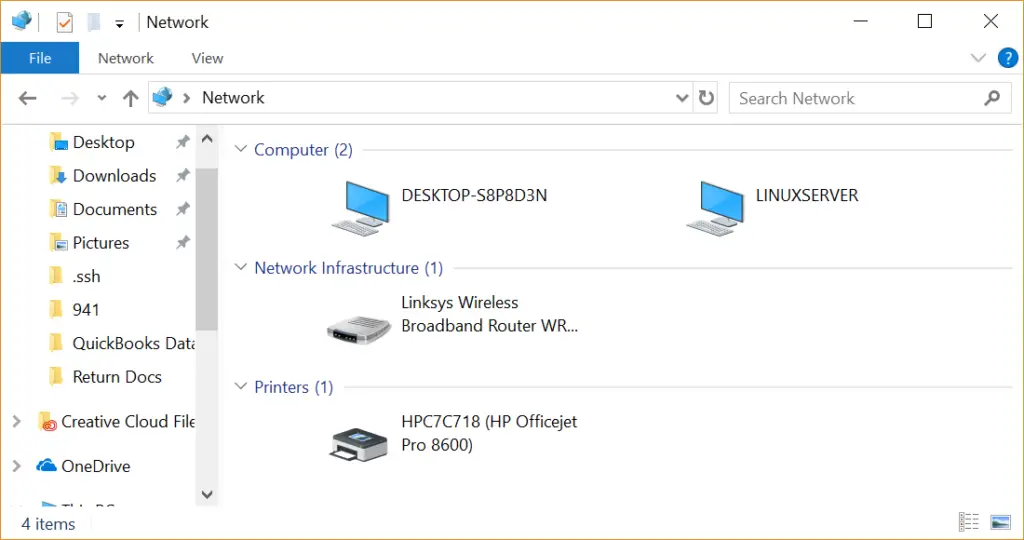
Now that the Samba resources are configured and the services are running, it is time to access the shared resource from a Windows system. On a suitable Windows system on the same workgroup as the Ubuntu system, open Windows Explorer and navigate to the Network panel. At this point, explorer should search the network and list any systems using the SMB protocol that it finds. The following figure illustrates an Ubuntu system named LINUXSERVER located using Windows Explorer on a Windows 10 system:
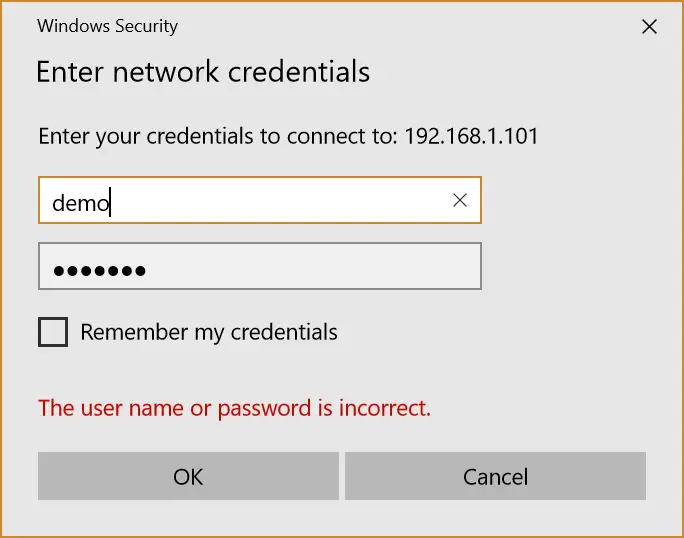
Double clicking on the LINUXSERVER host will prompt for the name and password of a user with access privileges. In this case it is the demo account that we configured using the smbpasswd tool:
Entering the username and password will result in the shared resources configured for that user appearing in the explorer window, including the previously configured /sampleshare resource:
Double clicking on the /sampleshare shared resource will display a listing of the files and directories contained therein.
If you are unable to see the Linux system or have problems accessing the shared folder, try mapping the Samba share to a local Windows drive as follows:
- Open Windows File Explorer, right-click on the Network entry in the left-hand panel and select Map network drive… from the resulting menu.
- From the Map Network Drive dialog, select a drive letter before entering the path to the shared folder. For example:
Enable the checkbox next to Connect using different credentials. If you do not want the drive to be mapped each time you log into the Windows system, turn off the corresponding check box:
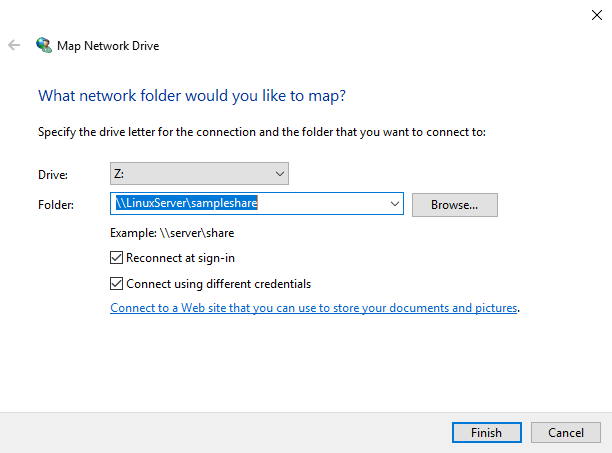
With the settings entered, click on the Finish button to map the drive, entering the username and password for the Samba user configured earlier in the chapter when prompted. After a short delay the content of the Samba share will appear in a new File Explorer window.
1.10 Accessing Windows Shares from Ubuntu
As previously mentioned, Samba is a two way street, allowing not only Windows systems to access files and printers hosted on an Ubuntu system, but also allowing the Ubuntu system to access shared resources on Windows systems. This is achieved using the smbclient package which was installed at the start of this chapter. If it is not currently installed, install it from a terminal window as follows:
Shared resources on a Windows system can be accessed either from the Ubuntu desktop using the Files application, or from the command-line prompt using the smbclient and mount tools. The steps in this section assume that appropriate network sharing settings have been enabled on the Windows system.
To access any shared resources on a Windows system using the GNOME desktop, begin by launching the Files application and selecting the Other Locations option. This will display the screen shown in Figure 23-7 below including an icon for the Windows Network (if one is detected):