- How To Fix No Sound in Ubuntu And Linux Mint
- Various methods to fix no audio in Ubuntu
- Fixing dummy output in sound settings
- First Alternate method to fix no sound in Ubuntu
- Second alternate method to fix no sound in Ubuntu
- Third alternate method: remove old Pulseaudio config
- Third alternate method: Try alsamixer
- Fourth alternate method to fix no audio in Ubuntu
- Fifth alternate method (specially for Lenovo Carbon X1)
- How to Control Audio on the Debian Command Line
- Install ALSA
- Using Alsamixer-the graphical interface for Alsa
- The Alsamixer Views
- Sound Card Selection
- Controlling Sound Properties
- Using Amixer-Control sound properties through commands
- Examples
- Search
- About This Site
- Latest Tutorials
How To Fix No Sound in Ubuntu And Linux Mint
As it happens with every Ubuntu release, you install or upgrade to a newer Ubuntu version and run in to a number of problems. But then, there is always a way to overcome these big little problems.
One of the most common problems faced is no sound after installing Ubuntu. While there could be several reasons for no sound in Ubuntu, I will share the tricks that worked for me.
Let’s see in steps how I fixed and how you can fix it.
Various methods to fix no audio in Ubuntu
There could be various reasons why there is no sound in Ubuntu. The fix depends on the kind of problem you have. Before you take the steps to fix it, I suggest get some information about your system, specially about the audio related hardware.
Now check the system, machine and audio information with this command:
You should see some information like this:
[email protected]:~$ inxi -SMA System: Host: itsfoss Kernel: 5.4.0-18-generic x86_64 bits: 64 Desktop: Gnome 3.35.91 Distro: Ubuntu 20.04 LTS (Focal Fossa) Machine: Type: Laptop System: Dell product: XPS 13 9360 v: N/A serial: Mobo: Dell model: 05JK94 v: A00 serial: UEFI: Dell v: 2.13.0 date: 11/14/2019 Audio: Device-1: Intel Sunrise Point-LP HD Audio driver: snd_hda_intel Sound Server: ALSA v: k5.4.0-18-genericLook closely in the audio section of the above output. It tells that it is Intel Sunrise Point-LP HD Audio and it has the Linux driver snd_hda_intel and the sound is served with Alsa. This information maybe useful in some stages of your audio troubleshooting.
Fixing dummy output in sound settings
First step, just to verify, check if the sound is not muted. Once you verify this, go to Sound Settings:
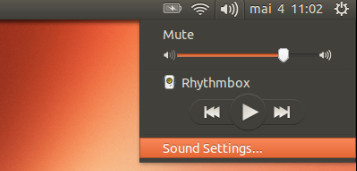
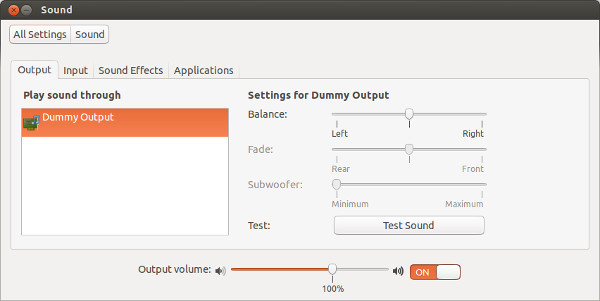
In the Sound Settings, you’ll find that you have practically nothing here except a dummy output. Quite frustrating. It means that your sound card is not even recognized. Puff!
No worries. The one shot solution which fixed the sound problem for me on my Intel powered Dell Inspiron is to force reload Alsa. To do that, use the following command in terminal (Ctrl+Alt+T):
The output will be like this.
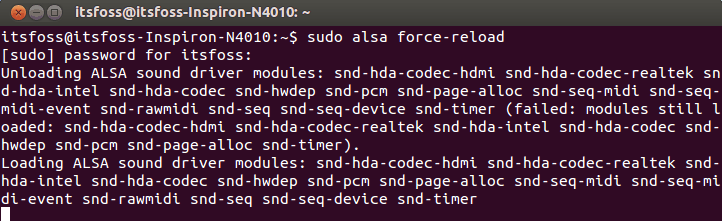
You may think that it is hanged or still in processing but it takes only couple of seconds. You can simply close it afterwards by using Ctrl+C.
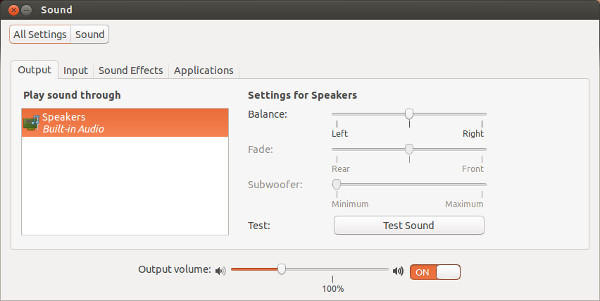
Now, you need to reboot your computer. Either play some music/video files or check in the system settings to see if it worked for you.
First Alternate method to fix no sound in Ubuntu
If the above problem did not fix it for you, try reinstalling Alsa and Pulse audio in the following manner:
sudo apt-get install --reinstall alsa-base pulseaudioAnd force reload Alsa again:
Restart and check if sound is back or not.
Second alternate method to fix no sound in Ubuntu
Try starting Pulseaudio and see if it works:
Third alternate method: remove old Pulseaudio config
Go to your home directory and then go to the hidden config directory. Rename the directory named pulse here:
mv ~/.config/pulse ~/.config/old_pulseNow reboot your system. The pulse directory should be created afresh and you should have sound.
Third alternate method: Try alsamixer
Open a terminal and use the following command to open alsamixer:
You should see a screen like this:
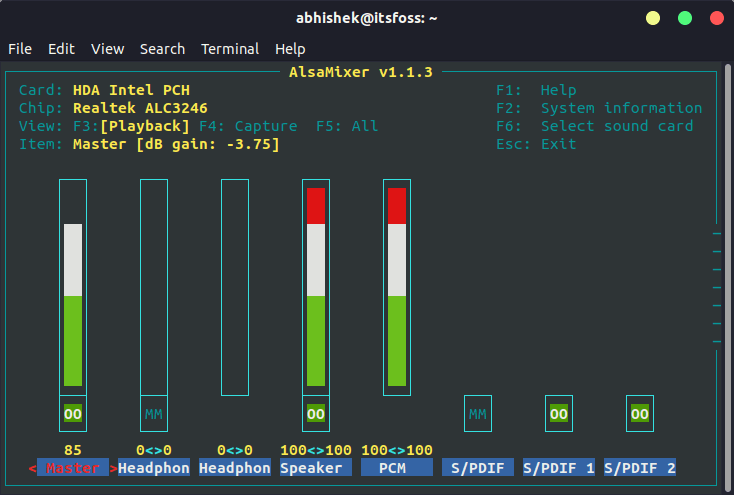
Check if the speakers or your desired audio output is muted here. MM means mute and OO means unmute. If your desired audio output (mostly it’s speakers) or the Master is muted, unmute it.
You can exit the screen using Esc key.
Note that if alsamixer command returns error, it’s probably because you have more than one sound card. In that case, you need to specify the sound card number (refer to the inxi output I mentioned in the beginning) like this:
Fourth alternate method to fix no audio in Ubuntu
Speed dispatcher is the feature that allows your system to convert text to speech. Sometimes, it conflicts with other audio settings. If you do not need this feature, you may try disabling it as it may bring your audio back.
Open the terminal and edit speech-dispatcher file by using the following command:
sudo gedit /etc/default/speech-dispatcherIn here, change RUN=yes to RUN=no . Reboot and enjoy the sound.
Fifth alternate method (specially for Lenovo Carbon X1)
A few of It’s FOSS readers mentioned that none of the above methods worked for their Lenovo Thinkpad Carbon X1 7th Gen laptop.
I looked into various places and found that this newer model has issues with Linux. While Linux kernel 5.5 and above versions has improved support for this model, it is still tricky for Ubuntu 18.04 and Mint 19 users because the kernel in use is still 5.3.
Check your Linux kernel version and if it is 5.4 or lower, try this possible workaround that is suggested by Arch Linux and Ubuntu developers.
Open the alsa configuration file (command might be different for Mint because Gedit text editor is not used in Mint):
sudo gedit /etc/modprobe.d/alsa-base.confAdd the following line to the end of this file:
options snd-hda-intel dmic_detect=0Save and close the file and reboot your system. You should have the audio back.
If it fixed your sound problem, you may want to fix brightness issue as well. Fixing the sound problem is definitely one of the must do things after installing Ubuntu.

If one of the above mentioned methods worked for you, please leave a comment below specifying the method that saved your day. Any other suggestions and feedback is also welcomed.
How to Control Audio on the Debian Command Line

A Terminal-savvy person will find a way to perform any action while staying in the comfort zone of the command line. We mostly control system volumes through the Debian GUI but there are certain situations where you want to do it from the command line. ALSA or the Advanced Linux Sound Architecture provides audio support for most Linux distros. There are high chances that your Debian is currently using the same architecture to run and manage audio on your system.
In this article, we will explain how you can install the ALSA utilities package if it is already not installed on your Debian. We will also explain how you can control the audio properties of your sound cards through:
We have run the commands and procedures mentioned in this article on a Debian 10 Buster system.
Install ALSA
The Alsa-utils package contains both the Alsamixer and Amixer utilities. This package is available in the official Debian repositories and can easily be installed through the command line using the apt-get command.
Open the Terminal application by pressing the Super(Windows) key and searching for Terminal through the Application Launcher as follows:

Login as root by entering su and then the password for root. You are now authorized to add/remove and configure software on Debian. Now, enter the following command in order to update the local repository index with that of the Internet. This helps you in installing the latest version of a software available online.

Now you are ready to install Alsa-utils; you can do so by running the following command as sudo:
# sudo apt-get install alsa-utils

The system might ask you the password for sudo and also provide you with a Y/n option to continue the installation. Enter Y and then hit enter; the software will then be installed on your system. The process may, however, take some time depending on your Internet speed.
Using Alsamixer-the graphical interface for Alsa
Alsamixer provides you with a graphical representation of the sound cards installed on your system and lets you easily view and control the properties of these cards. Alsamixer comes as part of the Ncurses interface so that you can stay within the Terminal while working on your sound card volume.
You can launch this graphical interface by running the following command in your Terminal:
The Alsamixer will display the properties of your default sound card as follows:

If you are not able to see all the properties as shown in the above screen shot, either expand your Terminal window or use the left and right arrow keys to view the properties that are not visible.
The Alsamixer Views
When you open the Alsamixer interface, you see it in the Playback view. This means that you can only control options related to sound playback from this view. These are the other two views you can switch to:
Capture view
In order to view properties only related to sound capturing, you can switch to the capture view by pressing F4 while the Alsamixer is open. This is how the Capture view looks like:

In order to view properties related to both sound capturing and playback, you can switch to the ‘All’ view by pressing F5 while the Alsamixer is open. This is how the All view looks like:

Playback view
In order to switch back to the Playback view press the F3 button.
Sound Card Selection
The Alsamixer utility displays the properties of the card that is saved as “default”. In order to view/edit properties of another sound card installed on your system, you can use the F6 control while Alsamixer is open.

The Sound Card menu, as shown above, appears when you press F6. You can move up and down the menu and then hit Enter in order to select another card. You can also manually enter the name of a card if it does not appear in the list by selecting the “enter device name” menu option.
You can quit this menu by hitting Esc.
Controlling Sound Properties
The most important part about using Alsamixer is to be able to turn up and turn down the volume of a certain property.
- You can move left and right to select the property whose volume you want to turn up, down, or mute.
- When you have selected a property, use the up and down keys in order to turn the volume up and down respectively.
- In order to mute a property/control, press the m key when that property is selected
- For information on all that you can do through the Alsamixer, hit the F1 control. This will display the help as follows:

You can use the Esc key in order to quit this help window.
Using Amixer-Control sound properties through commands
Amixer is a command based approach to managing properties of your sound cards. It provides a set of commands that you can use in order to turn the volume up, down, and even mute volume of a specified property of the specified card.
Use the following command in order to see all that you can do with Amixer:

Your amixer command looks mostly like this:
$ amixer -c [card-number] set [control] [value]
In all your amixer commands, you need to specify three things:
- The sound card (card number) whose property you want to manage
- The property/control whose volume you want to manage
- The volume value in percentage, or decibels that you want to set, increase or decrease. You can also specify if you want to mute a property of a sound card.
The scontrols command lets you view the list of controls you can manage:

Important: You can manage more controls by using the “su -” command as you will then be logged in as root.
Examples
1. The following command will set the volume on the Master control/property of the first sound card to 100%
$ amixer -c 0 set Master 100%
2. The following command will set the volume on the Speaker control/property of the second sound card to 30%
$ amixer -c 1 set Speaker 50%
3. The following command will set the volume on the Speaker control/property of the second sound card to 3db
$ amixer -c 1 set Speaker 3db
4. The following command will increase the volume on the Speaker control/property of the second sound card by 2db
$ amixer -c 1 set Speaker 2db+
5. Use the following commands to mute and unmute a property.
$ amixer -c 0 set Mic unmute
This was all about installing and using the ALSA utilities so that you can control sound properties and volume right from your Debian Terminal.
Search
About This Site
Vitux.com aims to become a Linux compendium with lots of unique and up to date tutorials.