- Launch program in screen after reboot
- 5 Answers 5
- GNU Screen Save Session on Reboot
- Prerequisites
- Saving Screen Session on Rebooting
- What is the .screenrc file?
- Configuration for .screenrc file
- 3) Third Party Applications
- Conclusion:
- About the author
- Zeeman Memon
- Run a screen session on boot from rc.local
- 4 Answers 4
Launch program in screen after reboot
I am running several headless Ubuntu 12.04 boxes. My typical usage involves logging into each machine via a putty session and executing a script using screen. After logging in via putty, I execute the following from the command line: screen /home/user/»script» My question is: Is there any way to get my script/program to run automatically after a reboot? I’m trying to prevent a loss of productivity in a power loss/automatic reboot situation.
5 Answers 5
You can use cron to do this for you.
- Simply do crontab -e in terminal
- It will open in your selected editor, where you can type
@reboot
(make sure you give full path for all executables) - Save the file and exit
Note the comment, in the link, that all needed services might not be available when the cron daemon starts.
I’m not sure exactly when this broke, but in my experience, screen is not immediately available in Ubuntu 14.04 (and newer?). So, you might need to make it @reboot sleep 5;
The official way to do this is by creating init scripts. These scripts have a start, stop, restart and status command and can be configured to run these commands at specific times. So when you switch to leven 6 (reboot) it will stop the service before rebooting and if configured correctly it will automaticly run start on this script when switching to runlevel 3. You can find these scripts in /etc/init.d. If you create the file correctly (so it must be able to handle a start and a stop parameter) you can run update-rc.d script.sh defaults to set it to automaticly boot. Make sure you did chmod +x on the script first to make it executable. The folder /etc/init.d contains loads of examples of how this is done.
There is also the /etc/rc.local file, this file runs after the system has fully booted, and you can just add your own commands.
Personally I prefer the init.d scripts because you can make sure that the program closes gracefully, thus preventing possible dataloss or other errors. But for one command, or somethhing that can’t really break /etc/rc.local will do just fine.
I also agree with this, update-rc.d will let you setup initscripts for various runlevels. manpages.ubuntu.com/manpages/precise/en/man8/update-rc.d.8.html
Modify your script in such a way that it can be invoked as an init script or, better yet, an upstart job. With some luck, you can keep it pretty much as it is, and have it run at boot by simply adding an upstart configuration to /etc/init . (Take any small .conf file there as a template.)
Two things you’ll need to be aware of:
- Your script is invoked with root privileges. Drop them, so that your script runs with the appropriate user privileges (your user identity, in this case). Do this by invoking the final screen command in your script using su su -c «screen . » — username .
- When started at boot, your script is run without a controlling terminal, whereas you currently run it from a shell. Since you use screen I assume you wish to re-attach to the terminal running script on your next login. If so, this may require passing extra options when you invoke screen .
There are other considerations with using Upstart, such as the /var/run/screen directory, please see unix.stackexchange.com/a/165647/103306
GNU Screen Save Session on Reboot
![]()
Linux has a utility called Screen, which allows you to use multiple terminal sessions inside a single window. Even if these get disconnected, you can start all over again from that exact spot. Therefore, our discussion topic in this article will be the process of how one can save their session in the GNU Screen utility on rebooting of their Linux systems.
Prerequisites
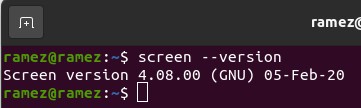
Before we move onto the main step of saving our session, we first need to make sure if the utility. The screen is installed on your systems or not. Screen often comes preinstalled with many Linux distributions today, which you can easily check by running the following command in the terminal:
However, if your system does not appear to have Screen installed on your computer systems, then you can simply do so by running the following command in the terminal:
Saving Screen Session on Rebooting
It is almost impossible to get a screen session that is entirely up to the mark of what you were doing. However, there is still a way to get it as close as possible to its initial state. This can be done by using the .screenrc file and adding some commands inside of it.
What is the .screenrc file?
The .screenrc file, which we will be using to save our screen session, is the user-specific configuration file for your GNU Screen utility. It is similar to the .emacs file of Emacs and is similarly known as the initialization file. Meaning, whenever you start Screen, it will first execute all the commands present in this file and then move to the rest of the stuff. Over here, you can store all the configurations of your screen utility that you want, and it is precisely these configurations that will allow you to save your Screen session.
Let us now look at what the configurations should be.
Configuration for .screenrc file
You can add several different configurations over here that meet your interests, such as turning off the starting welcome page or setting key bindings for easy shortcuts. For saving our Screen session, I mostly use the following configuration file.
# huge scrollback buffer
defscrollback 5000
# no welcome message
startup_message off
# default windows
screen -t Shell 1 bash
screen -t Python 2 python
# layouts
layout autosave on
layout new one
select 1
layout attach one
layout select one
In the above configuration, the scrollback buffer is the amount of text you want to be displayed on your screen. It is always good to keep this large as you will see the text more clearly and do your work easily. The following command is, as mentioned above, to turn your welcome message off.
The default windows are where the main crux of the screen session saving appears. These are the default windows that will be opened on startup. You can specify your important folders where you might be working over here as they will automatically open. In the layouts section, the first command, layout autosave on, is the most important one as it saves your screen sessions. It does this by turning the autosave mode on, and so, with each step you do, it automatically saves your work.
It is important to note that the layout autosave on command only works for explicitly named layouts in your .screenrc, so if you want to save a new layout, you have to either specifically mention it in your .screenrc file or use the following command to save your layout:
After adding your configurations in your .screenrc file, once you restart or login again into your Linux system, you will see your screen sessions saved.
3) Third Party Applications
An alternative to using configurations in your .screenrc file is to use third-party applications that provide you with additional tools along with your screen commands to make you do your work more efficiently. One such tool is screen-session, a program with a variety of utilities that you can as it makes working with GNU Screen easier. You can easily save your screen sessions using the save command of this program. It provides several different options for saving your Screen sessions. These include either saving your current session or saving any session of yours.
In the command above, the sessionname refers to the name of the session you want to save and the savedsessionname refers to the name which you want to save your session with.
Conclusion:
The Screen utility is extremely useful as it comes to our aid in crucial moments when, by chance, our internet connection gets lost, or our network fails, which, in turn, results in us losing our work. Screen easily lets you run your processes in the background, and as seen above, in case of any mishaps, you can start directly from where it got left off. A tool is definitely worth using.
About the author
Zeeman Memon
Hi there! I’m a Software Engineer who loves to write about tech. You can reach out to me on LinkedIn.
Run a screen session on boot from rc.local
I am trying to run a detached screen under a specific user in rc.local on boot. The code below is what I have so far, but it is not working for me. The su part seems to be giving me an error.
su - username -c /usr/bin/screen -dmS test bash -c '/var/www/path/to/script/script.sh; exec bash' 4 Answers 4
I think both -c parameters ( su and bash ) will have to be quoted at a minimum.
su - username -c "/usr/bin/screen -dmS test bash -c '/var/www/path/to/script/script.sh; exec bash'" Also — is expected to be last and may not be desirable here (see man su ).
A few more remarks. sudo could be a better choice for a one-shot command like yours, but not necessarily:
sudo -iu username /usr/bin/screen -dmS test bash -c '/var/www/path/to/script/script.sh; exec bash' In particular, you can use one less level of quoting with sudo .
Another thing you want to be careful with is executing commands without absolute path in a privileged context. This holds for su (or sudo ) but also for the path to bash in your command. You are doing it right with screen .
Just tested the following and it works nicely. I think the — is the main issue in your original line:
/bin/su username -c "/usr/bin/screen -dmS test bash -c '/home/username/test.sh; exec bash'" Evil remark: why don’t you give tmux a try? I have recently switched and never looked back. The only thing I needed to change immediately was the prefix key combination which in tmux defaults to Ctrl + B — back to GNU screen ‘s Ctrl + A .
It allows splitting your window into an almost arbitrary number of panes (vertically and horizontally) and its configuration file format (including the one for the status par) is actually intelligible to humans. Of course tmux is as good as screen when you simply want to run some program/script not originally written as daemon in background. If you intend to interact with the terminal multiplexer, however, I warmly recommend tmux .