- Start script on logon
- 3 Answers 3
- How to Configure Startup Applications in Ubuntu Linux
- How to get applications to startup at login in Ubuntu Linux
- How can I get autologin at startup working on Ubuntu Server 16.04.1?
- 2 Answers 2
- Enable or Disable Automatic Login in Ubuntu [Beginner’s Tip]
- Disable automatic login in Ubuntu
Start script on logon
I understand shell executes commands in either ~/.bash_profile, ~/.bash_login or ~/.profile, whichever is found first. My system has only .profile, yet commands entered there won’t get executed on startup/login. The script I’m talking about is essentially a cron front-end/TO-DO list manager. When user logs in (as in user gets access to his personal files/logs in to his account), the script should execute, checking whether there are any tasks that have failed to remind. If it finds any, zenity prompt will be poped up, asking next input.
how do you test if it doesn’t work? have you tried inserting an echo something. into ~/.profile and executing bash -l ?
3 Answers 3
First create your ~/.bash_login and make it do something simply (like echo a phrase.)
echo "echo Look at me go" > ~/.bash_login Then use bash -l like @mata said. The -l flag will run the bash as if it were the login shell (to make sure it reads your settings files.)
@LaurAliste, please precisely define login. What commands exactly need to be ran? Is this for mounting filesystems or something? If you need something to be used be ran for every ‘login’ irrespective, of what shell or program is actually performing the login, then you need to look at doing something with PAM.
Okay, I’ve found a solution to my initial problem. It’s dirty one though.
First of all, using ~/.bash_profile , ~/.bash_login , ~/.profile or even /etc/profile.d/ should be preferred methods instead (here’s good reading on the subject). Don’t know why it doesn’t work for me; perhaps it has something to do with my display manager auto logon workaround, just a guess.
Another solution would be adding script shortcuts to global file that gets executed at startup, for instance /etc/rc.local .
Since my script requires xserver and user to be logged on, I created initfile which waits after bootup for xserver and user to be logged on and then executes the script:
#! /bin/bash ### BEGIN INIT INFO # Provides: script_file.sh startup at boot # Required-Start: $all # Required-Stop: # X-Start-Before: # Default-Start: 2 3 4 5 # Default-Stop: # Description: runs '/usr/local/bin/script_file.sh --optional --flags' at startup, when xserver has started and YOURUSERNAME is logged on. ### END INIT INFO case "$1" in start) # Wait until X is running and required user logged in: count=0 until [[ "$(tty)" != "\/dev\/tty1" ]] && [[ "$(who | cut -d' ' -f1 | sort | uniq)" == "YOURUSERNAME" ]]; do sleep 5 let count=$count+1 if [[ "$count" == "10" ]]; then echo "Xserver hasn't started or other error occurred. Abort"; exit 1 fi done # Run the script as YOURUSERNAME instead of root: su - YOURUSERNAME -c '/usr/local/bin/script_file.sh --optional --flags' ;; stop) : ;; esac exit 0 This soulution assumes having automatic log-on set up. As mentioned, it really isn’t the way to do it, but works for now.
How to Configure Startup Applications in Ubuntu Linux
This post describes steps one can take to configure applications to automatically startup at login with Ubuntu Linux.
Some applications and services automatically start up when Ubuntu Linux boots up or when you log in. These apps and services are usually running in the background.
Like Windows and other modern operating systems, you can configure applications to startup every time a user logs in to their desktop in Ubuntu Linux.
Apps you configure to startup will get started when a user logs in, in addition to the default startup applications configured on the system.
Below is how to configure startup applications in Ubuntu Linux.
How to get applications to startup at login in Ubuntu Linux
As described above, like Windows and other modern operating systems, you can configure applications to startup every time a user logs in to their desktop in Ubuntu Linux.
Ubuntu Linux has a startup application that handles starting applications. You use this application to configure apps to auto startup.
To open Startup Applications, click the Activities overview dashboard and search for Startup Applications.

Alternatively, you can press ALT + F2 and run the gnome-session-properties command.
Once Startup Applications opens, click Add and enter the command to be executed at login (name and comment are optional).

For example, to make Firefox start automatically, it’s sufficient to type Firefox in the Command field and confirm with Add.

You can either type the command, click the Browse… button, and select a command.
Applications to autostart are typically located in the /usr/bin folder. If you don’t know the command for the application, you want to automatically startup, use the Browse… button, and go to the /usr/bin directory.

Choose the application you wish to run from the list and click Add to include it.

The next time you boot up and log in, the application will automatically startup.
This post showed you how to configure startup applications in Ubuntu Linux. Please use the comment form below if you find any errors above or have something to add.
Richard W
I love computers; maybe way too much. What I learned I try to share at geekrewind.com.
How can I get autologin at startup working on Ubuntu Server 16.04.1?
Nothing helps — I have to input my login and password at startup — any ideas what to do?
2 Answers 2
sudo systemctl edit getty@tty1.service This will the create a drop-in file (if neccessary) and open it an editor. Add the following, replacing myusername with your user name:
[Service] ExecStart= ExecStart=-/sbin/agetty --noissue --autologin myusername %I $TERM Type=idle - Create the folder /etc/systemd/system/getty@tty1.service.d if necessary
- Create the file /etc/systemd/system/getty@tty1.service.d/override.conf if necessary
I followed your guide and my machine can log in automatically now. BUT I cannot ssh to the machine as possible before. Please help me to get back to my SSH connection.
Instead of manually creating the .d directory and the override.conf file we can also simply say sudo systemctl edit getty@tty1.service . It will the create the file (if neccessary) and open it an editor. Simply save the file under the suggested name when finished.
Still works in 20.04. @PerlDuck I’ve edited the solution with a request that your improved steps are added to the original solution, they’re faster, use the official systemctl tool which is less prone to error and chooses a text editor automatically, alleviating doubt. I’ve preserved the OP’s documentation about the files that it creates so it doesn’t lose informational value. Thanks kindly!
@tresf Very nice, thank you. I took the freedom to replace «This will the create the file» with «This will the create a drop-in file» so that people know what kind of file that is — and what to search for in case more information is needed.
agetty opens a tty port, prompts for a login name and invokes the /bin/login command.
This file overrides the config by default of agetty on systemd for tty1. This provides a new instance of tty1 with autologin for the user specified.
By the way, the parameter —noissue is used to hide the contents of /etc/issue on login, so not needed in your case.
The option Type=idle found in the default getty@.service will delay the service startup until all jobs are completed in order to avoid polluting the login prompt with boot-up messages. When starting X automatically, it may be useful to start getty@tty1.service immediately by adding Type=simple into the file.
Enable or Disable Automatic Login in Ubuntu [Beginner’s Tip]
When you install Ubuntu, you are provided with the option to choose whether or not you want to use password to log in to the system. If you think you made the wrong choice at that time, you can change it any time.
In this quick beginner tip for Ubuntu users, I’ll explain the steps to enable or disable automatic login in Ubuntu 18.04 and higher versions that use GNOME desktop.
You may watch this video to see the steps in action or simply follow the rest of the tutorial.
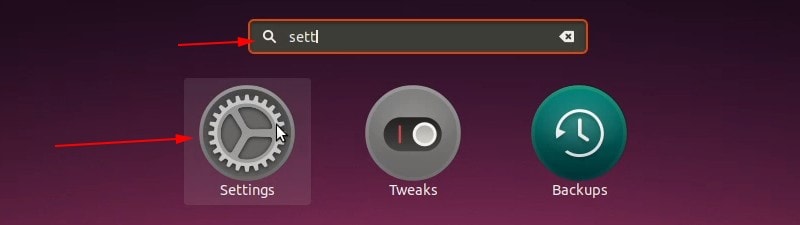
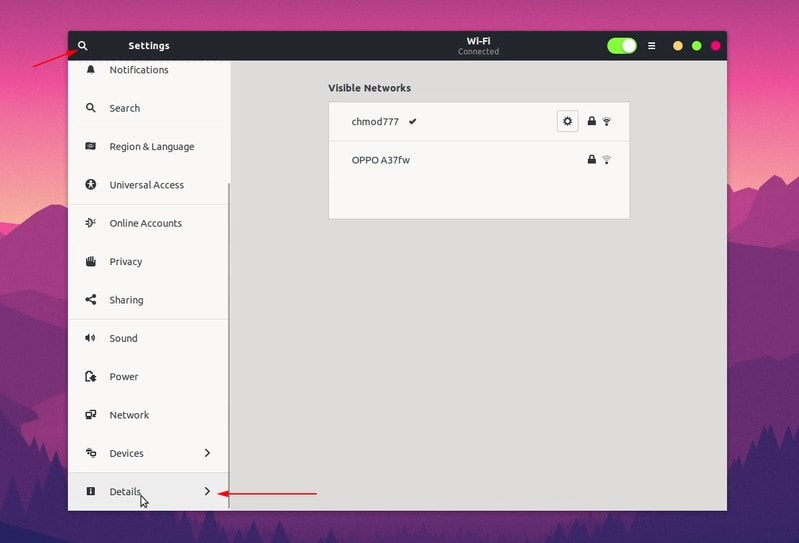
In the Settings, go to the bottom and look for Details in the left sidebar:
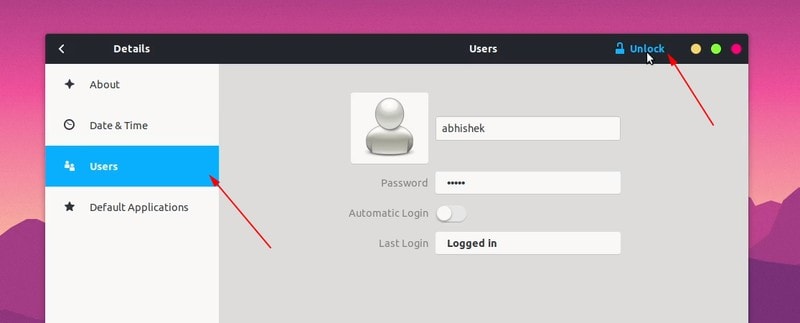
Now you should see the User option in the left sidebar. Click on it and you should see all the users available on your system. Click on the desired user and then click the unlock option.
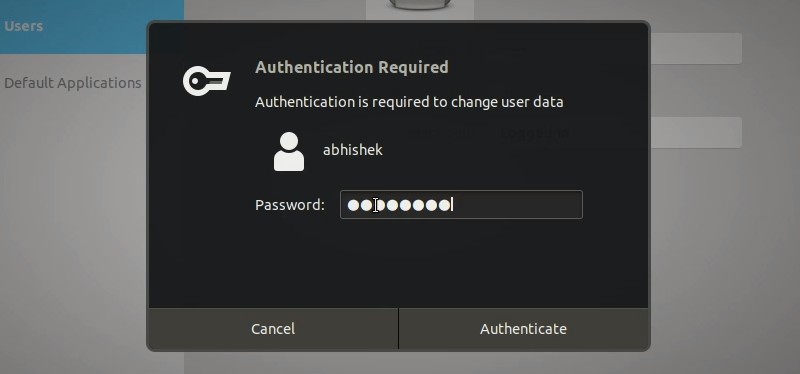
You’ll have to enter your own account’s password:
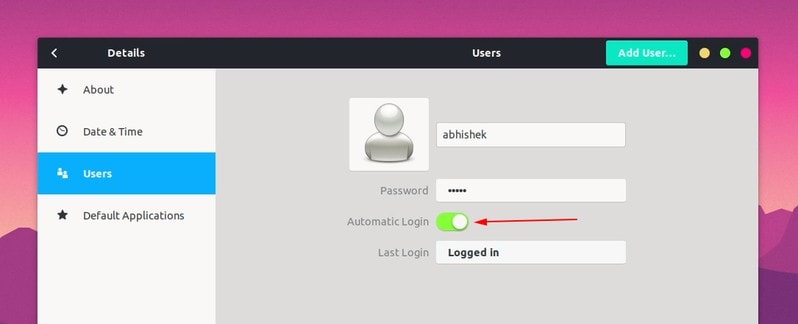
Now, you should be able to toggle the ‘Automatic Login’ button to enable automatic logon in Ubuntu.
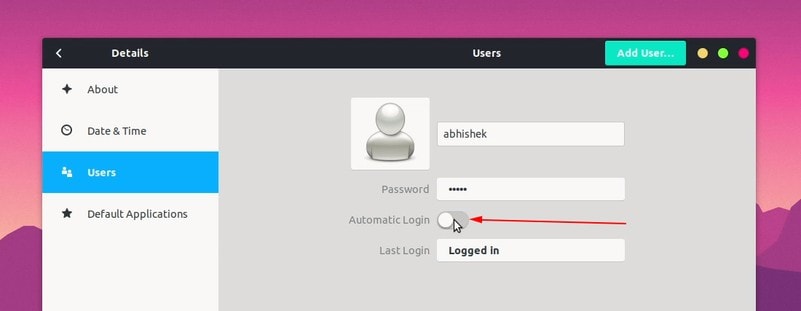
Disable automatic login in Ubuntu
You can disable automatic login the same way. You go to the Settings->Details->Users and then unlock it with your password and toggle the Automatic Login button off. That’s it.
Why you should avoid using automatic login in Ubuntu?
If you take my suggestion, avoid using automatic login. There are several reasons for that. The first reason is that it makes your computer less secure. And if you use Ubuntu irregularly, you may forget your password. Now resetting Ubuntu password is not a complicated task but it’s an additional pain nonetheless.
In addition to that, you’ll encounter the famous keyring in Ubuntu. You might be irked by a “unlock keyring” popup from time to time and you’ll have to enter the password anyway.
Either way, it’s your choice if you want to use auto login in Ubuntu or not. I showed you both ways to deal with it.
What do you prefer? Do you use automatic login in Linux or not?