- How to extract .tar.gz files on Windows 11
- Extract .tar.gz, .tgz, .gz tarballs on Windows 11 using tar
- Extract .tar.gz, .tgz, .gz tarballs on Windows 11 using Linux tar
- Related Stories
- How to Create tar.gz Archive File in Windows?
- Prerequisite: Install 7-Zip on Windows
- Step 1: Download the 7-Zip Installer
- Step 2: Execute the 7-Zip Installer File
- Step 3: Install 7-Zip
- How to Create a tar.gz Archive File in Windows?
- Step 1: Zip the Multiple Files in .tar Format
- Step 2: Compress the tar File in the “gzip” Format
- Conclusion
- About the author
- Rafia Zafar
- Tar — как запаковать и распаковать tar gz и tar bz2
- Как установить, создать архив Tar и распаковать его в Windows
- Как запаковать архив tar.gz и tar.bz2 в Ubuntu, Debian, CentOS
- Как распаковать архив tar.gz и tar.bz2 Ubuntu, Debian, CentOS
- Просмотр архивов tar в Linux
- Иные возможности tar
How to extract .tar.gz files on Windows 11
If you come across a .tar.gz, .tgz, or .gz file, you can use these steps to use the tar command-line tool to extract its content on Windows 11.
Windows 11 includes native support to extract “.tar.gz” files using Command Prompt without needing third-party tools. You can even use a Linux distro through the Windows Subsystem for Linux (WSL) to quickly extract tarballs created on another platform.
When you see a .tar.gz file, it means that this is a file created using the Unix-based archival application tar and then compressed using gzip compression. These files are often referred to as “tarballs.” While you can find them written like a double extension (.tar.gz), the format can also be written as .tgz or .gz. (It is worth noting that Linux doesn’t use file extensions. Instead, the file type is part of the file name.)
Although tar files are usually more common on Linux distros (for example, Ubuntu) and macOS for backups and archival, you may also come across these files on Windows 11. You could use third-party tools like 7-Zip and PeaZip, but these are not recommended as they don’t always work to extra .tar.gz files. Instead, you should be using the native tar support available on Windows 11 or a Linux distro in WSL.
In this guide, you will learn the steps to use native tar commands on Windows 11 using Command Prompt and Ubuntu to extract the content of a .tar.gz file.
Extract .tar.gz, .tgz, .gz tarballs on Windows 11 using tar
To extract .tar.gz, .tgz, .gz, and .zip files using tar on Windows 11, use these steps:
tar -xvzf C:/PATH/TO/FILE/FILE-NAME.tar.gz -C C:/PATH/TO/FOLDER/EXTRACTION

In the command, change the command to include the source and destination paths.
Once you complete the steps, the files and folders will extract to the specified destination.
It is assumed the tarball was created on another system. Also, we skipped some options that are usually useful to preserve permissions since they are not required on Windows 11.
Extract .tar.gz, .tgz, .gz tarballs on Windows 11 using Linux tar
You first have to install a distro using the Windows Subsystem for Linux before you can extract tarballs on Linux.
To extract a .tar.gz file using Linux, use these steps:
- Open Start.
- Search for Ubuntu and click the top result to open the app.
- Type the following command to extract the content of the .tar.gz file and press Enter:
sudo tar -xvzf /mnt/c/PATH/TO/TAR-FILE/Desktop/FILE-NAME.tar.gz -C /mnt/c/PATH/TO/DESTINATION/FOLDER

In the command, change the syntax to include the source and destination paths. If it’s only a .tar file, use the same command but omit the z argument.
We used the sudo command to run the tool as an administrator, tar to call the application, and we use these options:
- x — instructs tar you want to extract content.
- v — optional argument to display the extraction process. Otherwise, you will only see a blinking cursor until the process is complete.
- z — tells tar to uncompress the content of a “.tar.gz” file with gzip.
- f — instructs tarball the name of the file to extract.
After the option, you have to specify the path of the tarball file to extract. In the command, we start the path with /mnt/c/ since this is Linux, not Windows.
The -C — (hyphen and capital C) option is used to change folders, and you have to specify the destination path, which starts with the /mnt/ annotation followed by the Windows path.
You must pay attention to uppercase and lowercase while typing a Linux command since “Desktop” is not the same as “desktop.”
These are the basic options to extract a “.tar.gz” file, but you can use the tar —help command to learn more about the available options.
It’s important to note that Microsoft is building native support for TAR, GZ, 7-Zip, RAR, and many other archival formats to File Explorer. The support is expected to arrive with the release of Windows 11 23H2.
We may earn commission for purchases using our links to help keep offering the free content. Privacy policy info.
All content on this site is provided with no warranties, express or implied. Use any information at your own risk. Always backup of your device and files before making any changes. Privacy policy info.
Since you are here.
I’ve got a small favor to ask. This is an independent site, and producing content takes a lot of hard work. Although more people are reading Pureinfotech, many use adblocker. Thus advertising revenue is falling fast. And unlike many other sites, there is no paywall blocking readers here. So you can see why your help is needed. If everyone who finds this website useful and helps to support it, the future would be much more secure. Thank you.
If you use adblocker, please disable it for this site.
$125 raised so far by 11 people.
Related Stories
How to Create tar.gz Archive File in Windows?
![]()
A file that stores a collection of directories and files called a compressed archive file. By default, Windows uses the .zip format that contains a group of compressed files. The “tar” is an abbreviated form of “Tape archive”. It is used to combine files with each other for backup purposes. The “.tar.gz” is the extension in which the group of files is compressed into one file.
In this post, we will describe the method to create a tar.gz file in windows
Prerequisite: Install 7-Zip on Windows
By default, Windows uses built-in .zip conform to zip and unzip collection of files. But there are many tools that can be used to create a tar archive file in Windows, so we need to change it to Gzip format. The “.tar” file format is mostly used in Linux operating systems. Therefore, to create a .tar.gz file we need to install the 7-Zip tool on Windows.
To install 7-Zip on Windows, utilize the provided steps.
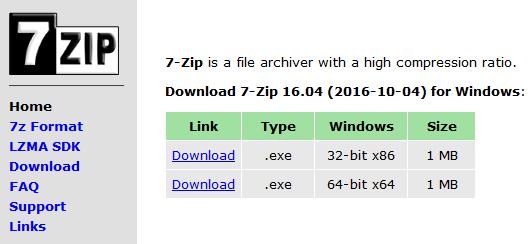
Step 1: Download the 7-Zip Installer
Navigate the below-mentioned link and install the 7-Zip installer according to the system specification. Our system is working 64-bit architecture; therefore, we will go with the 64-bit version:
Step 2: Execute the 7-Zip Installer File
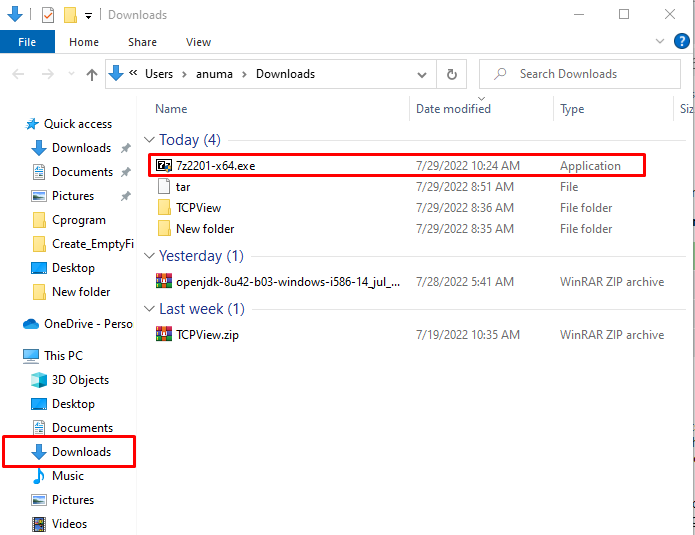
From the Downloads folder, double click on the 7-Zip installer to execute it:
Step 3: Install 7-Zip
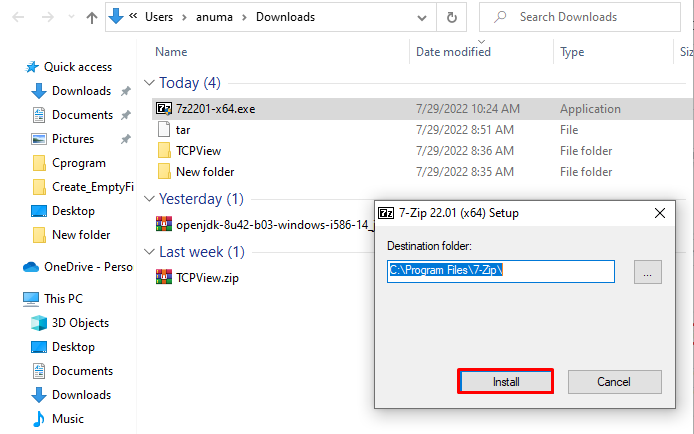
Select the 7-Zip installation location and press the “Install” button to install it on Windows:
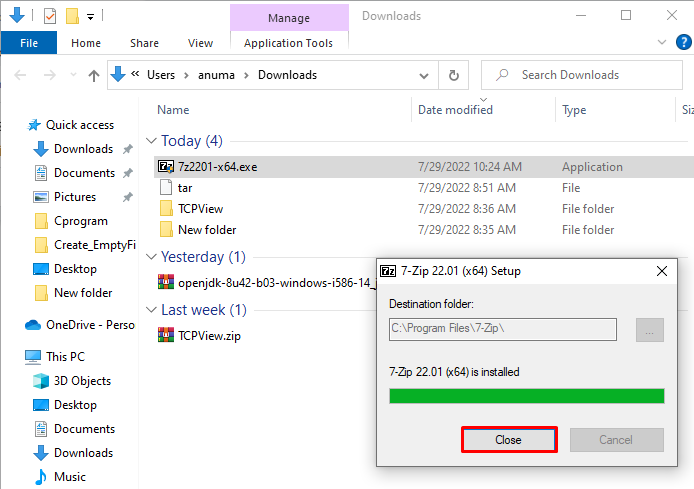
We have successfully completed the 7-Zip installation on Windows. Hit the “Close” button:
Let’s move ahead to use the 7-zip tool to create a “tar.gz” file in Windows.
How to Create a tar.gz Archive File in Windows?
Tar.gz zip format is mostly used in Unix and Linux-based operating systems. However, we can utilize the “.tar.gz” file format to compress files together in Windows with the help of third-party tools. In this article, we are using the 7-Zip tool to fulfill our purpose:
The below-listed steps will lead you to create a “.tar.gz” zip format file.
Step 1: Zip the Multiple Files in .tar Format
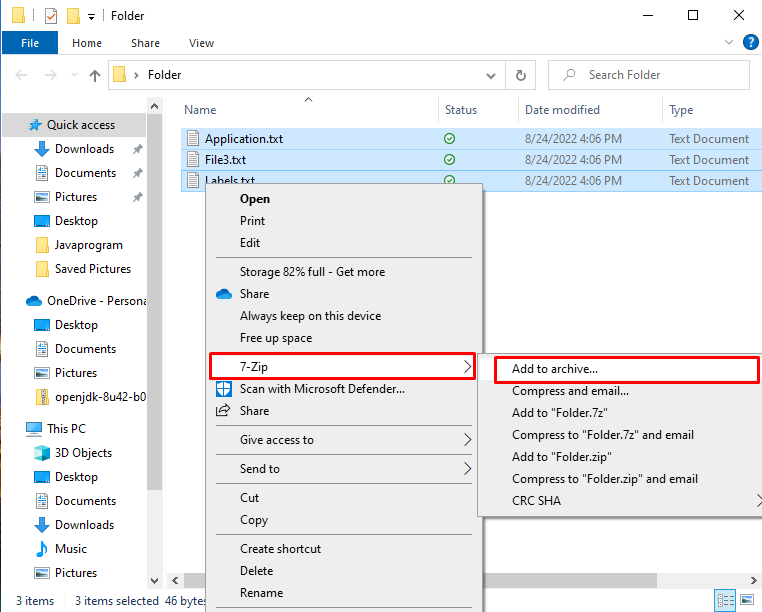
Select the files you want to zip them into a single file. Then, right-click, and move the pointer on the”7-Zip” option from the displayed menu. After that, select the “Add to archive” option:
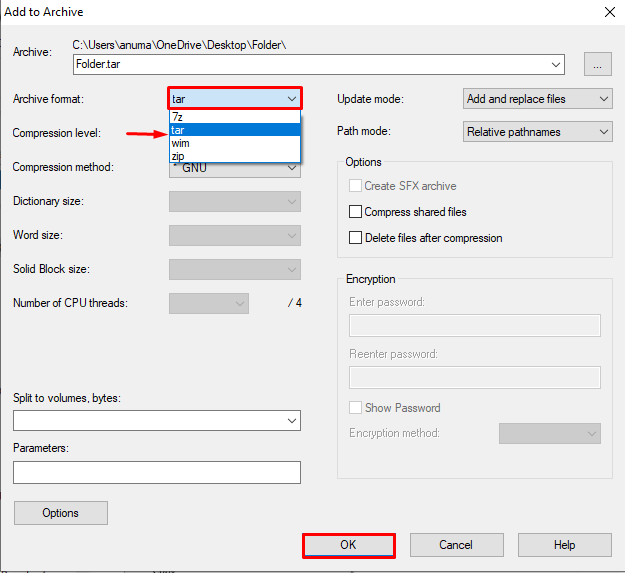
Provide the name of the folder in the Archive menu. Then, select the “tar” format from the “Archive format” drop-down menu and hit the “Ok” button. This will create the .tar zip file:
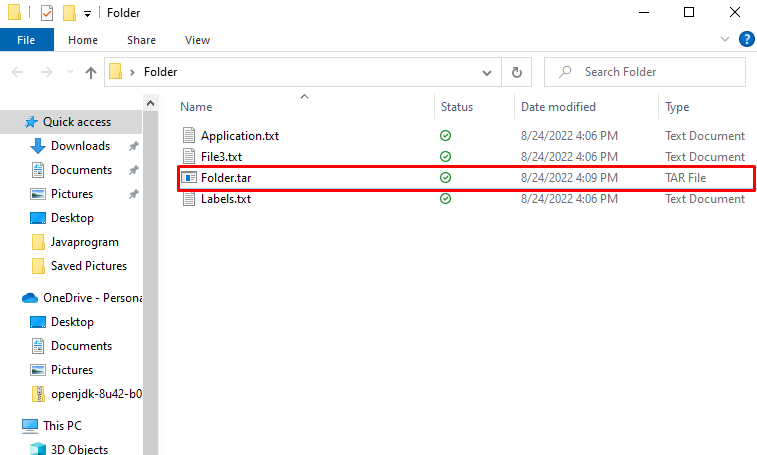
You can see that we have created the “Folder.tar” zip file:
Step 2: Compress the tar File in the “gzip” Format
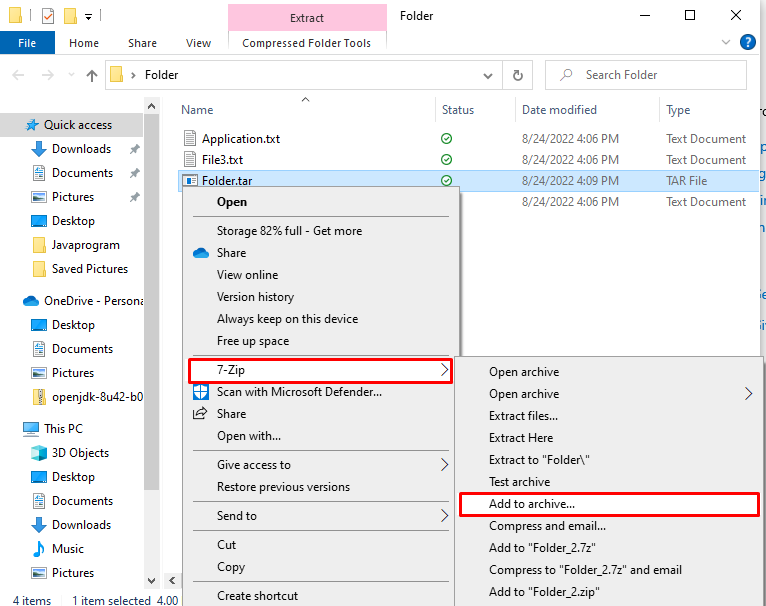
After creating the tar file, again right-click on the tar file, and move the mouse cursor to the “7-Zip” option. Then, select the “Add to archive” option from extended dropdown menu:
After that, select the “gzip” from the “Archive format” drop-down menu and click on the “Ok” button. This will change the simple tar file into a “tar.gz” file and reduces the size of the file:
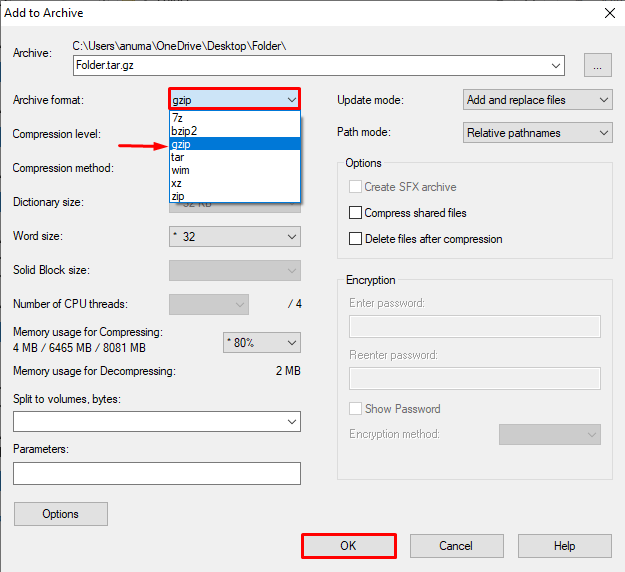
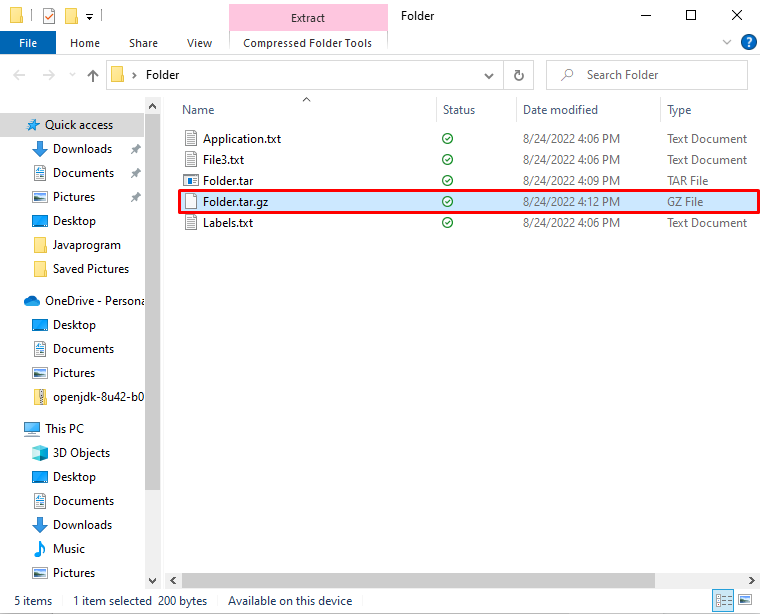
Now, the below input indicates that we have successfully created the tar.gz file in Windows:
That’s all! You have learned to create a “tar.gz” file on windows.
Conclusion
The tar.gz file format is used in Linux as well as Windows. Windows operating system by default uses “zip” format. Therefore, to create a tar.gz file, we have used the 7-Zip tool. It is used to zip and compress files in different formats. After installing the 7-Zip tool, select the files you want to convert to “tar.gz” and choose the archive format as “tar”. After that, you need to choose the “gzip” format from the “Add to Archive” menu to create a “tar.gz” file. This post has demonstrated the method to create a “tar.gz” file in windows.
About the author
Rafia Zafar
I am graduated in computer science. I am a junior technical author here and passionate about Programming and learning new technologies. I have worked in JAVA, HTML 5, CSS3, Bootstrap, and PHP.
Tar — как запаковать и распаковать tar gz и tar bz2
Tar — это популярный файловый архиватор в Unix/Linux системах. Tar зачастую используется вместе с архиваторами GZip или BZip2 , так как они отлично взаимодополняют друг друга: Tar не может сжимать файлы, только собирать их в одни архив, а GZip и BZip2 не могут сжимать несколько файлов одновременно, поэтому если вам нужно запаковать несколько файлов и директорий, сначала они собираются в один несжатый архив с помощью Tar , который сохранит их некоторые атрибуты, например такие, как права доступа, а затем этот архив сжимается с помощью GZip или BZip2 . Весь процесс запускается одной консольной командой, про которые далее.
Как установить, создать архив Tar и распаковать его в Windows
Чтобы использовать Tar в Windows, нужно воспользоваться одним из следующих вариантов:
- Установить Far Manager.
Инструкция по созданию и распаковке архива .tar с помощью Far Manager:
Теперь просто выделяете ПКМ (правой кнопкой мыши) или кнопкой клавиатуры Insert нужные вам файлы и папки и жмёте Shift + F1 , затем выбираете нужный формат (в нашем случае, TAR) и создаёте архив:
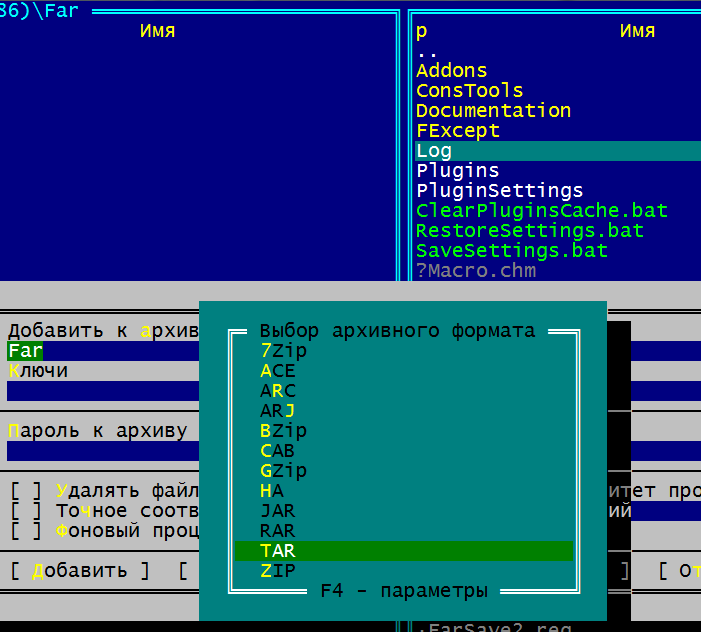
Создание архива в Far Manager
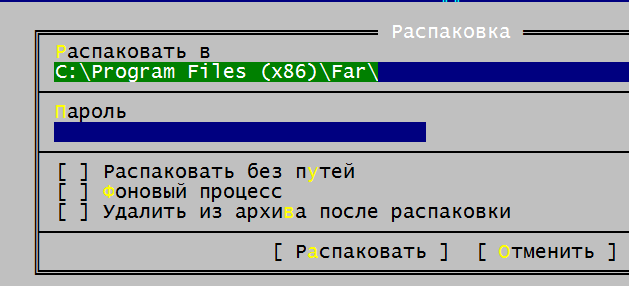
Как распаковать Tar в Far Manager
Скачать 7-zip архиватор
Как запаковать архив tar.gz и tar.bz2 в Ubuntu, Debian, CentOS
tar cfvz archive.tar.gz *.php
где tar — команда, cfvz — ключи, archive.tar.gz — имя будущего архива, *.php — список файлов, которые нужно заархивировать.
Список можно заменить директорией, которую нужно запаковать целиком, для этого указываем путь до неё, абсолютный или относительный
tar cfvz archive.tar.gz /forpack
Теперь подробнее про ключи
- -с — команда, которая означает «создать архив»
- -f — команда на упаковку файлов и директорий в один файл архива
- -v — включает визуальное отображение процесса архивации
- -z — использовать для сжатия GZip
Также, можно использовать для сжатия BZip2 . Для этого нужно использовать ключ -j вместо -z .
В этом случае, команда для запаковки tar.bz2 будет выглядеть так
tar cfvj archive.tar.bz2 /forpack
Вместо GZip и BZip2 можно пользоваться иными архиваторами, для этого просто нужно подобрать соответствующий ключ.
Чтобы исключить определённый каталог или файл из архива, можно воспользоваться ключом —exclude .
Сначала переходим в нужный каталог, затем используем следующую команду:
tar cfvz wp-content.tgz wp-content --exclude=wp-content/updraft --exclude=wp-content/uploads --exclude=wp-content/cache
Тут мы запаковываем каталог /wp-content/ на WordPress, исключая раздел Updraft wp-content/updraft , раздел Загрузки wp-content/uploads и Кеш wp-content/cache .
Важный момент — чтобы исключить ошибки, не указывайте слеш / в конце пути исключаемого каталога.
Как распаковать архив tar.gz и tar.bz2 Ubuntu, Debian, CentOS
Чтобы распаковать архив tar.gz или tar.bz2 , в команде нужно заменить -с на ключ -x , а также указать путь до архива, абсолютный или относительный
Команда для распаковки архива в текущую директорию выглядит так
С помощью ключа -С можно указать путь, куда нужно распаковать архив
tar xfvj archive.tar.bz2 -C /var/www
Просмотр архивов tar в Linux
Для просмотра содержимого архивов можно использовать ключ -t
Будет выведен список файлов и директорий в архиве. При добавлении ключа -v также будет выведена подробная служебная информация о правах доступа, размерах файлов и прочем.
Иные возможности tar
Tar имеет много дополнительных возможностей, к примеру, добавление файлов в существующий архив, исключение некоторых файлов и директорий при запаковке архива и так далее. Подробнее вы можете узнать о них при помощи команды