- How to Use Linux Terminal in Windows 10
- Raj Kumar
- Enable Windows Subsystem for Linux (WSL) and Install Ubuntu in Windows 10
- First, Check your Windows Version
- Enable Windows Subsystem for Linux
- Enable WSL 1 via PowerShell
- Enable WSL 2
- Enable WSL 2 via PowerShell
- Set WSL 2 as the Default Version
- Install your Linux distribution of choice
- Upgrade WSL1 to WSL 2 for Ubuntu
- bash shell on Windows 10
- Loved what you read? Don’t miss out on more! 😊🎉
- How to Use Tome AI
- How to Mute Someone on Threads
- How to Follow All Instagram Friends on Threads
- How to Disable Automatic Driver Download on Windows 11
- How to Remove or Hide Threads Badge from Instagram Profile
- How is Threads Different from Instagram
- How to Use Threads App on Desktop Using Windows 11
- How to Switch Profiles on Threads
- Ламповый Linux-like терминал в Windows
- Установка нужных программ
- Настройка
- Немного «свистелок»
- Заключение
How to Use Linux Terminal in Windows 10
You can now access most of the Linux command-line utilities and applications on top of Windows 10 OS using Windows Subsystem for Linux (WSL).
Raj Kumar

Although Windows is the most widely used and most popular operating system for desktops and laptops, it is not as secure and open-sourced as Linux OS. That’s is why a lot of software developers and professionals prefer Linux OS.
Microsoft has started a partnership with Canonical, creators of Ubuntu Linux. This paved way for Linux users to use Linux on Windows. Yes, you can run Linux on top of Windows 10 without the need for a dual boot, or using VMWare/VirtualBox, or installing it as your main Operating System.
You can access various Linux commands and software from the Linux terminal in Windows 10. In this article, we’ll give you step-by-step instructions on how to install and run the Linux terminal on Windows 10 OS.
Enable Windows Subsystem for Linux (WSL) and Install Ubuntu in Windows 10
If you intend to run a Linux terminal on Windows 10, you must first turn on the ‘Windows Subsystem for Linux’ feature. Then you can download and install your choice of Linux distribution.
The Windows Subsystem for Linux (WSL) is a feature that creates a GNU/Linux environment that allows you to run core Linux command-line tools and services directly on Windows, alongside your desktop and modern store apps.
By enabling Windows 10’s Linux subsystem, you can install and run various Linux distributions (distros) such as Ubuntu, OpenSuse, SUSE Linux, Fedora, etc.
First, Check your Windows Version
But before we get into how to enable Windows Subsystem for Linux (WSL) and install Linux, you need to check if you are running a compatible version of Windows 10. WSL is only supported on both Windows 10 64-bit (from version 1607) and Windows Server 2019.
To check your Windows version and build, go to ‘Settings’ from Windows Start menu.
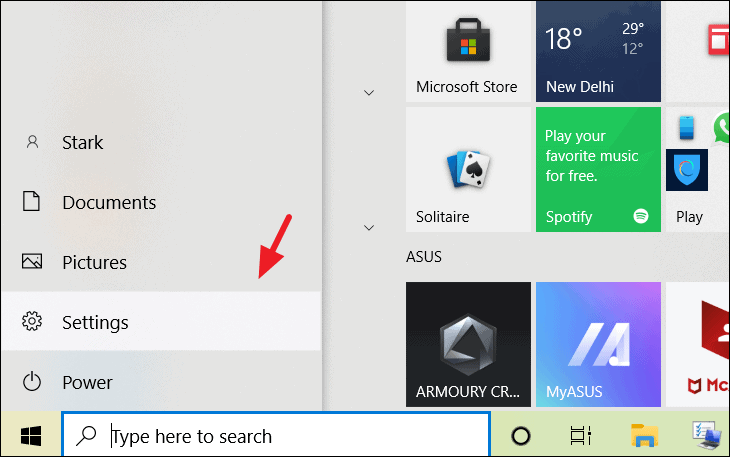
Next, click ‘System’ setting.
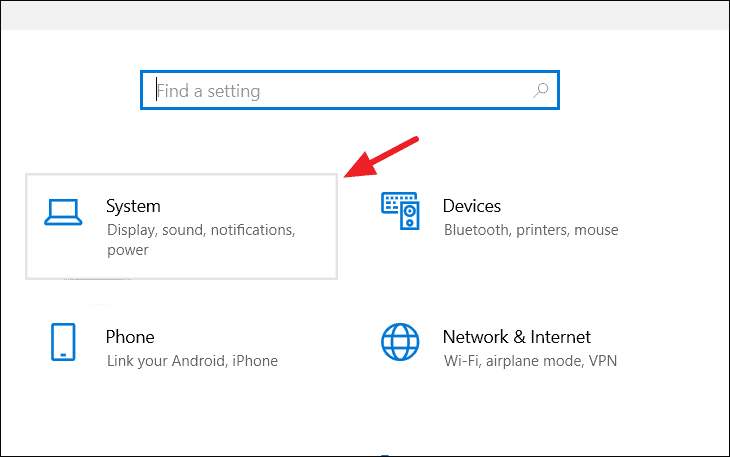
Then, scroll down and select ‘About’ option at the bottom of the left pane to view About section.
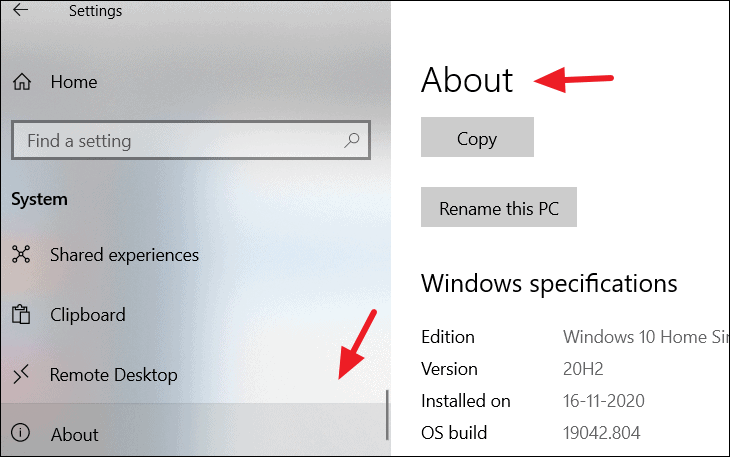
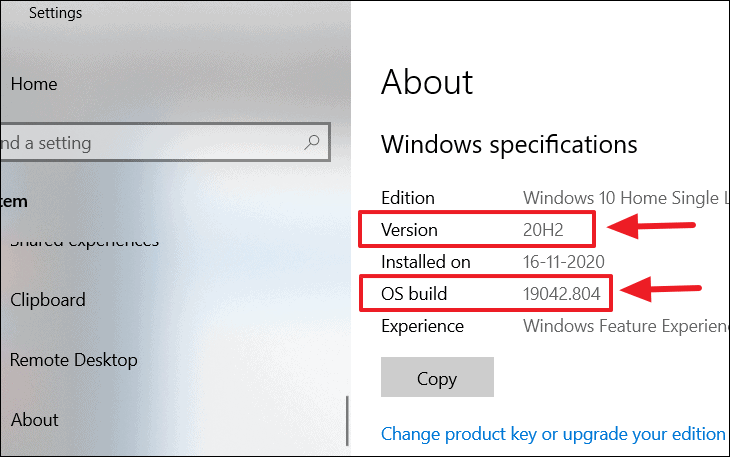
On the About page, under Windows specifications, you can see the ‘Version’ and ‘OS build’ of your Windows 10.
Enable Windows Subsystem for Linux
There are two different types of WSL versions: WSL 1 and WSL 2. While they both provide smooth and continuous integration of Linux within Windows, WSL 2 is the latest and fastest version with supports full Linux kernel and system call compatibility. WSL 1 runs a translation layer which bridges the gap between Linux kernal and Windows.
- To run WSL 2, you must be running Windows 10 x64 bit systems: Version 1903 or higher, with Build 18362 or higher.
- To run WSL 1, you will need Windows 10 x64 bit systems: Version 1709 or higher, with Build 16215 or higher.
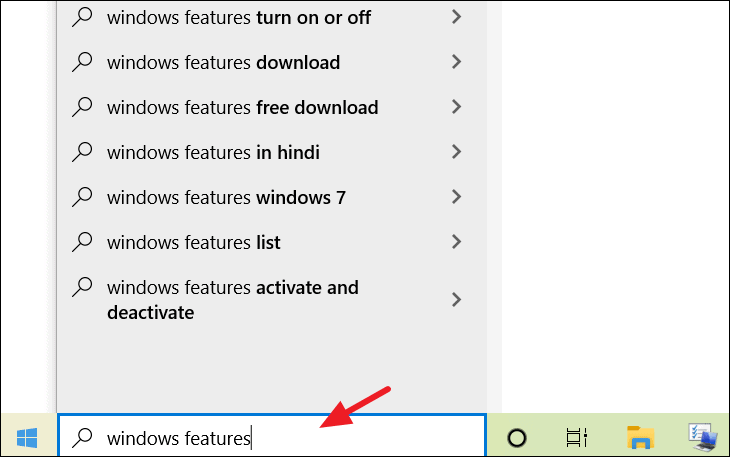
It doesn’t matter which version of WSL you want to run you must enable it first to use it. To do this, start type typing ‘Turn Windows features on and off’ into the Start Menu search field.
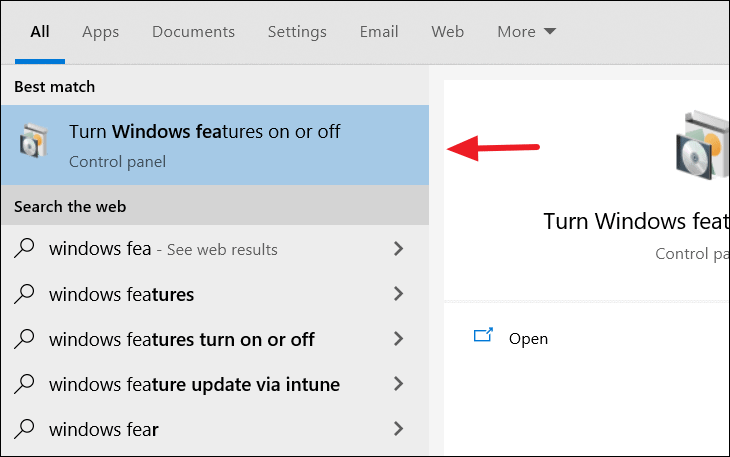
Select ‘Turn Windows features on and off’ control panel from the search result.
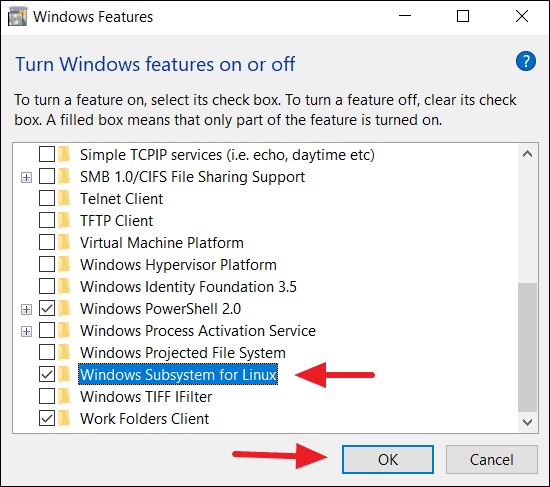
Then, scroll down to ‘Windows Subsystem for Linux’, tick the box in front of it, and click the ‘OK’ button.
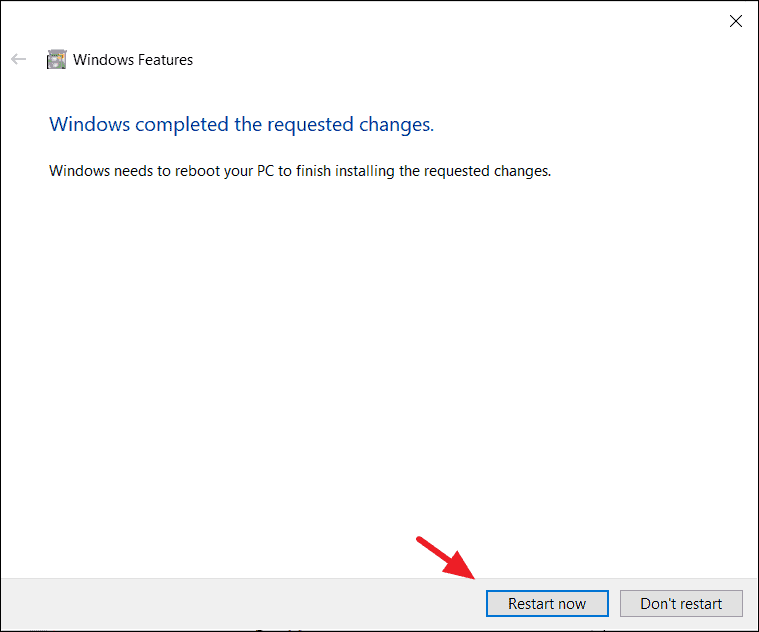
Once the changes are applied, click ‘Restart now’ to restart your computer
If you want to only install WSL 1, you can now restart your computer and install your Linux distro.
Enable WSL 1 via PowerShell
You can also enable WSL via the ‘PowerShell’ command-line tool. This does the same job as the Windows Features control panel. For that, open ‘PowerShell’ as an Administrator and run the below command.
dism.exe /online /enable-feature /featurename:Microsoft-Windows-Subsystem-Linux /all /norestart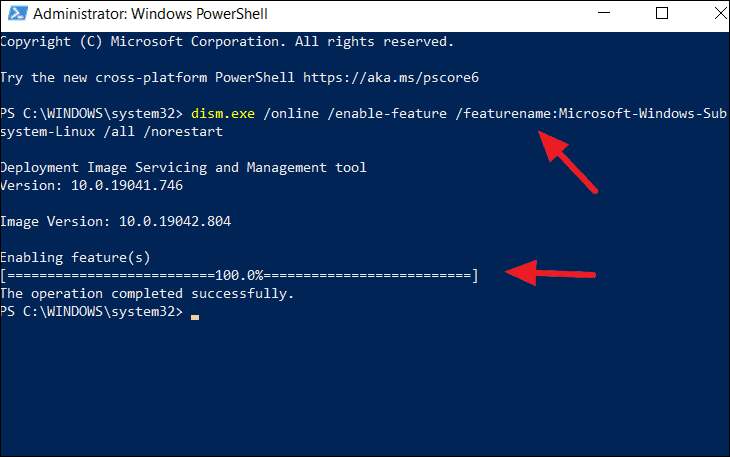
Enable WSL 2
We recommend you upgrade your WSL to version 2 for faster performance speed, and to run a real Linux kernel directly on Windows 10. All you need to do is enable the ‘Virtual Machine Platform’ feature in addition to the ‘Windows Subsystem for Linux’ feature on the Windows features control panel (see below).
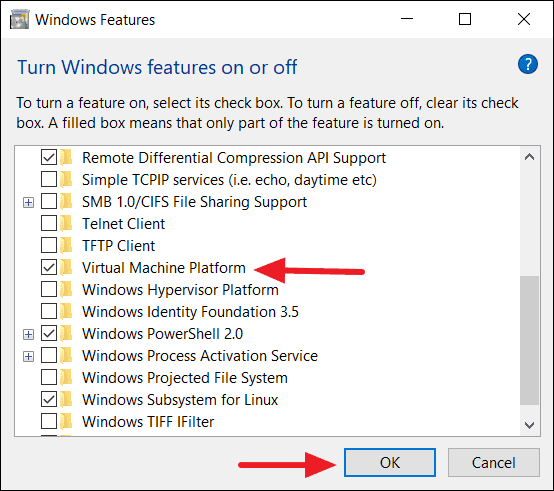
Wait for the changes to be applied, then restart your computer.
Enable WSL 2 via PowerShell
This first step to enable WSL 2 is enabling the Virtual Machine Platform feature component on Windows. You can also enable WSL 2 via the ‘PowerShell’ command-line tool. To do that, open ‘PowerShell’ as an Administrator and run the following additional command with the WSL 1 command.
dism.exe /online /enable-feature /featurename:Microsoft-Windows-Subsystem-Linux /all /norestartdism.exe /online /enable-feature /featurename:VirtualMachinePlatform /all /norestart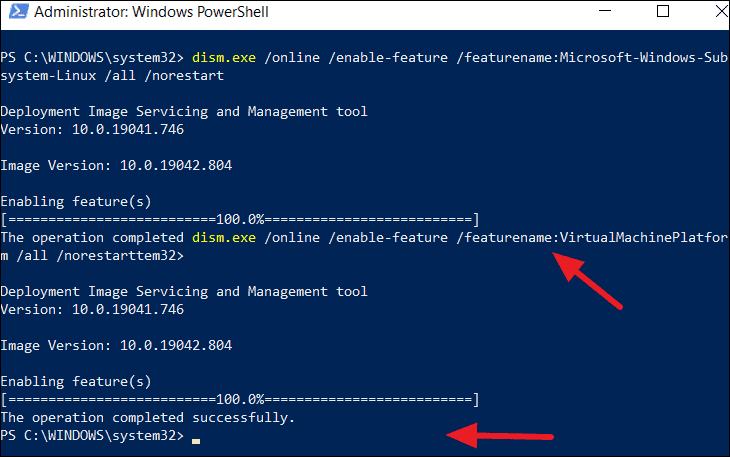
Set WSL 2 as the Default Version
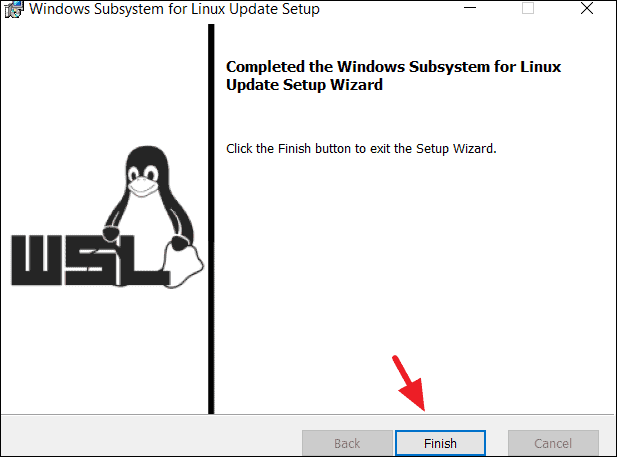
Before setting up WSL 2 as your default version for all Linux distributions, download the WSL Linux kernel package update for x64 systems.
Run the .msi installer downloaded and install it. It will take only seconds.
To set WSL 2 as your default version when installing a new Linux distribution, open PowerShell and run this command the following command:

Then restart your system to switch the feature from WSL 1 to WSL 2.
Install your Linux distribution of choice
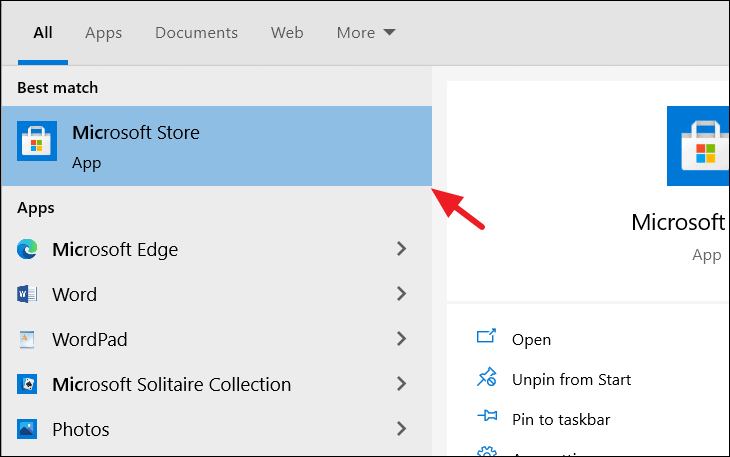
WSL is enabled, now we will install a Linux distribution. First, search for ‘Microsoft Store’ in the Start Menu search field. Then, open it from the search result.
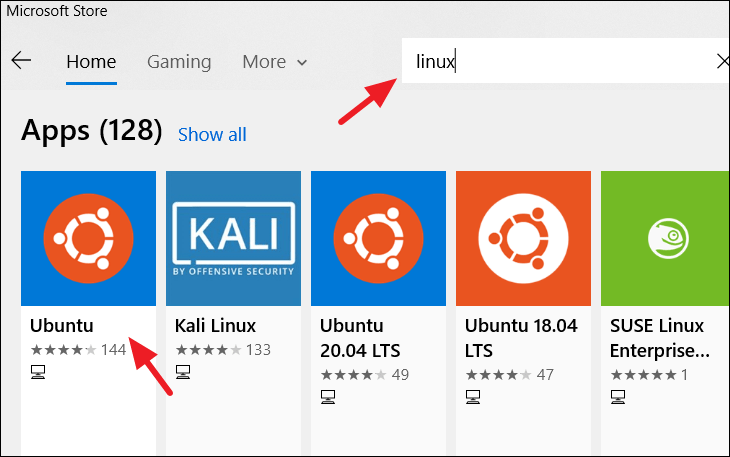
You’ll see a list of every Linux distributions currently available in the Windows Store which are supported by WSL.
- Ubuntu 16.04 LTS
- Ubuntu 18.04 LTS
- Ubuntu 20.04 LTS
- openSUSE Leap 15.1
- SUSE Linux Enterprise Server 12 SP5
- SUSE Linux Enterprise Server 15 SP1
- Kali Linux
- Debian GNU/Linux
- Fedora Remix for WSL
- Pengwin
- Pengwin Enterprise
- Alpine WSL
All of theses distributions are available for free. For our tutorial, we’ll select ‘Ubuntu’.
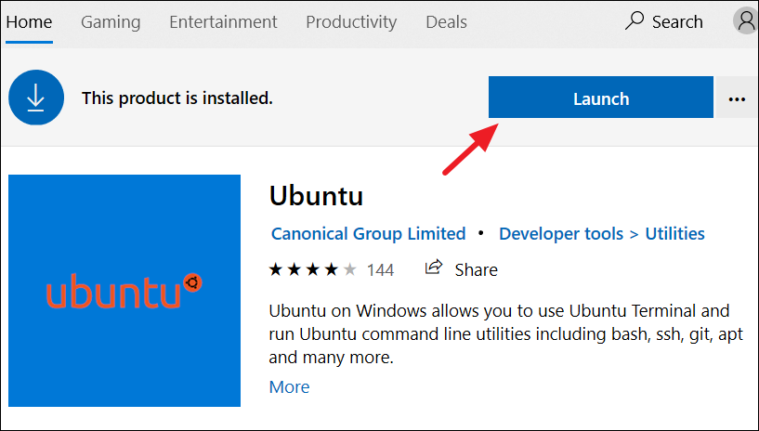
From the Ubuntu distribution’s page, Click the ‘Get’ button.
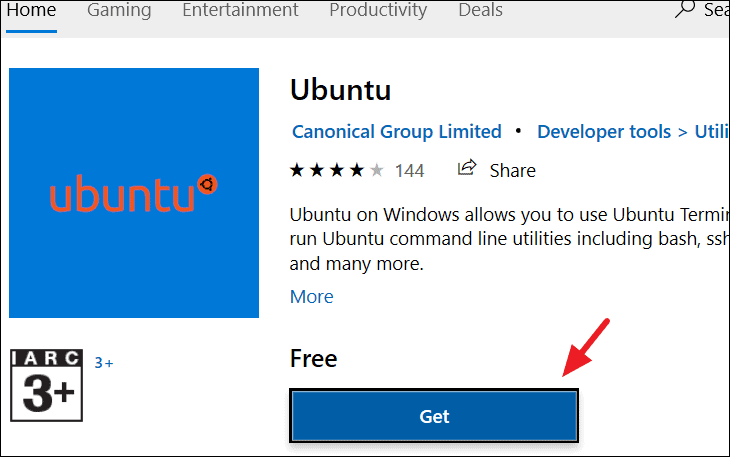
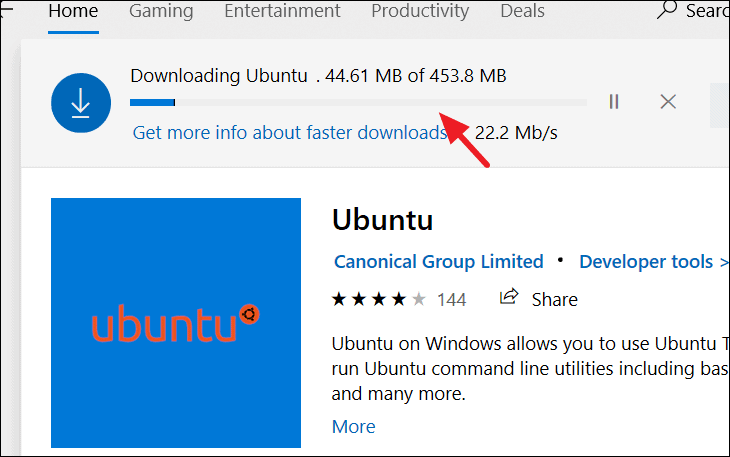
Now, Ubuntu distribution will be downloaded and installed automatically on your computer.
Once the installation finished, click the ‘Launch’ button to launch the terminal. You can also launch the app from the Windows Start Menu.
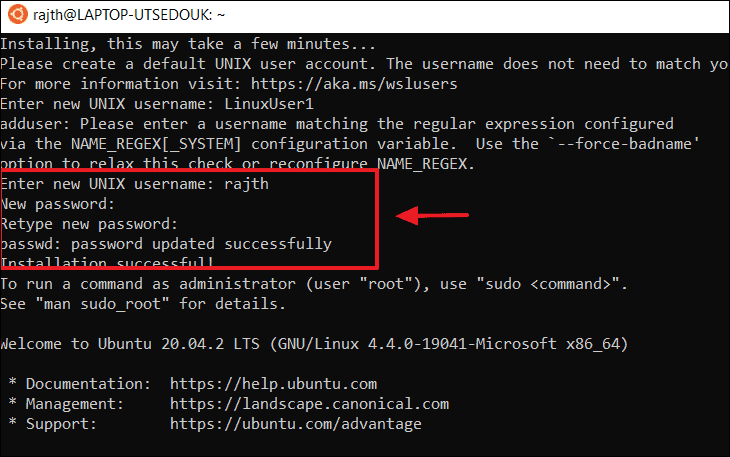
A new Ubuntu terminal window will appear. The first launch will take a few minutes to register the Ubuntu environment with WSL. Once that’s finished, the terminal will prompt you to create a ‘new Unix username’ and ‘new password’. Enter the new username and password and complete the setup.
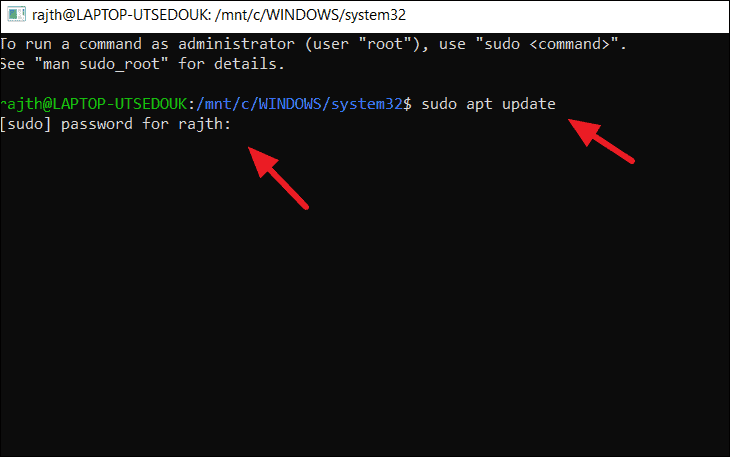
Once, the set up finished, it will take you to the bash command line. It’s better to update the software right away. In Ubuntu, you can search for, download, and install software updates, all from the apt command.
Enter the below command to update the software. And you’ll be prompted for the password, enter the newly created password to run the command as an administrator.
This ‘update’ command will update the Ubuntu repositories.
Ubuntu will download a series of package lists.
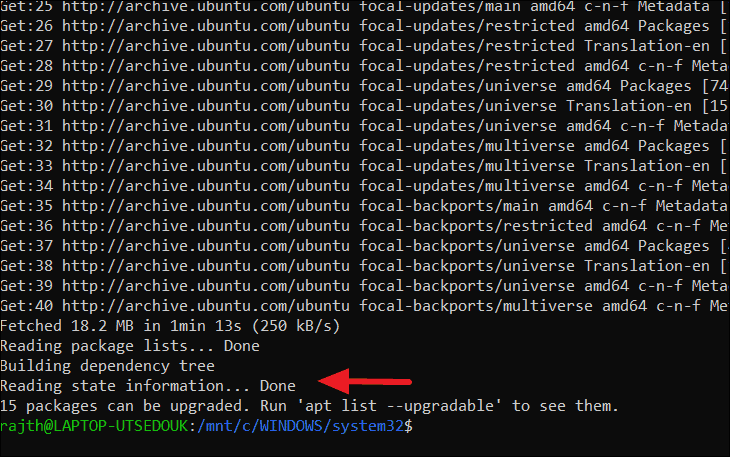
But they are not upgraded yet. To upgrade all available packages, enter the following command:
Enter ‘Y’ at the prompt to continue the installation.
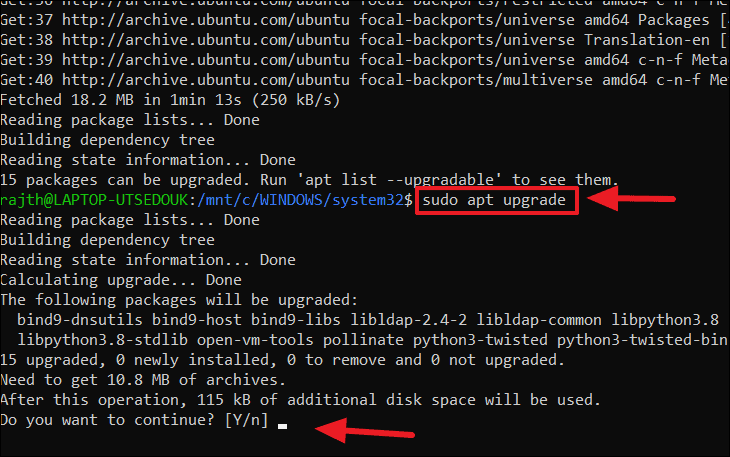
The ‘dist-upgrade’ command upgrade packages to their latest versions.
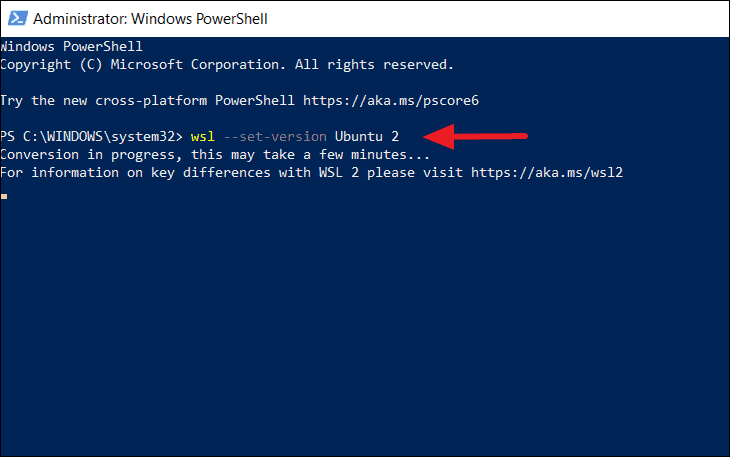
Upgrade WSL1 to WSL 2 for Ubuntu
If you wish to upgrade the existing WSL 1 version to WSL 2 for a specific distribution. Then, run the below command in PowerShell.
Replace ‘’ argument with the name of whichever distribution (Ubuntu in our case) your WSL 1 install runs.
Now, you can access Linux commands and software on a Windows 10 system using this Ubuntu Environment.
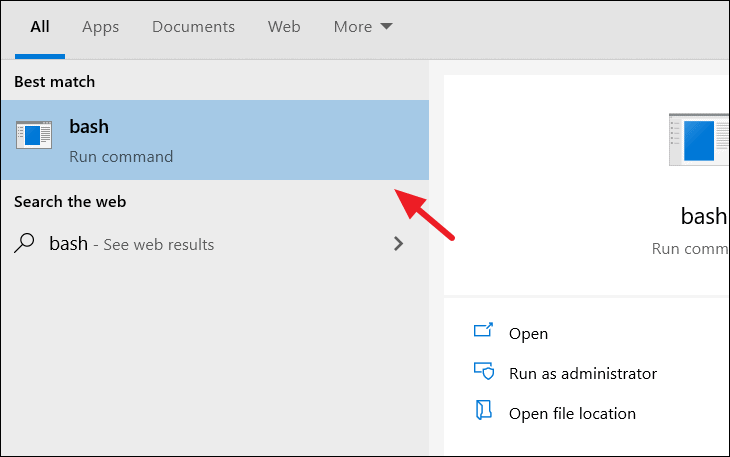
bash shell on Windows 10
You now have a full command-line ‘bash’ shell on your system based on the Linux distribution. You can access all the Linux commands and applications via that bash shell.
To run bash shell, type ‘bash’ into the Start Menu search field and click to open the bash command-line tool.
Now, you can start running commands there.

Loved what you read? Don’t miss out on more! 😊🎉

How to Use Tome AI

How to Mute Someone on Threads

How to Follow All Instagram Friends on Threads

How to Disable Automatic Driver Download on Windows 11

How to Remove or Hide Threads Badge from Instagram Profile

How is Threads Different from Instagram

How to Use Threads App on Desktop Using Windows 11

How to Switch Profiles on Threads
While the process to switch profiles on Threads isn’t as seamless as it is on Instagram, it isn’t so cumbersome either to make steer clear of it.
Ламповый Linux-like терминал в Windows
Для меня, автоматизатора-линуксоида, использвание Windows на основной рабочей станции первое время было просто болью и страданием. Но с этим я ничего поделать не мог: корпоративные стандарты и софт, кторый работает только на Windows. В попытке найти золотую середину, я прошёл три стадии. Сначала я только изредка переключался на винду по необходимости. Затем виртуалка на virtualbox-е с X-server-ом. После этого захотелось хоть чуть-чуть того консольного комфорта, который был на линуксе (я использовал Terminator в качестве основного терминала).
После яростного гугления и установки всех эмуляторов терминала под Windows, которые только удалось найти, оказалось, что нет ни одного хоть немного подходящего мне. А хотелось, чтобы вёл себя терминал максимально приближенно к линуксовым вариантам. Например, естественно нужны табы, сплит, выделение текста с прокруткой (когда нужно выделить больше чем один экран), копирование текста в буфер сразу при выделении и т.д.
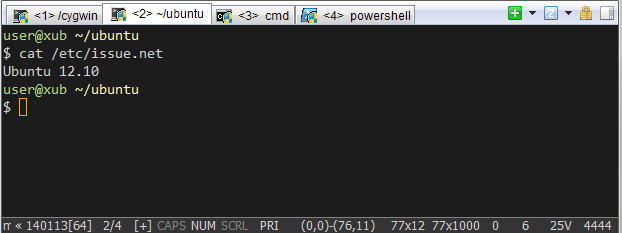
В итоге я получил «комбайн» как на скриншоте ниже. О том, как это настроить, можно узнать, заглянув под кат.
До того, как получить результат, я даже всерьёз задумался о своём велосипеде (портирование, написание своего). Но лень и здравый смысл взяли свое…
В процессе поиска хорошего терминала, я наткнулся на хабра-топик: Альтернативный терминал для Windows. ConEmu — приложение действительно классное, но оно не для тех, кто долгое время использовал линукс-терминалы. Затем я наткнулся на Mintty (был установлен вместе с Cygwin). Программка отличная, ведёт себя максимально близко к таким терминалам как Gnome-terminal и Terminator, но нет табов.
Оказалось, что вышеупомянутый ConEmu умеет запускать GUI-приложения внутри своих табов! И тут искра надежды начала разгораться… Но хватит лирики, пора приступить к делу!
Установка нужных программ
ConEmu ставим отсюда: code.google.com/p/conemu-maximus5
Mintty я ставил вместе с Cygwin: cygwin.com/install.html
Настройка
В ConEmu идём в Settings->Tasks и, нажимая плюсик, добавляем нужные таски как на скриншоте:
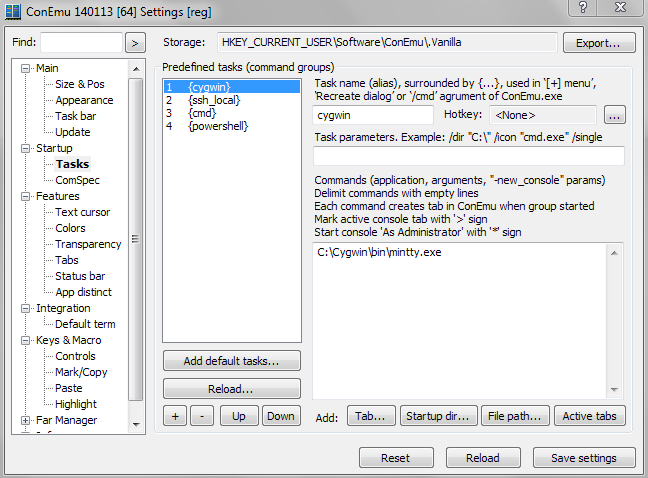
В нашем случае это:
| Имя таска | Команда |
| cygwin | C:\Cygwin\bin\mintty.exe |
| ssh_local | C:\Cygwin\bin\mintty.exe D:\Work\VMssh.bat |
| cmd | cmd |
| powershell | powershell |
Осторожно! Адский CMD!
@ECHO OFF SET VMNAME=xubuntu CALL D:\Work\VMstart.bat %VMNAME% ssh user@localhostВызывает скрипт старта виртуалки, VMNAME заменить на нужное.
@ECHO OFF SET VMNAME="%1" SET isVMRun= IF [%1] == [] ( echo Empty parameter VMNAME. Usage: %0 [name of vm] EXIT /B 1 ) FOR /F %%i IN ('VBoxManage list runningvms') DO SET isVMRun=%%i IF NOT "%isVMRun%" == "%VMNAME%" ( Vboxmanage startvm %VMNAME% --type headless )Проверяет запущена ли виртуалка и если нет, то запускает её. Таким образом, мне не нужно помнить запущена ли виртуалка, запускать отдельно VirtualBox и делать дополнительные клики.
Немного «свистелок»
ForegroundColour=208,208,208 BackgroundColour=28,28,28 CursorColour=255,175,0 IMECursorColour=128,224,160 Black=12,12,12 BoldBlack=10,10,10 Red=215,135,135 BoldRed=223,135,135 Green=175,215,135 BoldGreen=175,223,135 Yellow=247,247,175 BoldYellow=255,255,175 Blue=135,175,215 BoldBlue=135,175,223 Magenta=215,175,215 BoldMagenta=223,175,223 Cyan=175,215,215 BoldCyan=175,223,223 White=230,230,230 BoldWhite=238,238,238 BoldAsFont=no Font=Consolas FontHeight=11 CursorType=block FontSmoothing=full Term=xterm-256color Scrollbar=none Locale= Charset= Общая рабочая папка (файлы доступны на винде и на виртуалке) — нужно настроить в VirualBox-e следующим образом:

Также нужно прописать в fstab на виртуалке, чтобы автоматиечски монтировалось при старте.
Заключение
В результате я получил терминал, в котором хоть как-то можно жить. Я ни в коем случае не претендую на исключительность этого решения, но надеюсь кому-то пригодится. Отдельный плюс такого решения — общий текстовый буфер и общие папки. Таким образом, работаем с линукс-виртуалкой так же как и с остальными табами в терминале.
Для тех, кому не нужны GUI-табы и кто использует tmux, есть статья моего коллеги примерно на ту же больную тему: habrahabr.ru/post/196128.
Особая благодарность хабраюзеру Maximus5 за отличный Windows терминал ConEmu!