- Learn
- The newline Guide to Building Your First GraphQL Server with Node and TypeScript
- Teach
- Amelia Wattenberger
- Author of Fullstack D3
- Community
- The newline Guide to Bash Scripting
- Welcome: Introduction
- Introduction:
- Start Here
- Module 0: Introduction
- Lesson 1:
- About this book
- Lesson 2:
- Community and Code Downloads
- Lesson 3:
- Organization of this book
- Lesson 4:
- Conventions used in this book
- Lesson 5:
- Development environment
- Lesson 6:
- Acknowledgements
- Lesson 7:
- About the author
- Module 1: Self–Help
- Lesson 1:
- Find Bash Keyword, Function, and Builtin Command Documentation
- Lesson 2:
- How to Use man bash and help to Learn About Bash Commands
- Lesson 3:
- How to Find Information About Bash File Commands With —help
- Lesson 4:
- The Best References for Bash Commands
- Lesson 5:
- How to Find Package Specific Bash Documentation
- Lesson 6:
- How to Read a Synopsis and Understand Bash Documentation
- Lesson 7:
- How to Use apropos to Find Bash Commands (with examples)
- Module 2: Running Scripts
- Lesson 1:
- How to Run a Bash Script Explicitly as an Argument in Terminal
- Lesson 2:
- How to Run a Bash Script With a Shebang Line and the Script Path
- Lesson 3:
- The Simplest Way to Run a Bash Script with $PATH
- Module 3: Editing Commands and Scripts
- Lesson 1:
- How to Use Bash Readline to Edit Commands and Scripts
- Lesson 2:
- How to Edit Bash Scripts in Nano and Vim
- Module 4: Copying and Pasting
- Lesson 1:
- Copying and Pasting
- Lesson 2:
- How to Select Text in Linux Terminal With a Mouse
- Lesson 3:
- How to Copy and Paste in Linux Terminal With Keyboard Shortcuts
- Lesson 4:
- How to Copy and Paste Text With the xclip Bash Command
- Lesson 5:
- How to Copy Formatted Text as HTML From Linux Terminal
- Lesson 6:
- How to Paste Text in Linux Terminal Safely
- Module 5: Listing Files
- Lesson 1:
- Listing Files
- Lesson 2:
- Using Linux ls Command to List Files and grep to Search for Files
- Lesson 3:
- How to Glob, Find Pattern Matching Files, and Run Commands
- Module 6: Text
- Lesson 1:
- Text
- Lesson 2:
- How to Convert Windows Newlines For Bash With dos2unix
- Lesson 3:
- How to Convert Text to UTF-8 And Other Encodings in Bash Scripts
- Module 7: Math
- Lesson 1:
- Math
- Lesson 2:
- How to Perform Arithmetic Expansion in Bash
- Lesson 3:
- How to Evaluate and Calculate Arithmetic Expressions in Bash
- Lesson 4:
- Best Practices for Using Variables in Bash Arithmetic
- Lesson 5:
- How to Write Conditional Expressions in Bash
- Lesson 6:
- Convert Bases in Bash to Work With Octals and Hexadecimals
- Lesson 7:
- How to Perform Floating Point Math With Bash bc
- Module 8: Time
- Lesson 1:
- Time
- Lesson 2:
- Format Datetimes, Timestamps, and Time Zones in Bash
- Lesson 3:
- How to Time How Long a Bash Command Takes to Run
- Lesson 4:
- How to Kill Bash Commands With timeout
- Module 9: Output
- Lesson 1:
- Output
- Lesson 2:
- How to Use the Bash Echo Command to Print Text in Terminal
- Lesson 3:
- printf vs echo — Printing Formatted Text With Newlines in Bash
- Lesson 4:
- Using the logger Command to Log Bash Output
- Module 10: JSON
- Lesson 1:
- JSON
- Lesson 2:
- How to Use jq Command to Filter JSON in Bash
- Lesson 3:
- Creating
- Module 11: XML
- Lesson 1:
- XML
- Lesson 2:
- Extracting an XML Value in Bash With xml_grep
- Lesson 3:
- Formatting and Transforming XML with XSLT
- Lesson 4:
- How to Create XML Files in Bash With xsltproc
- Lesson 5:
- Auto-Formatting
- Module 12: Images
- Lesson 1:
- Images
- Lesson 2:
- How to Take Screenshots in Ubuntu Linux With Shortcuts and Bash
- Lesson 3:
- Resize, Convert, and Crop Pictures With ImageMagick mogrify
- Lesson 4:
- How to Create a Video From Images With ffmpeg
- Lesson 5:
- How to Create Graphs From Terminal With Graphviz
- Lesson 6:
- How to Remove and Edit Metadata From Photos With exif
- Module 13: Archiving and Compression
- Lesson 1:
- Archiving and Compression
- Lesson 2:
- Beginner’s Guide to tar Commands to Compress and Extract Files
- Lesson 3:
- Plain gzip
- Lesson 4:
- Zip
- Lesson 5:
- Other formats
- Module 14: SSH
- Lesson 1:
- SSH
- Lesson 2:
- How to Connect to an SSH Host Interactively
- Lesson 3:
- How to Create and Store SSH Keys in Bash
- Lesson 4:
- How to Execute Bash Scripts on Remote Server Non-Interactively
- Lesson 5:
- How to Access an SSH Server Behind a Jump Server
- Lesson 6:
- How to Exit SSH and Close a Hung Connection
- Module 15: From the Terminal to Production
- Lesson 1:
- From the Terminal to Production
- Lesson 2:
- The Portable Shebang Line to Run Bash Scripts Anywhere
- Lesson 3:
- How to Write Readable man Documentation For Your Bash Scripts
- Lesson 4:
- How to Build a Fail-Fast, Safe Bash Scripts
- Lesson 5:
- How to Check Shell Version From a Bash Script
- Lesson 6:
- How to Parse Bash Command Line Arguments
- Lesson 7:
- How to Include Files in Bash Command Line Arguments
- Lesson 8:
- How to Restrict Variable and Function Scope in Bash Scripts
- Module 16: Fail–Fast Settings
- Lesson 1:
- Fail–Fast Settings
- Lesson 2:
- How to Exit Bash Script on Error With errexit
- Lesson 3:
- How to Prevent a Bash Script From Overwriting Files With noclobber
- Lesson 4:
- Make Bash Treat Undefined Variables as Errors With nounset
- Lesson 5:
- How to Set Bash pipefail to Add Exit Codes to Scripts
- Lesson 6:
- How to Fail a Bash Glob if it Returns no Files With failglob
- Module 17: Version Control
- Lesson 1:
- Version Control
- Lesson 2:
- How to Start Using and Configure Git in Bash Terminal
- Lesson 3:
- How to Use Git in Bash Terminal to Push, Pull, and Commit Code
- Lesson 4:
- Git gud
- Module 18: Quality Assurance
- Lesson 1:
- Quality Assurance
- Lesson 2:
- The Beginner’s Guide to Bash Linter
- Lesson 3:
- How to Test Bash Scripts
- Module 19: Signals
- Lesson 1:
- An Intro to Bash Signals: SIGINT, SIGKILL, SIGQUIT, and SIGTERM
- Lesson 2:
- How to Send Signals From Bash
- Lesson 3:
- How to Handle Signals and Errors in Bash Scripts
- Module 20: Autocompletion
- Lesson 1:
- Autocompletion
- Lesson 2:
- How to Install Bash Autocompletions
- Lesson 3:
- How to Write an Autocompletion for a Bash Script
- Module 21: Summary and Changelog
- Lesson 1:
- Summary
- Lesson 2:
- Changelog
- How to Select Text in Linux Terminal With a Mouse
- Mouse #
- How to use Tmux mouse mode?
- What will we cover?
- Installing Tmux on Ubuntu 20.04
- Launching Tmux
- How to Use Tmux
- Using Mouse Mode For Tmux >= 2.1
- Enabling the mouse mode
- Using Tmux Mouse Mode For Tmux < 2.1
- Mouse action in Tmux
- Conclusion
- About the author
- Ali Imran Nagori
Learn
The newline Guide to Building Your First GraphQL Server with Node and TypeScript
In this course, we’ll show you how to create your first GraphQL server with Node.js and TypeScript Enroll for free
Teach
Amelia Wattenberger
Author of Fullstack D3
«Writing Fullstack D3 was a thoroughly enjoyable, fun process. The writing was over before I knew it, and we’ve sold way more copies than I expected! Plus, the compliments from my peers have been really amazing.»
Community
The newline Guide to Bash Scripting
Welcome: Introduction
Introduction:
Start Here
Module 0: Introduction
Lesson 1:
About this book
Lesson 2:
Community and Code Downloads
Lesson 3:
Organization of this book
Lesson 4:
Conventions used in this book
Lesson 5:
Development environment
Lesson 6:
Acknowledgements
Lesson 7:
About the author
Module 1: Self–Help
Lesson 1:
Find Bash Keyword, Function, and Builtin Command Documentation
Lesson 2:
How to Use man bash and help to Learn About Bash Commands
Lesson 3:
How to Find Information About Bash File Commands With —help
Lesson 4:
The Best References for Bash Commands
Lesson 5:
How to Find Package Specific Bash Documentation
Lesson 6:
How to Read a Synopsis and Understand Bash Documentation
Lesson 7:
How to Use apropos to Find Bash Commands (with examples)
Module 2: Running Scripts
Lesson 1:
How to Run a Bash Script Explicitly as an Argument in Terminal
Lesson 2:
How to Run a Bash Script With a Shebang Line and the Script Path
Lesson 3:
The Simplest Way to Run a Bash Script with $PATH
Module 3: Editing Commands and Scripts
Lesson 1:
How to Use Bash Readline to Edit Commands and Scripts
Lesson 2:
How to Edit Bash Scripts in Nano and Vim
Module 4: Copying and Pasting
Lesson 1:
Copying and Pasting
Lesson 2:
How to Select Text in Linux Terminal With a Mouse
Lesson 3:
How to Copy and Paste in Linux Terminal With Keyboard Shortcuts
Lesson 4:
How to Copy and Paste Text With the xclip Bash Command
Lesson 5:
How to Copy Formatted Text as HTML From Linux Terminal
Lesson 6:
How to Paste Text in Linux Terminal Safely
Module 5: Listing Files
Lesson 1:
Listing Files
Lesson 2:
Using Linux ls Command to List Files and grep to Search for Files
Lesson 3:
How to Glob, Find Pattern Matching Files, and Run Commands
Module 6: Text
Lesson 1:
Text
Lesson 2:
How to Convert Windows Newlines For Bash With dos2unix
Lesson 3:
How to Convert Text to UTF-8 And Other Encodings in Bash Scripts
Module 7: Math
Lesson 1:
Math
Lesson 2:
How to Perform Arithmetic Expansion in Bash
Lesson 3:
How to Evaluate and Calculate Arithmetic Expressions in Bash
Lesson 4:
Best Practices for Using Variables in Bash Arithmetic
Lesson 5:
How to Write Conditional Expressions in Bash
Lesson 6:
Convert Bases in Bash to Work With Octals and Hexadecimals
Lesson 7:
How to Perform Floating Point Math With Bash bc
Module 8: Time
Lesson 1:
Time
Lesson 2:
Format Datetimes, Timestamps, and Time Zones in Bash
Lesson 3:
How to Time How Long a Bash Command Takes to Run
Lesson 4:
How to Kill Bash Commands With timeout
Module 9: Output
Lesson 1:
Output
Lesson 2:
How to Use the Bash Echo Command to Print Text in Terminal
Lesson 3:
printf vs echo — Printing Formatted Text With Newlines in Bash
Lesson 4:
Using the logger Command to Log Bash Output
Module 10: JSON
Lesson 1:
JSON
Lesson 2:
How to Use jq Command to Filter JSON in Bash
Lesson 3:
Creating
Module 11: XML
Lesson 1:
XML
Lesson 2:
Extracting an XML Value in Bash With xml_grep
Lesson 3:
Formatting and Transforming XML with XSLT
Lesson 4:
How to Create XML Files in Bash With xsltproc
Lesson 5:
Auto-Formatting
Module 12: Images
Lesson 1:
Images
Lesson 2:
How to Take Screenshots in Ubuntu Linux With Shortcuts and Bash
Lesson 3:
Resize, Convert, and Crop Pictures With ImageMagick mogrify
Lesson 4:
How to Create a Video From Images With ffmpeg
Lesson 5:
How to Create Graphs From Terminal With Graphviz
Lesson 6:
How to Remove and Edit Metadata From Photos With exif
Module 13: Archiving and Compression
Lesson 1:
Archiving and Compression
Lesson 2:
Beginner’s Guide to tar Commands to Compress and Extract Files
Lesson 3:
Plain gzip
Lesson 4:
Zip
Lesson 5:
Other formats
Module 14: SSH
Lesson 1:
SSH
Lesson 2:
How to Connect to an SSH Host Interactively
Lesson 3:
How to Create and Store SSH Keys in Bash
Lesson 4:
How to Execute Bash Scripts on Remote Server Non-Interactively
Lesson 5:
How to Access an SSH Server Behind a Jump Server
Lesson 6:
How to Exit SSH and Close a Hung Connection
Module 15: From the Terminal to Production
Lesson 1:
From the Terminal to Production
Lesson 2:
The Portable Shebang Line to Run Bash Scripts Anywhere
Lesson 3:
How to Write Readable man Documentation For Your Bash Scripts
Lesson 4:
How to Build a Fail-Fast, Safe Bash Scripts
Lesson 5:
How to Check Shell Version From a Bash Script
Lesson 6:
How to Parse Bash Command Line Arguments
Lesson 7:
How to Include Files in Bash Command Line Arguments
Lesson 8:
How to Restrict Variable and Function Scope in Bash Scripts
Module 16: Fail–Fast Settings
Lesson 1:
Fail–Fast Settings
Lesson 2:
How to Exit Bash Script on Error With errexit
Lesson 3:
How to Prevent a Bash Script From Overwriting Files With noclobber
Lesson 4:
Make Bash Treat Undefined Variables as Errors With nounset
Lesson 5:
How to Set Bash pipefail to Add Exit Codes to Scripts
Lesson 6:
How to Fail a Bash Glob if it Returns no Files With failglob
Module 17: Version Control
Lesson 1:
Version Control
Lesson 2:
How to Start Using and Configure Git in Bash Terminal
Lesson 3:
How to Use Git in Bash Terminal to Push, Pull, and Commit Code
Lesson 4:
Git gud
Module 18: Quality Assurance
Lesson 1:
Quality Assurance
Lesson 2:
The Beginner’s Guide to Bash Linter
Lesson 3:
How to Test Bash Scripts
Module 19: Signals
Lesson 1:
An Intro to Bash Signals: SIGINT, SIGKILL, SIGQUIT, and SIGTERM
Lesson 2:
How to Send Signals From Bash
Lesson 3:
How to Handle Signals and Errors in Bash Scripts
Module 20: Autocompletion
Lesson 1:
Autocompletion
Lesson 2:
How to Install Bash Autocompletions
Lesson 3:
How to Write an Autocompletion for a Bash Script
Module 21: Summary and Changelog
Lesson 1:
Summary
Lesson 2:
Changelog
How to Select Text in Linux Terminal With a Mouse
Mouse #
Most Linux applications including terminals support quick copying and pasting using a mouse. Simply click and drag over some text with the left button, and as soon as you lift your finger the selection will be copied into what is called the “primary selection,” where it stays until you select something else. You can then middle–click to paste the selection in basically any application.
Left–clicking and dragging as above selects one character at a time. You can also select a word or line by double- or triple–clicking, respectively, and select multiples by holding down the mouse button after the last click and dragging.
How to use Tmux mouse mode?
![]()
Tmux is an open-source terminal multiplexer application for efficiently managing multiple terminal windows. People who have previously used the Terminator application are mostly familiar with the notion of tab management in Linux Terminal. With Tmux, we can split the terminal into several panes. We can adjust these panes by moving around, resizing and switching between them. This helps in curbing the pain of managing multiple windows and tabs of the Gnome terminal.
In general, when you close an SSH connection, the corresponding remote terminal sessions are also closed. Here comes the Tmux for help as it preserves those sessions when the SSH connection is terminated.
After installing Tmux, you will not find any icon associated with it. It will not appear as a separate application; instead, we will have to invoke it from the Gnome Terminal itself. We will later see how to do this.
Note: In this ‘HowTo’ we have used the ‘Ctrl+b’ as the prefix; if you configured some other prefix, then replace the command with yours’ prefix.
What will we cover?
This guide will explore how we can install Tmux and, more specifically, “How to use Tmux mouse mode”. We will use Ubuntu 20.04 as the base system for this guide. Let us first start with installing Tmux.
Prerequisites
1. Tmux should be installed on your system.
2. Internet connectivity and user account with ‘sudo’ privileges.
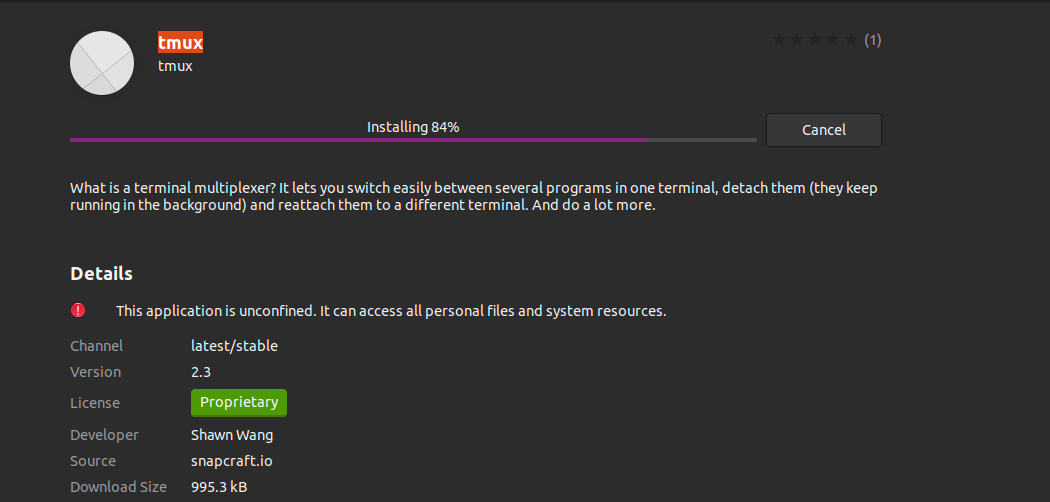
Installing Tmux on Ubuntu 20.04
Major operating systems like Linux, MacOS and Windows Subsystem for Linux (WSL) provide Tmux software packages from their official repository. So to install Tmux on Ubuntu 20.04, we can simply use the package manager or Software center as described below:
1. To install Tmux using package manager, simply run the command:
2. To install Tmux using the software center, open the software center, search for Tmux and click install.
Launching Tmux
Once the Tmux is installed, we will have to use the Gnome terminal to invoke it. One may encounter the following error when trying to run the ‘tmux’ command:

To overcome this error, type “export TERM=xterm” on the terminal and hit enter. Now again, run the ‘tmux’ command, and this time the error should not appear.
Another way is to use the ‘XTERM’ terminal and launch the Tmux from here. This worked on our Ubuntu 20.04 system.
How to Use Tmux
We can use three ways to send commands to a Tmux terminal:
Using the Prefix keys: Tmux uses a combination of keys called prefix key, which is by default ‘CTRL+b’. This prefix is followed by one or two more keys which Tmux will interpret for a particular operation. For example, we can detach from a session using [Prefix+d].
Using the command mode: To send the commands directly to the Tmux terminal, we need to enter the command mode by pressing the prefix keys followed by a colon (:). A command prompt will open up at the bottom of the terminal, where we can enter the Tmux commands.
Using the command line: Tmux commands can also be used from the non-Tmux terminal or shell prompt. These commands are preceded by the ‘tmux’ keyword. We have illustrated this method in the below section.
Using Mouse Mode For Tmux >= 2.1
When we start using Tmux (of course, as a novice), we feel how nice it would be to scroll or select Tmux windows with a mouse. Surely, we can do that in Tmux by customizing the tmux.conf file. This is where Tmux mouse mode comes into play. Let see the mouse mode in action:
Enabling the mouse mode
We need to first enable the mouse mode. Open the tmux.conf file and put the following line inside it:

Now reload the ‘tmux.conf’ file:
Note: Every time we make changes to tmux.conf file, source, or reload the tmux.conf file to make the changes work.
After reloading the tmux.conf file, we can control the pane selection, pane resizing and window selection operation with the Mouse itself.
Using Tmux Mouse Mode For Tmux < 2.1
set -g mouse-select-window on
If you want to make yourself comfortable with the keybindings of Tmux operations, we suggest you disable the mouse options by simply setting the above option to ‘off’ or directly disabling the mouse mode by:
In this way, we can also avoid doing wrong things while selecting Tmux’s windows/panes with a mouse.
Mouse action in Tmux
We can also select a word and a line in Tmux. E.g. to select a word, hold the right button and double click the left button. Similarly, hold the right button and triple click the left button to select a line. You can now also use the arrow keys to select multiple lines.
Conclusion
In this guide, we have learned about the installation of Tmux, its basics and more specifically, “How to use Tmux mouse mode”. Although we can use Tmux mouse mode, it is generally a good practice to use Keyboard. This is because as the number of applications increases, it becomes very distractive to use a mouse for switching between panes and windows running different applications. A more detailed explanation of various Tmux operations can be found on the Tmux Man pages or on the Github page of Tmux.
About the author
Ali Imran Nagori
Ali imran is a technical writer and Linux enthusiast who loves to write about Linux system administration and related technologies. You can connect with him on LinkedIn
.