- 4 Ways to Run Linux Commands in Windows
- Using Linux commands inside Windows
- 1. Use Linux Bash Shell on Windows 10 with WSL
- 2. Use Git Bash to run Bash commands on Windows
- 3. Using Linux commands in Windows with Cygwin
- 4. Use Linux in a virtual machine
- Conclusion
- How to Use Linux Terminal in Windows 10
- Raj Kumar
- Enable Windows Subsystem for Linux (WSL) and Install Ubuntu in Windows 10
- First, Check your Windows Version
- Enable Windows Subsystem for Linux
- Enable WSL 1 via PowerShell
- Enable WSL 2
- Enable WSL 2 via PowerShell
- Set WSL 2 as the Default Version
- Install your Linux distribution of choice
- Upgrade WSL1 to WSL 2 for Ubuntu
- bash shell on Windows 10
- Loved what you read? Don’t miss out on more! 😊🎉
- How to Use Tome AI
- How to Mute Someone on Threads
- How to Follow All Instagram Friends on Threads
- How to Disable Automatic Driver Download on Windows 11
- How to Remove or Hide Threads Badge from Instagram Profile
- How is Threads Different from Instagram
- How to Use Threads App on Desktop Using Windows 11
- How to Switch Profiles on Threads
4 Ways to Run Linux Commands in Windows
Want to use Linux commands but don’t want to leave Windows? Here are several ways to run Linux bash commands in Windows.
If you are learning Shell scripting probably as a part of your course curriculum, you need to use Linux commands to practice the commands and scripting. Your school lab might have Linux installed but you don’t have a Linux laptop but a regular Windows computer like everyone else. Your homework needs to run Linux commands and you wonder how to run Bash commands and scripts on Windows. You can install Linux alongside Windows in dual boot mode. This method allows you to choose either Linux or Windows when you start your computer. But taking all the trouble to mess with partitions for the sole purpose of running Linux commands may not be for everyone. You can also use Linux terminals online but your work won’t be saved here. The good news is that there are several ways you can run Linux commands inside Windows, like any regular application. Isn’t it cool?
Using Linux commands inside Windows

As an ardent Linux user and promoter, I would like to see more and more people using ‘real’ Linux but I understand that at times, that’s not the priority. If you are just looking to practice Linux to pass your exams, you can use one method to run Bash commands on Windows.
1. Use Linux Bash Shell on Windows 10 with WSL
Did you know that you can run a Linux distribution inside Windows 10? The Windows Subsystem for Linux (WSL) allows you to run Linux inside Windows. The upcoming version of WSL will be using the real Linux kernel inside Windows. This WSL, also called Bash on Windows, gives you a Linux distribution in command-line mode running as a regular Windows application. Don’t be scared with the command line mode because your purpose is to run Linux commands. That’s all you need. 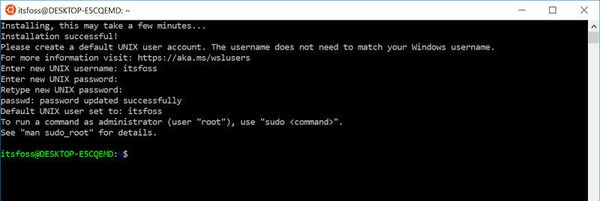 You can find some popular Linux distributions like Ubuntu, Kali Linux, openSUSE etc in Windows Store. You just have to download and install it like any other Windows application. Once installed, you can run all the Linux commands you want.
 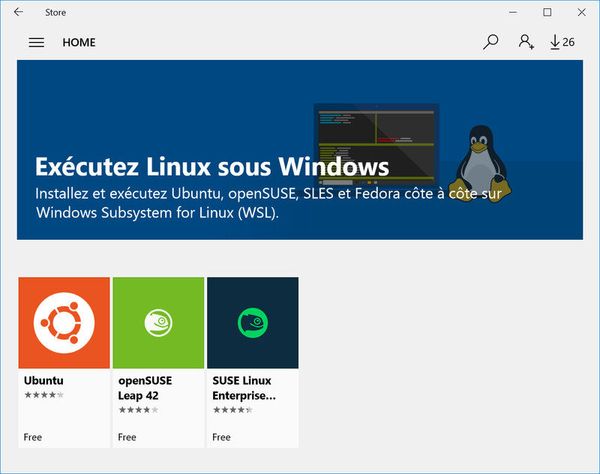 Please refer to this tutorial about installing Linux bash shell on Windows.
2. Use Git Bash to run Bash commands on Windows
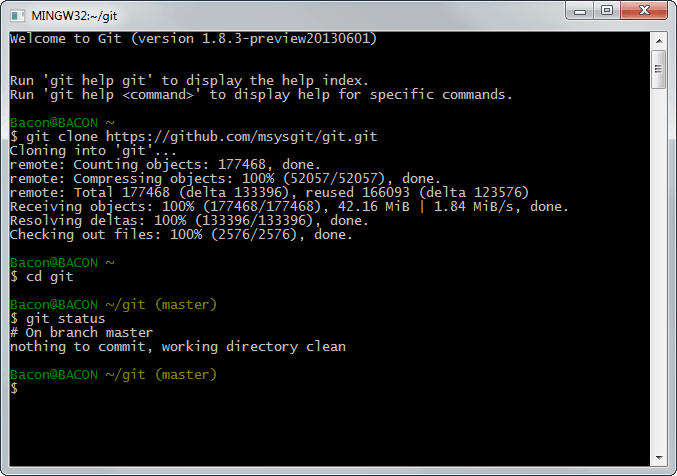
You probably know what Git is. It’s a version control system developed by Linux creator Linus Torvalds. Git for Windows is a set of tools that allows you to use Git in both command line and graphical interfaces. One of the tools included in Git for Windows is Git Bash. Git Bash application provides and emulation layer for Git command line. Apart from Git commands, Git Bash also supports many Bash utilities such as ssh, scp, cat, find etc. In other words, you can run many common Linux/Bash commands using the Git Bash application. You can install Git Bash in Windows by downloading and installing the Git for Windows tool for free from its website.
3. Using Linux commands in Windows with Cygwin
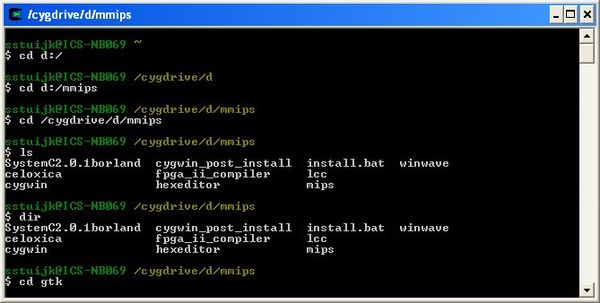
If you want to run Linux commands in Windows, Cygwin is a recommended tool. Cygwin was created in 1995 to provide a POSIX-compatible environment that runs natively on Windows. Cygwin is a free and open source software maintained by Red Hat employees and many other volunteers. For two decades, Windows users use Cygwin for running and practicing Linux/Bash commands. Even I used Cygwin to learn Linux commands more than a decade ago. You can download Cygwin from its official website below. I also advise you to refer to this Cygwin cheat sheet to get started with it.
4. Use Linux in a virtual machine
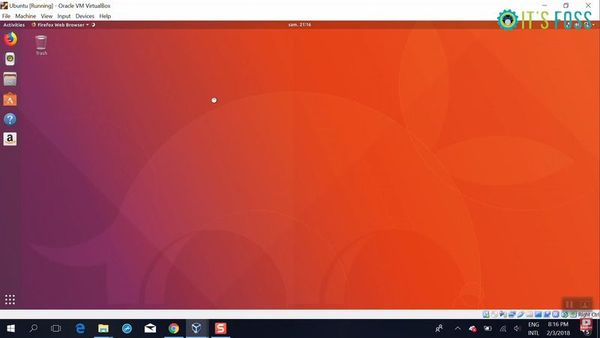
Another way is to use virtualization software and install Linux in it. This way, you install a Linux distribution (with a graphical interface) inside Windows and run it like a regular Windows application. This method requires that your system has a good amount of RAM, at least 4 GB but better if you have over 8 GB of RAM. The good thing here is that you get the real feel of using a desktop Linux. If you like the interface, you may later decide to switch to Linux completely. There are two popular tools for creating virtual machines on Windows, Oracle VirtualBox and VMware Workstation Player. You can use either of the two. Personally, I prefer VirtualBox. You can follow this tutorial to learn how to install Linux in VirtualBox.
Conclusion
The best way to run Linux commands is to use Linux. When installing Linux is not an option, these tools allow you to run Linux commands on Windows. Give them a try and see which method is best suited for you.
How to Use Linux Terminal in Windows 10
You can now access most of the Linux command-line utilities and applications on top of Windows 10 OS using Windows Subsystem for Linux (WSL).
Raj Kumar

Although Windows is the most widely used and most popular operating system for desktops and laptops, it is not as secure and open-sourced as Linux OS. That’s is why a lot of software developers and professionals prefer Linux OS.
Microsoft has started a partnership with Canonical, creators of Ubuntu Linux. This paved way for Linux users to use Linux on Windows. Yes, you can run Linux on top of Windows 10 without the need for a dual boot, or using VMWare/VirtualBox, or installing it as your main Operating System.
You can access various Linux commands and software from the Linux terminal in Windows 10. In this article, we’ll give you step-by-step instructions on how to install and run the Linux terminal on Windows 10 OS.
Enable Windows Subsystem for Linux (WSL) and Install Ubuntu in Windows 10
If you intend to run a Linux terminal on Windows 10, you must first turn on the ‘Windows Subsystem for Linux’ feature. Then you can download and install your choice of Linux distribution.
The Windows Subsystem for Linux (WSL) is a feature that creates a GNU/Linux environment that allows you to run core Linux command-line tools and services directly on Windows, alongside your desktop and modern store apps.
By enabling Windows 10’s Linux subsystem, you can install and run various Linux distributions (distros) such as Ubuntu, OpenSuse, SUSE Linux, Fedora, etc.
First, Check your Windows Version
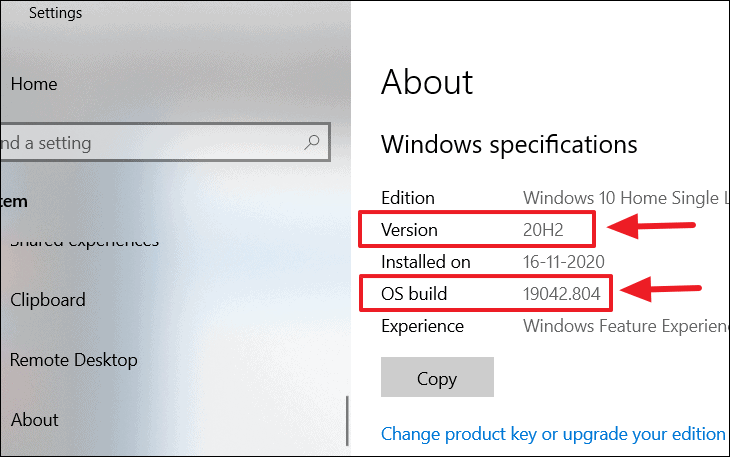
But before we get into how to enable Windows Subsystem for Linux (WSL) and install Linux, you need to check if you are running a compatible version of Windows 10. WSL is only supported on both Windows 10 64-bit (from version 1607) and Windows Server 2019.
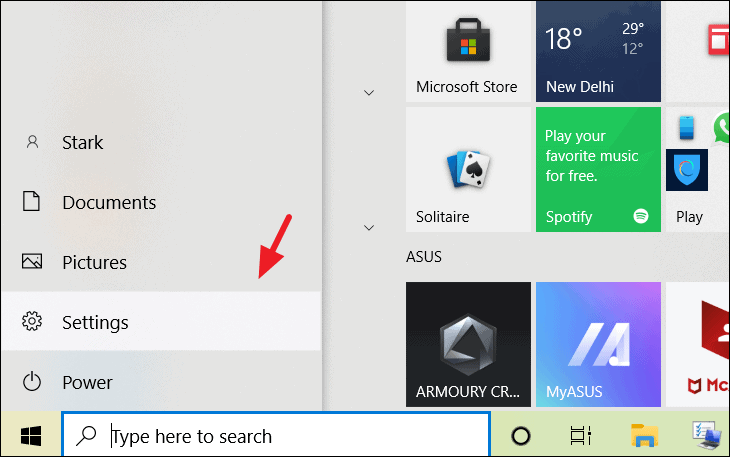
To check your Windows version and build, go to ‘Settings’ from Windows Start menu.
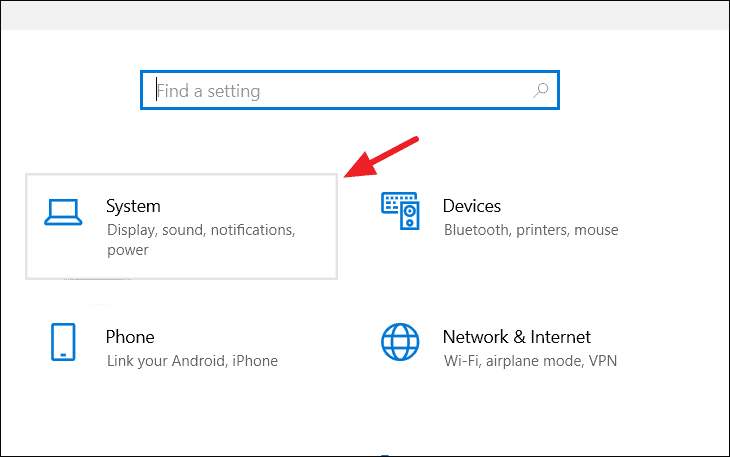
Next, click ‘System’ setting.
Then, scroll down and select ‘About’ option at the bottom of the left pane to view About section.
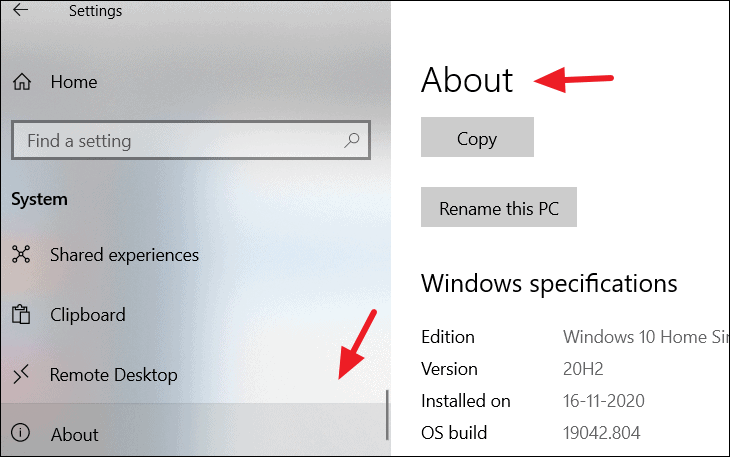
On the About page, under Windows specifications, you can see the ‘Version’ and ‘OS build’ of your Windows 10.
Enable Windows Subsystem for Linux
There are two different types of WSL versions: WSL 1 and WSL 2. While they both provide smooth and continuous integration of Linux within Windows, WSL 2 is the latest and fastest version with supports full Linux kernel and system call compatibility. WSL 1 runs a translation layer which bridges the gap between Linux kernal and Windows.
- To run WSL 2, you must be running Windows 10 x64 bit systems: Version 1903 or higher, with Build 18362 or higher.
- To run WSL 1, you will need Windows 10 x64 bit systems: Version 1709 or higher, with Build 16215 or higher.
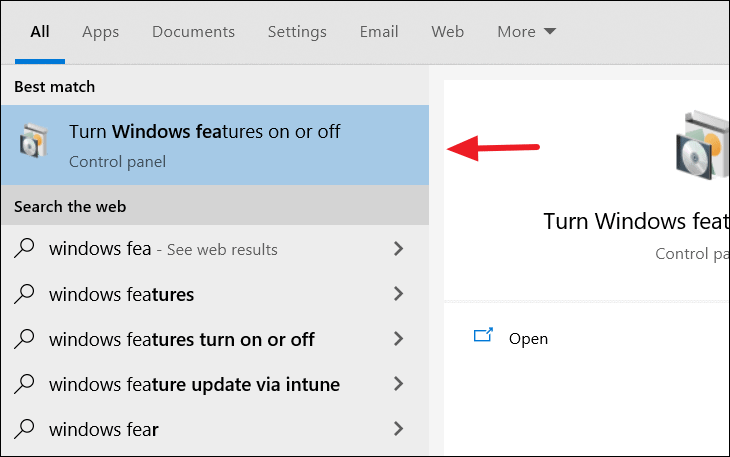
It doesn’t matter which version of WSL you want to run you must enable it first to use it. To do this, start type typing ‘Turn Windows features on and off’ into the Start Menu search field.
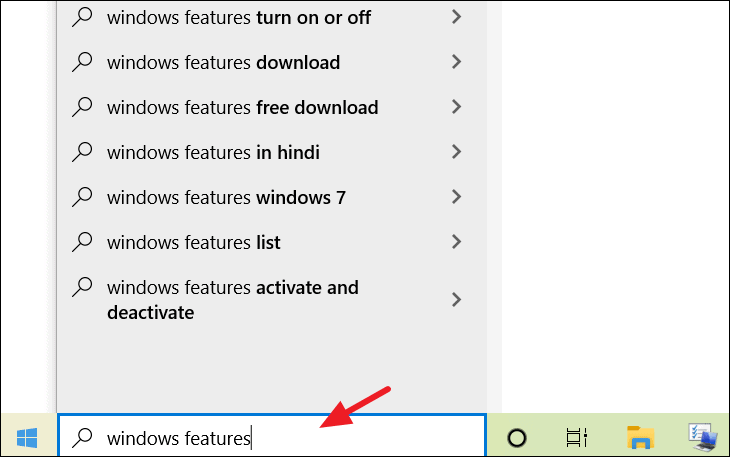
Select ‘Turn Windows features on and off’ control panel from the search result.
Then, scroll down to ‘Windows Subsystem for Linux’, tick the box in front of it, and click the ‘OK’ button.
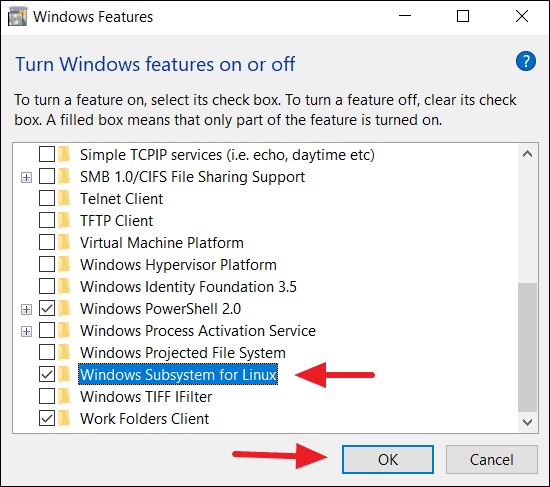
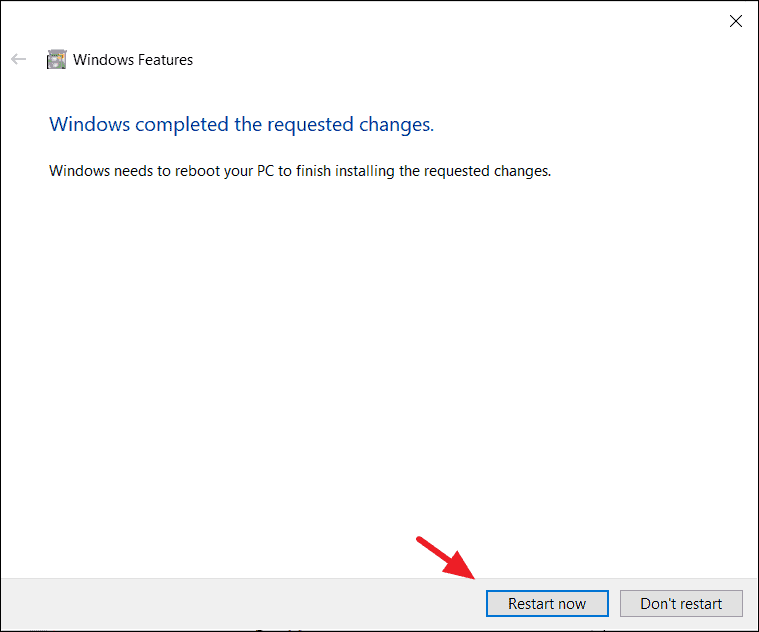
Once the changes are applied, click ‘Restart now’ to restart your computer
If you want to only install WSL 1, you can now restart your computer and install your Linux distro.
Enable WSL 1 via PowerShell
You can also enable WSL via the ‘PowerShell’ command-line tool. This does the same job as the Windows Features control panel. For that, open ‘PowerShell’ as an Administrator and run the below command.
dism.exe /online /enable-feature /featurename:Microsoft-Windows-Subsystem-Linux /all /norestart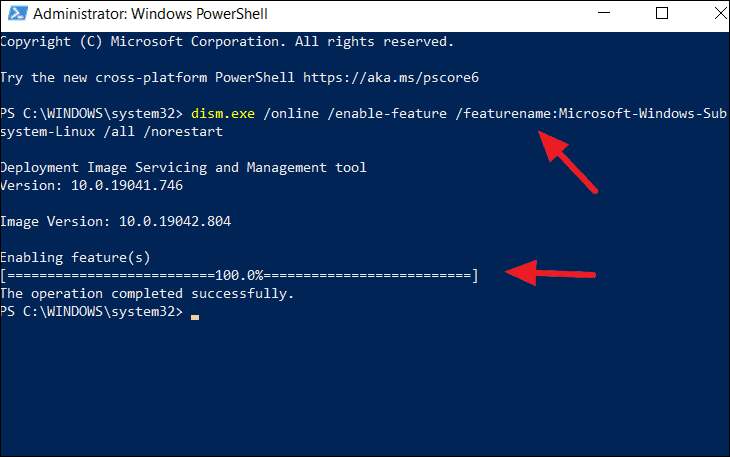
Enable WSL 2
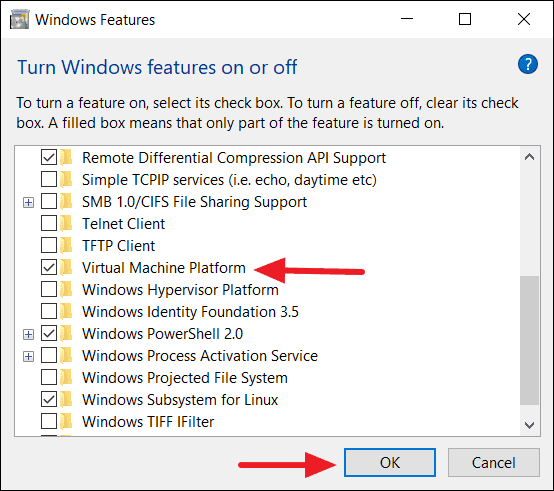
We recommend you upgrade your WSL to version 2 for faster performance speed, and to run a real Linux kernel directly on Windows 10. All you need to do is enable the ‘Virtual Machine Platform’ feature in addition to the ‘Windows Subsystem for Linux’ feature on the Windows features control panel (see below).
Wait for the changes to be applied, then restart your computer.
Enable WSL 2 via PowerShell
This first step to enable WSL 2 is enabling the Virtual Machine Platform feature component on Windows. You can also enable WSL 2 via the ‘PowerShell’ command-line tool. To do that, open ‘PowerShell’ as an Administrator and run the following additional command with the WSL 1 command.
dism.exe /online /enable-feature /featurename:Microsoft-Windows-Subsystem-Linux /all /norestartdism.exe /online /enable-feature /featurename:VirtualMachinePlatform /all /norestart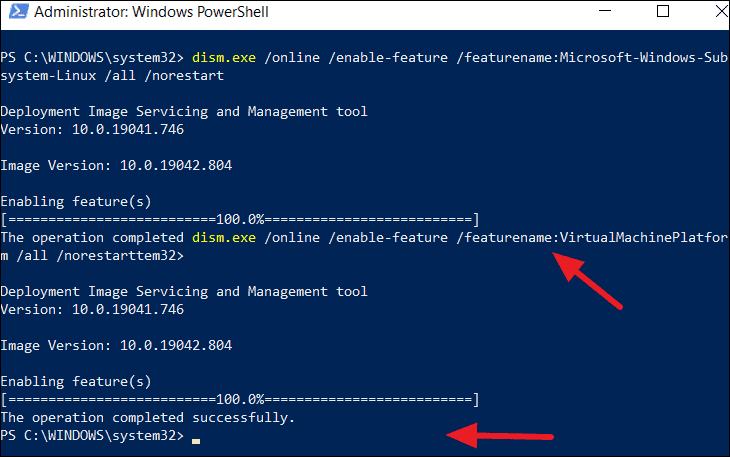
Set WSL 2 as the Default Version
Before setting up WSL 2 as your default version for all Linux distributions, download the WSL Linux kernel package update for x64 systems.
Run the .msi installer downloaded and install it. It will take only seconds.
To set WSL 2 as your default version when installing a new Linux distribution, open PowerShell and run this command the following command:

Then restart your system to switch the feature from WSL 1 to WSL 2.
Install your Linux distribution of choice
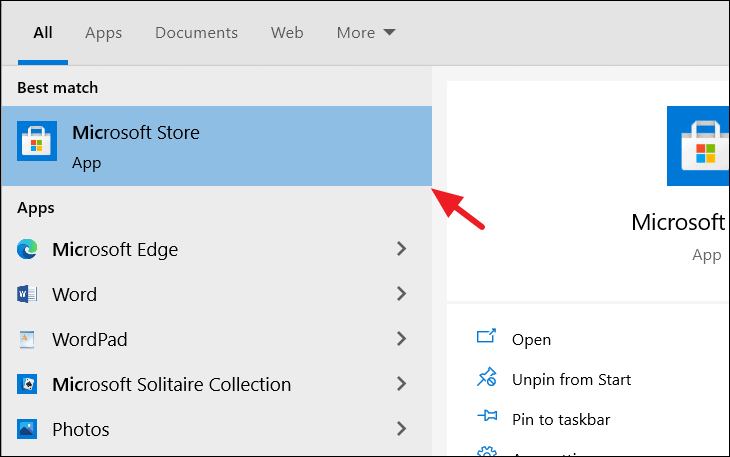
WSL is enabled, now we will install a Linux distribution. First, search for ‘Microsoft Store’ in the Start Menu search field. Then, open it from the search result.
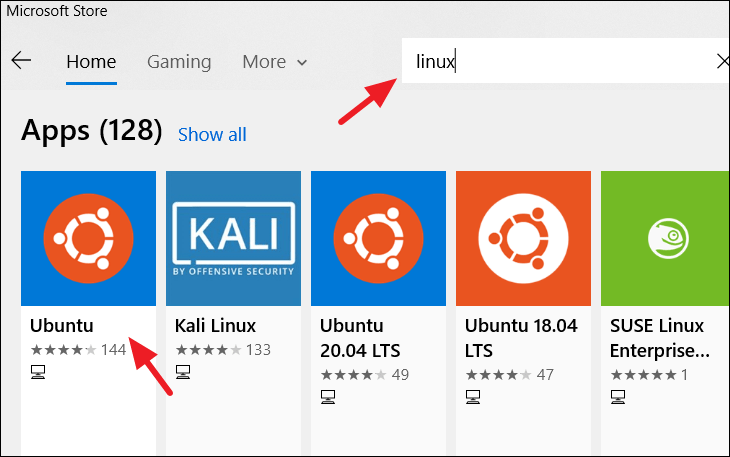
You’ll see a list of every Linux distributions currently available in the Windows Store which are supported by WSL.
- Ubuntu 16.04 LTS
- Ubuntu 18.04 LTS
- Ubuntu 20.04 LTS
- openSUSE Leap 15.1
- SUSE Linux Enterprise Server 12 SP5
- SUSE Linux Enterprise Server 15 SP1
- Kali Linux
- Debian GNU/Linux
- Fedora Remix for WSL
- Pengwin
- Pengwin Enterprise
- Alpine WSL
All of theses distributions are available for free. For our tutorial, we’ll select ‘Ubuntu’.
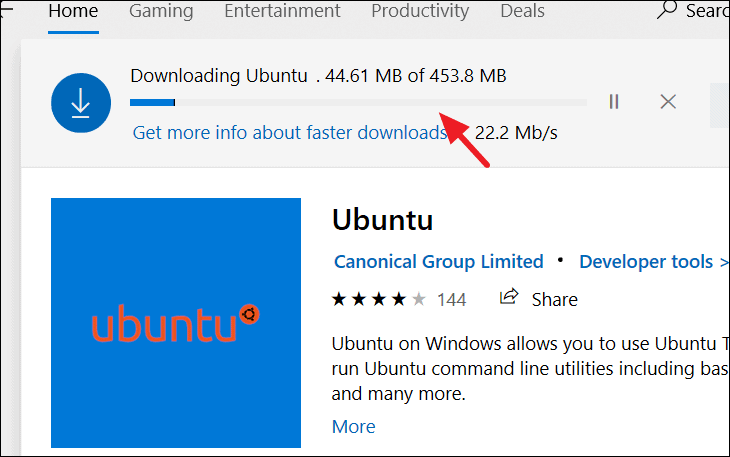
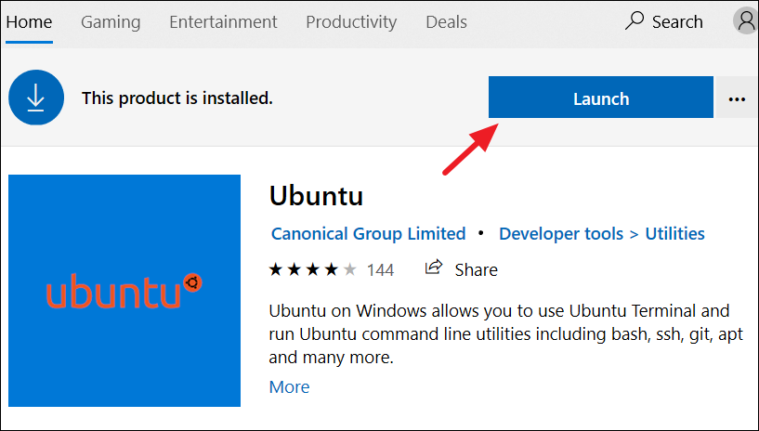
From the Ubuntu distribution’s page, Click the ‘Get’ button.

Now, Ubuntu distribution will be downloaded and installed automatically on your computer.
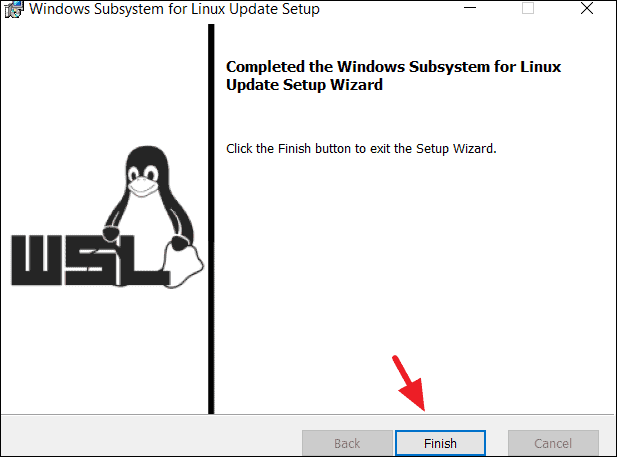
Once the installation finished, click the ‘Launch’ button to launch the terminal. You can also launch the app from the Windows Start Menu.
A new Ubuntu terminal window will appear. The first launch will take a few minutes to register the Ubuntu environment with WSL. Once that’s finished, the terminal will prompt you to create a ‘new Unix username’ and ‘new password’. Enter the new username and password and complete the setup.
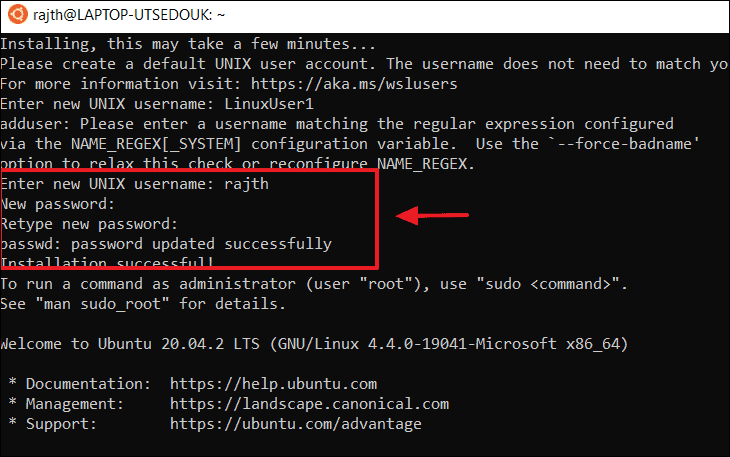
Once, the set up finished, it will take you to the bash command line. It’s better to update the software right away. In Ubuntu, you can search for, download, and install software updates, all from the apt command.
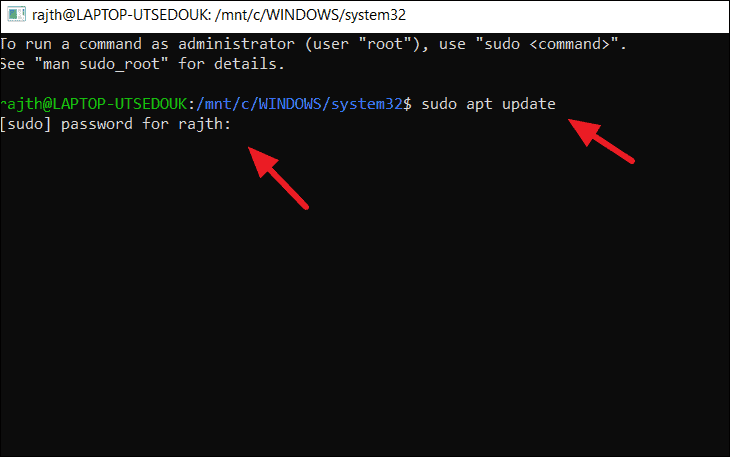
Enter the below command to update the software. And you’ll be prompted for the password, enter the newly created password to run the command as an administrator.
This ‘update’ command will update the Ubuntu repositories.
Ubuntu will download a series of package lists.
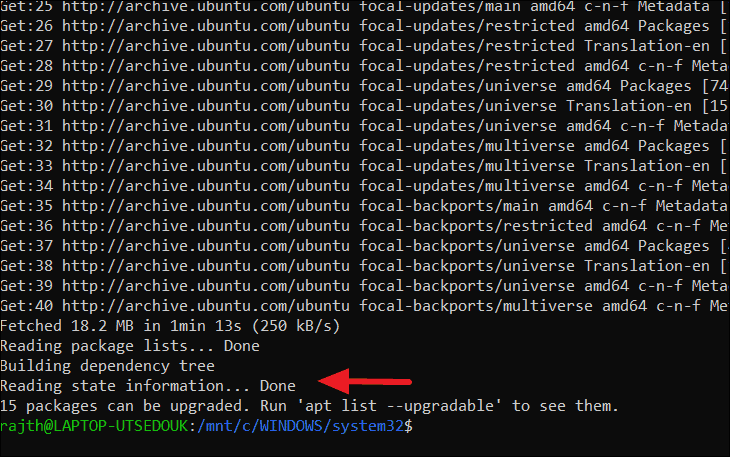
But they are not upgraded yet. To upgrade all available packages, enter the following command:
Enter ‘Y’ at the prompt to continue the installation.
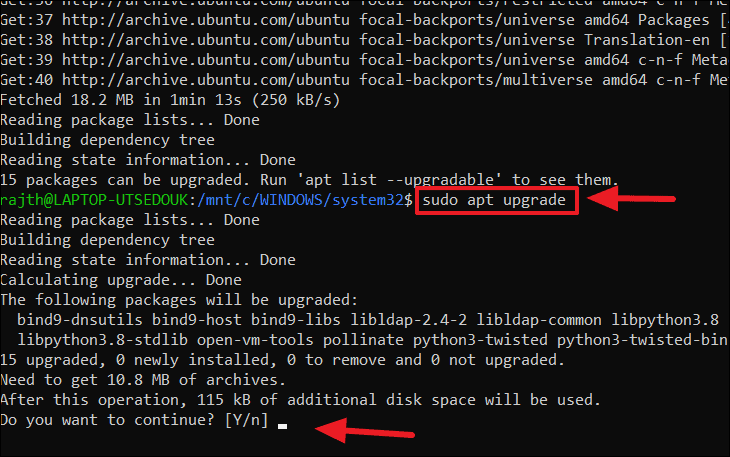
The ‘dist-upgrade’ command upgrade packages to their latest versions.
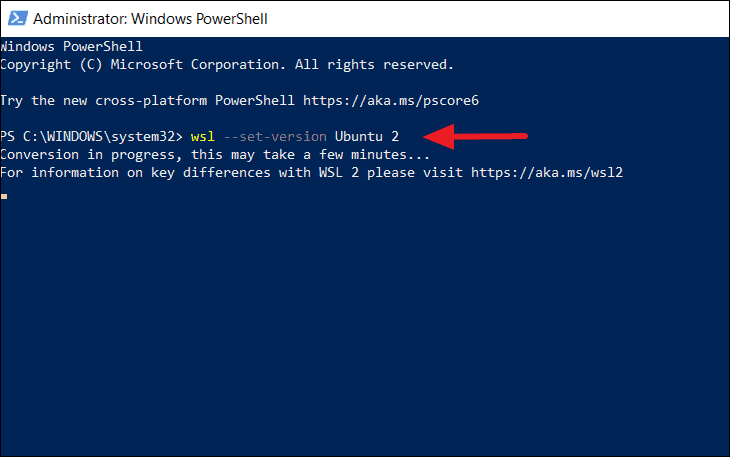
Upgrade WSL1 to WSL 2 for Ubuntu
If you wish to upgrade the existing WSL 1 version to WSL 2 for a specific distribution. Then, run the below command in PowerShell.
Replace ‘’ argument with the name of whichever distribution (Ubuntu in our case) your WSL 1 install runs.
Now, you can access Linux commands and software on a Windows 10 system using this Ubuntu Environment.
bash shell on Windows 10
You now have a full command-line ‘bash’ shell on your system based on the Linux distribution. You can access all the Linux commands and applications via that bash shell.
To run bash shell, type ‘bash’ into the Start Menu search field and click to open the bash command-line tool.
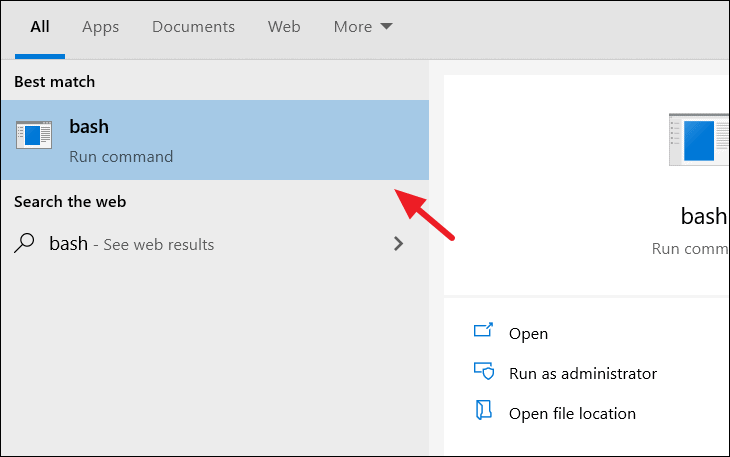
Now, you can start running commands there.

Loved what you read? Don’t miss out on more! 😊🎉

How to Use Tome AI

How to Mute Someone on Threads

How to Follow All Instagram Friends on Threads

How to Disable Automatic Driver Download on Windows 11

How to Remove or Hide Threads Badge from Instagram Profile

How is Threads Different from Instagram

How to Use Threads App on Desktop Using Windows 11

How to Switch Profiles on Threads
While the process to switch profiles on Threads isn’t as seamless as it is on Instagram, it isn’t so cumbersome either to make steer clear of it.