- Установил Ubuntu на свой смартфон. Рассказываю, что из этого вышло
- Как это работает?
- Как я это реализовал?
- Полноценный рабочий стол
- Плюсы, минусы и вывод
- How to install a Linux desktop on your Android device
- Debian NoRoot: One-click Linux desktop
- Install Ubuntu and other Linux flavors with UserLAnd
- Final steps: How to install Linux apps on your Android device
- How to Run Ubuntu on Top of Android
- Can my Android Run Ubuntu?
- How to Run Ubuntu on Top of Android
- 1. Downloading UserLAnd
- 2. Set Up UserLAnd
- 3. Download Ubuntu
- 4. Create Root Password
- 5. Create a New User
- Conclusion
- About the author
- Denis Kariuki
Установил Ubuntu на свой смартфон. Рассказываю, что из этого вышло
К счастью, разработчики уже давно смогли запустить все возможные дистрибутивы на смартфоне , и у вас есть возможно нацепить полноценную Linux-среду внутри обычного Android-смартфона .
Как это работает?
На самом деле, идея далеко не нова, и в году так 2014 были инструкции, описывающие метод установки того же Arch Linux на SD-карту.
Сегодня же, Linux можно установить как отдельное приложение, и даже запустить его, как отдельный процесс в системе!
Происходит это благодаря обычному наложению «среды» нужной ОС Linux поверх самой ОС Android . Дело в том, что сам Android , по сути — модифицированная ОС на базе ядра Linux , поэтому, запуск простых команд, сборка каких-то файлов и даже запуск полноценного интерфейса — совсем не сложно .
Как я это реализовал?
Здесь нет нечего сложного — достаточно иметь смартфон, не раньше 2014 с версией Android , выше 4.4.
Для примера, я буду брать приложение Termux с Play Market .
Также, дополнительно я установлю утилиты AnLinux . Зачем она — расскажу позже.
По сути, после запуска Termux , у нас уже есть более-менее рабочая ОС Linux на смартфоне. По работе она чем-то напоминает Debian/Ubuntu и даже команды, вроде apt работают без проблем.
Однако, нам ведь огрызок не нужен, верно? Обещал полноценный дистрибутив — пожалуйста.
Для этого мы будем использовать ту самую программку AnLinux . Она до боли проста — это сборщик нужных команд, которые нужно просто вставить в Termux и ты получаешь то, что хочешь .
В главном меню, можно выбрать подходящий дистрибутив. Полный список на момент написания статьи :
Проверял работу Ubuntu, Debian и Arch — все работает без проблем .
Как видите, терминал стал от Ubuntu и прямо сейчас у вас установлен полноценный дистрибутив Ubuntu, как в компьютере !
Полноценный рабочий стол
Думаю, не многим зайдет обычный и скучный терминал. Не беда — есть решение .
Ребята, у нас есть Telegram-группа. Там вы можете задать свой вопрос, поделиться своим мнением или впечатлениями от использования Linux-дистрибутивов.
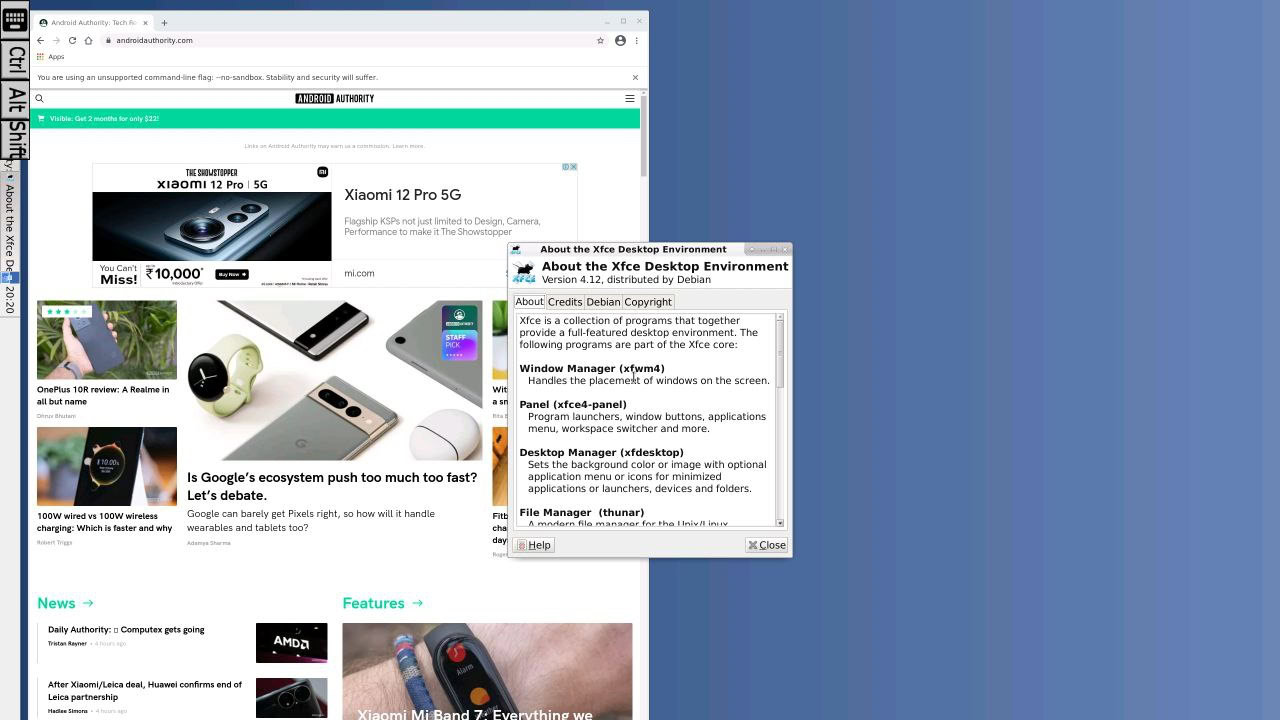
В той же программке AnLinux , я выбрал Desktop Environment (среду рабочего стола) и поставил XFCE. По сути, после установки у меня будет подобие Xubuntu 19.10. Также, можно поставить LXQT.
Правда, для управление таким рабочим столом удобнее взять мышь и клавиатуру. Так как у меня нет переходника, я подключился удаленно через свой компьютер к рабочему столу своего телефона и могу спокойно управлять системой, заблокировав и положив телефон в карман!
Плюсы, минусы и вывод
Как вы уже поняли, реализовать это — достаточно трудно и новичкам может все это совсем не понравится. И, даже если у вас получится, вы все же столкнетесь с минусами :
- поиграть в тяжелые игры, заниматься моделированием не выйдет . Все же — это дистрибутив в телефоне, а телефон на базе процессоров архитектуры ARM (но, создать конкуренцию Raspberry Pi можно)
- для хранения подобной красоты нужно выделить немного памяти (Ubuntu + XFCE + LXQT = 1.2 GB)
- многим придется будет устанавливать root-права на свой телефон (особенно это касается смартфонов Xiaomi) . Хотя — это зависит от модели вашего телефона и вам может повезти.
Ну и теперь поговорим кратко о плюсах :
- пусть и на ARM, но это — ОС Linux на вашем смартфоне!
- есть возможность разгуляться программистам
- отличный полигон для разных экспериментов, который не испортит вам телефон
Так что, если плюсы вас устраивают и вы готовы мириться с некоторыми минусами — стоит попробовать!
Друзья, у нас есть Telegram-группа, где могут помочь с вашей проблемой с Linux и где вы сможете приятно пообщаться с единомышленниками.
How to install a Linux desktop on your Android device
Have you ever wished your Android phone or tablet could replace your entire computer? You’re in luck — you can install a Linux or Ubuntu desktop environment on virtually any modern Android device. You could even combine it with a Bluetooth keyboard and mouse (and maybe an external display) for a powerful desktop-grade experience. While the experience is not always perfect, it’s usable in a pinch.
QUICK ANSWER
To install Linux on your Android device, install an app like Debian NoRoot or UserLAnd. If you choose the latter, you’ll be able to select between various distributions like Kali Linux, Arch, and Ubuntu. Neither option installs a full operating system, but they offer a complete desktop environment and the ability to run popular Linux programs.
JUMP TO KEY SECTIONS
Debian NoRoot: One-click Linux desktop
Debian NoRoot offers one of the easiest and least complicated ways to access a Linux desktop on Android. It’s a free app that you need to install via the Play Store. If you haven’t heard of Debian, it’s the flavor of Linux that the popular Ubuntu distribution is based upon. This guarantees compatibility with a wide range of Linux apps and the apt package manager.
Debian NoRoot is pretty lightweight and should run on most Android smartphones and tablets. It’s not the complete Debian operating system — instead, its developer describes it as a “compatibility layer, which allows you to run Debian applications.” How is this possible? Well, Android runs a modified Linux kernel, making it somewhat related to our end-goal. Debian NoRoot also includes all of the basics, including a desktop environment and a terminal application. All in all, it’s a perfect starting point for experienced and novice users alike.
Debian NoRoot lets you access a full-fledged Linux desktop with a simple download from the Play Store.
Once you’ve installed the Debian NoRoot app on your Android device and open it for the first time, it will present you with a list of display resolutions and font scales. Select the default options here, and it will eventually bring you to the desktop.
From this point on, you can immediately get to installing additional Linux programs and apps. We’ll explain how you can do this via the terminal in a later section. For now, consider plugging in a keyboard and mouse since the on-screen touch keyboard can take up a big chunk of your screen’s real estate.
Install Ubuntu and other Linux flavors with UserLAnd
Select your Linux distribution of choice
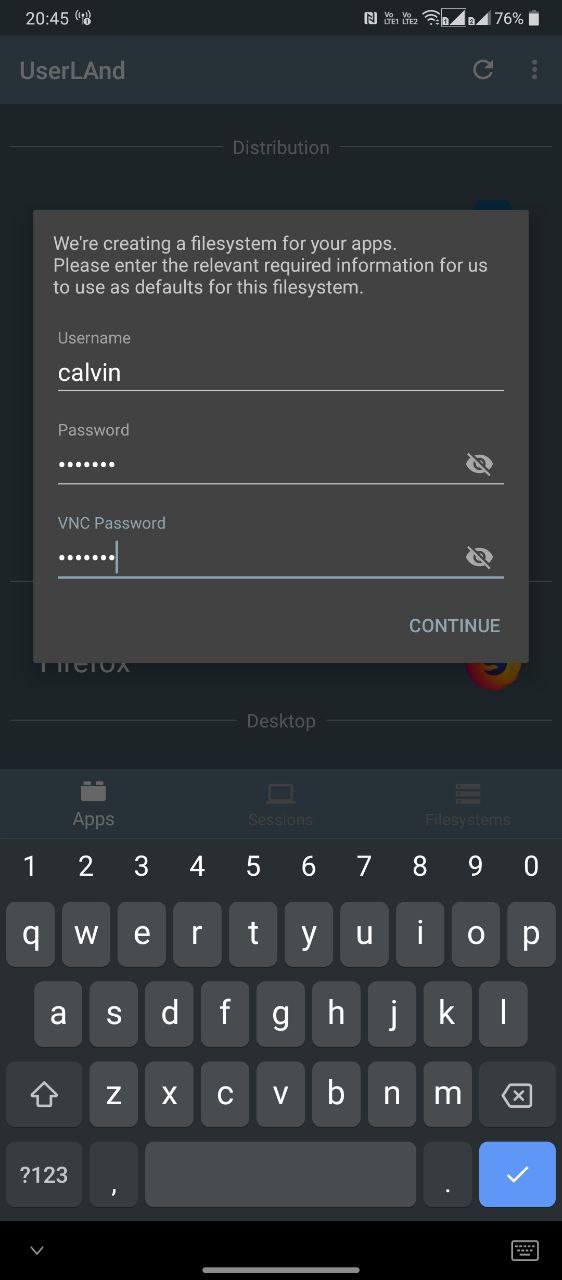
Enter a username and password
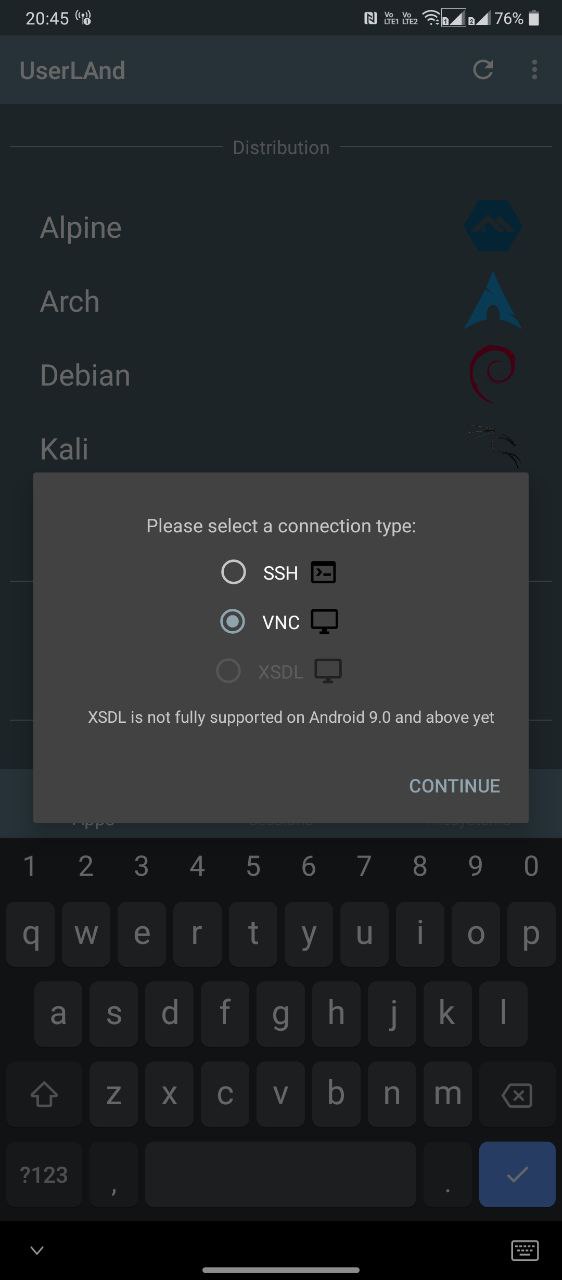
Select VNC if you’d like a graphical user interface or SSH for a text-based session
If Debian NoRoot doesn’t satisfy your needs or you’d like to install a different Linux distribution, another option is the UserLAnd application. It lets you install various Linux distros on your Android device, including Arch, Kali, Ubuntu, Debian, and Alpine. You can also choose to launch applications like Gimp and LibreOffice independently, eliminating the need for a full-blown desktop environment.
Here’s a step-by-step guide on how to install Ubuntu on your Android device:
- Download and install the UserLAnd app from the Play Store.
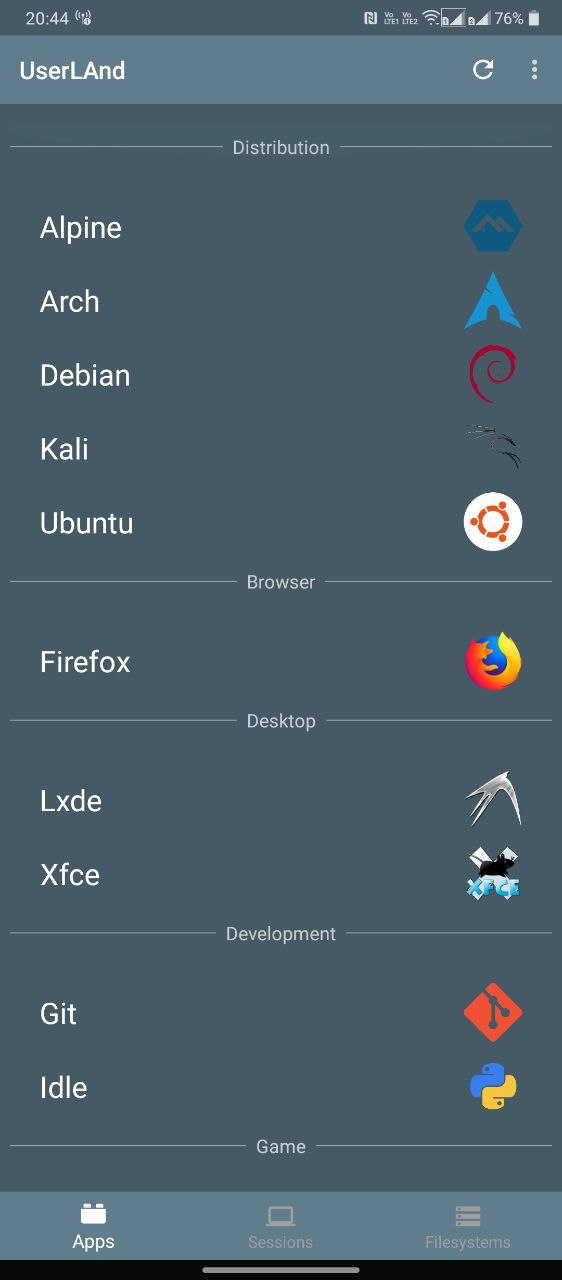
- Open the app and select the Linux distribution you wish to install. For the sake of this guide, we’ll proceed with Ubuntu.
- Enter a username, password, and VNC password of your choice when prompted. Don’t forget these details or you’ll have to start the process all over again.
- The app will now ask you to choose between an SSH or VNC connection. Select the latter if you need a graphical user interface.
- Wait until the download completes.
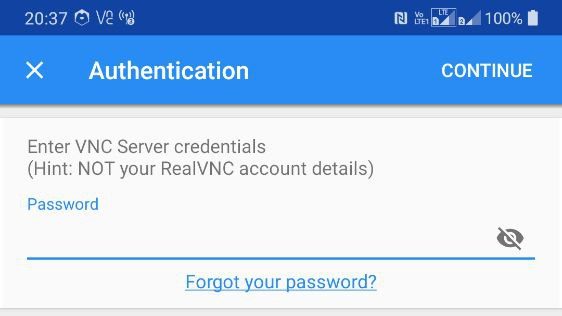
- Finally, you should be presented with a login screen, as shown below. Enter the VNC password from earlier to proceed.
You can also initiate a VNC connection from a different device on the same network. First, determine your Android device’s IP address, either from your router or using a free app like Fing. Finally, add :51 to the end of the IP address (example: 192.168.0.101:51) and connect to it using a VNC app like TightVNC on the other device.
Final steps: How to install Linux apps on your Android device
Now that you’ve got your preferred flavor of Linux installed on your Android phone, you may be wondering what you can and can’t do with it. Let’s start with the latter — you can only install and run programs designed for ARM processors. This rules out certain apps like Steam, which only support the desktop x86 architecture. Still, most of the standard productivity-related programs you’d want — ranging from Firefox to LibreOffice — offer ARM versions these days.
Here’s how to install Linux apps on your Android device
- Log into your Ubuntu session via one of the above methods
- Open a terminal window
- Enter the following commands one by one: sudo apt update and sudo apt install firefox-esr
- You can replace firefox-esr in the above command with any other desired program of your choice. Some other examples include vlc and libreoffice.
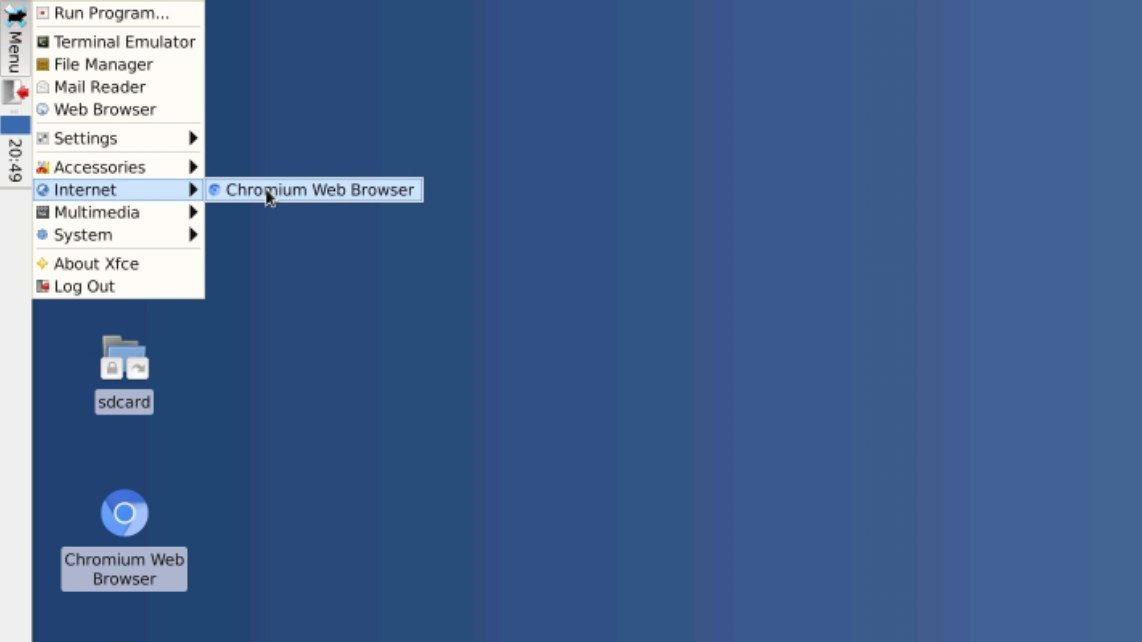
- Once installed, you can launch the program from within the Applications menu, as shown below:
Besides which Linux apps you can install, there are a couple of other limitations you should consider too. You cannot access low-level hardware functions like Wi-Fi or Bluetooth from within Linux because those are still completely controlled by Android. Likewise, you cannot expect hardware acceleration or complex 3D graphics to work at full speed. Remember that you aren’t running full-fledged Linux — it’s just a compatibility layer on top of the base Android operating system. You’ll be better off with a Chrome OS device if those aspects are important to you.
How to Run Ubuntu on Top of Android
![]()
Android is built upon the Linux kernel. As a Linux user, you are probably curious about how to run Ubuntu on top of Android. The good news is that it’s possible to run Linux on Android, and you can achieve that using a rooted and a non-rooted Android device.
Moreover, you can install the VNC or SSH version of Linux on your Android, such that you can access the Graphical interface of Ubuntu or stick to the command line. This guide covers the steps for installing Ubuntu on Android.
Can my Android Run Ubuntu?
Ubuntu for Android is lightweight. Besides, different apps support the installation of Linux on Android devices, such as UserLAnd. Any Android should be able to run Ubuntu, whether it’s rooted or not. Although you won’t access the entire Ubuntu operating system on your Android, most functionalities will be available, and you can install various packages.
How to Run Ubuntu on Top of Android
There are various tools you can use to install Ubuntu on Android. However, this guide focuses on using UserLAnd as it offers more convenience, is easy to use, and allows the installation of various distros, including Kali, Ubuntu, Debian, Arch, etc.
Follow the steps below to use UserLAnd.
1. Downloading UserLAnd
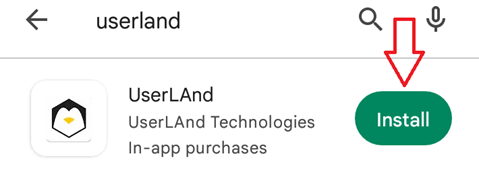
On your Android phone, open the Google Play Store and search for UserLAnd. Once it comes up, click on it. Alternatively, you can access the app using this link.
Next, tap the install button at the top to start downloading and installing the app.
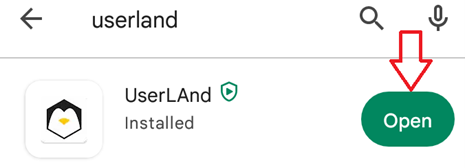
Once the download completes, click the open button at the top.
2. Set Up UserLAnd
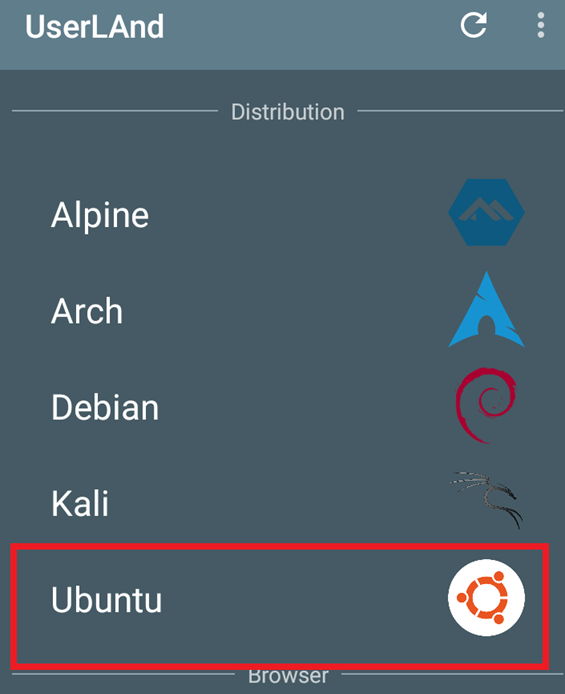
With the app installed, open it. Once UserLAnd opens, you will see a screen with the various distributions you can install, and each distro will have its logo on the right. Our focus is on Ubuntu. Therefore, locate it and click on it.
3. Download Ubuntu
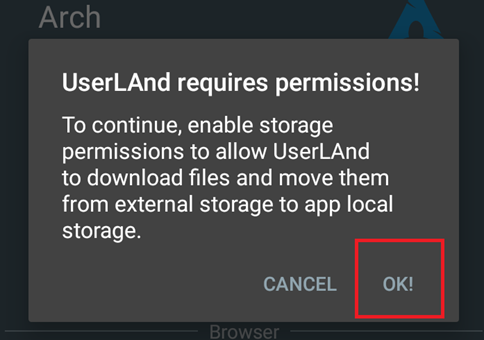
UserLAnd requires access to your storage permissions to facilitate downloading the required files for the successful installation of Ubuntu.
In the permission prompt on your screen, click the OK option to grant UserLAnd the required permissions.
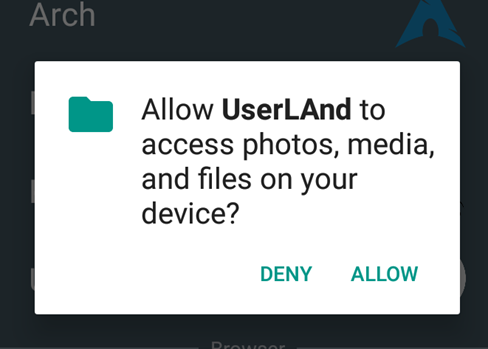
Also, you must allow UserLAnd to access your files by clicking the Allow button when prompted.
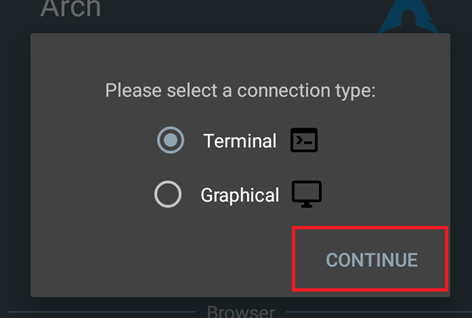
Next, select the connection type to use for the installation of Ubuntu. The connection type depends on whether you want to utilize the terminal or install the graphical interface for Ubuntu.
For our case, we will use the terminal as it offers more flexibility. Select your selection and click the Continue button.
The app will fetch the required files and assets, then begin downloading them.
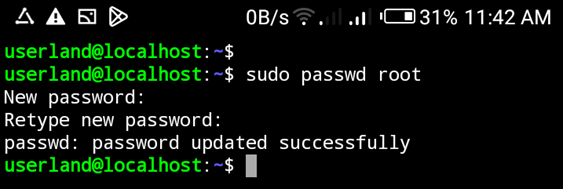
4. Create Root Password
Ubuntu will get installed, and the terminal will open if you set your connection type as terminal instead of the graphical interface,
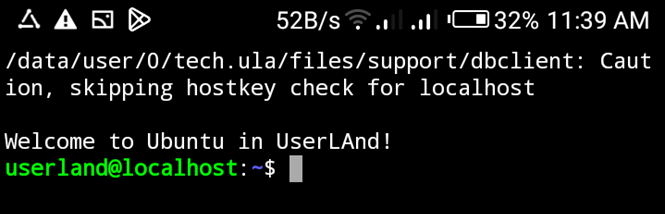
Once your terminal is open, set up a root password, as shown in the image below.
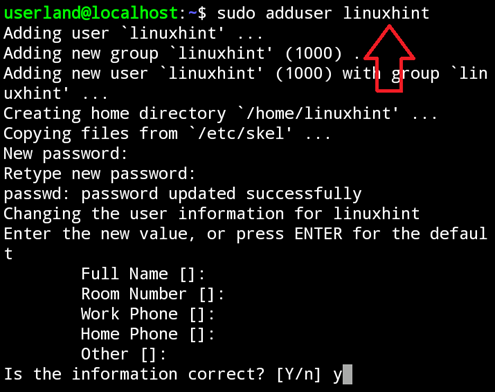
5. Create a New User
We can create a new user on our Ubuntu.
That’s it. You can now update and upgrade your Ubuntu and perform other necessary activities.
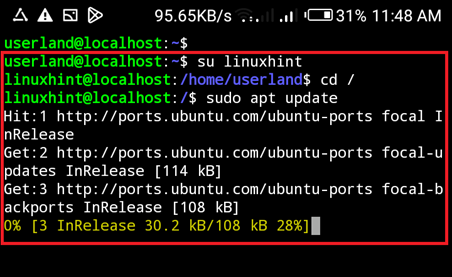
Enjoy using Ubuntu on Android.
Conclusion
It’s possible to run Ubuntu on Android using various tools. In this tutorial, we’ve covered the steps for installing Ubuntu on Android using UserLAnd. Besides, you can select the connection type you are comfortable using, and with the steps presented in this guide, you will manage to run Ubuntu on Android. All the best!
About the author
Denis Kariuki
Denis is a Computer Scientist with a passion for Networking and Cyber Security. I love the terminal, and using Linux is a hobby. I am passionate about sharing tips and ideas about Linux and computing.