- Set Up Automatic Security Update (Unattended Upgrades) on Ubuntu
- Configure Automatic Security Update (Unattended Upgrades) on Ubuntu Server
- Email Notification
- Auto Remove Unused Dependencies
- Automatic Reboot
- Enable Automatic Security Update
- Run Unattended Upgrade at a Specific Time
- Setting Up SMTP Relay
- Add Sender Addresses
- Sending Test Email
- Email not Sending?
- Disable Receiving Email
- Email Report
- Logs
- Check Restart
- Wrapping Up
- How to Install Security Updates in Ubuntu
- Intalling Security Updates on Ubuntu
- Updating a Single Package on Ubuntu
- Upgrading a Ubuntu System
- Installing Latest Security Updates Automatically on Ubuntu
Set Up Automatic Security Update (Unattended Upgrades) on Ubuntu
This tutorial is going to show you how to set up automatic security update, aka unattended upgrades, on Ubuntu. If you are not living in a cave, then you probably know the massive Equifax data breach. 143 million Equifax customers’ information, including name, social security number, date of birth, driver’s license, and 200k credit card numbers, was stolen between May – July 2017.
In March 2017, a critical vulnerability in Apache Structs was found and the Apache Foundation released a fix for it when they announced the existence of the vulnerability. However, Equifax didn’t patch the vulnerability for two months, resulting in a massive data breach. Corporations running complex applications may need to do extensive testing before installing updates, but if you have a simple Linux server for personal use, you can turn on automatic security updates to patch vulnerabilities ASAP.
Configure Automatic Security Update (Unattended Upgrades) on Ubuntu Server
First, install the unattended-upgrades package.
sudo apt update sudo apt install unattended-upgrades
You need to install the update-notifier-common package in order to set up automatic reboot.
sudo apt install update-notifier-common
Then edit the 50unattended-upgrades file.
sudo nano /etc/apt/apt.conf.d/50unattended-upgrades
In this file, you can configure what packages should be automatically updated. By default, only security updates will be automatically installed, as indicated by the following lines. So there’s no need to change this section.
Unattended-Upgrade::Allowed-Origins < "$:$"; "$:$-security"; // Extended Security Maintenance; doesn't necessarily exist for // every release and this system may not have it installed, but if // available, the policy for updates is such that unattended-upgrades // should also install from here by default. "$ESMApps:$-apps-security"; "$ESM:$-infra-security"; // "$:$-updates"; // "$:$-proposed"; // "$:$-backports"; >;
- The first origin «$:$» is necessary because security updates may pull in new dependencies from non-security sources. This origin doesn’t provide software updates.
- The second origin is for regular security updates.
- The third and fourth origins (ESMApps and ESM) are for extended security maintenance, i.e. for those who run an Ubuntu release that reached end-of-life. You can leave it as is.
Email Notification
Sometimes Ubuntu can fail to install security updates, so a manual update is required. If you like to receive email notifications after every security update, then find the following line and uncomment it. (Remove the double slashes at the beginning.)
//Unattended-Upgrade::Mail "root";
You can specify an email address to receive notifications like below.
If you prefer to receive email notifications only when there’s an error during security update, then uncomment the following line.
//Unattended-Upgrade::MailOnlyOnError "true";
On Ubuntu 20.04/22.04, you need to find the following line
//Unattended-Upgrade::MailReport "on-change";
Uncomment it and change on-change to
Unattended-Upgrade::MailReport "only-on-error";
Auto Remove Unused Dependencies
You probably need to do sudo apt autoremove after every update, so find the following line:
//Unattended-Upgrade::Remove-Unused-Dependencies "false";
Uncomment this line and change false to true .
Unattended-Upgrade::Remove-Unused-Dependencies "true";
Automatic Reboot
When a security update for the Linux kernel is installed, you need to restart Ubuntu server in order to apply the kernel update. If the server is only used by you or a few people, then enabling automatic reboot can be convenient. Find the following line.
//Unattended-Upgrade::Automatic-Reboot "false";
Uncomment it and change false to true to enable automatic reboot
Unattended-Upgrade::Automatic-Reboot "true";
You can also specify what time reboot will be performed. By default reboot is done immediately after installing kernel update. I set it to reboot at 4 AM. Make sure you set a correct time zone for your server.
Unattended-Upgrade::Automatic-Reboot-Time "04:00";
If the server is being used by many users or requires high uptime (such as this blog), then you shouldn’t enable automatic reboot. Instead, you can use Canonical livepatch to patch Linux kernel without reboot.
Enable Automatic Security Update
Now that automatic security update is configured, we need to enable it by creating the 20auto-upgrades file.
sudo nano /etc/apt/apt.conf.d/20auto-upgrades
Copy and paste the following two lines into the file.
APT::Periodic::Update-Package-Lists "1"; APT::Periodic::Unattended-Upgrade "1";
- The first line makes apt do “ apt-get update ” automatically every day. If it’s set to 2, then every other day. (0=disabled)
- The second line makes apt to install security updates automatically. (1=enabled, 0=disabled)
Save and and close the file.
Run Unattended Upgrade at a Specific Time
Unattended upgrade is run randomly between 12 AM to 7AM, so as to prevent load spike to mirror servers due to everyone running updates at the same time. You can manually run unattended upgrade with:
You can also add this command to your Cron job.
Add the following line at the bottom of your Crontab file, so the unattended upgrade will run every day at 2 AM.
0 2 * * * sudo /usr/bin/unattended-upgrade -v
Setting Up SMTP Relay
In order to receive email notifications after every security update, your server needs to be able to send emails. If this is your email server, then the only thing left to do is install the bsd-mailx package.
sudo apt install bsd-mailx
If this isn’t an email server, then you need to set up SMTP relay. We can install Postfix SMTP server, then relay emails through email service providers.
There are several email service providers (ESP) that can act as relay host. Some charge a little fee, some offer free quotas every month. In this article, I’d like to show you how to use Sendinblue, which is an email service provider that allows you to send 300 emails per day for free.
Create a free account at sendinblue.com. Once you complete your user profile, click the Transactional tab, you will get your SMTP settings. If there’s no SMTP settings, you need to contact Sendinblue customer service in order to activate the transactional email service.
Now you need to configure your Postfix SMTP server to use the Sendinblue SMTP settings.
Let’s install Postfix SMTP server on Ubuntu with the following command.
sudo apt install postfix libsasl2-modules
When you see the following message, press the Tab key and press Enter.
Then choose the second option: Internet Site .
Next, set the system mail name. For example, I enter my domain name linuxbabe.com .
After Postfix is installed, open the main configuration file with a command-line text editor like Nano.
sudo nano /etc/postfix/main.cf
By default, its value is empty. Set the value of relayhost to [smtp-relay.sendinblue.com]:587 .
relayhost = [smtp-relay.sendinblue.com]:587
Then add the following lines to the end of this file.
# outbound relay configurations smtp_sasl_auth_enable = yes smtp_sasl_password_maps = hash:/etc/postfix/sasl_passwd smtp_sasl_security_options = noanonymous smtp_tls_security_level = may header_size_limit = 4096000
Save and close the file. Then create the /etc/postfix/sasl_passwd file.
sudo nano /etc/postfix/sasl_passwd
Add the SMTP relay host and SMTP credentials to this file like below. Replace smtp_username and smtp_password with your own username and password that are given by SendinBlue. Note there’s a colon between the username and password.
[smtp-relay.sendinblue.com]:587 smtp_username:smtp_passowrd
Save and close the file. Then create the corresponding hash db file with postmap .
sudo postmap /etc/postfix/sasl_passwd
Now you should have a file /etc/postfix/sasl_passwd.db . Restart Postfix for the changes to take effect.
sudo systemctl restart postfix
By default, sasl_passwd and sasl_passwd.db file can be read by any user on the server. Change the permission to 600 so only root can read and write to these two files.
sudo chmod 0600 /etc/postfix/sasl_passwd /etc/postfix/sasl_passwd.db
From now on, Postfix will send emails via Sendinblue.
Add Sender Addresses
Click the drop-down menu on the upper-right corner of your Sendinblue account dashboard and select the Senders & IPs tab to add your domain and sender address.
Sending Test Email
Now we can send a test email with mailx command like below.
sudo apt install bsd-mailx echo "this is a test email." | mailx -r from-address -s hello to-address
If SMTP configurations are correct, you will receive an email.
Email not Sending?
You can check the mail log ( /var/log/mail.log ) to debug why email is not sending.
If you wrap the relay host with brackets in /etc/postfix/main.cf file.
relayhost = [smtp-relay.sendinblue.com]:587
Then you also need to wrap the hostname in /etc/postfix/sasl_passwd file.
Remember to re-generate the hash db file.
sudo postmap /etc/postfix/sasl_passwd
Restart Postfix for the changes to take effect.
sudo systemctl restart postfix
Disable Receiving Email
By default, Postfix is configured to accept incoming mail. If this is not your email server, then you can configure Postfix to only send email, but accept no incoming email. Find the following line in /etc/postfix/main.cf file.
Change it to the following text so Postfix will only listen on localhost.
inet_interfaces = loopback-only
Email Report
There are 3 possible emails sent by unattended upgrade:
- Unattended upgrade returned: True. This means packages are installed successfully.
- Unattended upgrade returned: False. This means some error happened when installing updates. Usually requires human intervention. If you receive this email, you need to manually run sudo apt upgrade .
- Unattended upgrade returned: None. There are updates available, but the system refused to install them.
Logs
Logs can be found in /var/log/unattended-upgrades/ directory.
Check Restart
The checkrestart command can help you find out which processes need to be restarted after an upgrade. It is available from debian-goodies package.
sudo apt install debian-goodies sudo checkrestart
Wrapping Up
I hope this tutorial helped you set up unattended upgrades on Ubuntu server. As always, if you found this post useful, subscribe to our free newsletter to get more tips and tricks 🙂
How to Install Security Updates in Ubuntu
One of the easiest ways to protect your Ubuntu systems is by keeping up to date software on them. Therefore applying updates frequently is an important part of maintaining secure systems. In this article, we will show how to install security updates in Ubuntu and Linux Mint systems.
Intalling Security Updates on Ubuntu
If your system has the update-notifier-common package installed, Ubuntu will alert you about pending updates via the message of the day (motd) upon console or remote login.
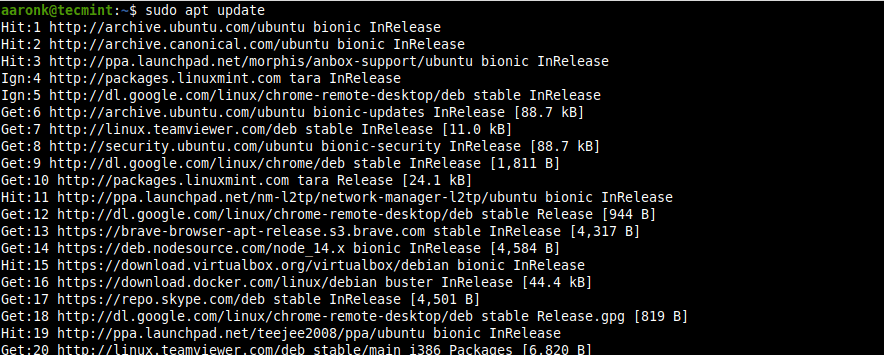
Once you have logged into your Ubuntu system, you can check for new updates using the following apt command.
Updating a Single Package on Ubuntu
To check and update a single package, for example, a package called php , after updating your system’s package cache, then update the required package as follows. If the php package already installed it will try to update to the latest version available:
Upgrading a Ubuntu System
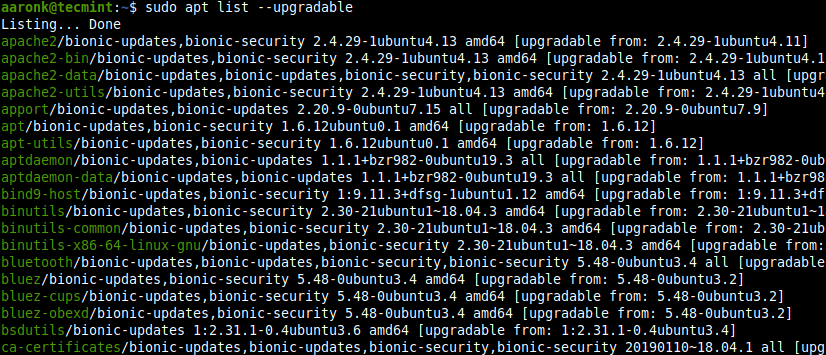
To list all the newly available updates for your Ubuntu system, run:
To install all updates, run:
Installing Latest Security Updates Automatically on Ubuntu
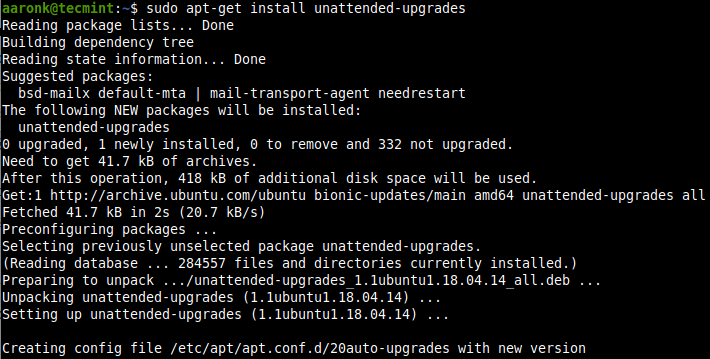
You can use the unattended-upgrades package to keep the Ubuntu system with the latest security (and other) updates automatically. To install the unattended-upgrades package if it isn’t already installed, run the following command:
$ sudo apt-get install unattended-upgrades
To enable automatic updates, run:
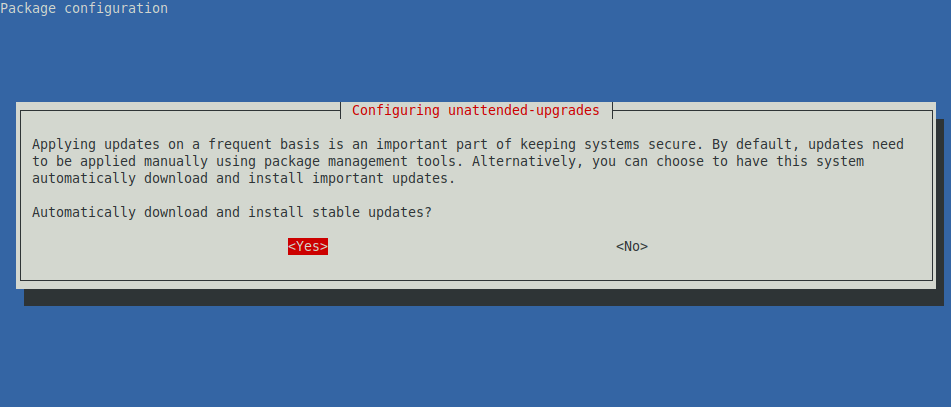
$ sudo dpkg-reconfigure unattended-upgrades
Then configure the package to install automatic updates by selecting yes from the interface below.
Attention: Please note that updates may restart services on your server, so applying updates automatically may not be appropriate for all environments particularly servers.
You can run unattended-upgrades manually also:
Or add the -d flag to enable debugging mode:
That’s all for now. For any queries or comments, you would like to share with us, use the comment section below.


