- Linux ulimit Command | Explained
- How Does ulimit Command Work in Linux?
- Syntax
- Limitation Types
- Soft Limit
- Hard Limit
- Examples of Linux ulimit Command
- Example 1: Get Brief Limit Report
- Example 2: Display Maximum Users Process
- Modify the Users Process Limit
- Example 3: Show Maximum File Size
- Adjust the File size Limit
- Example 4: Get Maximum Virtual Memory Size
- Set the Specific Memory Size Limit
- Example 5: Check Maximum Scheduling Priorities
- Example 6: Number of Opened Files
- How to Adjust the Hard and Soft Limits Manually?
- Conclusion
- How to Set ulimit Value Permanently
- Ulimit value
- Using ulimit
- Display all limits
- Limit parameters
- Change ulimit value temporarily
- Change ulimit value permanently
- Final thoughts
- About the author
- Sidratul Muntaha
Linux ulimit Command | Explained
The “ulimit” command line utility stands for “User Limit”. It is used to control or report particular user resources. The resources contain default values and limits. However, these values can be modified per the user’s requirement, i.e., to set the limit of file size, no of user processes, virtual memory, and much more.
This post provides a deep insight into the working and the usage of the ulimit command in Linux with the following outcomes:
Let’s start with the working of the “ulimit” command.
How Does ulimit Command Work in Linux?
The generalized syntax of the ulimit command is written below:
Syntax
The syntax holds the following components:
- ulimit: Identifies the “ulimit” command.
- flags: Denotes the supported flags/options of the “ulimit” command.
- limit: Represents the resource “Hard” or “Soft” limit value for a particular resource.
Limitation Types
The “ulimit” basically contains two types of resource limitations one is the “Hard” limit, and the other is the “Soft” limit. Both are described below:
Soft Limit
The soft limits are the effective value assigned to the user for the actual processing. The user can increase it but cannot adjust the soft limit higher than the hard limit.
Use the below command to get the detailed report of soft limit:
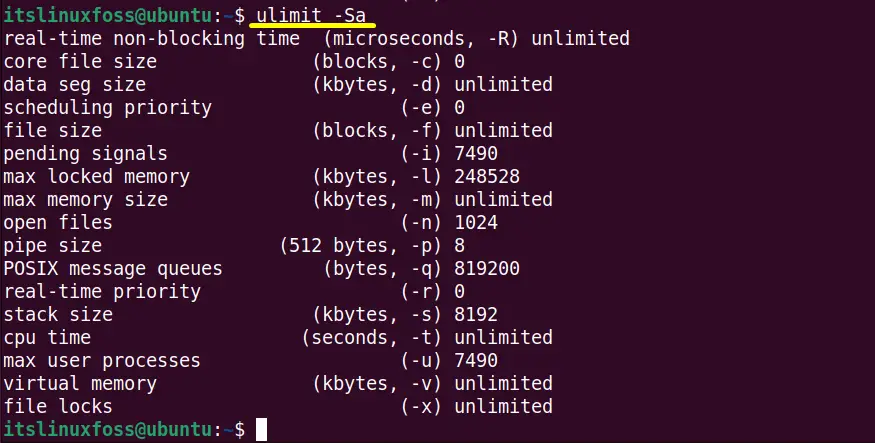
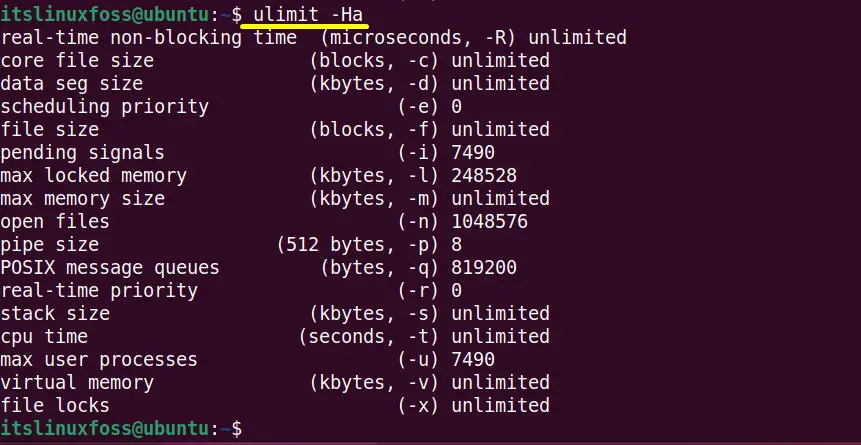
Hard Limit
The “hard” limit is the maximum value that can only be changed by the root user. It also acts as an upper bound or ceiling of the soft limit.
Type the following command to check the detailed report of hard limit:
Type the “–help” command in the terminal to get the built-in flags that are supported by the “ulimit” command:
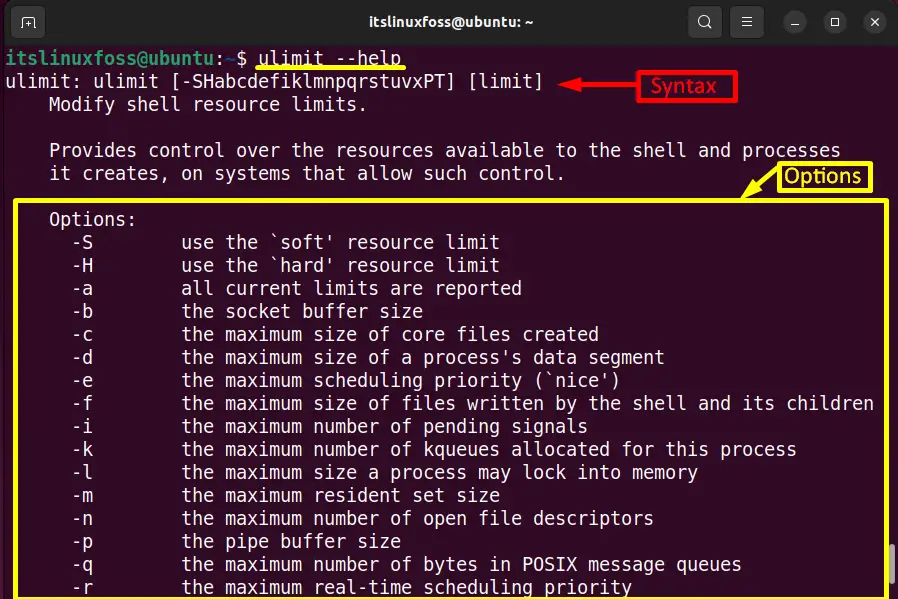
Scroll down the page to get the complete list of options/flags.
Examples of Linux ulimit Command
Now, look at the practical examples of the “ulimit” command to understand its functionality in Linux.
Example 1: Get Brief Limit Report
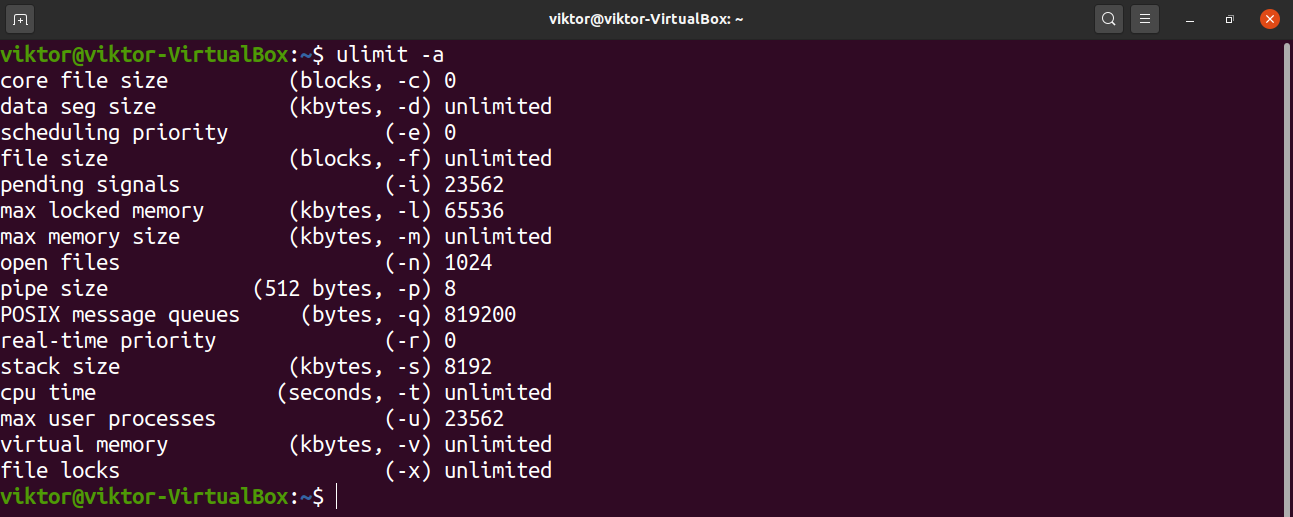
Generally, without any argument, the “ulimit” command provides the total value of the resources that a current user holds.
Use the “-a” flag to get the detail or brief report of that resources as shown in the screenshot:
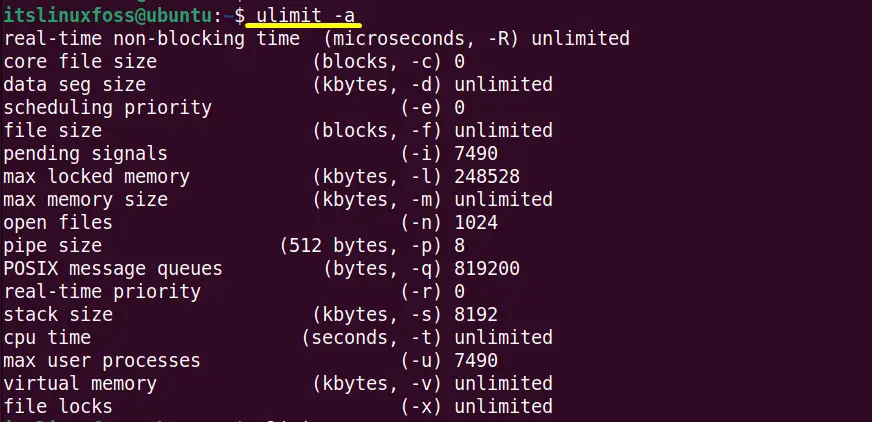
The output shows all the resources along with their limitations.
Example 2: Display Maximum Users Process
The “-u” flag represents the total value of the maximum process occupied by the user. The practical implementation of this flag is as follows:

The output prints the logged-in user maximum processes that are “7490”.
Modify the Users Process Limit
To limit the process of the current logged-in “itslinuxfoss” or the particular user processes execute the “ulimit” command in the following way:
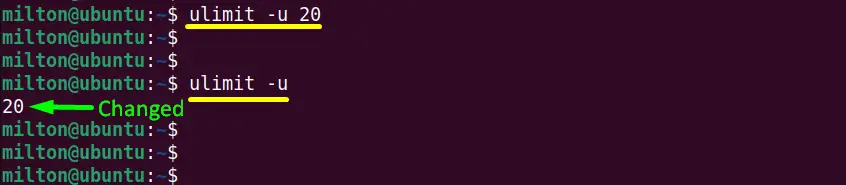
The maximum process limit has been changed to “20”. This methodology is not recommended as it restricts the maximum process of each user. It prevents the users from using all the system processes.
Example 3: Show Maximum File Size
The “-f” flag displays the maximum size the user can make while working in Linux. It can be “unlimited” or a specific size in “Kilobytes”:

The output shows that the maximum file size is “unlimited”
Adjust the File size Limit
The “-f” flag is also beneficial to set or adjust the file size limit. In this example, the “File1.txt” size limit is adjusted to “40” which is occupied “39k” currently:
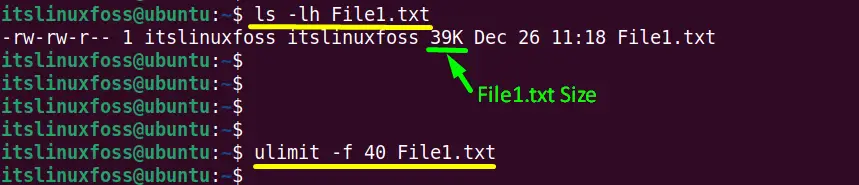
If the user adds the content after adjusting its limit to “40k”, then it will show an error shown in the screenshot:

Example 4: Get Maximum Virtual Memory Size
The “-m” flag shows the maximum size of the virtual memory in “kilobytes” held by the process. It can be unlimited:

The output displays the “unlimited” virtual memory.
The “unlimited” output specifies that the current process consumes all the available memory. The drawback of “unlimited” memory of a process is it slow downs the other processes, which consume low memory.
Set the Specific Memory Size Limit
The “unlimited” memory size of a process can be set to a specific limit by using the “-v” flag with the assigned memory:

Hence, the virtual memory has been modified to “1000kB”.
Example 5: Check Maximum Scheduling Priorities
The “-e” flag identifies the maximum scheduling priorities that a logged-in user can assign to a process. For this purpose, use the “ulimit” command with the “-e” flag in this way:

Here, the user “itslinuxfoss” is not assigned any scheduling priority.
Example 6: Number of Opened Files
The “-n” flag shows the maximum number of files that can be opened simultaneously. It is also known as “file descriptor”. The “file descriptor” is typically a number that uniquely refers to an open file in the current working operating system.
In this example, the “-n” displays that the process has “13” file descriptors:

How to Adjust the Hard and Soft Limits Manually?
The “limit.conf” configuration file defines the resource limits. This file is located in the “/etc/security” directory. Only the root user can make changes in this file. So logged-in as a root user or use the “sudo” command to edit this file.
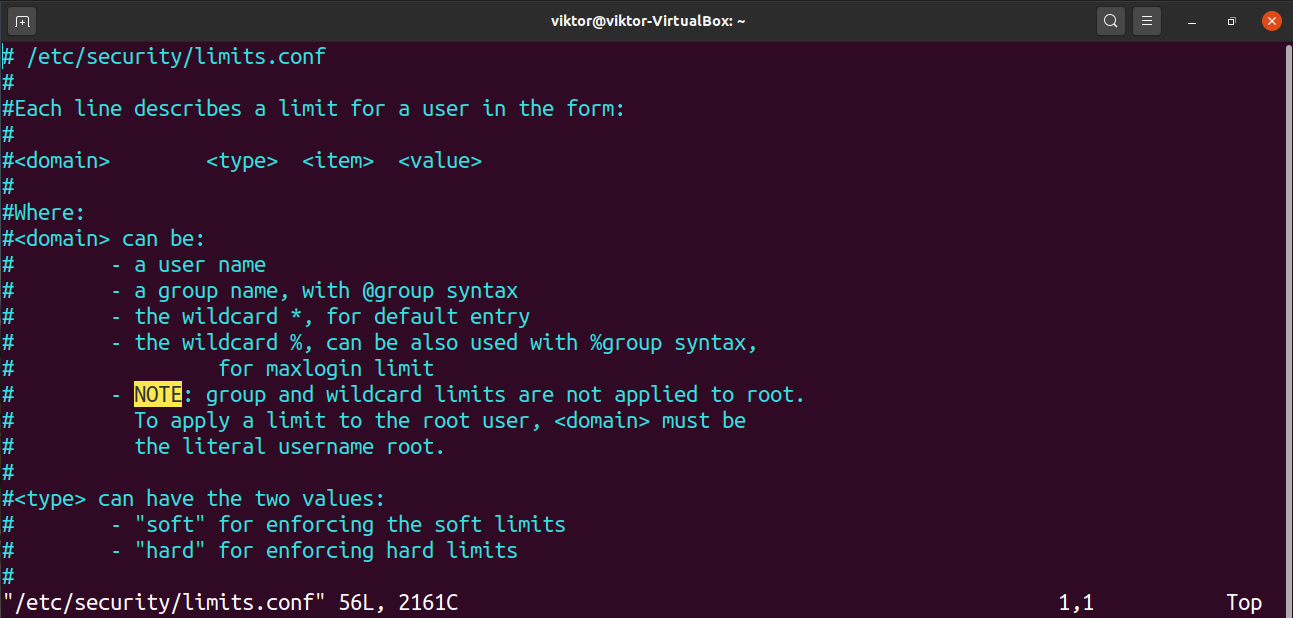
Run the below command with “sudo” to open the “limit.conf” file in the “nano” text editor. This file defines all the applicable limits:
$ nano /etc/security/limits.conf

The above command pops up the “nano” editor “window” displaying “limit.conf” file information:
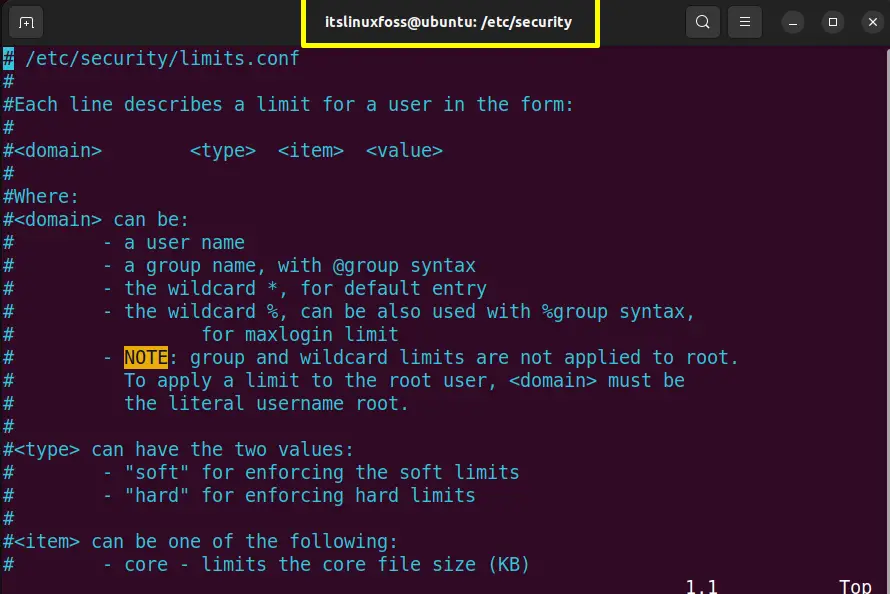
Scroll down the window to get the complete information.
As the file displays that each entry follows a structure. To change the default limit values and add the new limit values, follow the entry’s basic structure that contains four sections “domain”, “type”, “item”, “and value”. The description of these options is shown in the above screenshot.
It’s all about the Linux “ulimit” command.
Conclusion
Linux’s “ulimit” command is generally used to list down the resource limit occupied by the specific user. These limits are of two types “Hard” and “Soft”. The user can increase the limit of the resources in the range defined by default. This post has briefly illustrated a brief description of the “ulimit” command with the support of practical examples.
How to Set ulimit Value Permanently
![]()
In Linux, ulimit is a built-in tool to manage resource allocation at global, group, and user levels. For a multi-user system like Linux, such a feature is almost paramount to have. It can prevent the consumption of unwanted system resources like RAM, and CPU power.
Check out how to set ulimit value permanently on Linux.
Ulimit value
Ulimit enforces the predefined limit of how much resources a user can use. The tool uses a certain configuration file as the core to assign the ulimit values. For more fine-tuned control, it’s better to edit the file.
There are two types of limits that can be imposed: soft and hard limits. It’s better to explain these types with a simple example.
Let’s say a system admin would like a certain user to hover around a certain value. Here, the user can exceed the value if necessary but not hard-bound by it. In this case, it’ll be a soft limit. On the other hand, if the admin wants to strictly impose the limit, then it’ll be a hard limit.
Using ulimit
Ulimit is a command-line tool. Here’s the basic structure of the ulimit command.
Display all limits
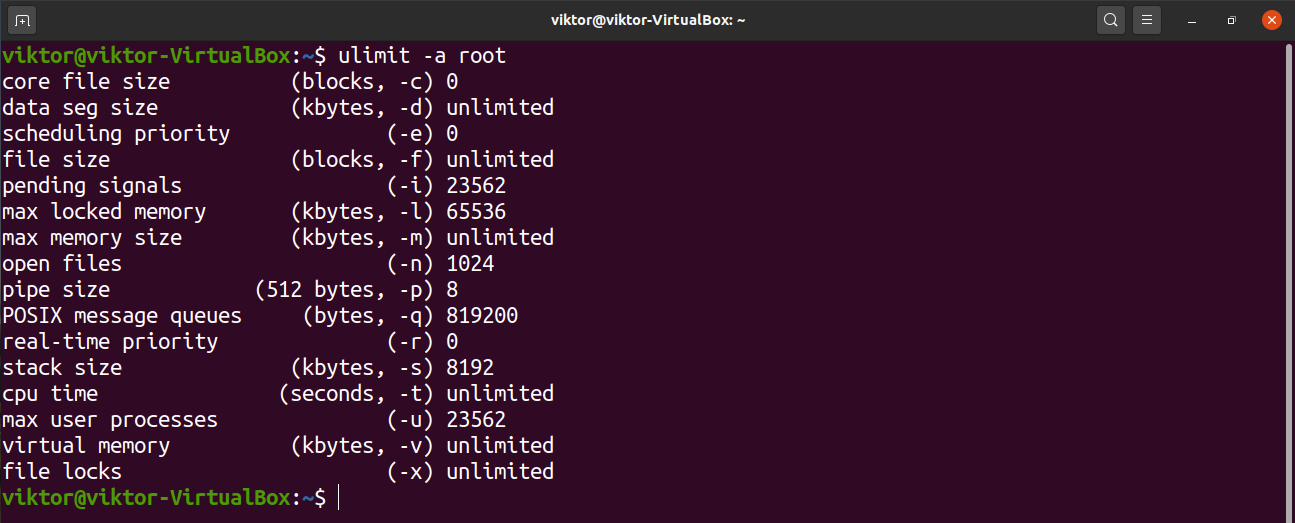
The “-a” flag will list all the options and configurations for a particular user. If no user is defined, it’ll print the limits for the current user instead.
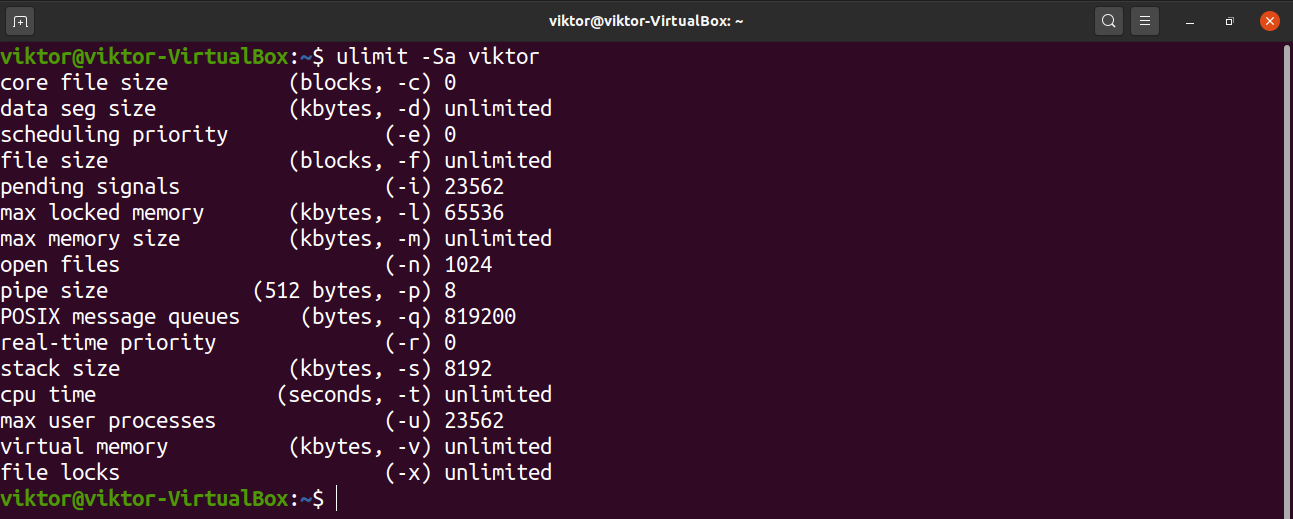
To display the soft limits of a user, use the “-S” flag.
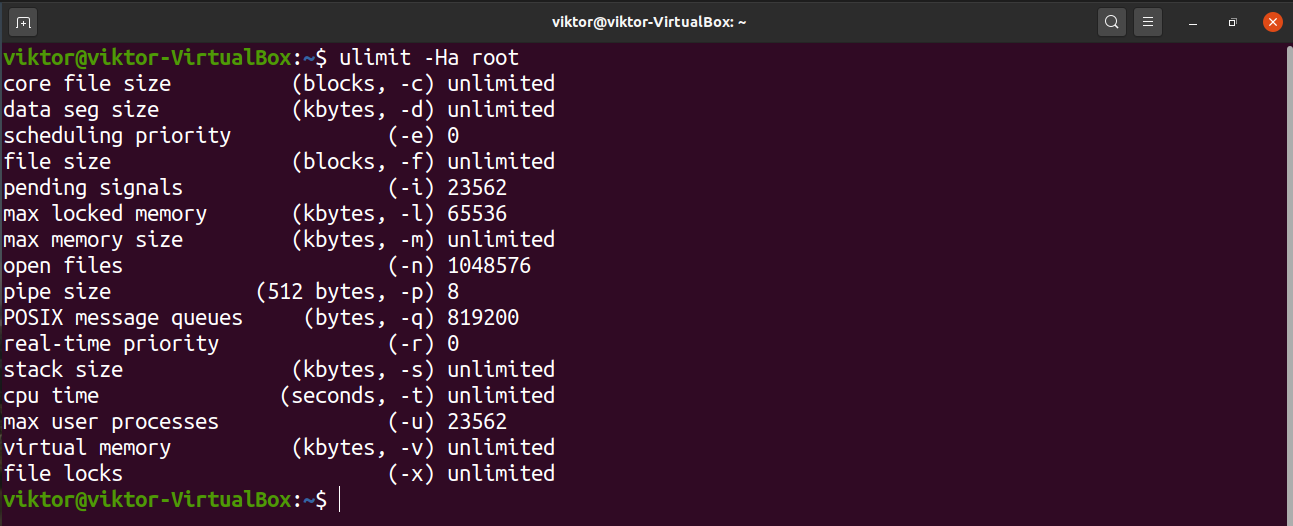
To display the hard limits of a user, use the “-H” flag.
It’s possible to see the limits of a certain process. The details are located in the following file. Note that it’s a unique file for each of the processes that are currently running. Swap the PID field with the PID of the target process.
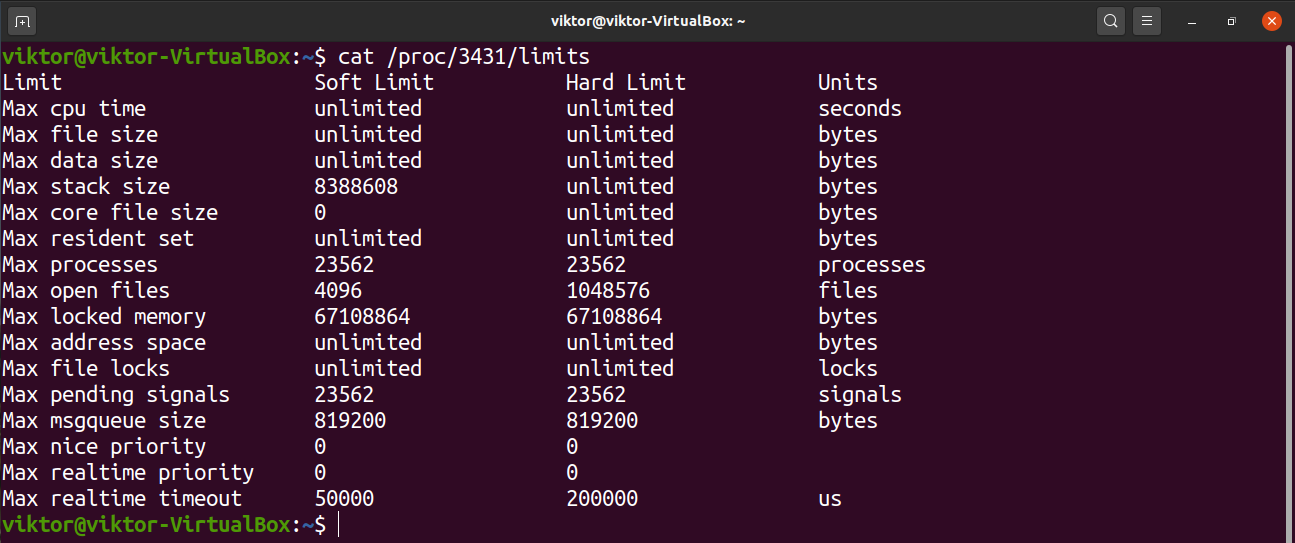
Limit parameters
To change the ulimit, you have to declare which type of limit you’d like to define. Here’s a shortlist with all the available parameters you can change. Almost all of them define the maximum value of each of the parameters.
- b: Socket buffer size
- c: Size of core files created
- d: Process’s data segment size
- e: Scheduling priority (“nice” value)
- f: Number of files created by the shell
- i: Number of pending signals
- l: Size to lock into memory
- m: Resident set size
- n: Number of open file descriptors
- p: Pipe buffer size
- q: Number of bytes in POSIX message queues
- r: Real-time scheduling priority
- s: Stack size
- t: CPU time (in seconds)
- T: Number of threads
- u: Number of processes available to a user
- v: Amount of virtual memory available to process
- x: Number of file locks
Change ulimit value temporarily
It’s possible to temporarily change the value of ulimit for a particular user. The change will remain effective until the user is logged out, the session expires or the system reboots. Here, I’ll be showing an example of how to set the max process number for a user.
To change the number of available processes to 12345, run the following command. It’ll impose a temporary hard limit on the user.


Check out the hard limit to verify.

Change ulimit value permanently
As mentioned earlier, ulimit utilizes a system configuration file that determines the default ulimit value. By making changes to this file, you can permanently change the ulimit value for any user.
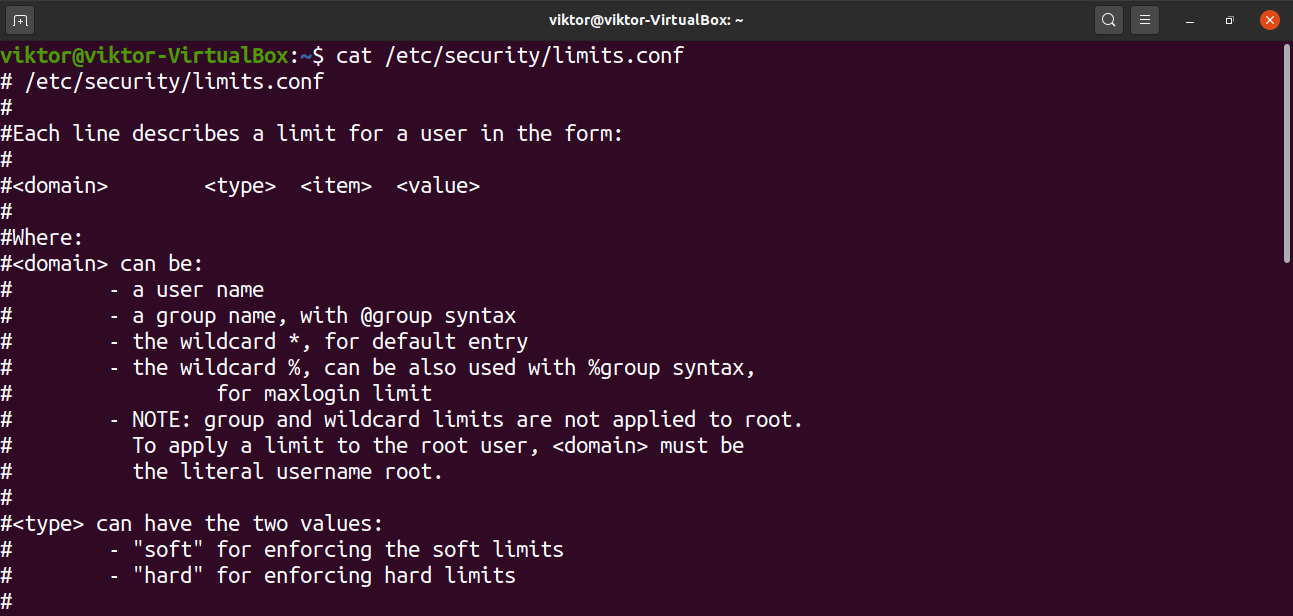
Open the file in your favorite text editor. Note that the file has to be opened with root permission for the changes to be saved.
Here, the entries of the file follow the following structure.
Let’s have a quick breakdown of each of the fields.
- domain: Usernames, groups, GUID ranges, etc.
- type: Type of limit (soft/hard)
- item: The resource that’s going to be limited, for example, core size, nproc, file size, etc.
- value: The limit value
Here’s a shortlist of all the available items.
- core: Limits core file size (in KB)
- cpu: CPU time (in min)
- data: Data size (in KB)
- fsize: File size (in KB)
- locks: File locks user can hold
- memlock: Locked-in-memory address space (in KB)
- nproc: Number of processors
- rtpio: Real-time priority
- sigpending: Number of signals pending
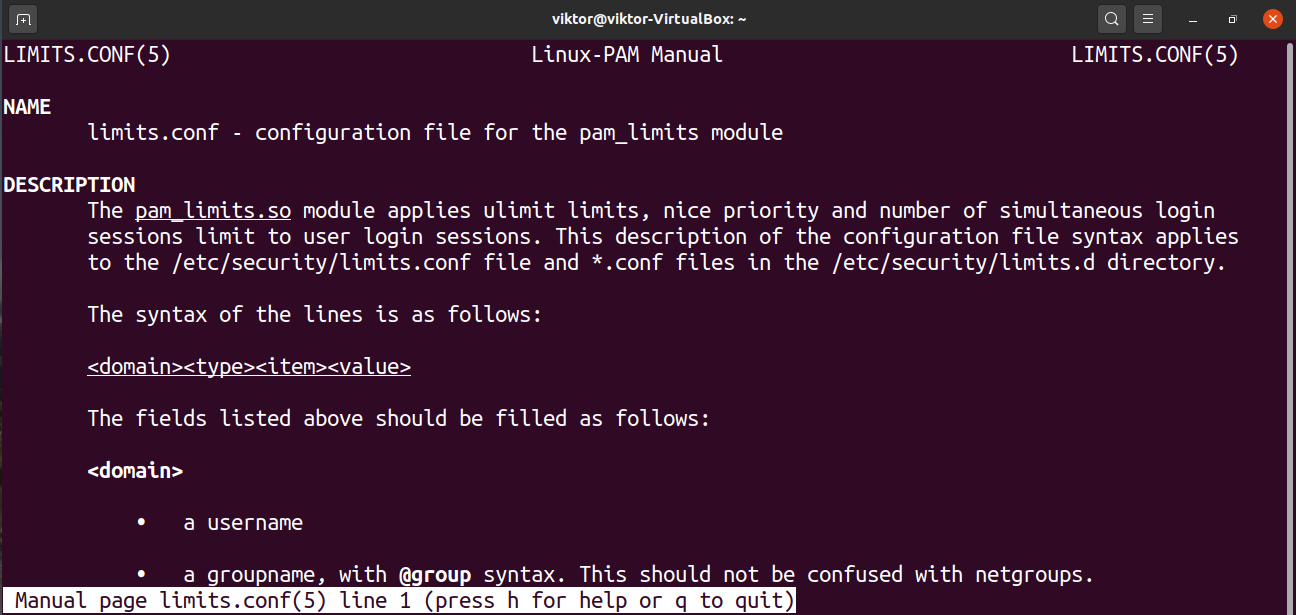
For a full list of available items, check out the man page of limits.conf.
For example, the following entry would limit the number of CPU cores the user “Viktor” can use down to 2.
Once edited, save the file. To take the changes into effect, the affected user(s) need to log out and re-login. Depending on how it’s implemented, it may also require the system to reboot.
Final thoughts
The ulimit tool offers a powerful way of managing resources. It’s simple yet powerful in what it does. Whatever you do, make sure that the limit you’re about to implement is entered correctly. If you’re trying these things out for the first time, then try to test them out in a virtual machine first.
There’s more to the ulimit command than what I’ve discussed here. If you want to learn more, check out Linux ulimit command.
About the author
Sidratul Muntaha
Student of CSE. I love Linux and playing with tech and gadgets. I use both Ubuntu and Linux Mint.