- Boot-Repair
- Getting Boot-Repair
- 1st option : get a disk including Boot-Repair
- 2nd option : install Boot-Repair in Ubuntu
- Using Boot-Repair
- Advanced options
- External Links
- How To Repair the GRUB Bootloader Using A Ubuntu Live USB Drive
- Repair the GRUB Bootloader
- Method 1: Repair GRUB Bootloader with Ubuntu Server Live Disk
- Step 1: Download Ubuntu Server and Create A Bootable Disk
- Step 2: Enter the Rescue Mode
- Step 3: Mount the Disk Partition
- Step 4: Repair the GRUB Bootloader and Reboot
- Method 2: Repair GRUB Bootloader Using A Desktop Live CD
- Step 1: Try Ubuntu Live Session
- Step 2: Install the GRUB Repair Tool
- Step 3: Repair the Bootloader on Ubuntu Linux
- Step 4: Reboot The System
- Extra Tip: Use a Dedicated Boot Repair ISO
- Final Words
Boot-Repair
Boot-Repair is a simple tool to repair frequent boot issues you may encounter in Ubuntu like when you can’t boot Ubuntu after installing Windows or another Linux distribution, or when you can’t boot Windows after installing Ubuntu, or when GRUB is not displayed anymore, some upgrade breaks GRUB, etc.
Boot-Repair lets you fix these issues with a simple click, which (generally reinstalls GRUB and) restores access to the operating systems you had installed before the issue.
Boot-Repair also has advanced options to back up table partitions, back up bootsectors, create a Boot-Info (to get help by email or forum), or change the default repair parameters: configure GRUB, add kernel options (acpi=off . ), purge GRUB, change the default OS, restore a Windows-compatible MBR, repair a broken filesystem, specify the disk where GRUB should be installed, etc.
This tool is aimed entirely at those new to Ubuntu who want to get past their booting issues and enjoy using Linux. For the purpose of helping the forum and IRC members help you diagnose issues with your boot setup, Boot-Repair creates a Boot-Info diagnosis for you to share that allows experienced members to see what’s wrong with your boot. The tool systematically asks if you want to upload this diagnosis to a pastebin or keep it local. The Pastebin is not easily searchable and automatically expires after some days, but for confidentiality purpose you may prefer to keep the report local.
Boot-Repair is a free software, licensed under GNU-GPL.

Getting Boot-Repair
1st option : get a disk including Boot-Repair
The easiest way to use Boot-Repair is to create a live-USB disk of Boot-Repair-Disk (a disc starting Boot-Repair automatically), and boot on it.
Remark : it is recommended to install the ISO on a live-USB (eg via UnetBootin or LiliUSB or Universal USB Installer). Do not burn it on a DVD if your boot is in EFI mode.
2nd option : install Boot-Repair in Ubuntu
— either from an Ubuntu live-session (boot your computer on a Ubuntu live-USB then choose «Try Ubuntu») or from your installed Ubuntu session (if you can access it)
— open a new Terminal, then type the following commands (press Enter after each line):
sudo add-apt-repository ppa:yannubuntu/boot-repair && sudo apt update sudo apt install -y boot-repair && boot-repair
Using Boot-Repair
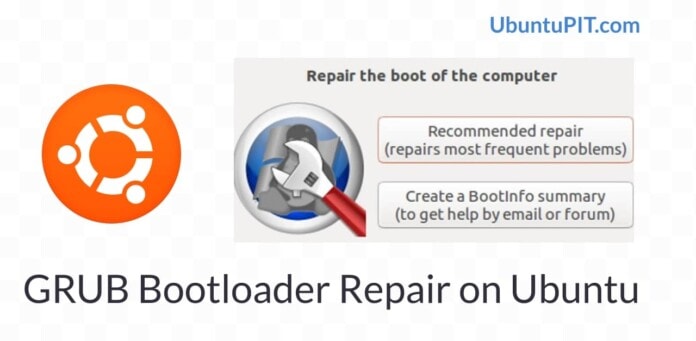
- — First click the Create a Boot-Info Summary button. This will simply create a Boot-Info diagnosis. A pop-up will ask if you want to upload the report online in order to share it more easily.

- — Check the diagnosis contents. If any doubt, you can share it on Ubuntu Forums (here) along with a description of your boot issue, so that experienced forum members can advise. — Once you get green light from experienced forum members, click the Recommended repair button. When repair is finished, note the new URL (paste.ubuntu.com/XXXXX) that appeared on a paper, then reboot and check if you recovered access to your OSs. — If the repair did not succeed, indicate the URL to people who help you by email or forum.
Advanced options
Warning: the default settings are the ones used by the «Recommended Repair». Changing them in the Advanced options may worsen your problem. Don’t change them unless requested by experienced helpers.
External Links
Boot-Repair (последним исправлял пользователь yannubuntu 2022-01-18 23:30:53)
The material on this wiki is available under a free license, see Copyright / License for details
You can contribute to this wiki, see Wiki Guide for details
How To Repair the GRUB Bootloader Using A Ubuntu Live USB Drive
One of Linux’s ISO files’ best features lets you look at it before installing it on your machine. You can run a live test on your system; later, you can choose whether you want to install it. This feature is helpful to test drives and can help recover your operating system if you accidentally remove or mess up with the GRUB bootloader. The GRUB is the short form of GNU GRand Unified Bootloader, commonly called GRUB bootloader. If you have a Ubuntu live CD or a USB live stick, you can repair the GRUB bootloader and save your operating system.
Repair the GRUB Bootloader
The GRUB bootloader files are stored inside an EFI filesystem on a Linux system. You can damage your GRUB files in many ways. One of the major reasons for damaging the GRUB files is having multiple bootloader directories for different distributions and operating systems.
Using Ubuntu and Windows together in a dual boot system is commonly used very often. If you’re not conscious about partitioning the bootloader files for Windows and Ubuntu, you probably end up mismatching with the GRUB bootloader. This post will see three different methods for repairing the GRUB bootloader using a Ubuntu Live USB drive.
Method 1: Repair GRUB Bootloader with Ubuntu Server Live Disk
Using a Ubuntu server ISO file to repair a Ubuntu desktop or server is clever because the ISO server file size is smaller than the desktop LTS file. It takes a short time to make a bootable file and is quick to boot. Here, we will see how to use the Ubuntu server ISO file to recover and repair the GRUB bootloader file on Ubuntu.
Step 1: Download Ubuntu Server and Create A Bootable Disk
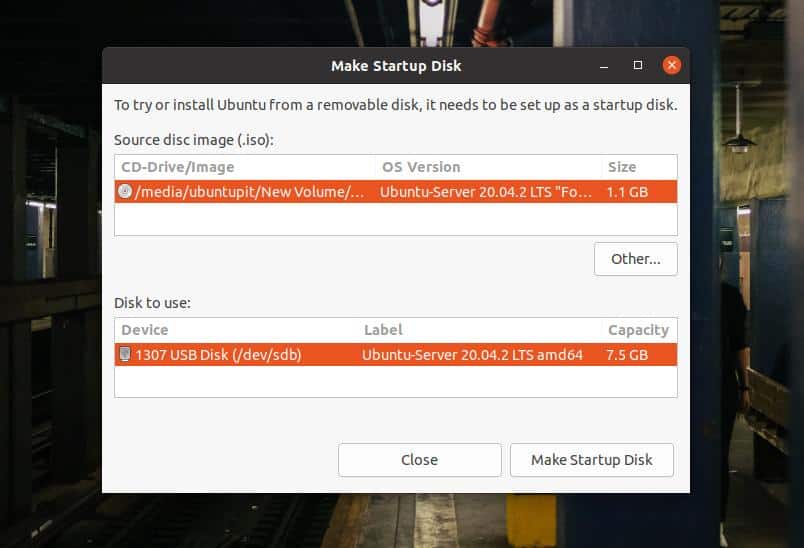
In the very first step, you might need to download the ISO file of the Ubuntu server if you don’t have a live CD or a spare USB stick. You can click on this link to reach the server ISO file for downloading. When the download finishes, you use Ubuntu’s default Startup Disk creator application to make a bootable USB disk.
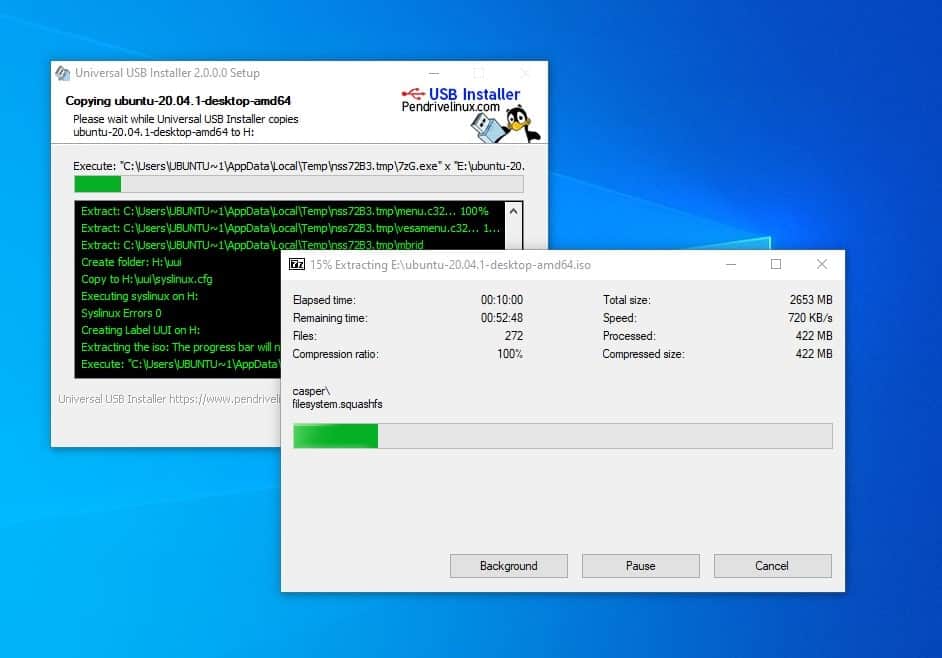
If you’re using a Windows machine, you can use the UUI tool to make a Linux bootable file, it’s easy, and the steps are self-explanatory.
Step 2: Enter the Rescue Mode
After creating the bootable disk, insert it into your computer and power your system on. Then you need to press the function key from the keyboard to select the bootloader menu. The boot menu function appears in ESC or F9 key in most laptops and computers. You can find the boot menu key for your machine by googling it.
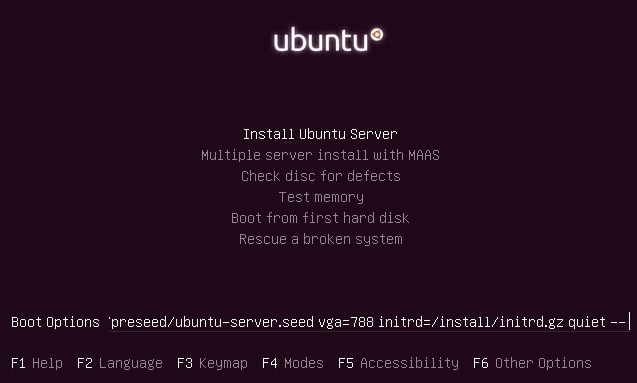
When the first boot screen appears, press the F6 button to enter the Expert mode. In the Expert mode, you can edit the boot options. To enter the broken image rescue mode, you need to write the following rescue value given below.

When it boots successfully, you need to select the language, keyboard format, and other configurations to start with the live USB stick.
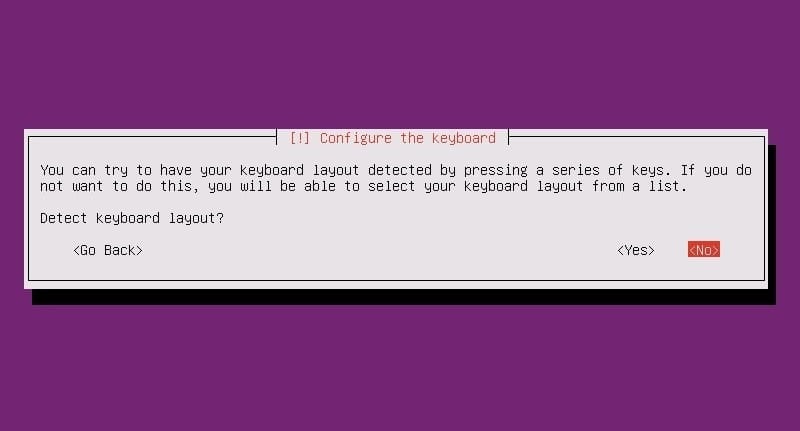
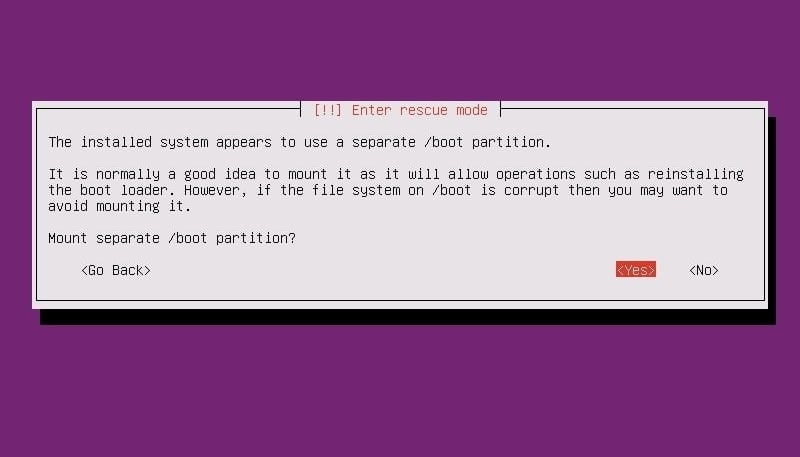
Step 3: Mount the Disk Partition
In this step, you will need to set the boot partition, mount the live disk, and rescue the GRUB loader. You can choose if you need to re-install the GRUB bootloader or if you just need to repair it with simple efforts.
Step 4: Repair the GRUB Bootloader and Reboot
In this step, the drop-down menus will appear, and you can select options to repair and reinstall the GRUB bootloader on your Linux system. You might see this window again when the boot repair finishes rebooting your system. If you don’t need to reinstall the entire GRUB loader, you can select the first option to open a shell to run a few commands for boot repair.
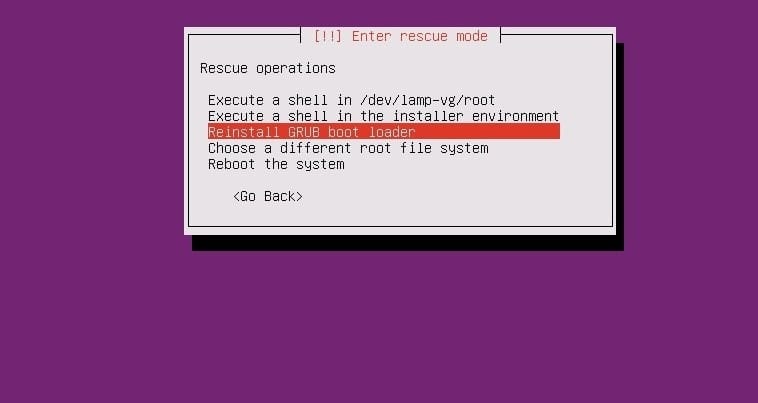
When the shell appears, you can chronologically run the following command lines to repair the bootloader. Make sure you’ve replaced the sda with your own directory value.
# ls /dev/sd*
# grub-install /dev/sda
# exit
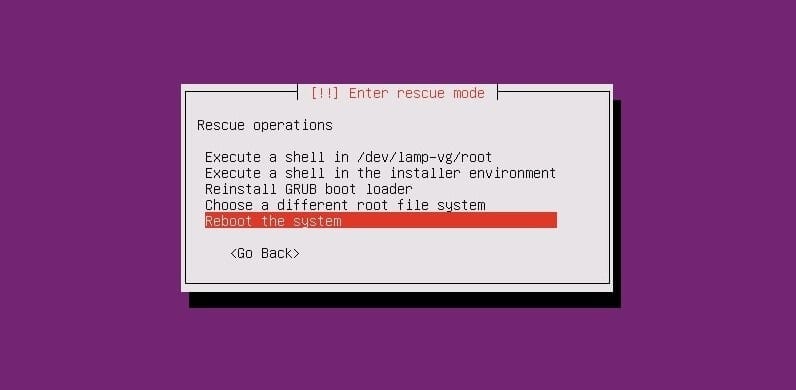
The GRUB bootloader won’t take very long; when the boot rescue finishes, you can reboot your system to get the GRUB bootloader back.
Method 2: Repair GRUB Bootloader Using A Desktop Live CD
Using a Ubuntu desktop ISO is pretty similar to using the server ISO live USB stick. This method will use the latest Ubuntu ISO file and burn it to a USB drive. You can follow the steps shown previously to burn the ISO file.
Step 1: Try Ubuntu Live Session
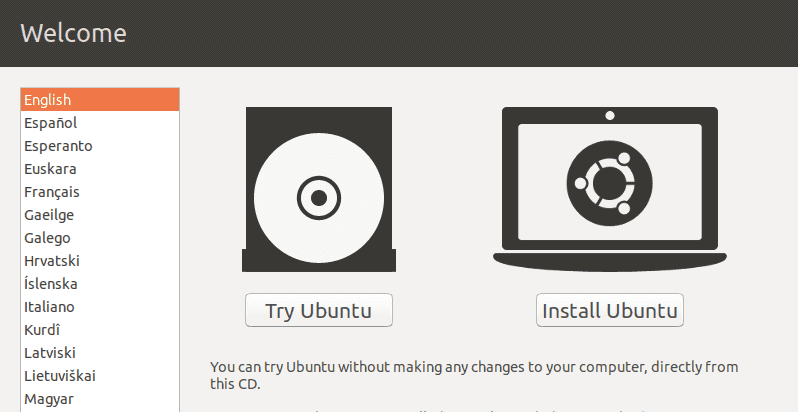
After making the bootable USB stick, insert it into your computer and boot Ubuntu on your computer. Here, despite choosing the Install Ubuntu button, we will press on the Try Ubuntu button to use Ubuntu as a live ISO file. When the first startup page arrives, you will need to put the keyboard layout, time zone, and other related information to get started with Ubuntu Live.
Step 2: Install the GRUB Repair Tool
As we are using the live USB disk, we won’t require any root privileges to run the sudo commands. Now, make sure that you have an active internet connection on your computer. You can now use the following commands to install the GRUB bootloader repair tool on your system.
sudo apt-add-repository ppa:yannubuntu/boot-repair
sudo apt update
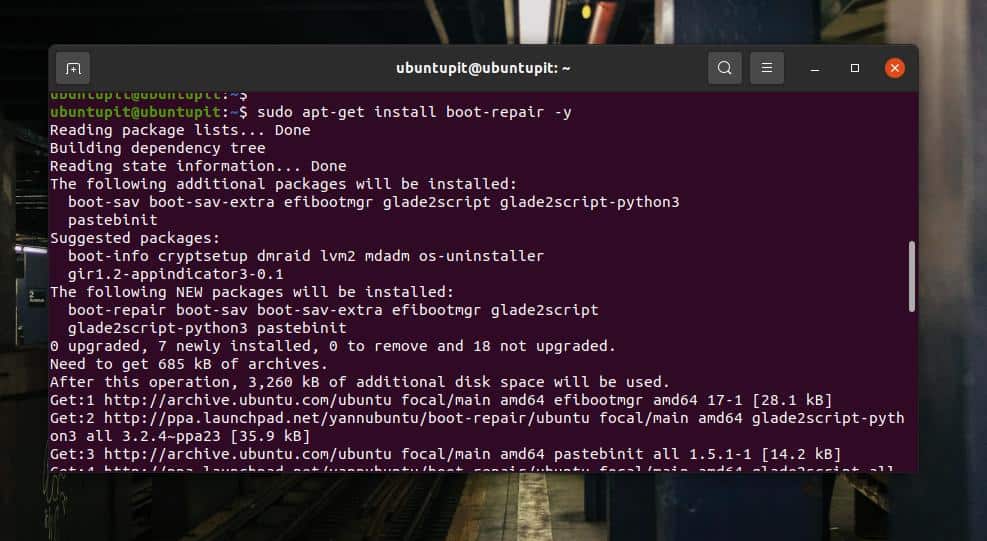
sudo apt install boot-repair -y
When the installation finishes, run the following command to open the boot repair tool. You can also find it on the top bar application menu.
Step 3: Repair the Bootloader on Ubuntu Linux
On the first screen of the GRUB boot repair tool, you will see the Main options, Grub Location, GRUB options, and other helpful tabs. In the Main options, you will find checkboxes to reinstall and repair the GRUB bootloader on your Ubuntu machine.
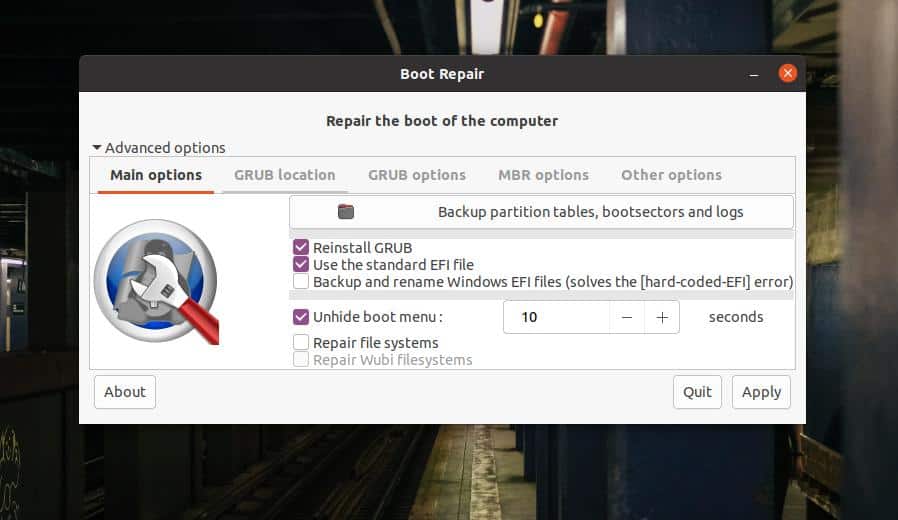
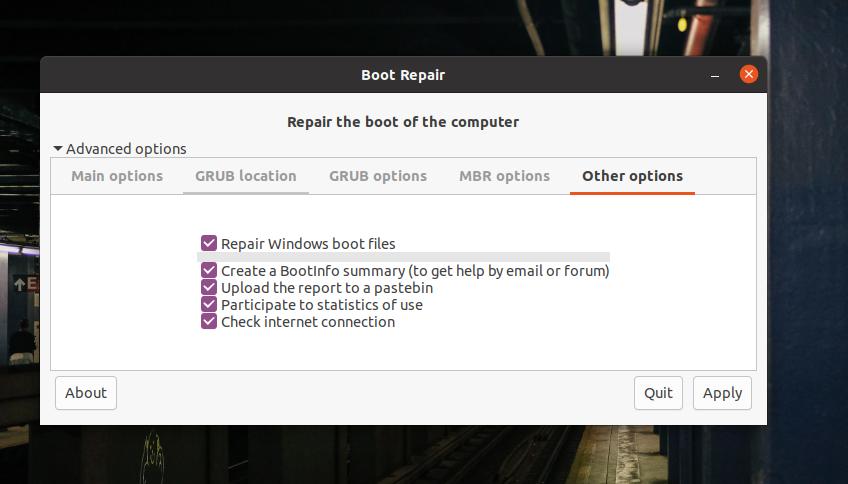
Use the EFI file to select the GRUB location if you have separate directories for root and GRUB files. If your system runs on an MBR partition, look inside the MBR options to see the MBR boot repair options. In the Other options tab, you will find choices to rescue the bootloader files of Windows or other operating systems.
Now, to repair Ubuntu’s GRUB bootloader, select the ‘Main options’ and select ‘Reinstall GRUB’, then proceed with the Apply button. The entire process won’t take more than five minutes to complete. If your filesystem has additional partitioning errors, it will also detect and show you the issues.
Step 4: Reboot The System
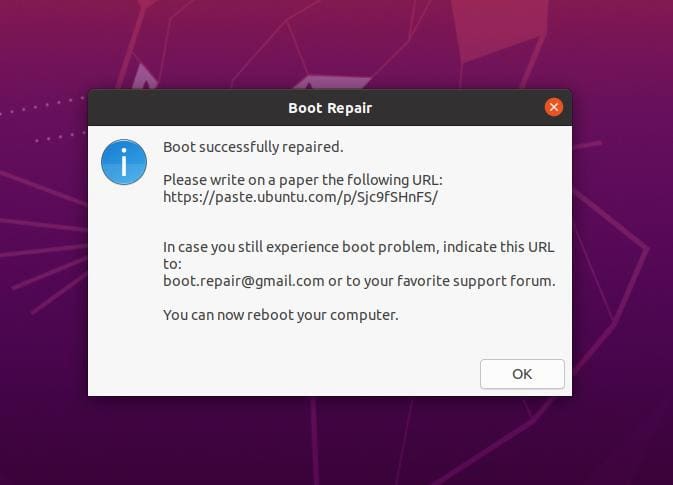
After a successful GRUB bootloader repair, a ‘Boot successfully repaired’ message will appears on your screen. It will provide a URL where you will find all the information regarding the boot repair. You can now reboot and system and boot your system with the repaired GRUB bootloader.
Extra Tip: Use a Dedicated Boot Repair ISO
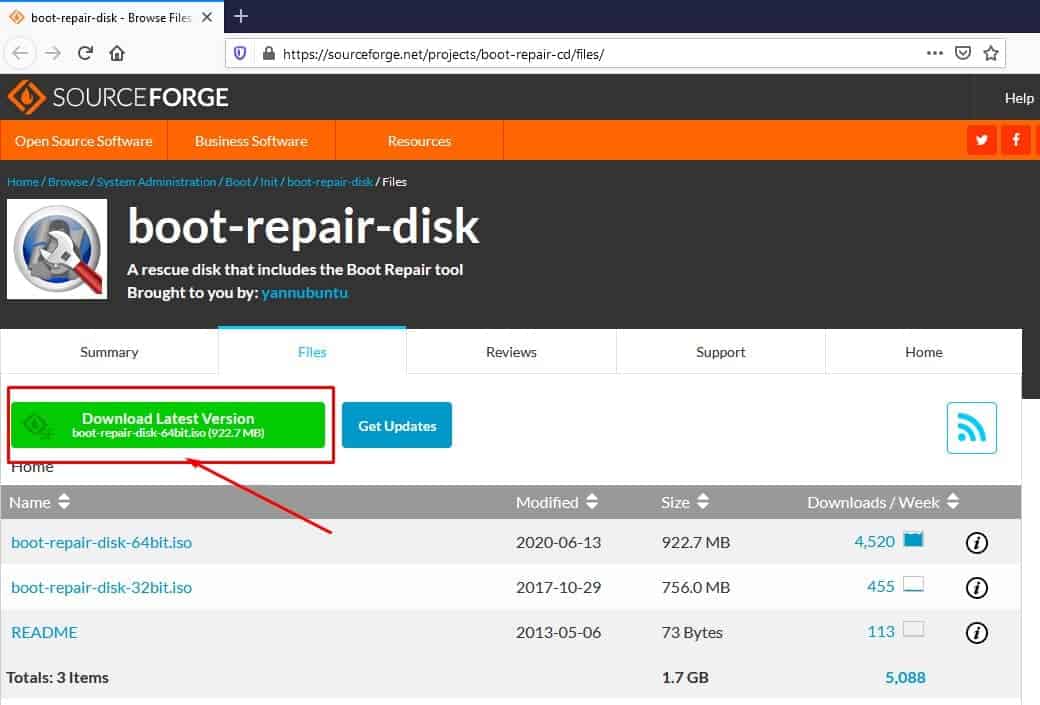
Till now, we have used a live CD/USB disk of the Ubuntu desktop/server to repair the GRUB bootloader. There are options to repair the bootloader with a dedicated GRUB bootloader ISO file. You can download the GRUB loader ISO file and make it bootable instead of using the desktop/server ISO file.
Final Words
In a multi-boot desktop arrangement, you need to be careful using the bootloader files. If you mess something up, you don’t need to install the entire OS again. In the entire post, we’ve seen how to repair the GRUB bootloader on a Ubuntu machine. If you find this post useful and informative, please share it with your friends and the Linux community. You can also write down your opinions regarding this post in the comment section.