- How To Format USB Drive in Linux Command Line
- Step 1 – Attach USB to System
- Step 2 – Format USB Drive in Linux
- Conclusion
- How to Use the LSUSB Command
- Install usbutils Package
- Using the lsusb Command
- Options Used with the lsusb Command
- Example 1: Display a Specific USB Device
- Example 2: Display Detailed Information about All USB Devices
- Example 3: Display Information about a Specific USB Device
- Example 4: Display All USB Devices in a Tree Structure
- Conclusion
- About the author
- Aqsa Yasin
- List USB Devices Linux
- Listing USB Devices using lsusb Command
- Listing USB devices with usb-devices Command
- Listing Block USB Devices
- About the author
- Shahriar Shovon
How To Format USB Drive in Linux Command Line
USB formatting is the process of erasing all data from the disk and prepare it for use. Sometimes we are required to change the filesystem on our USB drive, In that case, we have to format the USB drive with the new filesystem type. Formatting a USB drive in Ubuntu using Terminal commands is much easier than formatting it in Windows systems.
This tutorial will help Ubuntu (Linux) users with the simple steps for format a USB flash drive using the command line.
Step 1 – Attach USB to System
Insert a USB drive into your system and identify your USB drive correctly. This is the step you need to take care, because you may format the wrong disk if not correctly identify your disk.
Filesystem Size Used Avail Use% Mounted on /dev/sda1 28G 24G 2.3G 92% / udev 1.4G 12K 1.4G 1% /dev tmpfs 277M 1.2M 276M 1% /run none 5.0M 0 5.0M 0% /run/lock none 1.4G 34M 1.4G 3% /run/shm /dev/sdc1 14.8G 1.4G 13.4G 10% /media/tecadmin
Now, You can see that the USD drive is attached as /dev/sdc1 device. Which is mounted on /media/tecadmin.
Step 2 – Format USB Drive in Linux
Whenever we attach a USB drive in Ubuntu, it is automatically mounted to the system. We can not format any disk on Linux systems that are already mounted. So first un-mount /dev/sdc1 USB drive on your system.
Now, Use one of the following commands as per the file system you want. To format a USB drive, most of the users prefer VFAT and NTFS file systems because they can be easily used on the Windows operating system.
Similarly, you can format a USB Flash drive with any required file system.
Conclusion
In this tutorial, you have learned to format a USB drive on a Linux system via the command-line interface.
How to Use the LSUSB Command
![]()
The lsusb command, commonly known as the “List USB” command, is one of the most commonly used commands in Linux. As the name implies, this command is used to list all the USB devices that are attached to your Linux system. When combined with different parameters or options, this command can also be used to serve other purposes. This article shows you how to use the lsusb command in Linux.
Note: Linux Mint 20 is used throughout this article to demonstrate the usage of this command. However, you can work with any Linux distribution of your choice.
Install usbutils Package
Before getting started with the lsusb command, install the usbutils package onto your Linux Mint 20 system. To install the package, follow the steps shown below:
Launch the terminal by clicking on the terminal icon, highlighted in the following image:

After you click on this icon, the terminal window will immediately pop up, as shown below:

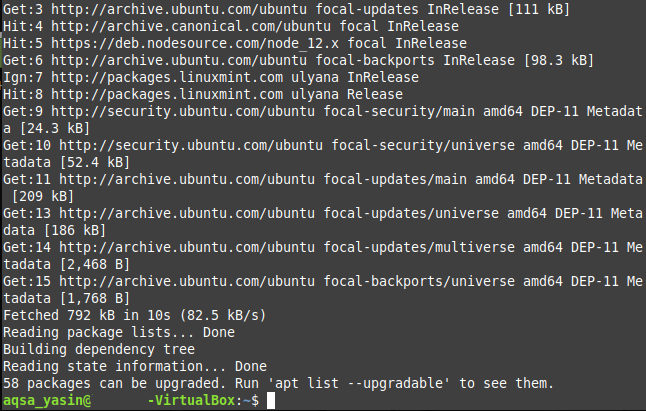
Before installing the usbutils package, it is highly recommended to update your Linux Mint 20 system to avoid hindrances during the installation. This can be done by executing the update command in the following manner:
This command can be seen in the image shown below:

Once your system has been updated, you will see the following output, as mentioned in the image on your terminal:
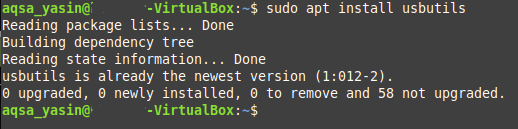
After successfully updating your system, you can now run the following command without any worries:
This command will install the usbutils package on your Linux Mint 20 system.

The successful installation of the said package will render the following output on your terminal:
Using the lsusb Command
The lsusb command provides information about the USB devices attached to your Linux system. This command may either be used individually or combined with various choices. For this section, we are only interested in running the lsusb command independently, i.e., without any additional parameters or options. Simply run the following command in your Linux Mint 20 terminal to do so:

Upon successful execution of this command, you will see all the information related to any USB buses and devices connected to your system, as in the following image:

Options Used with the lsusb Command
As mentioned previously, the lsusb command can also be used in conjunction with different options. These options include the following:
- -s: Displays information about any particular USB device, according to the device’s bus number and device number.
- -v: Shows more detailed information about the USB devices connected to your system.
- -D: Provides detailed information read from a specific USB device file.
- -t: Displays all the connected USB devices in the form of a tree or hierarchy.
In the examples given below, you will learn more about the usage of these options.
Example 1: Display a Specific USB Device
To display a specific USB device, you need to know two things about the device: its bus number and its device number. These two items can be determined simply by running the lsusb command alone, as discussed above. Once you know the bus and device numbers of the USB device, run the following command on your terminal:
Replace the BusNum and DeviceNum with the device’s bus number and device number, respectively. For the sake of demonstrating this method, we have used bus number 1 and port number 1, which you can verify in the image below:

After running this command, you will see the USB device, along with the specified bus number and device number on your terminal, as shown in the following image:

Example 2: Display Detailed Information about All USB Devices
To display every detail about all the USB devices that are connected to your system, run the following command in your terminal:
You can also see this command in the image below, for more clarity:

After this command is executed successfully, you will be able to see more details about all the USB devices connected to your system, as seen in the image below:

Example 3: Display Information about a Specific USB Device
As you may have noticed, in the method above, the output with the –v option was quite long. In some situations, you might want to have detailed information only about a single device, instead of having it for all the USB devices attached to your system. If this is the goal, then a detailed output about a single USB device can be achieved by executing the following command in your terminal:
Again, to run this command, you will need to know the bus number and device number of the specific USB device that you would like more information about from the device’s particular file. In this example, we have replaced the ‘BusNum’ with 001 and the ‘DeviceNum’ with 002, as shown in the image below:

After running this command, you will be able to see all the details about the specified USB device, read directly from the device’s file, as shown in the following image:

Example 4: Display All USB Devices in a Tree Structure
At times, you may also want to list down all the connected USB devices in the form of a hierarchy or a tree structure, for easier readability. This can be done by executing the following command in your terminal:
This command can also be seen in the image below:

Running this command will display all the USB devices that are connected to your system in the form of a tree structure, as shown in the following image:

Conclusion
This article gives you a detailed overview of the usage of the lsusb command in Linux Mint 20. Now, whenever you require more information about the USB devices attached to your system, you can conveniently make use of this command.
About the author
Aqsa Yasin
I am a self-motivated information technology professional with a passion for writing. I am a technical writer and love to write for all Linux flavors and Windows.
List USB Devices Linux
![]()
In the world of USB computer peripherals, almost everyone uses some sort of USB devices in their computer. These days there are USB webcams, USB hard drives, USB stick also known as PenDrive etc. Almost every device has a USB version of it. So if you’re using Linux, listing what USB device is connected to your system might be necessary at some point.
There are many programs and many ways to list USB devices on Linux.
In this article, I will show you how to list USB devices on Linux. I am using Ubuntu 18.04 Bionic Beaver for the demonstration, but these commands are available on every Linux distribution. So let’s get started.
Listing USB Devices using lsusb Command
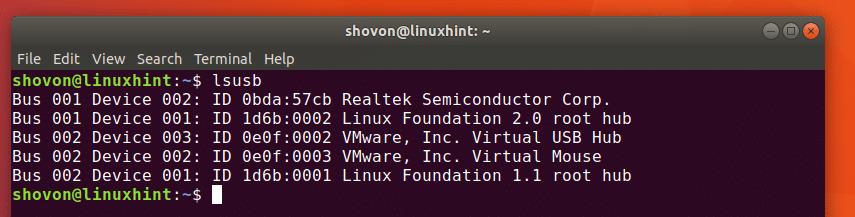
The widely used lsusb command can be used to list all the connected USB devices in Linux.

As you can see from the output of the lsusb command in the screenshot below, all the connected USB device is listed. The Bus ID, Device ID, USB ID, and a title is displayed in the output of lsusb command.
As you can see in the marked section of the screenshot below, Realtek Semiconductor Corp. with ID 0bda:57cb, this is my USB Webcam.
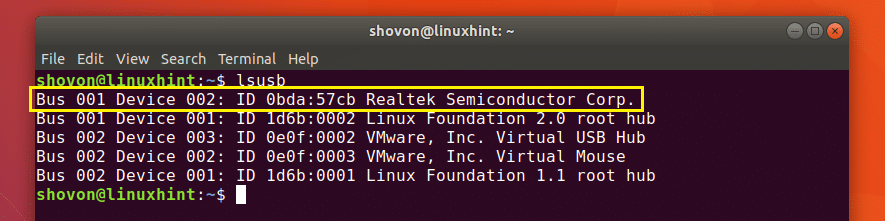
You can’t tell that it’s a Webcam by looking at the output of lsusb command, Can you? Nope! So how do I know this? It’s because I checked the output of the lsusb command before and after connecting the USB Webcam and once I compared the outputs, the newly added row is the USB device I connected. Plain! But there are ways to find out what the USB device is.
You can use the dmesg command to find out more information about the connected USB devices. The last connected USB device is the easiest to find with dmesg command. It is more widely used for debugging purpose. You will shortly see why.
You run dmesg command as follows:

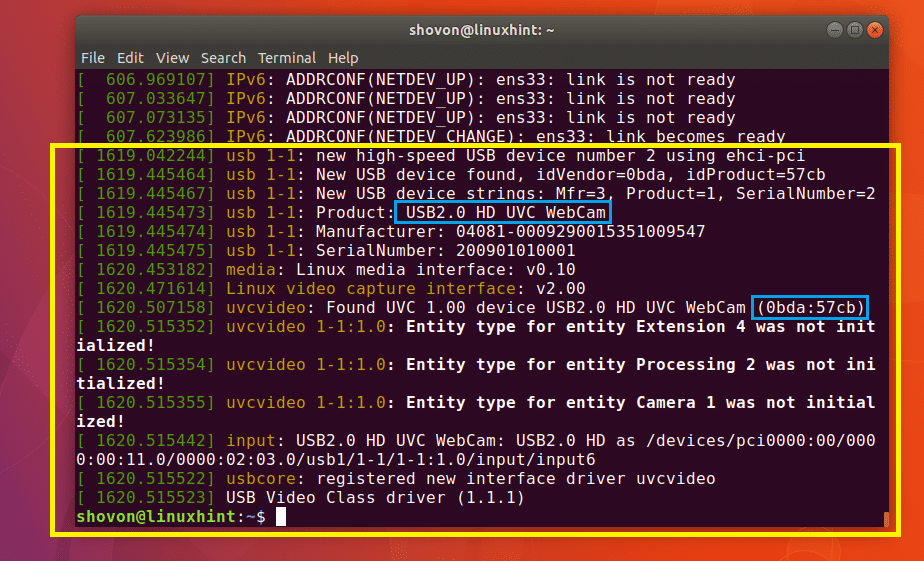
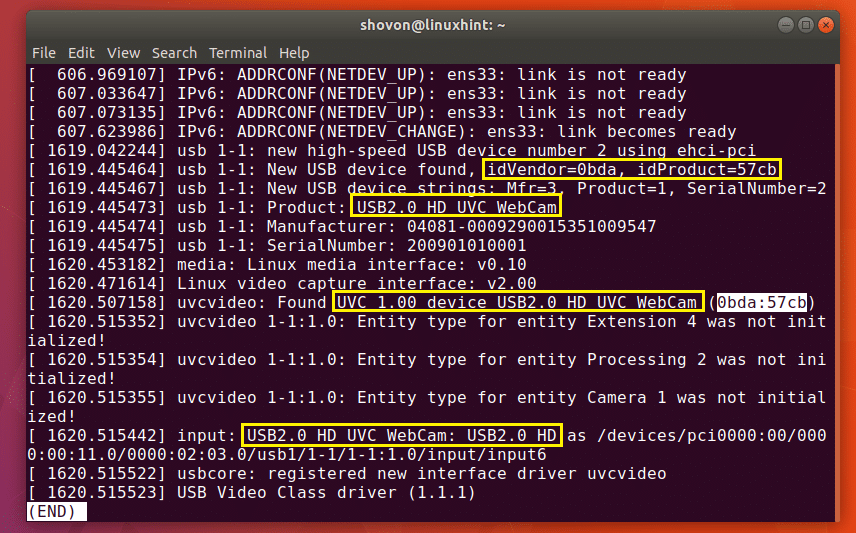
As you can see in the yellow marked box in the screenshot below, these are information about the USB device I connected last, which was my USB Webcam. You can see in one of the blue marked box, the USB device I connected is a HD UVC WebCam and its ID is 0bda:57cb.
By now you may have found out that the output of dmesg command is system log messages. Well yes, it is.
You can also search for a specific USB device by its ID in the dmesg system log.
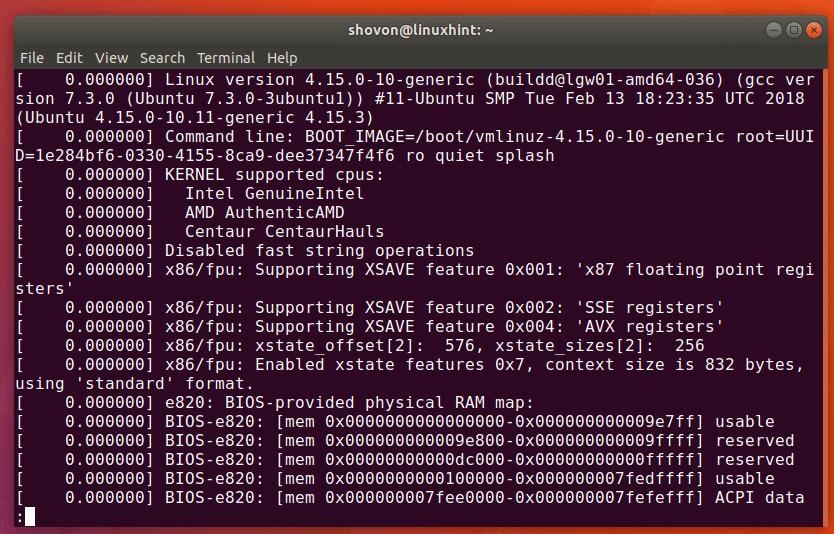
Run the following command to open the output of dmesg command with less text pager:

You should see the following window:
Now to search for a string, press / key on your keyboard. And you should the a / appear on the bottom of terminal window as marked in the screenshot below.
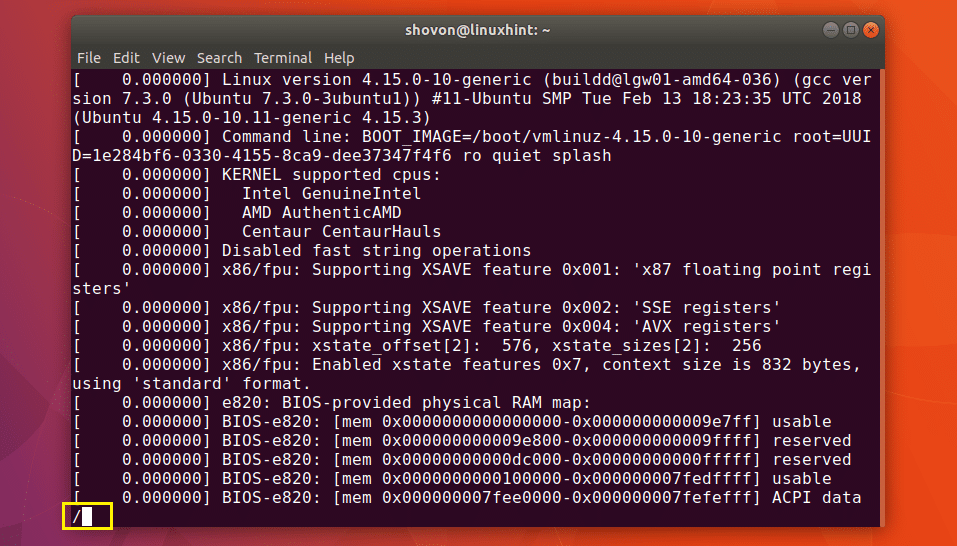
Now type in the USB device ID. For example, earlier when I listed the connected USB devices with lsusb command, one of the USB device had ID 0bda:57cb
Type in the USB Device ID and press . As you can see in the marked section of the screenshot below, the search string is marked white.
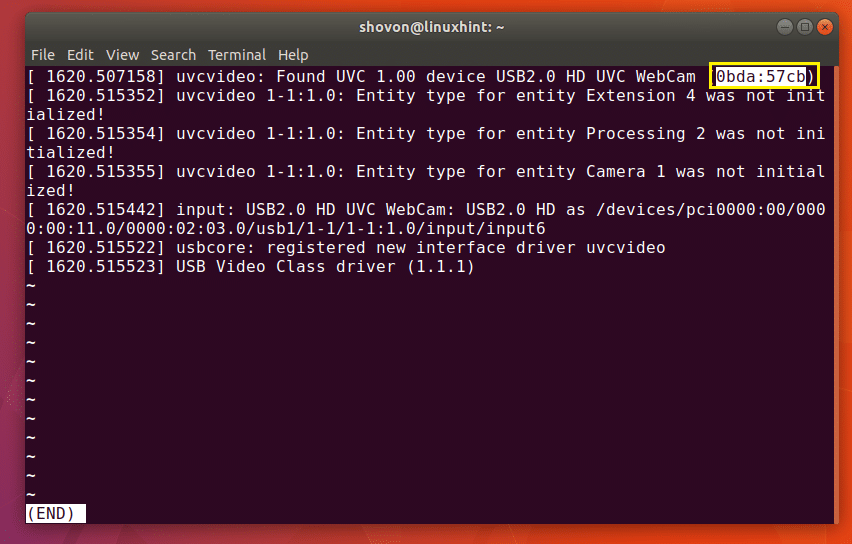
You may press and arrow keys to navigate up and down and read through it. You should find a lot of information about that USB device as you can see in the marked section of the screenshot below.
Listing USB devices with usb-devices Command
You can run the following command to list all the connected USB devices of your system:

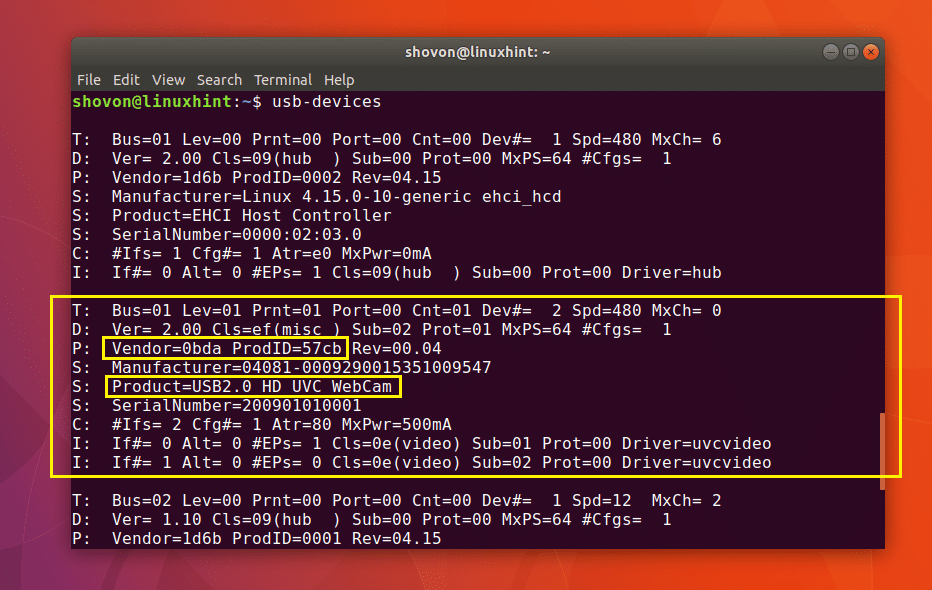
As you can see in the screenshot below, all the connected USB devices are listed. we can find out pretty much the same information as before with usb-devices command.
Listing Block USB Devices
If you want to list all the USB block storage devices, that is all the USB storage devices, then you can use the lsblk or fdisk command to do so.
Listing USB block storage devices with lsblk:
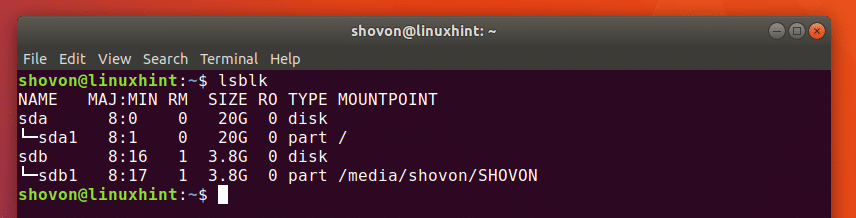
As you can see in the screenshot below, all the available block storage devices (including the USB block storage devices) are listed.
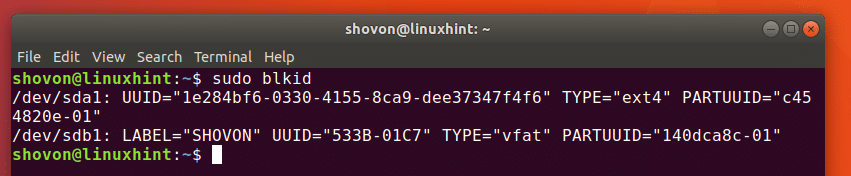
You can get almost the same information as lsblk command with blkid command. But you have to run it as root as follows:
You can also use fdisk command to list all the USB block storage devices as follows:
As you can see in the screenshot below, the connected block storage devices (including the USB devices) are listed.

That’s how you list all the USB devices on Linux. Thanks for reading this article.
About the author
Shahriar Shovon
Freelancer & Linux System Administrator. Also loves Web API development with Node.js and JavaScript. I was born in Bangladesh. I am currently studying Electronics and Communication Engineering at Khulna University of Engineering & Technology (KUET), one of the demanding public engineering universities of Bangladesh.