- Установка и использование 7-Zip в Linux
- Установка 7-Zip в Linux
- Установка 7-Zip в Ubuntu, Debian
- Установка 7-Zip в Fedora, CentOS
- Установка 7-Zip в ArchLinux
- Раcпаковка 7zip-архивов
- Распаковать в текущую директорию
- Распаковать в определенную директорию
- Распаковать без сохранения структуры директорий
- Создание 7zip-архива
- Упаковать один файл
- Упаковать несколько файлов
- Упаковать директорию и ее содержимое
- Добавить файлы в существующий архив
- Просмотр файлов в архиве
- Протестировать целостность архива
- Заключение
- How to Install Zip and Unzip in Linux
- How to Install Zip/Unzip in Debian/Ubuntu/Mint
- How to Install Zip/Unzip in RedHa/CentOS/Fedora
- How to Install Zip/Unzip in Arch/Manjaro Linux
- How to Install Zip/Unzip in OpenSUSE
- How To Install Zip and Unzip in Linux
- Install Zip/Unzip in Linux
- Leave a Comment Cancel reply
- VS Code Tutorials
Установка и использование 7-Zip в Linux
Формат 7-Zip впервые появился в 1999 году. Данный формат отличает высокая степень сжатия данных. По сравнению с ZIP степень сжатия 7-Zip может быть на 30-50% лучше. 7-Zip в основном используется среди пользователей Windows.
7-Zip нельзя использовать для создания резервных копий в Linux, так как формат не сохраняет информацию о правах доступа к файлам и данные о владельце.
В данной заметке мы рассмотрим, как установить поддержку 7-Zip в некоторых дистрибутивах Linux, а также как работать с 7zip-архивами.
Установка 7-Zip в Linux
Установка 7-Zip в Ubuntu, Debian
Для установки поддержки 7-Zip в Ubuntu и Debian, а также производных от них дистрибутивах (LinuxMint и др.), доступно три пакета:
- p7zip — базовая версия, которая поддерживает только архивы в формате .7z Представляет собой порт утилиты 7za.exe для POSIX систем.
- p7zip-full — полная версия, которая поддерживает различные алгоритмы сжатия при создании 7zip-архивов, а также другие форматы архивов. Установка данного пакета также обеспечивает поддержку 7-Zip в менеджере архивов File Roller, который используется в Ubuntu.
- p7zip-rar — отдельный модуль для p7zip, позволяющий распаковывать RAR-архивы.
Для установки 7-Zip в Ubuntu (Debian) вы можете установить пакет p7zip-full, а также p7zip-rar для поддержки RAR. Для этого выполните в терминале команду:
sudo apt install p7zip-full p7zip-rarПримечание: В новых версиях Ubuntu (например, в Ubuntu 18.04 и новее) 7-Zip автоматический поддерживается в файловом менеджере Nautilus. Можно создавать и распаковывать 7zip архивы.
Установка 7-Zip в Fedora, CentOS
В дистрибутивах Fedora, CentOS доступны пакеты p7zip, p7zip-plugins.
Для установки используйте следующую команду:
sudo yum install p7zip p7zip-pluginsУстановка 7-Zip в ArchLinux
Для установки поддержки 7-Zip в ArchLinux установите пакет p7zip, который доступен в официальных репозиториях дистрибутива.
Раcпаковка 7zip-архивов
Когда поддержка 7-Zip установлена, то для распаковки .7z файлов вы можете использовать графические утилиты (например, File Roller, Ark), средства файлового менеджера вашего дистрибутива (если есть поддержка), а также командую строку.
Для работы с 7-Zip архивами через командную строку используется команда 7z
Распаковать в текущую директорию
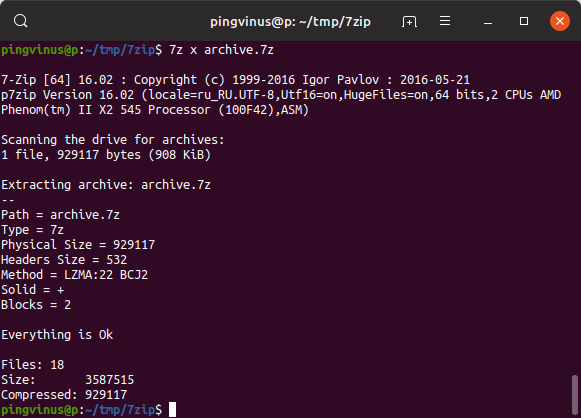
Чтобы распаковать .7z архив в текущую директорию с сохранением структуры директорий, которые находятся внутри архива, выполните в терминале команду:
Файлы архива будут распакованы в текущую директорию. Если в архиве содержатся директории, то при распаковке их структура будет сохранена.
Распаковать в определенную директорию
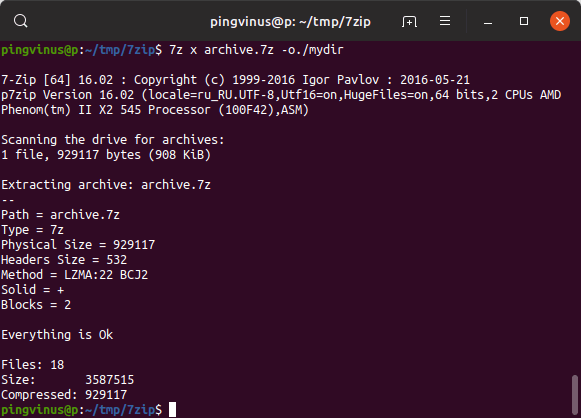
Чтобы распаковать архив в определенную директорию используется опция -o , за которой без пробела указывается путь до директории.
Распаковать без сохранения структуры директорий
Можно распаковать .7z архив, не сохраняя структуру директорий. То есть, если внутри архива есть директории и файлы в них, то при распаковке все файлы будут распакованы в одну директорию. Для этого используется опция (команда) e .
Создание 7zip-архива
Упаковать один файл
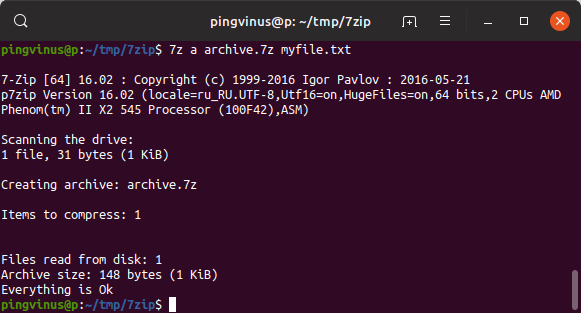
Чтобы создать .7z архив используется следующая команда.
В результате выполнения данной команды будет создан архив archive.7z , который содержит файл myfile.txt
Упаковать несколько файлов
Чтобы упаковать несколько файлов, перечислите их имена через пробел.
7z a archive myfile1.txt myfile2.txt myfile3.txtУпаковать директорию и ее содержимое
Вместо файла, при создании архива, можно указать путь до директории, которую необходимо сжать.
7z a archive.7z /path/to/mydirДобавить файлы в существующий архив
Если архив уже создан, то можно добавлять в него новые файлы. Для этого используется такая же команда, как и для создания архива, только в качестве названия архива указывается существующий файл.
7z a archive.7z myfile123.txtПросмотр файлов в архиве
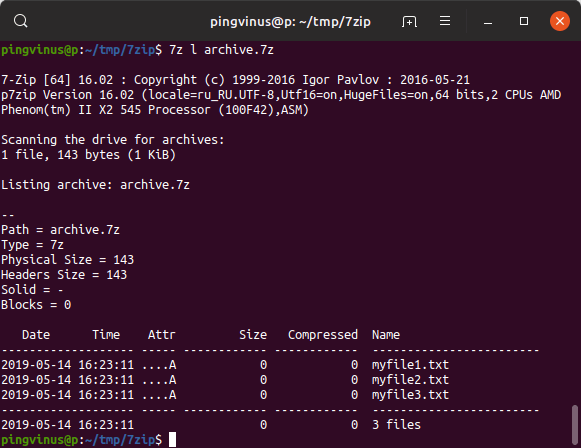
Для просмотра содержимого архива используется команда:
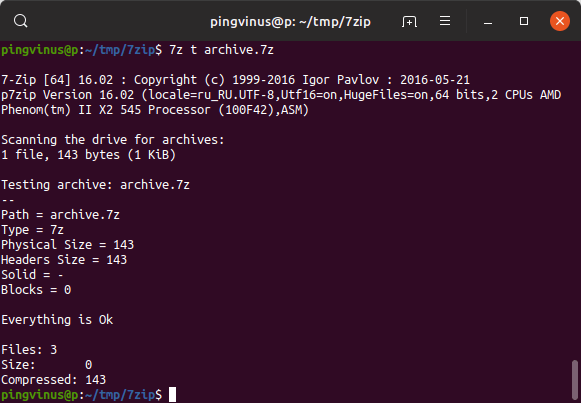
Протестировать целостность архива
Чтобы проверить целостность архива (проверить, что архив «не битый») используется команда:
Заключение
Мы рассмотрели как установить поддержку 7-Zip в популярных дистрибутивах Linux, а также рассмотрели базовые возможности работы с 7zip-архивами.
Утилита 7z имеет много возможностей. Чтобы получить дополнительную информацию можно использовать следующие команды:
How to Install Zip and Unzip in Linux
Zip is a command-line utility tool used for compressing files and folders. Compression of files & folders enables faster and more efficient transfer, storage, and emailing of files and folders. On the other hand, unzip is a utility tool that helps you decompress files and folders.
Benefits of zipping files:
- Compressed/zipped files take up less disk space, leaving you with more space to work with.
- Zipped files are easy to transfer including uploading, downloading, and attaching them on email.
- You can easily decompress zipped files on Linux, Windows, and even mac.
In this topic, we focus on how you can install the zip and unzip utilities on various Linux distributions.
On this page:
Let’s now see how you can install these useful command-line utilities.
How to Install Zip/Unzip in Debian/Ubuntu/Mint
For Debian-based distributions, install the zip utility by running the command.
After installation, you can confirm the version of zip installed using the command.
For the unzip utility, execute a similar command as shown.
Again, just like zip, you can confirm the version of the unzip utility installed by running.
How to Install Zip/Unzip in RedHa/CentOS/Fedora
Just like on Debian distributions, installing zip and unzip utilities on Redhat distros is quite simple.
To install zip, simply execute:
For the unzip utility, install it by running:
How to Install Zip/Unzip in Arch/Manjaro Linux
For Arch-based distros, run:
How to Install Zip/Unzip in OpenSUSE
On OpenSUSE, run the command below to install zip.
And to install unzip, execute.
$ sudo zypper install unzip
For more information, read our article that shows how to create and extract a zip files in Linux.
Conclusion
For newer versions of Linux distros such as Ubuntu 20.04 and CentOS 8, the zip and unzip utilities already come pre-installed and you are good to go.
We covered how to install zip and unzip command-line tools on various Linux distributions and the benefits that come with compressing files.
How To Install Zip and Unzip in Linux
In this tutorial, we will show you how to install Zip and Unzip on a Linux system.
Zip is a command-line utility tool used to compress files in Linux. File and folder compression allows for quicker and more reliable file and folder transfer, storage, and email. On the other hand, unzip is a utility tool that helps you decompress files and folders.
The zip format is hugely popular because it can:
- Compressed/zipped files so that they eat up less disk space.
- Zipped files are small enough to conveniently transfer over the internet, including uploading, downloading, and attaching them on email.
- Compress and decompress programs that supports zip format are available on major platforms such as Linux, Windows and macOS.
This article assumes you have at least basic knowledge of Linux, i.e. know how to use the shell. The installation is quite simple, demonstrated using a Linux user with root privileges, so that they can add ‘ sudo ‘ to the commands to get root privileges. We will show you through the step-by-step installation of the Zip and Unzip packages on Linux.
By default, zip and unzip are not installed in most Linux systems due to licensing restrictions. In this article, we’ll show you how to install zip and unzip in major Linux distributions.
Also check out: How to install HandBrake, Newman, Cisco Webex, vim in Ubuntu and Debian.
Install Zip/Unzip in Linux
Step 1. Update the system
Before doing anything else, the very first step you need to do is ensure that your system are up-to-date by running the following commands in the terminal.
For Ubuntu/Debian-based distro (Linux Mint, Pop! OS)
sudo pacman -S zip sudo pacman -S unzipStep 2. Installing zip/unzip using package managers.
Debian-based distributions use apt as their default package manager. So if you’re running either Debian, Ubuntu or Linux Mint, run the following commands to install the zip utility:
sudo apt install zip sudo apt install unzipSit back and wait a minute, until the installation is finished. The first line installs the zip package while the latter fetches the unzip utility for decompression. Once the installation completes, you can confirm the version number of zip using the command below.
For CentOS/Fedora system, install the zip with dnf package manager by running the command:
sudo dnf install zip sudo dnf install unzipFor Arch-based distros which use pacman package manager, run the following command to install zip and unzip:
sudo pacman -S zip sudo pacman -S unzipThe syntax for zipping a folder includes -r flag, which stands for recursive:
zip -r compressed_filename.zip folder_nameCode language: CSS (css)The syntax for unzipping a file is even simpler, just run unzip followed by the filename to decompress it.
unzip compressed_filename.zipCode language: CSS (css)We hope that the information above helped you successfully install zip and unzip on your Linux system. We’ve also covered other software installation for Linux, especifically Debian and Ubuntu, such as how to install Discord and Chromium in case you’re interested.
If you have any suggestion, please feel free to leave a comment below.
Leave a Comment Cancel reply
Hey! I’m Daan. I work as a SysAdmin in the Netherlands. Whenever I find free time, I write about IT, Linux, Open Source and hardware on this site.
VS Code Tutorials
- Automatic code indentation
- Comment out multiple lines
- Quickly duplicate a line in VSCode
- Create a comment block in VSCode
- Show hidden files in VSCode
- Quickly find a file in VSCode
- How to delete the whole line in VSCode
- Collapse code blocks in VSCode
- Enable/disable word wrap in VSCode
- Bind terminal commands to VSCode keyboard shortcuts
- VSCode Command Palette
- VSCode Format On Save
- VSCode «go to definition» guide
