- Package management with APT
- Introduction
- Commands
- Installation commands
- auto-apt
- Maintenance commands
- Removal commands
- Search commands
- Typical usage example
- Setting up apt-get to use a http-proxy
- Temporary proxy session
- APT configuration file method
- BASH rc method
- How to login a proxy user
- Useful additional packages
- Additional links
- Troubleshooting
- Обновление Ubuntu до новой версии
- Обновление Ubuntu до новой версии через Менеджер обновлений
- Шаг 1. Настройки обновления системы
- Шаг 2. Обновление пакетов (по необходимости)
- Шаг 3. Обновление Ubuntu до новой версии
- Обновление Ubuntu до новой версии через командную строку
- Шаг 1. Откройте терминал
- Шаг 2. Обновление Ubuntu до новой версии
Package management with APT

Package management via apt-get runs hand-in-hand with the /etc/apt/sources.list file. For information on editing or updating your sources list see SourcesList.
Introduction
This page describes how to handle the packages on your system using apt-get and related commands. For example, you can install a new package, remove an installed package, or update all installed packages to the latest versions.
Commands

- Example:
sudo apt-get install ubuntu-desktop
Installation commands
 Use the -s flag to simulate an action. For example: «apt-get -s install » will simulate installing the package, showing you what packages will be installed and configured. Use the -s flag to simulate an action. For example: «apt-get -s install » will simulate installing the package, showing you what packages will be installed and configured. |
auto-apt
This command runs
- You’re compiling a program and, all of a sudden, there’s an error because it needs a file you don’t have. The program auto-apt asks you to install packages if they’re needed, stopping the relevant process and continuing once the package is installed.
Maintenance commands
The same as the above, except add the «smart upgrade» checkbox. It tells APT to use «smart» conflict resolution system, and it will attempt to upgrade the most important packages at the expense of less important ones if necessary.
| «apt-get dist-upgrade» does not upgrade from a previous version of Ubuntu. For more information of upgrading from a previous version of Ubuntu see http://www.ubuntu.com/getubuntu/upgrading . |
du -sh /var/cache/apt/archives
Reconfigure the named package. With many packages, you’ll be prompted with some configuration questions you may not have known were there.
- For example:
dpkg-reconfigure fontconfig-config
echo " hold" | dpkg --set-selections
 This command may have the unintended side effect of preventing upgrades to packages that depend on updated versions of the pinned package. apt-get dist-upgrade will override this, but will warn you first. If you want to use this command with sudo, you need to use echo " hold" | sudo dpkg --set-selections not sudo echo " hold" | dpkg --set-selections. This command may have the unintended side effect of preventing upgrades to packages that depend on updated versions of the pinned package. apt-get dist-upgrade will override this, but will warn you first. If you want to use this command with sudo, you need to use echo " hold" | sudo dpkg --set-selections not sudo echo " hold" | dpkg --set-selections. |
echo " install" | dpkg --set-selections
Removal commands
This command completely removes a package and the associated configuration files. Configuration files residing in ~ are not usually affected by this command.
- + operator
- If you want to remove package1 and install package2 in one step:
dpkg -l | grep '^rc' | awk '' | xargs dpkg --purge
Search commands
This command determines which installed package owns
. It shows files from installed packages that match , with the name of the package they came from. Consider this to be a «reverse lookup» utility.  In order to use this command, the package dlocate must be installed on your system.
dpkg -L package | grep /usr/bin
For more information on apt-get, apt-cache and dpkg consult their manual pages by using the man command. These manuals will provide a wider scope of information in addition to all of the options that you can use with each program.
- Example:
Typical usage example
I want to feel the wind in my hair, I want the adrenaline of speed. So let’s install a racing game. But what racing games are available?
apt-cache search racing game
It gives me a lot of answers. I see a game named «torcs». Let’s get some more information on this game.
Hmmm. it seems interesting. But is this game not already installed on my computer? And what is the available version? Which repository is it from (Universe or Main)?
Ok, so now, let’s install it!
What is the command I must type in the console to launch this game? In this example, it’s straightforward («torcs»), but that’s not always the case. One way of finding the name of the binary is to look at what files the package has installed in «/usr/bin». For games, the binary will be in «/usr/games». For administrative programs, it’s in «/usr/sbin».
dpkg -L torcs | grep /usr/games/
The first part of the command display all files installed by the package «torcs» (try it). With the second part, we ask to only display lines containing «/usr/games/».
Hmmm, that game is cool. Maybe there are some extra tracks?
But I’m running out of space. I will delete the apt cache!
Oh no, my mother asked me to remove all games from this computer. But I want to keep the configuration files so I can simply re-install it later.
If I want to also remove config files :
Setting up apt-get to use a http-proxy
These are three methods of using apt-get with a http-proxy.
Temporary proxy session
This is a temporary method that you can manually use each time you want to use apt-get through a http-proxy. This method is useful if you only want to temporarily use a http-proxy.
Enter this line in the terminal prior to using apt-get (substitute your details for yourproxyaddress and proxyport).
export http_proxy=http://yourproxyaddress:proxyport
If you normally use sudo to run apt-get you will need to login as root first for this to work unless you also add some explicit environment settings to /etc/sudoers, e.g.
Defaults env_keep = "http_proxy https_proxy ftp_proxy"
APT configuration file method
This method uses the apt.conf file which is found in your /etc/apt/ directory. This method is useful if you only want apt-get (and not other applications) to use a http-proxy permanently.
gksudo gedit /etc/apt/apt.conf
Add this line to your /etc/apt/apt.conf file (substitute your details for yourproxyaddress and proxyport).
Acquire::http::Proxy "http://yourproxyaddress:proxyport";
BASH rc method
This method adds a two lines to your .bashrc file in your $HOME directory. This method is useful if you would like apt-get and other applications for instance wget, to use a http-proxy.
Add these lines to the bottom of your ~/.bashrc file (substitute your details for yourproxyaddress and proxyport)
http_proxy=http://yourproxyaddress:proxyport export http_proxy
Save the file. Close your terminal window and then open another terminal window or source the ~/.bashrc file:
Test your proxy with sudo apt-get update and whatever networking tool you desire. You can use firestarter or conky to see active connections.
If you make a mistake and go back to edit the file again, you can close the terminal and reopen it or you can source ~/.bashrc as shown above.
How to login a proxy user
If you need to login to the Proxy server this can be achieved in most cases by using the following layout in specifying the proxy address in http-proxy. (substitute your details for username, password, yourproxyaddress and proxyport)
http_proxy=http://username:password@yourproxyaddress:proxyport
Useful additional packages
Additional links
Troubleshooting
Обновление Ubuntu до новой версии

Помимо периодических обновлений пакетов в Ubuntu Linux, раз в полгода (в апреле и октябре) выходят новые версии дистрибутива. Версии нумеруются числами — 18.04, 18.10, 19.04, . которые означают год и месяц выхода дистрибутива.
Когда выходит новая версия дистрибутива, то у пользователей появляется возможность обновиться до этой версии.
В данной статье мы рассмотрим, как обновить Ubuntu Linux до новой версии. Мы рассмотрим два способа обновления системы:
- Используя графическую утилиту Менеджер обновлений.
- Используя командую строку (терминал).
Обновление Ubuntu до новой версии через Менеджер обновлений
Внимание: Процесс обновления Ubuntu до новой версии очень простой. Не пугайтесь количества скриншотов и текста ниже. Мы приводим возможные сообщения, которые могут появиться в процессе обновления.
Шаг 1. Настройки обновления системы

Откройте Лаунчер, нажав сочетание клавиш Super+A , и запустите утилиту Программы и обновления (Software & Updates).

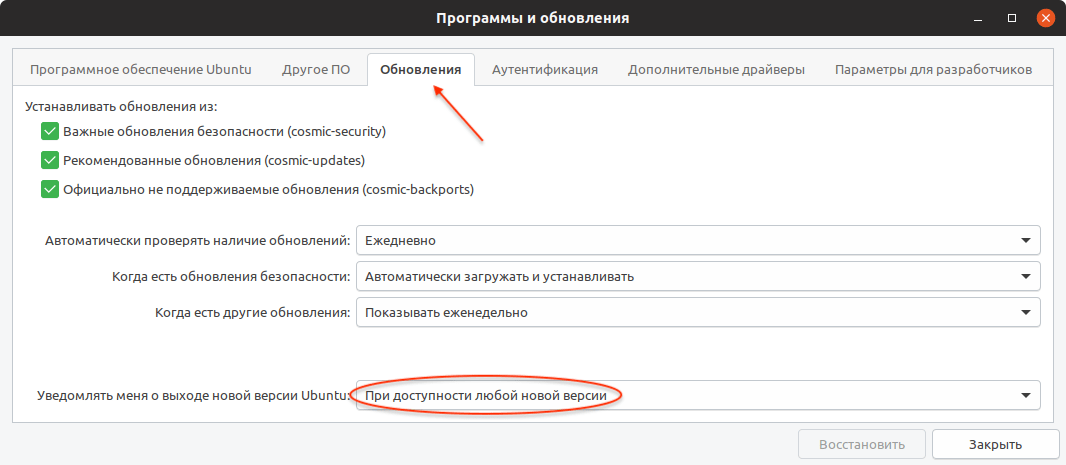
Откроется утилита Программы и обновления. Перейдите на вкладку Обновления и проверьте, что в пункт Уведомлять меня о выходе новой версии Ubuntu ( Notify me of a new Ubuntu version ) установлен в состояние При доступности любой новой версии ( For any new version ) , если нет, то выберите этот пункт. После этого закройте окно.
Шаг 2. Обновление пакетов (по необходимости)

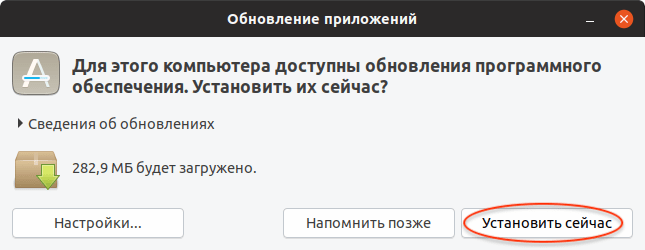
Запустите Менеджер обновлений Ubuntu. Его можно запустить из Лаунчера (нажав Super+A ) и выбрав иконку «Обновление приложений». Перед тем, как обновлять сам дистрибутив до новой версии, может потребоваться обновить пакеты в системе. Поэтому сначала может появиться следующее окно, с предложением обновить пакеты. Нажмите кнопку Установить сейчас , чтобы начать обновление пакетов.

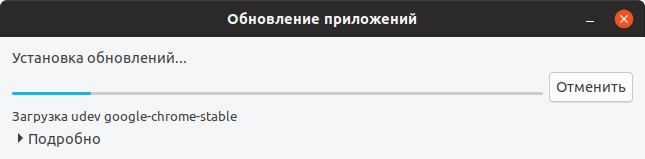
Появится окно для ввода пароля пользователя. Введите пароль. После этого начнется процесс обновления пакетов.
После того, как процесс обновления пакетов завершится, может появиться сообщение о необходимости перезагрузить компьютер. В таком случае перезагрузите компьютер.
Шаг 3. Обновление Ubuntu до новой версии
Снова, как и на предыдущем шаге, запустите Менеджер обновлений Ubuntu (Обновление приложений).
Примечание: Если вдруг снова появилось окно с предложением обновить пакеты, то это означает, что требуется обновить еще некоторые пакеты. Обновите их.

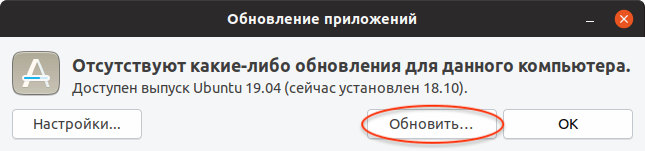
Если вышла новая версия дистрибутива Ubuntu, и ваша система может обновиться до нее, то появится следующее окно. Сообщение вида «Доступен выпуск Ubuntu 19.04 (сейчас установлен 18.10)» информирует вас о том, до какой версии Ubuntu будет обновлена текущая система. Нажмите кнопку Обновить ( Upgrade ) .
Появится запрос на ввод пароля пользователя. Введите пароль и нажмите кнопку Подтвердить .

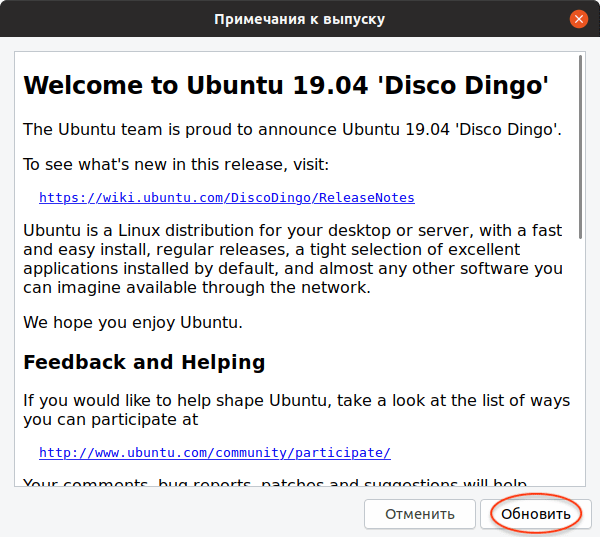
Появится окно с информацией о версии, до которой будет обновлена текущая система. Нажмите кнопку Обновить .

Начнется подготовка к обновлению системы.

В процессе подготовки может появиться сообщение, информирующее вас о том, что будут отключены некоторые PPA-репозитории (скорее всего вы их добавляли, когда устанавливали какие-нибудь программы). Вы сможете их включить после установки.

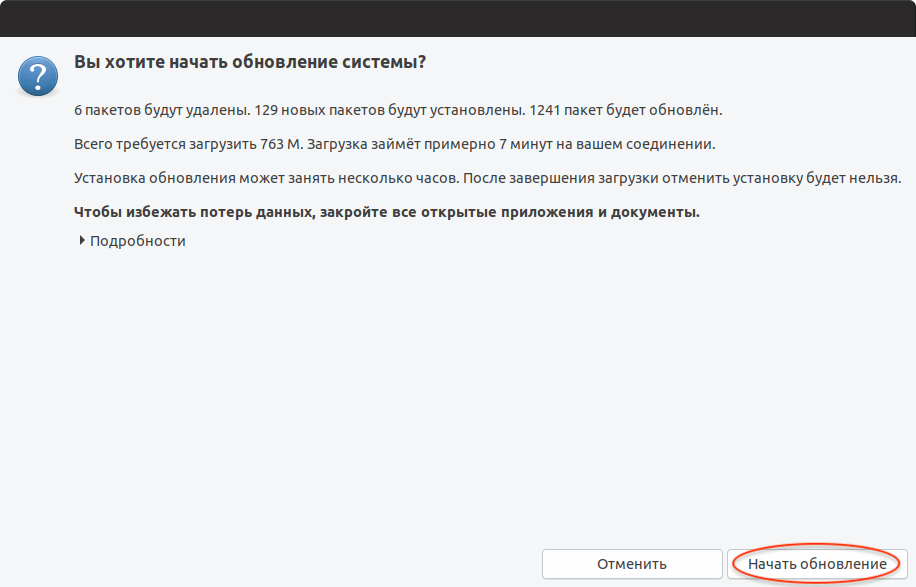
Откроется информационное окно, в котором будет показано сколько пакетов будет обновлено и установлено, и сколько мегабайт данных требуется загрузить в процессе обновления. На данном этапе рекомендуется закрыть все открытые программы. Нажмите кнопку Начать обновление .
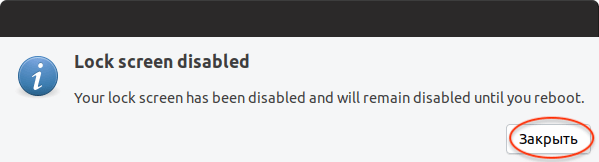
Появится еще одно информационное сообщение. Ознакомьтесь с информацией и закройте его.

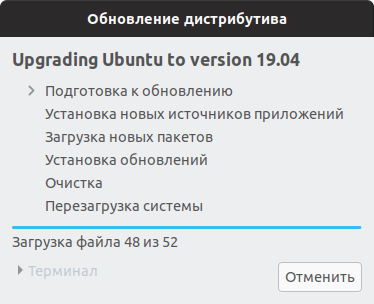
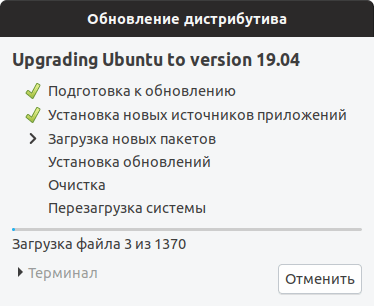
Начнется процесс обновления Ubuntu до новой версии. Процесс может занимать довольно долгое время.

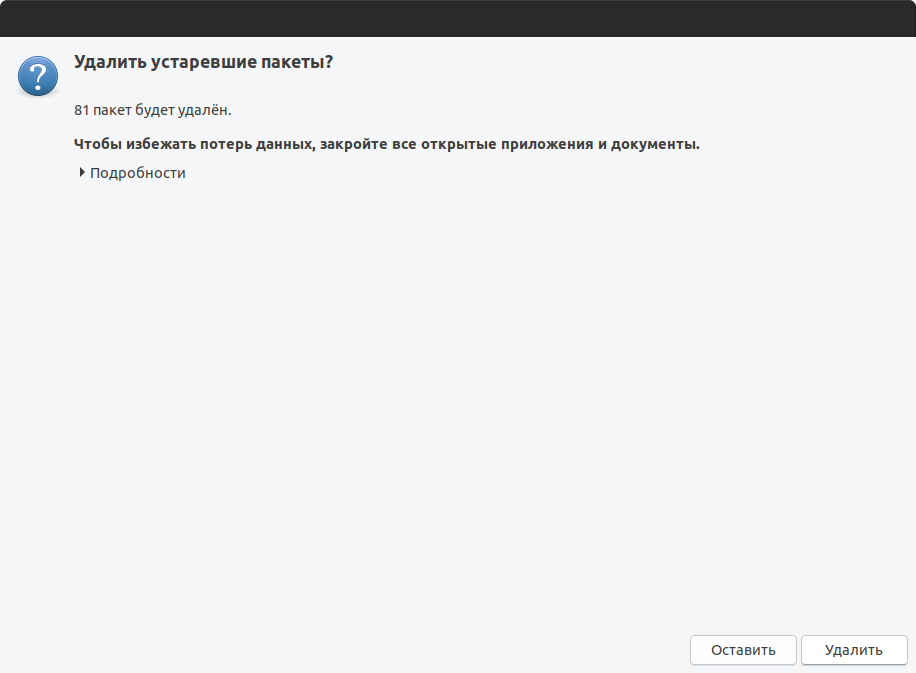
Почти в конце обновления может появиться следующее окно. В нем указано, что будут удалены некоторые пакеты, которые больше не нужны. Нажмите кнопку Удалить .

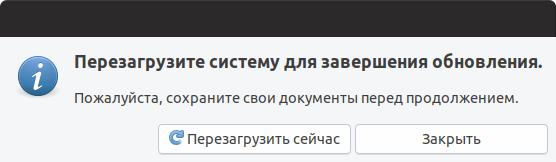
Когда обновление будет выполнено, появится окно с сообщением о необходимости перезагрузить компьютер. Нажмите кнопку Перезагрузить сейчас .
Начнется перезагрузка компьютера. После перезагрузки вы попадете в новую версию Ubuntu.
Обновление Ubuntu до новой версии через командную строку
Шаг 1. Откройте терминал
Откройте терминал. Это можно сделать, нажав сочетание клавиш Ctrl+Alt+T .
Шаг 2. Обновление Ubuntu до новой версии
Обновление Ubuntu до новой версии выполняется в 2 этапа. Сначала нужно обновить все пакеты до новой версии и только потом обновлять саму систему.
Для обновления пакетов, введите в терминале последовательно следующие команды.
sudo apt update sudo apt full-upgradeЕсли будут найдены обновления каких-либо пакетов, то эти пакеты должны быть обновлены.
Теперь выполним непосредственно обновление системы до новой версии. Выполняем команду:
Если будет найдена новая версия Ubuntu, то появится соответствующее сообщение. Нажмите Enter , чтобы начать обновление. Процесс обновления может занять продолжительное время.
В процессе обновления могут выдаваться запросы, на которые вы должны отвечать Да (Yes) или Нет (No). Если у вас русская версия системы, то чтобы ответить Да, нужно ввести д и нажать Enter . Для английской версии систему, нужно ввести y и нажать Enter .
После завершения обновления перезагрузите компьютер.