- Installation
- Preinstalled
- Linux
- BSD
- Illumos
- Manual installation
- Как установить среду рабочего стола Mate на Debian 11 | Debian 10
- Установите среду рабочего стола Mate на Debian 11 Bullseye
- Шаг 1. Прежде чем мы установим какое-либо программное обеспечение, важно убедиться, что ваша система обновлена, выполнив следующие apt команды в терминале:
- Шаг 2. Установка среды рабочего стола Mate в Debian 11.
- Шаг 3. Доступ к среде рабочего стола Mate в Debian.
- Установка среды рабочего стола MATE на Ubuntu
- Установка рабочего стола MATE на Ubuntu
- Использование рабочего стола MATE в Ubuntu
- Возвращение в GNOME после Mate
- Удаление рабочего стола MATE из Ubuntu
- How to Install MATE Desktop in Ubuntu 22.04 or 20.04
- Update and Upgrade Package Index
- Install MATE Desktop Environment on Ubuntu
- Install Ubuntu MATE Desktop (ubuntu-mate-desktop package)
- Install Ubuntu MATE Minimal Desktop (ubuntu-mate-core package)
- Install MATE Desktop (using tasksel)
- Troubleshooting
- Thick black borders around windows on MATE remote desktop
- Conclusion
Installation
This page describes how to install the MATE Desktop Environment.
Preinstalled
We recommend to use a distribution that already comes with the MATE Desktop pre-installed, such as (but not limited to):
Linux
- Fedora MATE-Compiz Spin
- Ubuntu MATE
- Linux Mint — MATE
- Debian: In the net-install installer choose the “Mate Desktop Environment” option. Alternatively you can use a live install image (scroll down and choose the iso file with “mate” in its name).
- Manjaro MATE Community Edition
- Solus
If you already have a Linux distribution installed and want to switch to the MATE Desktop without reinstalling everything, this is still possible. Almost every distribution include the MATE Desktop in their official repositories.
BSD
Illumos
Manual installation
We now describe how to install the MATE Desktop manually from the official repositories of your distribution. The manual install is useful, if you have a distribution without a graphical interface and decided to use the MATE Desktop.
Manual install
If you already have a Desktop Environment installed (like Gnome, KDE, …) and install MATE on top of that, there can be conflicting programs (window manager, screensaver, control centre, …). You can try to remove the old Desktop Environment, but keep in mind that this is not the recommended way to get the best MATE experience.
Install the MATE Desktop Environment with
If you want some extras (such as a menu-editor) you can replace the above command with
You can still install the extras later on if you are not sure about it right now.
If you do not have a desktop environment installed already you might want to install a graphical display manager.
After rebooting you should be able to login to the MATE Desktop.
If you do not want a display manager, you can add mate-session to ~/.xinitrc file.
exec ck-launch-session mate-session If you have authorization problems (e.g. when mounting disks), try adding dbus-launch after ck-launch-session .
Install the MATE Desktop Environment with
Install the MATE Desktop Environment with
Install the MATE Desktop Environment with
Как установить среду рабочего стола Mate на Debian 11 | Debian 10

В этом руководстве мы покажем вам, как установить Mate Desktop Environment на Debian 11. Для тех из вас, кто не знал, MATE Desktop Environment — это продолжение GNOME 2. Оно известно своей легкостью, быстротой и стабильностью при работе. в операционных системах Linux. Он обеспечивает привлекательную и интуитивно понятную среду рабочего стола, что делает его простым и удобным для взаимодействия.
В этой статье предполагается, что у вас есть хотя бы базовые знания о Linux, вы знаете, как использовать оболочку, и, самое главное, вы размещаете свой сайт на собственном VPS. Установка довольно проста и предполагает, что вы работаете с учетной записью root, в противном случае вам может потребоваться добавить ‘ sudo ‘ к командам, чтобы получить привилегии root. Я покажу вам пошаговую установку Mate Desktop Environment на Debian 11 (Bullseye).
Установите среду рабочего стола Mate на Debian 11 Bullseye
Шаг 1. Прежде чем мы установим какое-либо программное обеспечение, важно убедиться, что ваша система обновлена, выполнив следующие apt команды в терминале:
sudo apt update sudo apt upgrade sudo apt install gnupg2
Шаг 2. Установка среды рабочего стола Mate в Debian 11.
По умолчанию Mate Desktop доступен в базовом репозитории Debian 11. Теперь выполните следующую команду ниже, чтобы установить Mate Desktop Environment в вашу систему Debian:
### Install MATE Desktop basic ### sudo apt install mate-desktop-environment### Install MATE Desktop with extras ### sudo apt install mate-desktop-environment-extras
После завершения установки вы перезагрузите систему Debian 11, используя следующую команду:
Шаг 3. Доступ к среде рабочего стола Mate в Debian.
После перезагрузки системы вы снова вошли в систему и выбрали MATE Desktop на экране входа в систему. Вы получите следующие результаты в вашей системе:

Поздравляем! Вы успешно установили Mate Desktop . Благодарим вас за использование этого руководства для установки последней версии среды рабочего стола Mate в Debian 11 Bullseye. Для получения дополнительной помощи или полезной информации мы рекомендуем вам посетить официальный веб-сайт Mate Desktop .
Установка среды рабочего стола MATE на Ubuntu

Думаю, вы уже слышали о среде рабочего стола MATE. Ответвление теперь уже устаревшей классической GNOME 2, MATE обеспечивает классический рабочий стол с новейшими приложениями. Вскоре после своего выпуска, MATE стал считаться одним из лучших окружений рабочего стола для Linux.
О популярности MATE desktop можно догадаться по тому, что Ubuntu MATE является одним из официальных в Ubuntu. Даже Linux Mint имеет версию MATE.
На самом деле мы будем использовать пакеты, предоставленные командой Ubuntu Mate, для простой установки среды рабочего стола MATE в Ubuntu 18.04 и других версиях. Пожалуйста, обратите внимание, что этот же метод НЕ применим для установки MATE в Linux Mint.
Установка рабочего стола MATE на Ubuntu
Перед тем, как продолжить установку MATE, я должен сказать вам, что иногда среды рабочих столов конфликтуют друг с другом.
Возможно и такое, что вы столкнётесь с парой проблем совместимости, если вернётесь в GNOME.
Итак, вас предупредили, давайте посмотрим, как установить MATE в Ubuntu.
В Ubuntu теперь есть MATE Desktop в репозиториях, так что нет необходимости добавлять PPA.
Перед установкой нового окружения рабочего стола убедитесь, что наша система полностью обновлена.
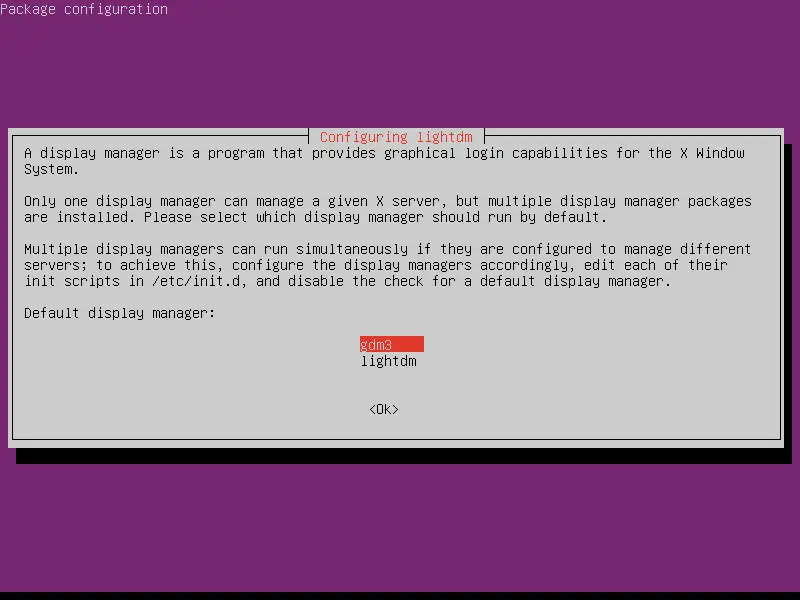
sudo apt update && sudo apt upgrade -y sudo apt install ubuntu-mate-desktopНа последнем этапе установки у вас будет выбор между «lightdm» и «gdm3», которые являются экранами входа в систему для MATE и GNOME соответственно. Выберите lightdm для полного погружения в MATE.
Использование рабочего стола MATE в Ubuntu
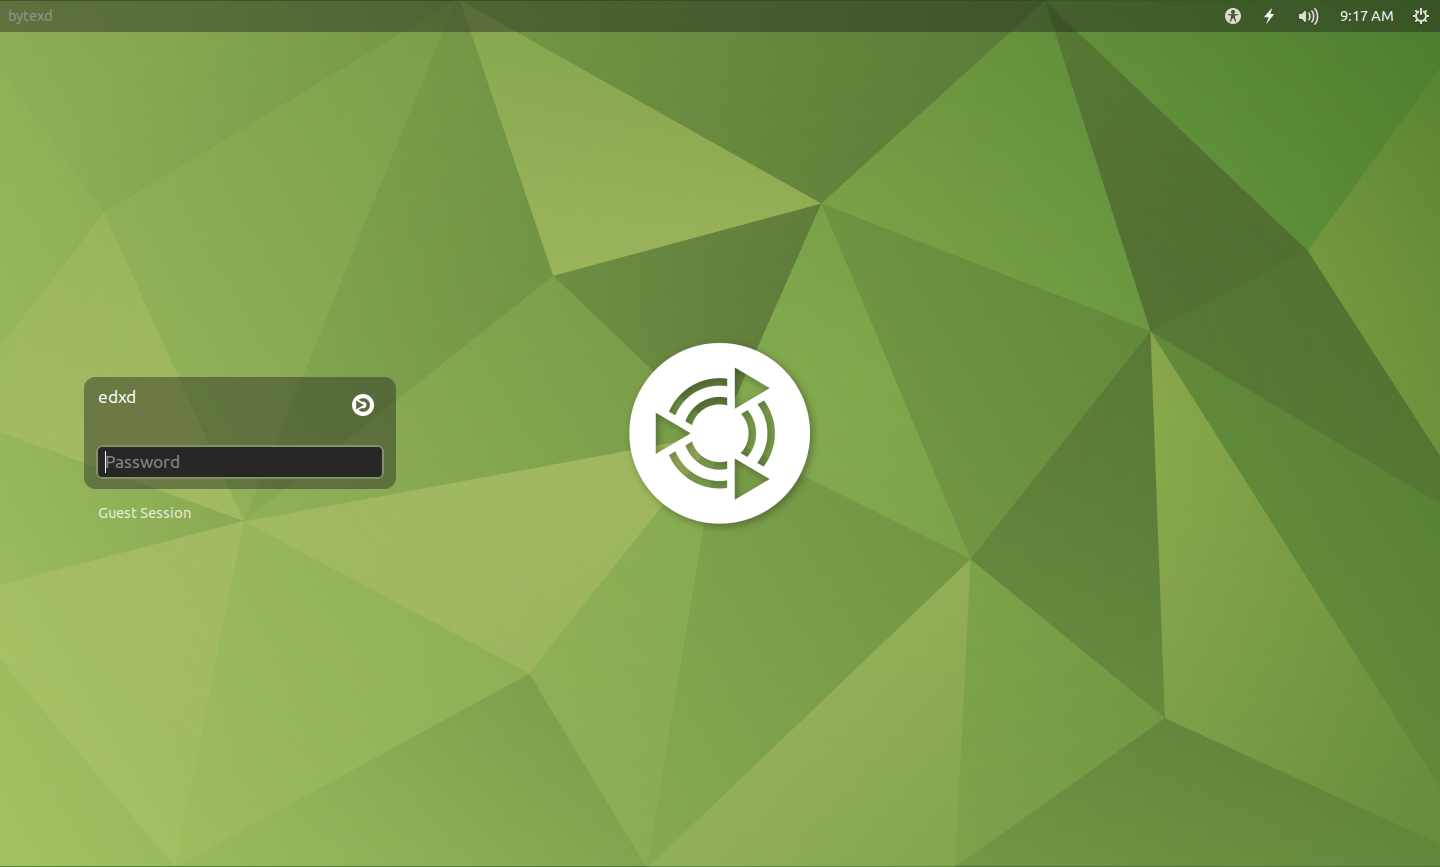
После установки рабочего стола MATE выйдите из системы. На экране входа в систему нажмите на знак Ubuntu, редом с именем пользователя, чтобы выбрать среду рабочего стола.
Здесь вы увидите множество вариантов. Выберите MATE для использования среды рабочего стола MATE:

Выберите MATE и введите свой обычный пароль, после чего вы войдете в среду рабочего стола MATE. Вот как это выглядело на моем ноутбуке. Мне очень понравился фон Ubuntu MATE.

В моем кратком тестировании я не нашел никаких видимых проблем с MATE, поскольку я много чего не пробовал. Опыт прошел гладко и никаких глюков не было замечено.
Возвращение в GNOME после Mate
Если вы хотите переключиться между MATE и GNOME, выйдите из системы. Затем, используя ту же самую подсказку, которую мы использовали для выбора MATE, выберите Ubuntu (по умолчанию).

Удаление рабочего стола MATE из Ubuntu
Ладно! Допустим, вы попробовали MATE, и вам это окружение рабочего стола не понравилось. Возникает вопрос, как удалить MATE из Убунту? Для этого мы будем использовать команды apt remove следующим образом:
sudo apt remove -y ubuntu-mate-desktop mate-* ubuntu-mate-* plymouth-theme-ubuntu-mate-* lightdm sudo apt autoremove -y sudo apt install --reinstall -y gdm3Это удалит (почти) все пакеты MATE. Так что теперь вы даже не увидите фон Ubuntu MATE во время выхода из системы.
После этого мы перезагрузим нашу систему, чтобы полностью восстановить ее обратно в Ubuntu DE по умолчанию, т.е. GNOME
Вы пробовали установить MATE в Ubuntu 18.04? Каков ваш опыт работы с ним? Если у вас возникли проблемы или вопросы, не стесняйтесь оставлять комментарии.
How to Install MATE Desktop in Ubuntu 22.04 or 20.04

MATE is a GNOME-based desktop environment that provides a modern, intuitive, and attractive desktop for users. MATE is a fork of GNOME 2 that uses the GTK+ 3 toolkit.
GNOME 3 caused controversy when it was first released due to its radical change in design from GNOME 2. As a result MATE was forked from GNOME 2 to address some of the design decisions made in GNOME 3 that were not popular with some users, who felt that GNOME 3 was too difficult to use and that it removed too many features that they were used to.
MATE was created as a more traditional desktop environment that would be more familiar to users of GNOME 2.
Linus Torvalds, the creator of the Linux Kernel, also criticized GNOME 3.0, saying “The developers have apparently decided that it’s ‘too complicated’ to actually do real work on your desktop, and have decided to make it really annoying to do“ 1 Source: Linus Torvalds Ditches GNOME For Xfce . He abandoned GNOME for a while but returned to using it later on, thanks to some of the available extensions that can be used to fix its shortcomings 2 Source: Linus Torvalds switches back to Gnome 3.x desktop .
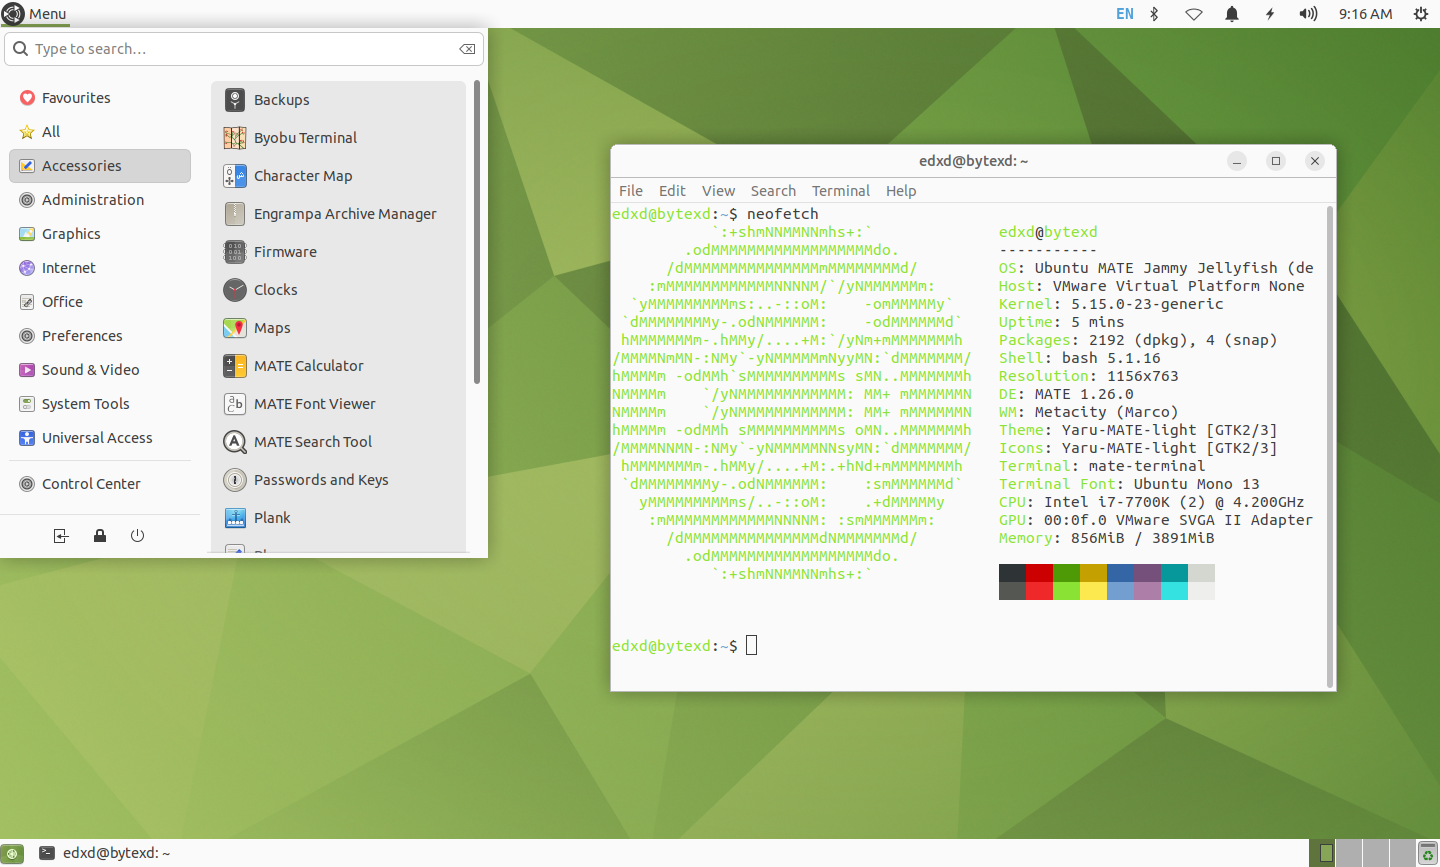
Some notable default applications included in MATE are Caja (file manager), Pluma (text editor), Atril (document viewer), Engrampa (archive manager), Eom (image viewer), Mate Terminal.
MATE is a good choice for a desktop environment for users who want a traditional desktop interface with a few modern features.
Some disadvantages of MATE are that it is not as up-to-date as some other desktop environments, such as GNOME 3 or KDE Plasma. Additionally, MATE is not as widely used as some other desktop environments, so it may not have as many applications or features as other environments.
As far as resource usage goes, MATE is not as lightweight as some other desktop environments, such as LXDE or Xfce. However, it is still relatively lightweight compared to GNOME 3 or KDE Plasma.
You can learn more about MATE from the official website.
In this tutorial we’ll be installing the MATE desktop environment on an Ubuntu 20.04 or 22.04 machine.
Table of Contents
Update and Upgrade Package Index
Before proceeding to install MATE on Ubuntu, first make sure you have your packages upgraded to their latest versions. There are some instances where you may get errors when trying to install it without having everything up to date.
sudo apt update && sudo apt upgrade
Install MATE Desktop Environment on Ubuntu
We’ll cover two easy to install MATE on Ubuntu. By installing the ubuntu-mate-desktop or by using the tasksel utility.
Install Ubuntu MATE Desktop (ubuntu-mate-desktop package)
To install Ubuntu MATE Desktop just run:
sudo apt install ubuntu-mate-desktop
The installation size, which includes packages and dependencies, has about 3.4GB on a fresh Ubuntu server install.
You may be asked to select a display manager during the install – usually between gmd3 and lightdm. I usually prefer lightdm but you can choose whichever you prefer.
After the installation process is finished, you may have to reboot.
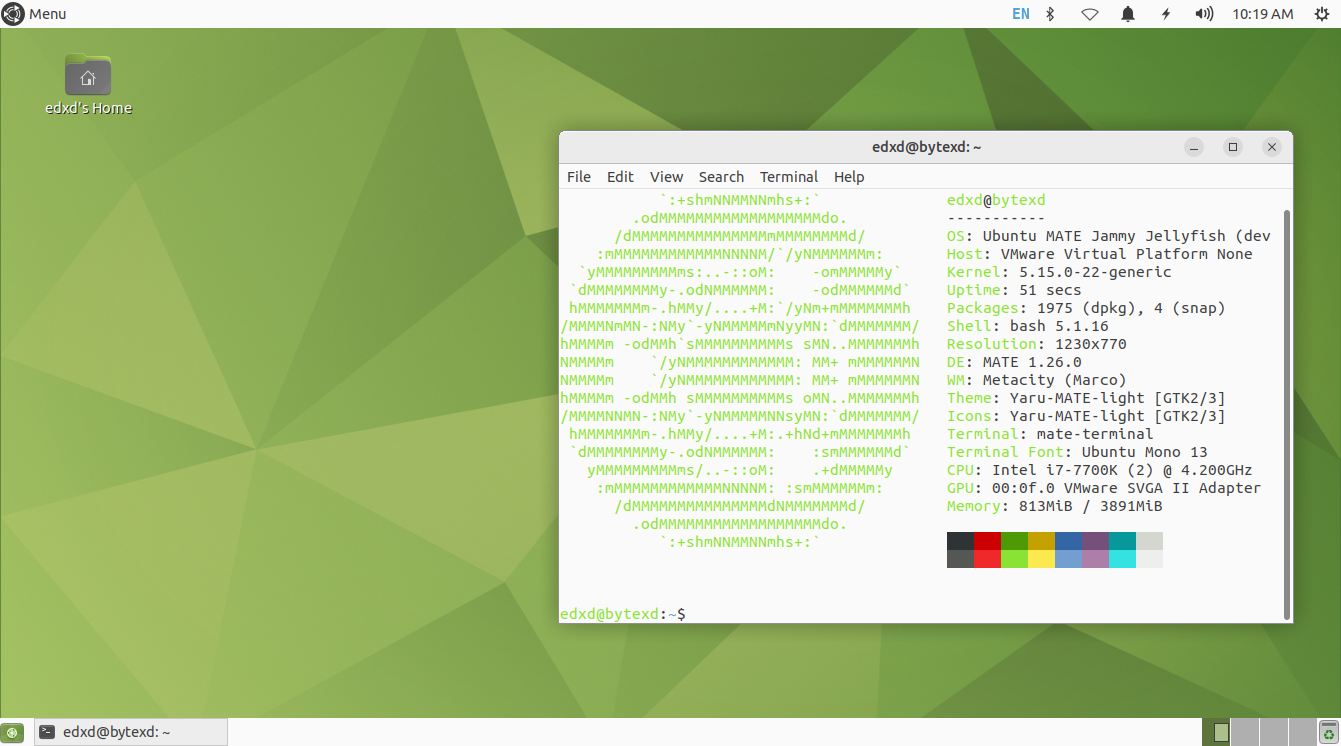
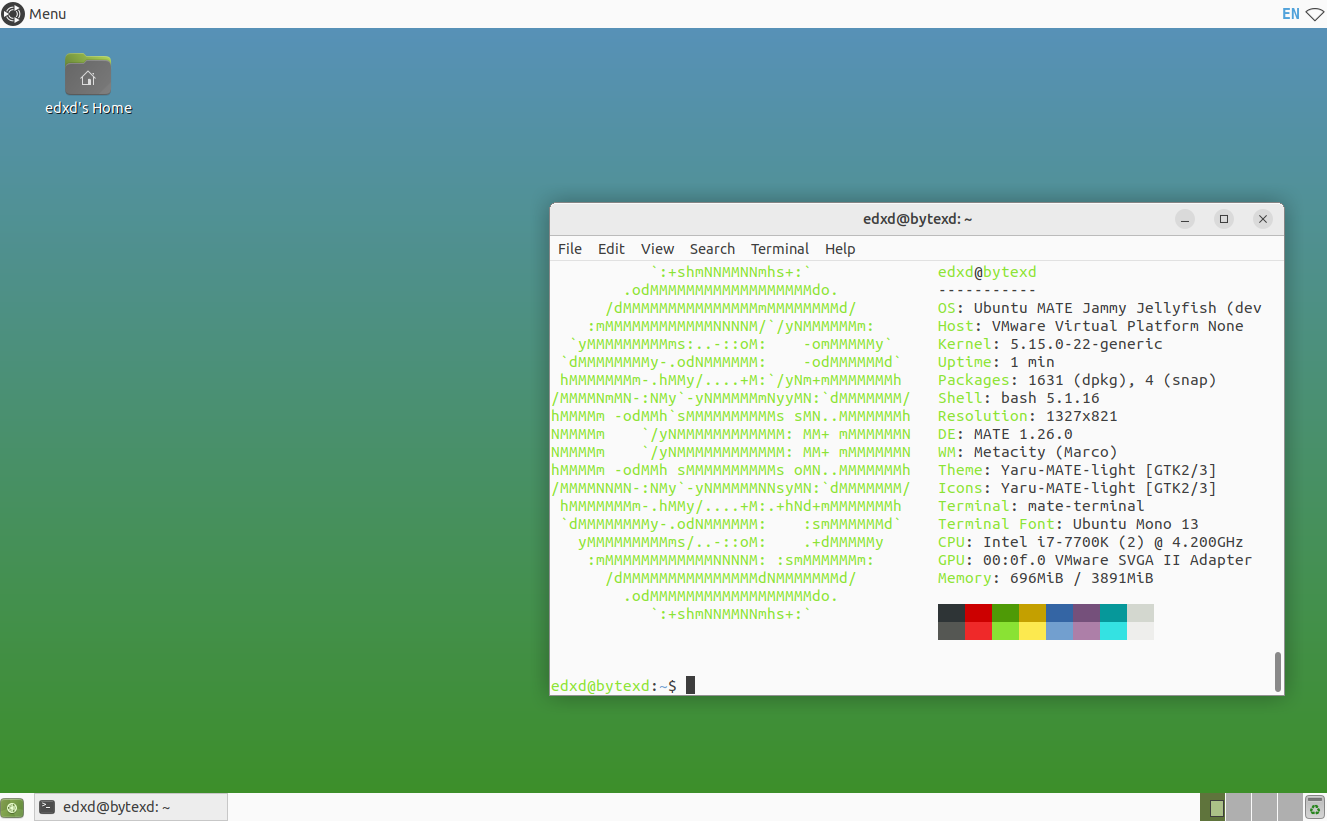
This is what MATE looks like on an Ubuntu 22.04 machine.
Install Ubuntu MATE Minimal Desktop (ubuntu-mate-core package)
The Ubuntu MATE minimal desktop is a stripped down version of the full MATE desktop. It contains mainly the core applications required to run the Ubuntu MATE deskop environment, without some pre-installed applications that you’d typically have on a full desktop. You can check out the differences in pre-installed applications here.
To install the MATE minimal desktop just run the following command:
sudo apt install ubuntu-mate-core
The installation size, which includes core packages and dependencies, has about 2.7GB on a fresh Ubuntu server install.
This is what MATE minimal looks like after installed on a fresh Ubuntu server:
Install MATE Desktop (using tasksel)
Tasksel is a utility that allows us to install some software collections more easily.
First install tasksel by running:
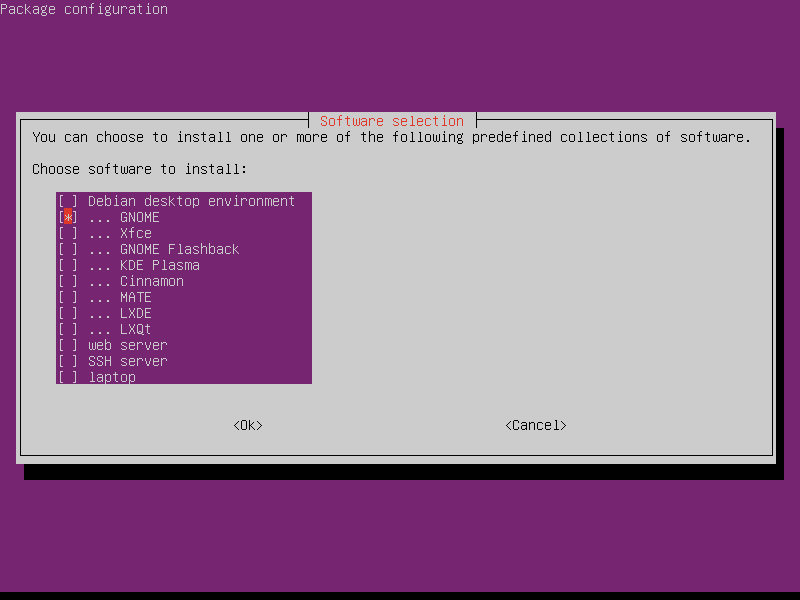
You should be presented with an interactive screen from which you can select the software collections you want to install, among which there are some of the most popular desktop environments, including MATE.
Important Note: On Ubuntu 22.04 it seems that, at the time of writing, we’re offered less software than Ubuntu 20.04, when using tasksel. I don’t know the reason for this.
I’d recommend using a different method to install MATE on Ubuntu 22.04 at this time. But on Ubuntu 20.04 it should work just fine.

This is how Ubuntu 22.04 looks like with MATE installed. Some applets seem to be missing by default, such as the clock, and the tray in the taskbar. There are probably other differences as well.
Troubleshooting
Thick black borders around windows on MATE remote desktop
This can happen when you’re using MATE over remote desktop software, like X2Go, VNC, and others.
To easily fix this you can install and use mate-tweak .
sudo apt install mate-tweak
Now you’ll find MATE Tweak in your applications.

Open it and in the left sidebar select “Windows” and under Window manager select Marco (No compositor) instead of Marco (built-in: Xpresent). That should fix it.
Conclusion
In this tutorial we covered how to install the MATE desktop environment on an Ubuntu machine, in its full and minimal versions, by installing the corresponding packages via the command like and using the tasksel utility.
If you have any questions or feedback feel free to leave us a comment and we’ll get back to you as soon as we can.