Как установить AppImage
В операционной системе Windows мы довольно часто используем портативные программы. Это программы которые не требуют установки, сохраняют конфигурационные файлы при себе и запускаются независимо от установленных в системе компонентов. Их возможности могут быть очень полезны при создании флешек восстановления, тестирования нового программного обеспечения или просто установки новых программ, которых пока еще нет в репозиториях.
Для Linux был придуман формат портативных программ AppImage. Одна программа состоит из одного файла образа, в котором находятся все необходимые для ее работы библиотеки, конфиги и сама программа. Конфигурация сохраняется по прежнему в домашней папке пользователя. В этой статье мы рассмотрим как запустить и установить AppImage в Linux.
Что такое AppImage?
Фактически программа AppImage представляет собой ISO образ, содержащий всё необходимое для запуска программы, упакованный специальным способом со включённым битом исполняемости. Для запуска программ не нужно ничего устанавливать достаточно скачать образ, сделать его исполняемым и запускать. А благодаря тому, что все библиотеки находятся внутри образа, программу можно использовать в большинстве дистрибутивов Linux. Также такой способ подходит для запуска тестовых программ, которые требуют особые зависимости, но вы можете не засорять систему и просто скачать программу одним файлом.
Многие разработчики начали использовать AppImage для своих приложений потому что это удобно и больше нет необходимости создавать отдельные пакеты приложений для каждого дистрибутива.
Где взять AppImage?
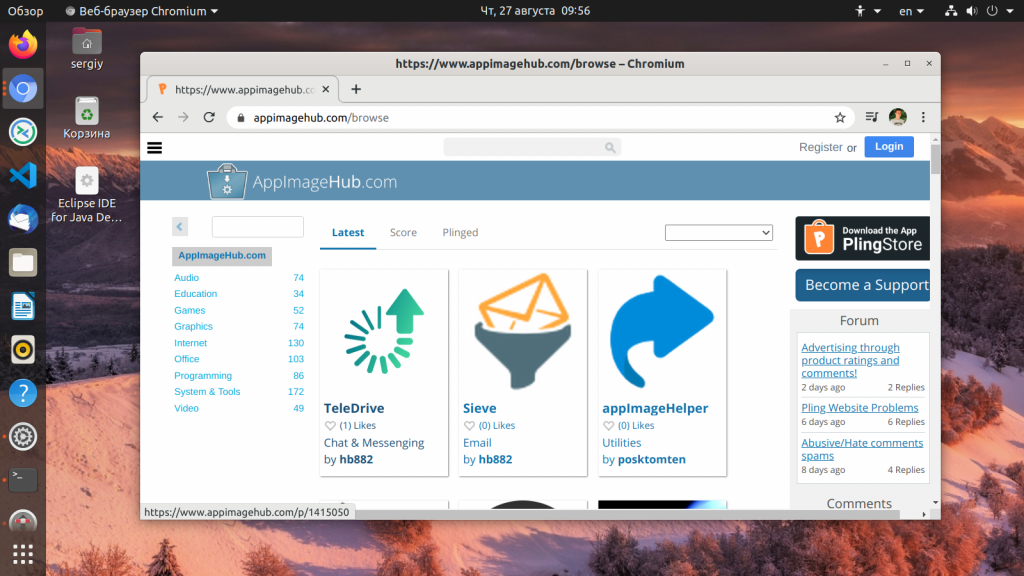
На официальном сайте AppImage есть список программ, распространяемых таким образом. Небольшую коллекцию программ AppImage можно найти на этом сайте. Здесь находятся программы собранные их разработчиками и сторонними пользователями. Здесь есть популярные браузеры, медиаплееры и текстовые редакторы и другие утилиты:
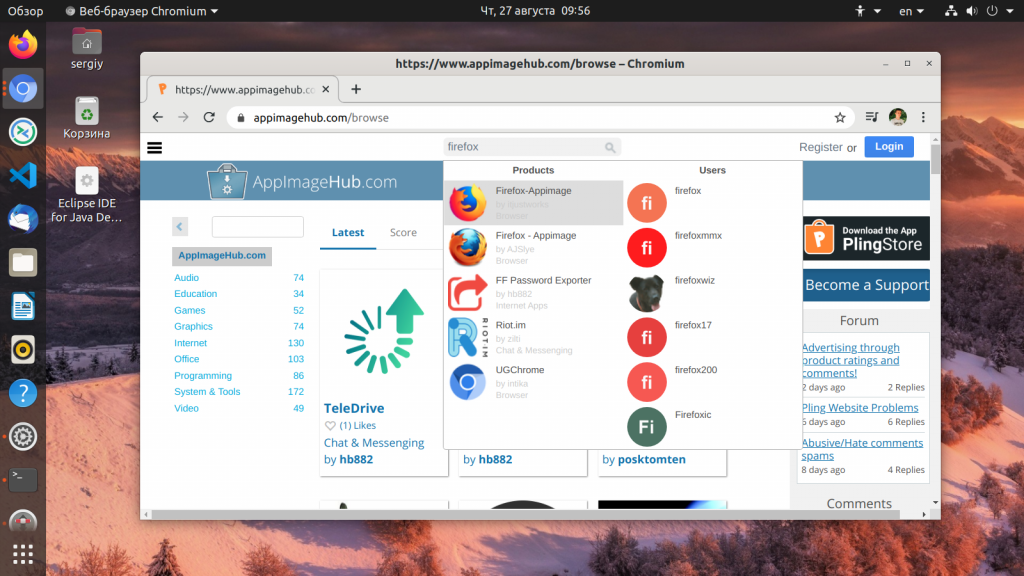
На сайте есть поиск, поэтому вы можете попытаться найти нужную программу:
Чтобы скачать программу, вам нужно перейти на вкладку Files, затем выбрать подходящую версию и просто кликнуть по ней.

Но не только здесь можно найти программы в формате AppImage, некоторые разработчики сами распространяют свои продукты в этом формате, например известный видеоредактор OpenShot и многие другие.
Как запустить и установить AppImage?
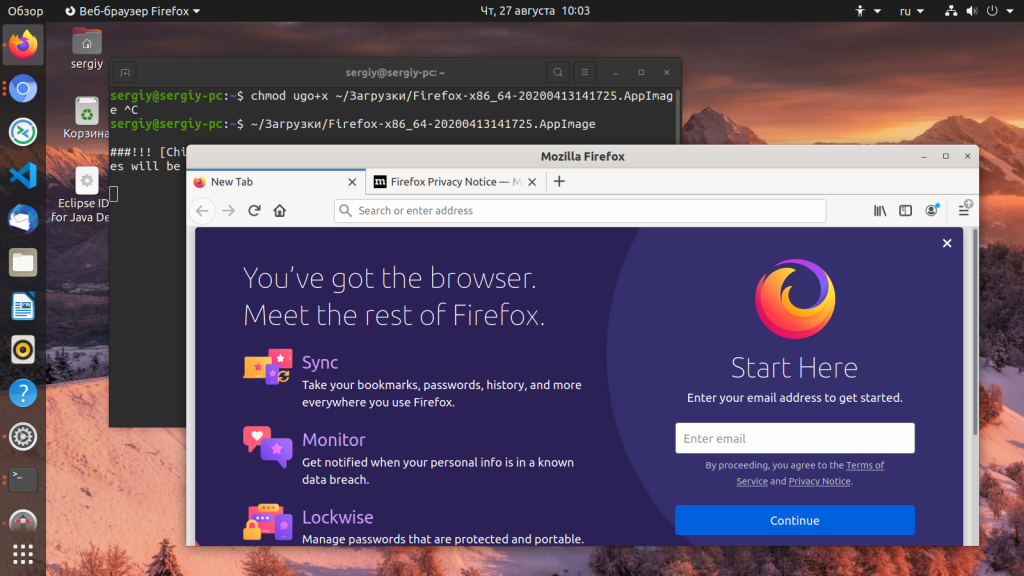
После окончания загрузки файла AppImage осталось сделать файл исполняемым. Чтобы сделать это в терминале, например, для Firefox, выполните:
chmod ugo+x ~/Загрузки/Firefox-x86_64-20200413141725.AppImage
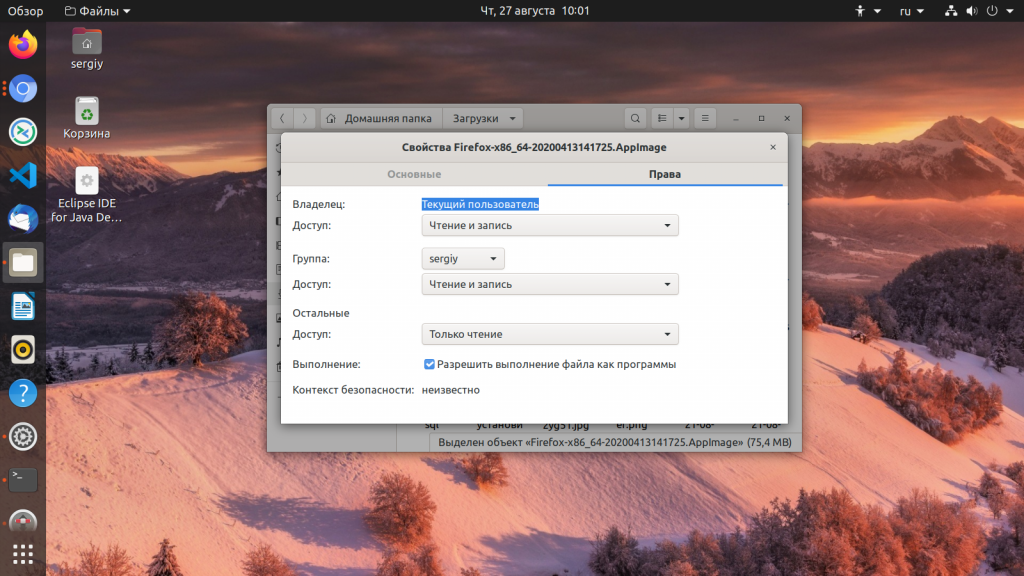
Аналогично можно всё сделать через графический интерфейс, откройте контекстное меню для файла, выберите Свойства, а затем на вкладке Права установите флажок напротив Разрешить выполнение файла как программы:
И можно запускать выполнение:
Как видите, программа полностью работает, и теперь её можно записать на флешку и пробовать в другом дистрибутиве.
Поскольку AppImage — это портативные программы многих интересует, как их всё таки установить в систему чтобы программой было удобно пользоваться. Файлы AppImage можно разместить в папках ~/Applications/ или ~/.local/bin/ или ~/bin/, а затем просто создать ярлык для удобного запуска. Разместить его можно в ~/.local/share/applications/, это папка в которой находятся локальные ярлыки пользователя. Например для Firefox в папке ~/bin/ ярлык будет выглядеть так:
[Desktop Entry]
Version=1.0
Name=Firefox
Comment=Start AppImage Firefox Browser
Exec=~/bin/Firefox-x86_64-20200413141725.AppImage
Icon=/usr/share/icons/hicolor/128×128/apps/firefox.png
Terminal=false
Type=Application
Для создания ярлыков в графическом интерфейсе вы можете использовать пакет gnome-panel и утилиту gnome-desktop-item-edit.
Выводы
Портативные программы Linux — это очень спорная технология. С одной стороны это очень удобно, потому что можно распространять софт поддерживаемый любым дистрибутивом, решается проблема с зависимостями, но с другой, такой способ распространения программ может повлечь за собой увеличение количества вирусов для Linux, ведь минимальное распространение вирусов обусловлено тем, что все программы устанавливаются из небольшого количества надежных и хорошо проверенных источников. А как вы считаете? Нужны ли Portable программы в Linux? Будете ими пользоваться? Напишите в комментариях!
Обнаружили ошибку в тексте? Сообщите мне об этом. Выделите текст с ошибкой и нажмите Ctrl+Enter.
Running AppImages
This page shows how a user can run AppImages, on their favorite distribution using the desktop environment tools or via the terminal. Also, it explains the concept of desktop integration, and presents tools that can be used for this purpose.
Download, make executable, run
It’s quite simple to run AppImages. As the heading says, just download them, make them executable and run them. This can either be done using the GUI or via the command line.
Information on how to run AppImages was moved into our Quickstart page.
Please see How to run an AppImage for more information.
Mount or extract AppImages
To inspect the contents of any AppImage, it is possible to either mount them without running them, or extract the contents to a directory in the current working directory..
Mount an AppImage
AppImages can be mounted in the system to provide read-only access for users to allow for inspecting the contents.
To mount an AppImage temporarily, you have two options. The easiest way to do so is to call AppImages with the special parameter —appimage-mount , for example:
> my.AppImage --appimage-mount /tmp/mount_myXXXX # now, use another terminal or file manager to inspect the contents in the directory printed by --appimage-mount
The AppImage is unmounted when the application called in the example is interrupted (e.g., by pressing Ctrl + C , closing the terminal etc.).
This is only available for type 2 AppImages. Type 1 AppImages do not provide any self-mounting mechanism. To mount type 1 AppImages, use mount -o loop .
This method is to be preferable, as other methods have some major disadvantages explained below.
Another way to mount AppImages is to use the normal mount command toolchain of your Linux distribution. Mounting and unmounting devices, files, images and also AppImages requires root permissions. Also, you need to provide a mountpoint. Please see the following example:
> mkdir mountpoint > sudo mount my.AppImage mountpoint/ # you can now inspect the contents > sudo umount mountpoint/
> mkdir mountpoint > my.AppImage --appimage-offset > 123456 > sudo mount my.AppImage mountpoint/ -o offset=123456 # you can now inspect the contents > sudo umount mountpoint/
Note that the number 123456 is just an example here, you will likely see another number.
AppImages mounted using this method are not unmounted automatically. Please do not forget to call umount the AppImage as soon as you don’t need it mounted any more.
If an AppImage is not unmounted properly, and is moved to a new location, a so-called “dangling mount” can be created. This should be avoided by properly unmounting the AppImages.
Type 2 AppImages which are mounted using the —appimage-mount parameter are not affected by this problem!
There is currently no way to use the former method without calling the target AppImage. This might not always be appropriate, e.g., if the AppImage is not trustworthy.
The AppImage team is working on implementing a mount option in appimagetool . Please see the related GitHub issue for progress on this.
Extract the contents of an AppImage
An alternative to mounting the AppImages is to extract their contents. This allows for modifying the contents. The resulting directory is a valid AppDir , and users can create AppImages from them again using appimagetool .
Analog to mounting AppImages, there is a simple commandline switch to extract the contents of type 2 AppImages without external tools. Just call the AppImage with the parameter —appimage-extract . This will cause the runtime to create a new directory called squashfs-root , containing the contents of the AppImage’s AppDir .
Type 1 AppImages require the deprecated tool AppImageExtract to extract the contents of an AppImage. It’s very limited functionality wise, and requires a GUI to run. It creates a new directory in the user’s desktop directory.
There is currently no way to use the former method without calling the target AppImage. This might not always be appropriate, e.g., if the AppImage is not trustworthy.
The AppImage team is working on implementing a mount option in appimagetool . Please see the related GitHub issue for progress on this.
Integrating AppImages into the desktop
AppImages are standalone bundles, and do not need to be installed. However, some users may want their AppImages to be available like distribution provided applications. This primarily involves being able to launch desktop applications from their desktop environments’ launchers. This concept is called desktop integration.
appimaged
appimaged is a daemon that monitors the system and integrates AppImages. It monitors a predefined set of directories on the user’s system searching for AppImages, and integrates them into the system using libappimage .
More information on appimaged can be found in appimaged .
AppImageLauncher
AppImageLauncher is a helper application for Linux distributions serving as a kind of “entry point” for running and integrating AppImages. It makes a user’s system AppImage-ready™.
AppImageLauncher must be installed into the system to be able to integrate into the system properly. It uses technologies that are independent from any desktop environment features, and therefore should be able to run on most distributions.
After install AppImageLauncher, you can simply double-click AppImages in file managers, browsers etc. You will be prompted whether to integrate the AppImage, or run it just once. When you choose to integrate your AppImage, the file will be moved into the directory ~/Applications . This helps reducing the mess of AppImages on your file system and prevents you from having to search for the actual AppImage file if you want to e.g., remove it.
To provide a complete solution for managing AppImages on the system, AppImageLauncher furthermore provides solutions for updating and removing AppImages from the system. These functions can be found in the context menus of the entries in the desktop’s launcher.
More information about AppImageLauncher can be found in AppImageLauncher .