- Как установить Linux используя Virtualbox
- How to Install a Linux Virtual Machine on Windows 10
- Can you run a Linux virtual machine on Windows 10
- Make sure your PC is capable of running a Linux VM
- How to install a Linux VM on Windows 10
- How to backup and restore Linux VM in Hyper-V
- How to backup and restore Linux VM step by step
- Summary
- How to create an Ubuntu VM on Windows 10
- Install Hyper-V
- Create an Ubuntu virtual machine on Windows 10
Как установить Linux используя Virtualbox
Если вы работаете на Windows версии ниже 10 или хотите получить изолированную операционную систему Linux, да ещё и с графическим окружением, то можно воспользоваться сторонним бесплатным программным продуктом под названием VirtualBox.
Общая информация о технологии виртуализации
- Инсталлятор Oracle VM VirtualBox для Windows Hosts Ссылка на скачивание: Download Oracle VM VirtualBox
- Образ операционной системы Ubuntu Linux в формате ISO Ссылка на скачивание: Download Ubuntu Desktop
Для начала необходимо установить и запустить приложение VirtualBox.

Нажимаем кнопку «Создать», выбираем из списка тип операционной системы «Linux», если нет своих предпочтений по дистрибутиву, то выбираем версию «Ubuntu» 32 или 64 битной архитектуры, а название можно ввести любое.

Указываем объём оперативной памяти выделенной под виртуальную систему. Рекомендованный объём составляет 1024 MB.

Указываем объём дискового пространства выделенного под виртуальную систему. Рекомендованный объём составляет 10 GB.
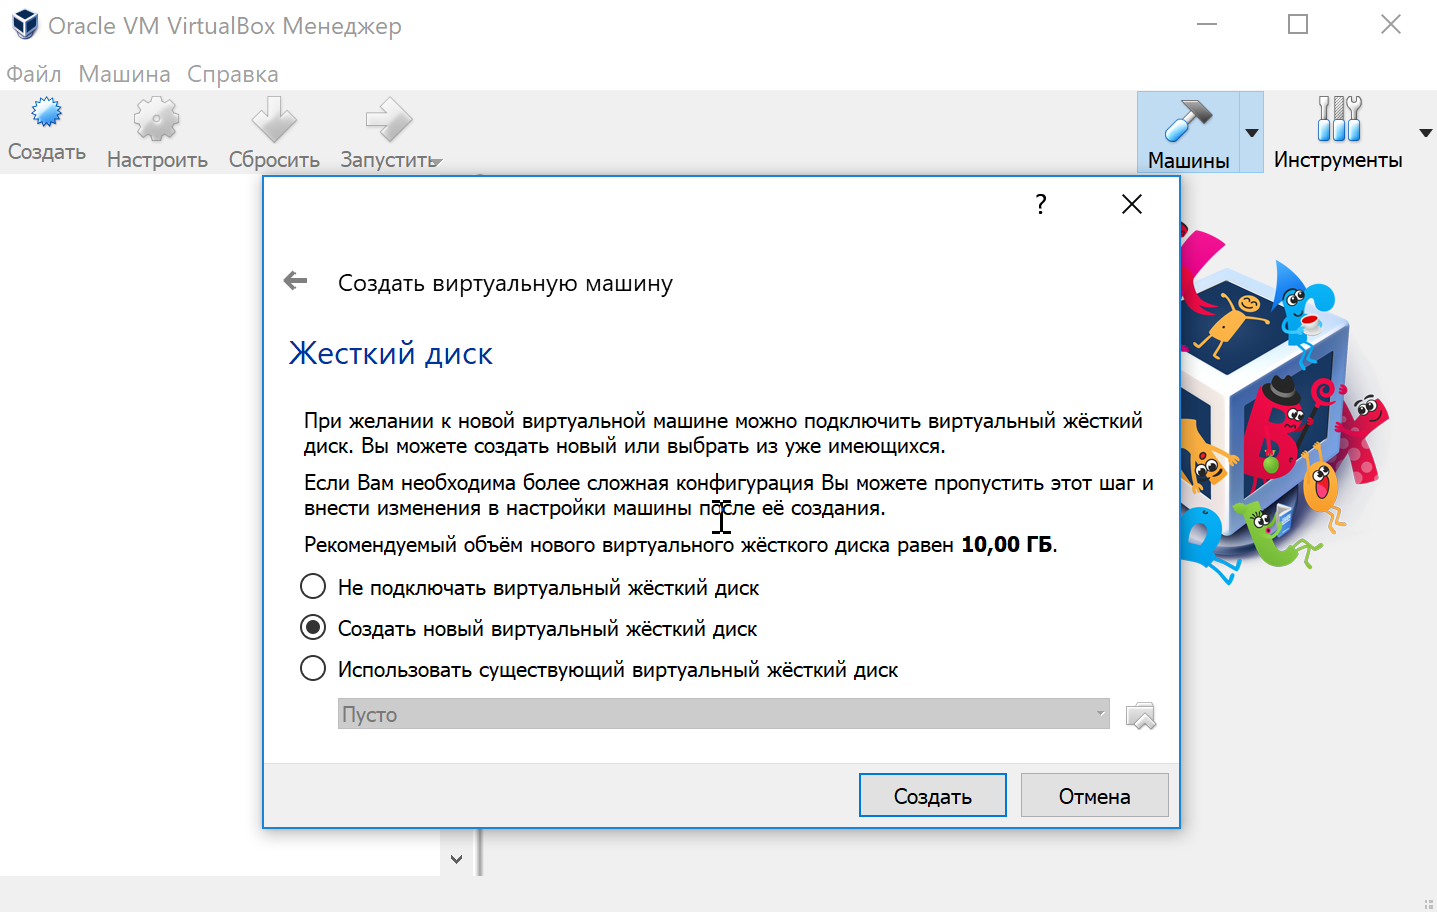
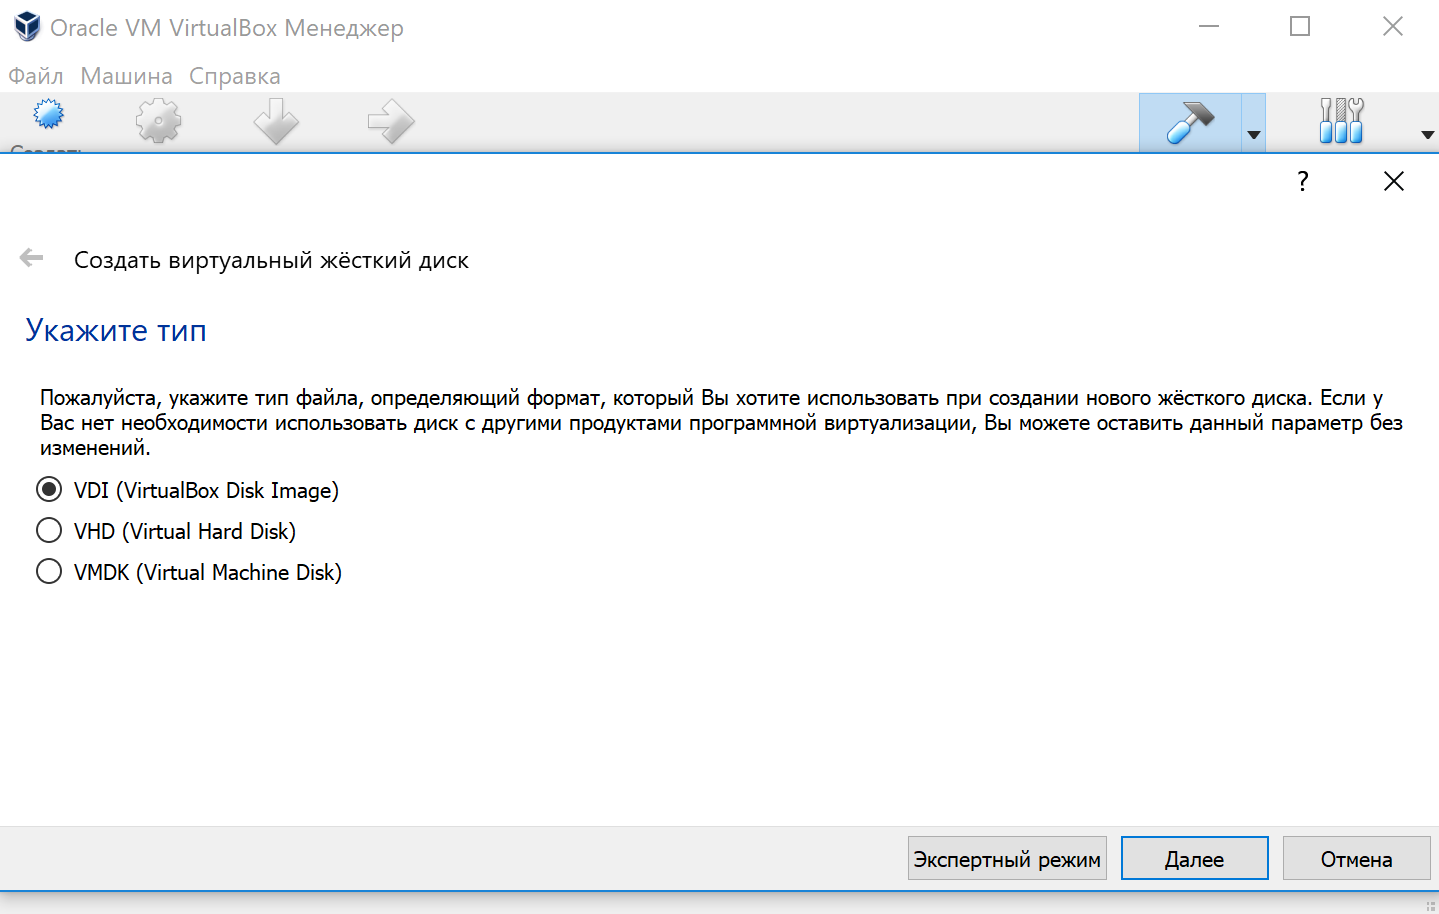
Тип виртуального жёсткого диска можно оставить как есть — VDI (VirtualBox Disk Image).
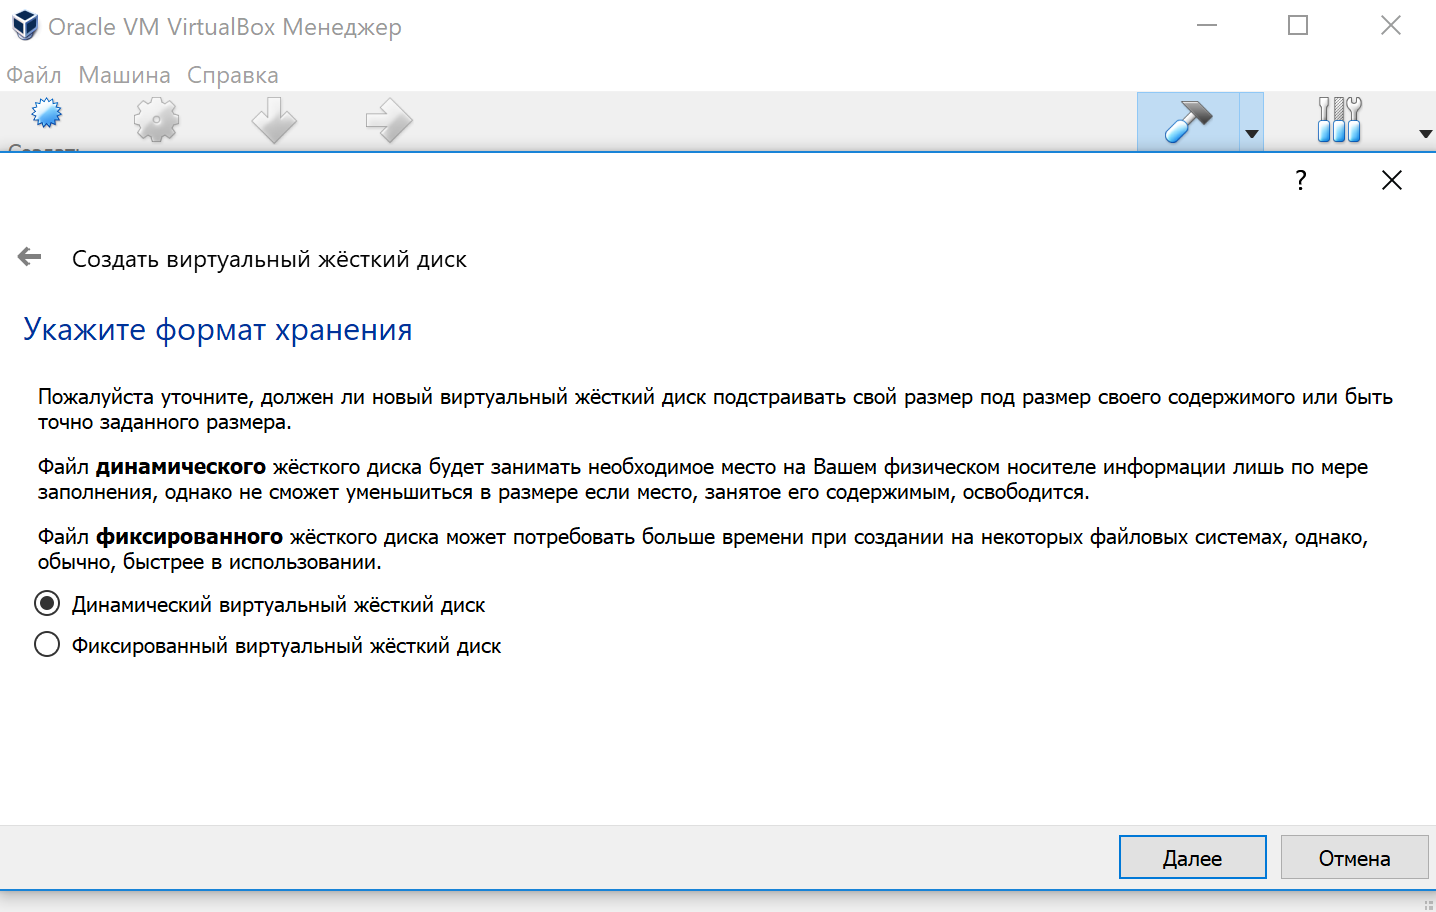
Формат хранения данных выберите исходя из личных предпочтений. Динамический виртуальный жёсткий диск растёт по мере заполнения, а фиксированный создаётся сразу того размера, который был указан на предыдущем шаге.
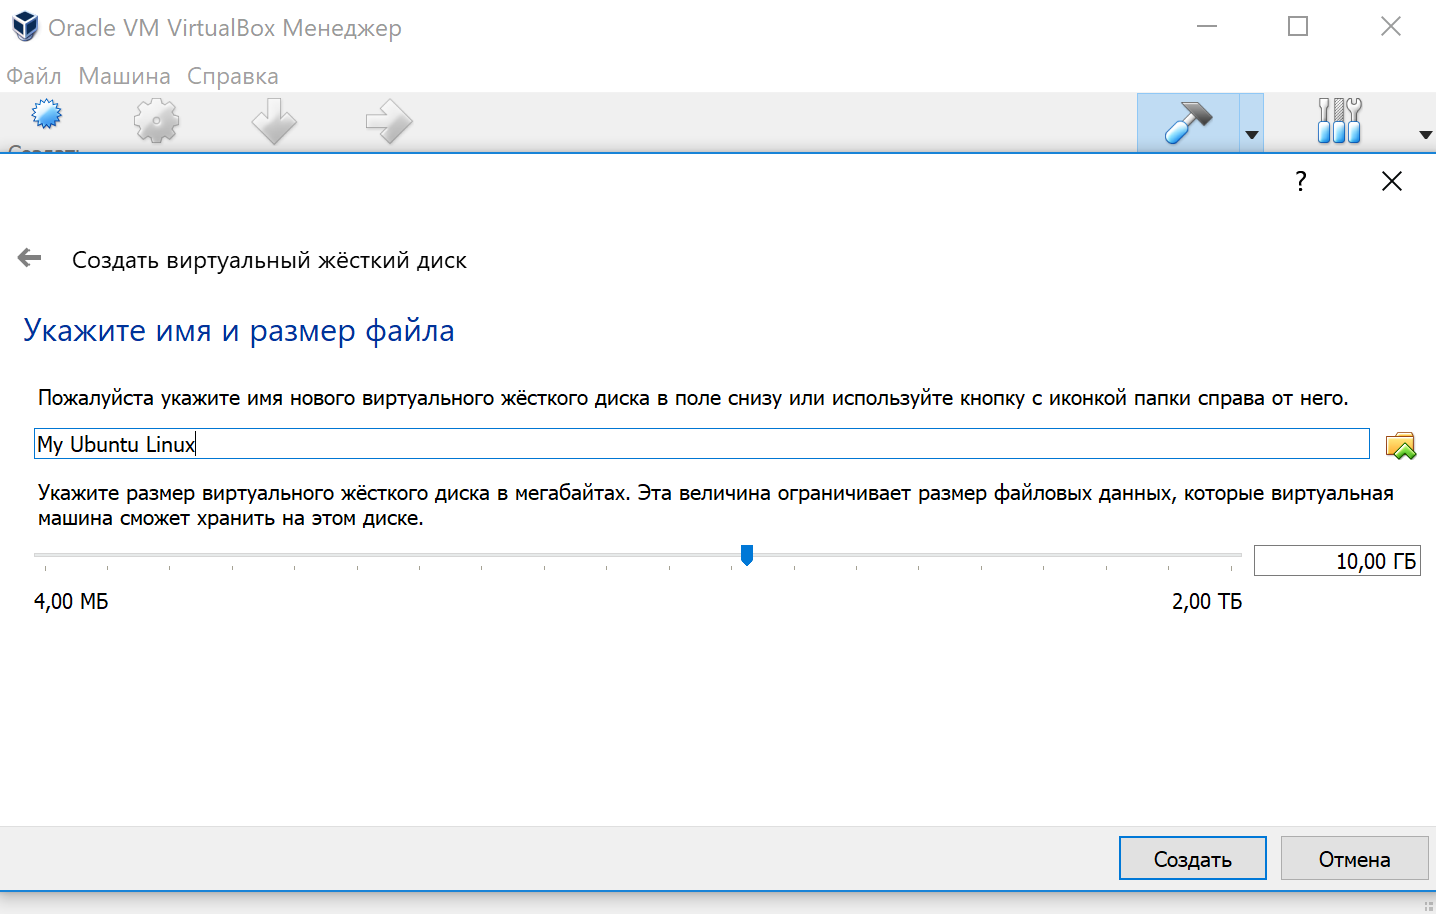
Имя и размер файла можно оставить без изменений и сразу нажать на кнопку «Создать».
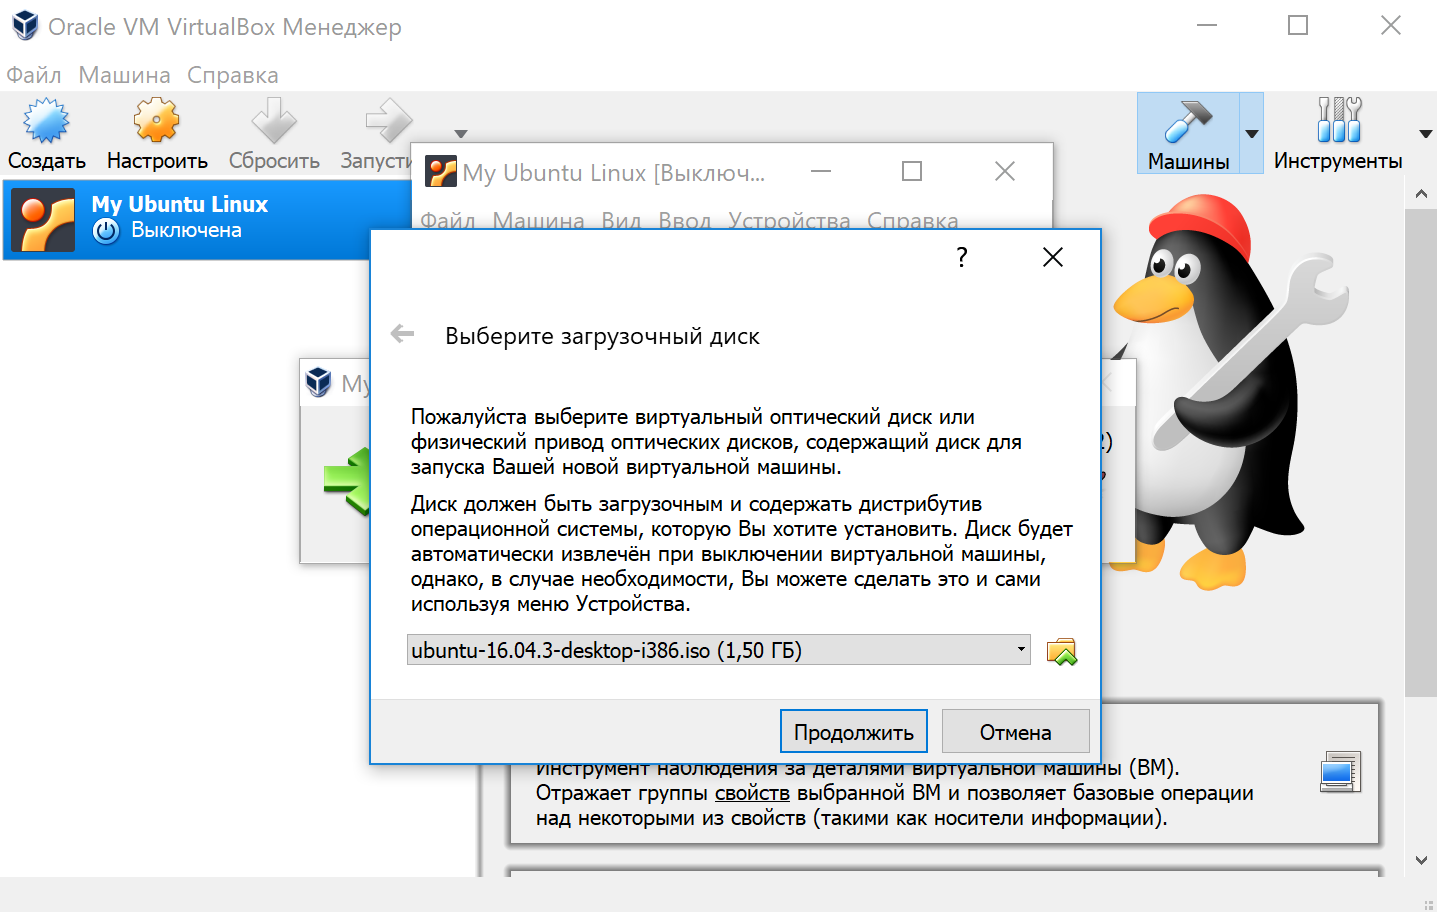
По завершению у вас будет создана виртуальная машина, но она пока без операционной системы. Для того чтобы её установить, нужно скачать Ubuntu Linux (32-bit или 64-bit, в зависимости от того, что было выбрано на шаге, где мы указывали тип ОС).
Нажатие на кнопку «Запустить» должно привести к появлению диалогового окна с предложением указать путь до скаченного ISO образа. Сделайте этого и нажмите кнопку «Продолжить»
Виртуальная машина автоматически будет выполнять часть процессов, но в некоторых операциях всё же потребуется участие пользователя.
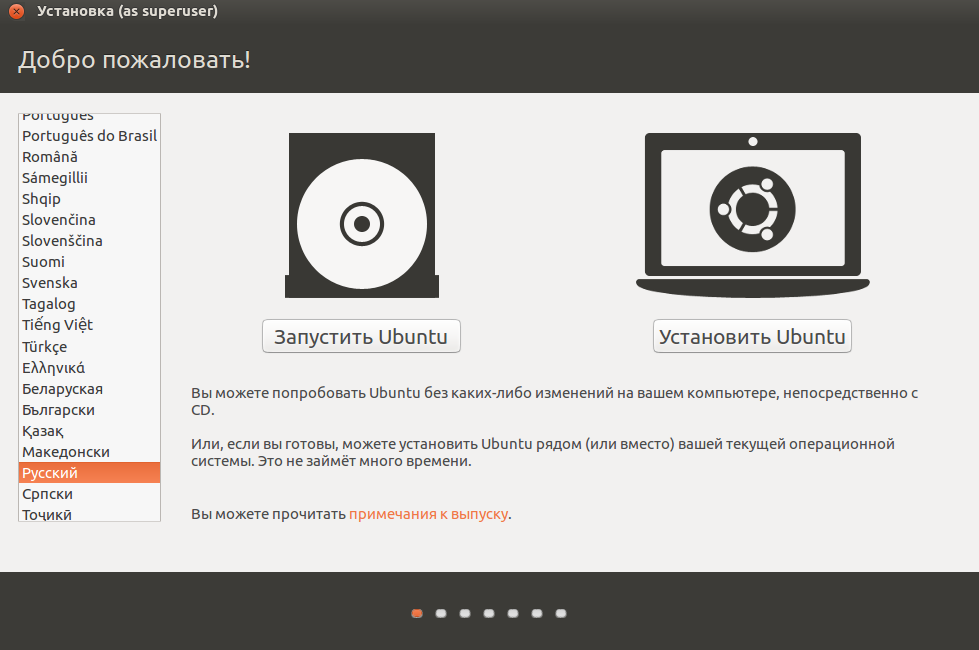
Выберите языковую поддержку в списке слева и нажмите «Установить Ubuntu».
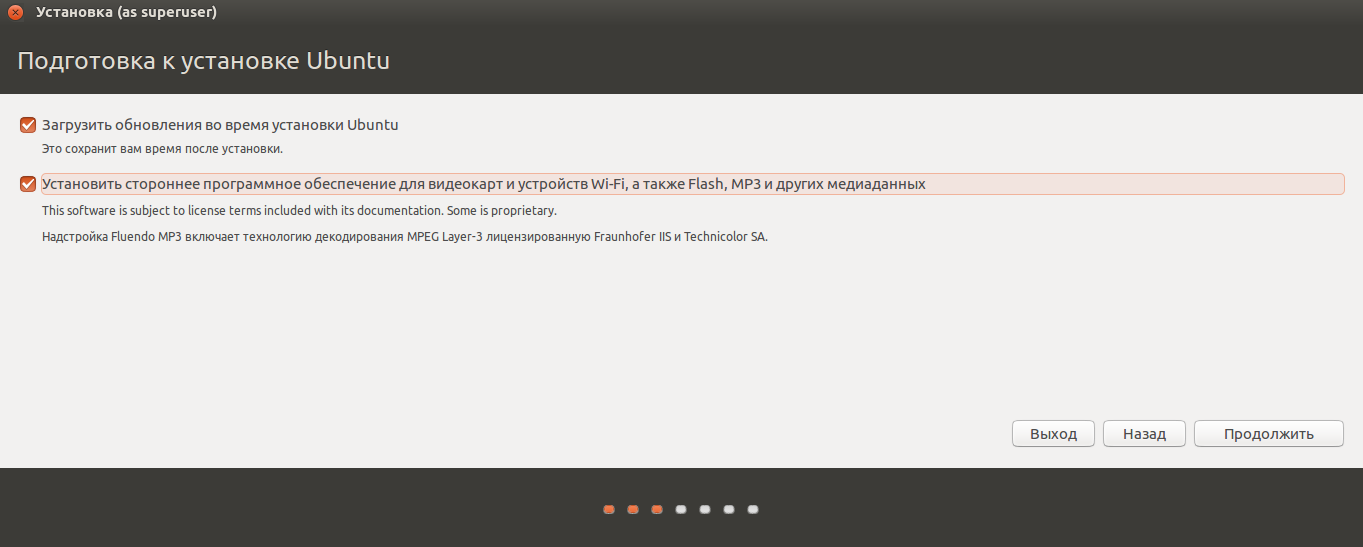
Можно загрузить обновления сразу на этапе установки.
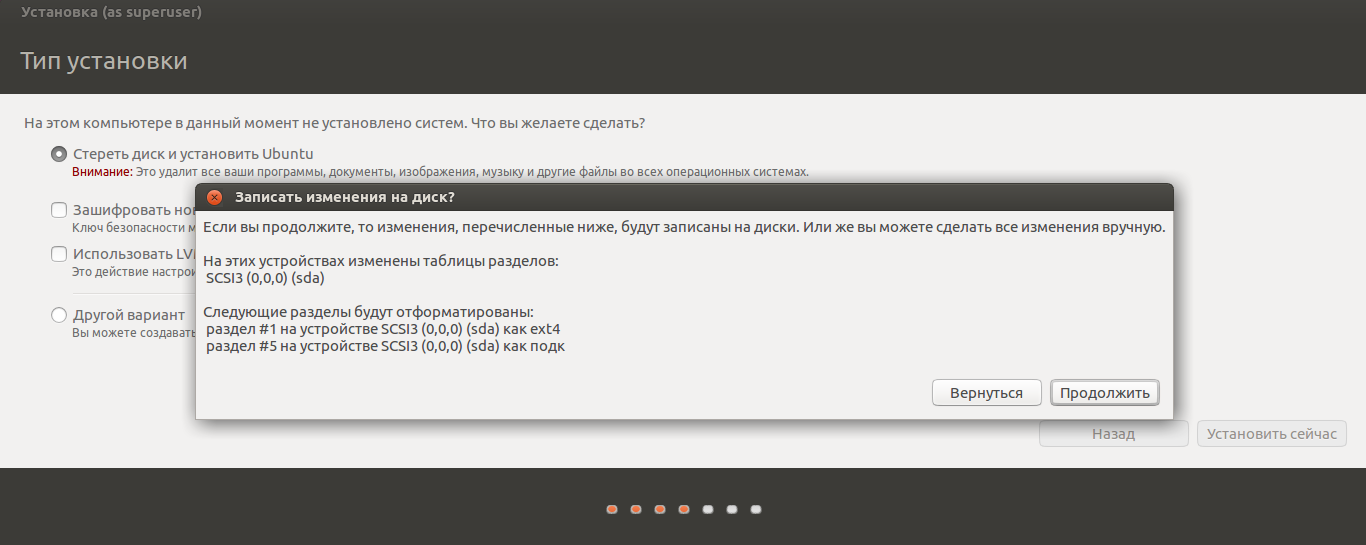
Без особых опасений выбираем пункт «Стереть диск и установить Ubuntu» и двигаемся дальше.
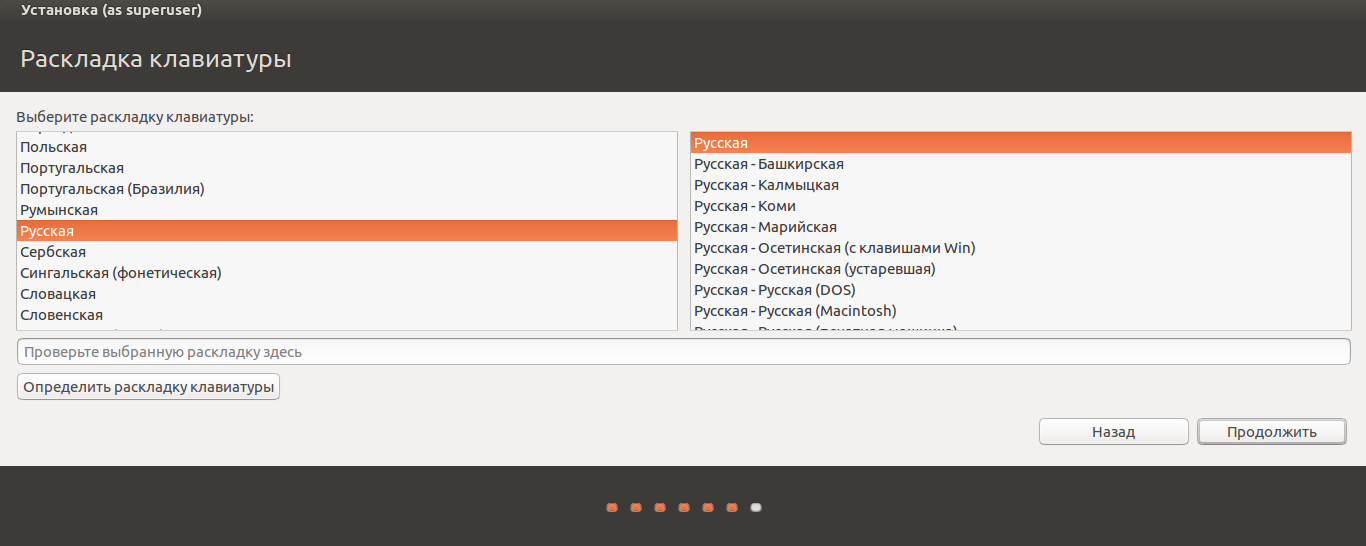
Если вы выбрали русский язык на первом этапе установки, то вам предложат русскую раскладку клавиатуры в качестве дополнительной.
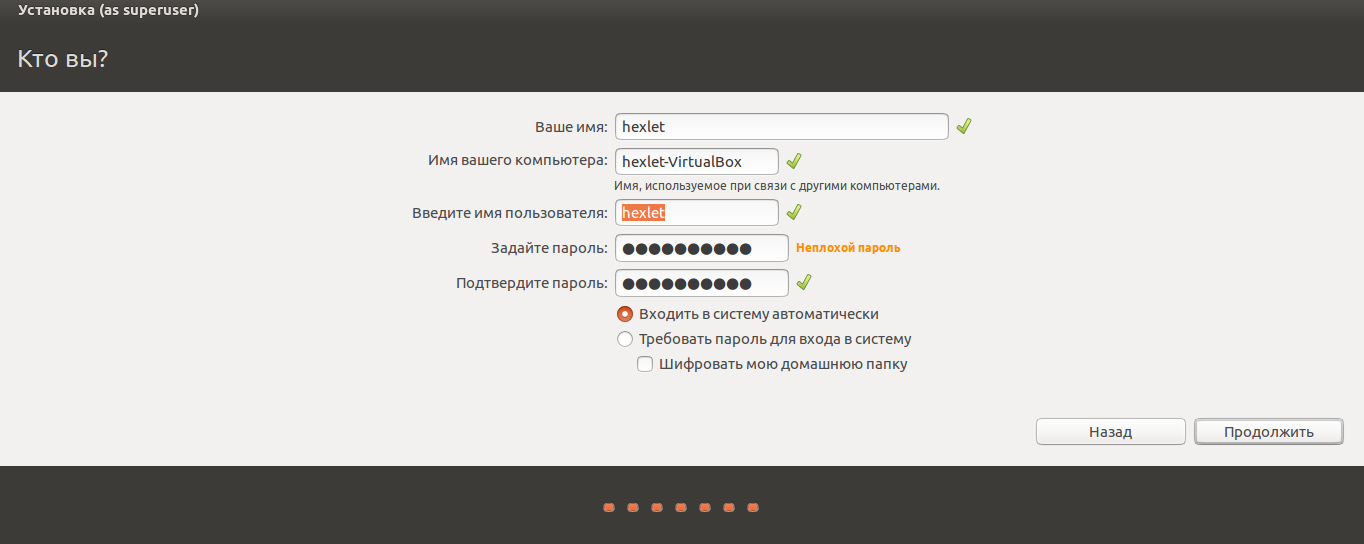
Заполните поля и выберите режим входа в систему.
Далее начнётся процедура разметки диска, переноса файлов, установка обновлений и другие процессы, которые не потребуют прямого участия пользователя.
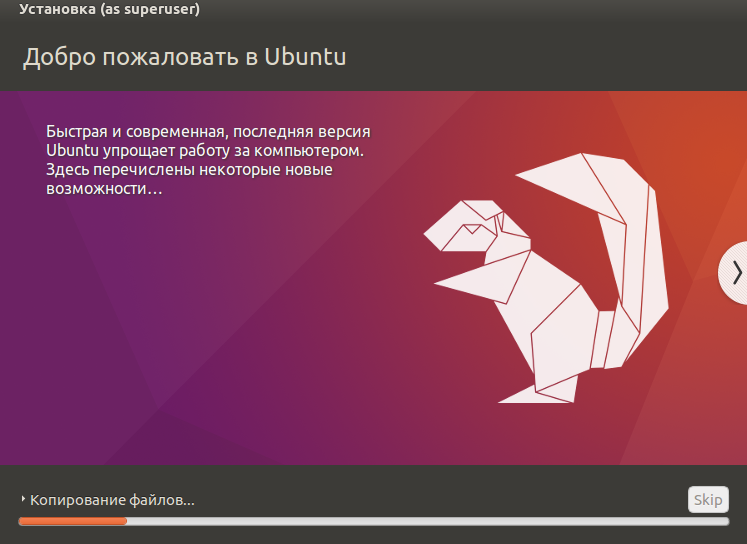
По завершению виртуальный компьютер перезагрузится и вы попадёте в уже установленную среду Ubuntu Linux.
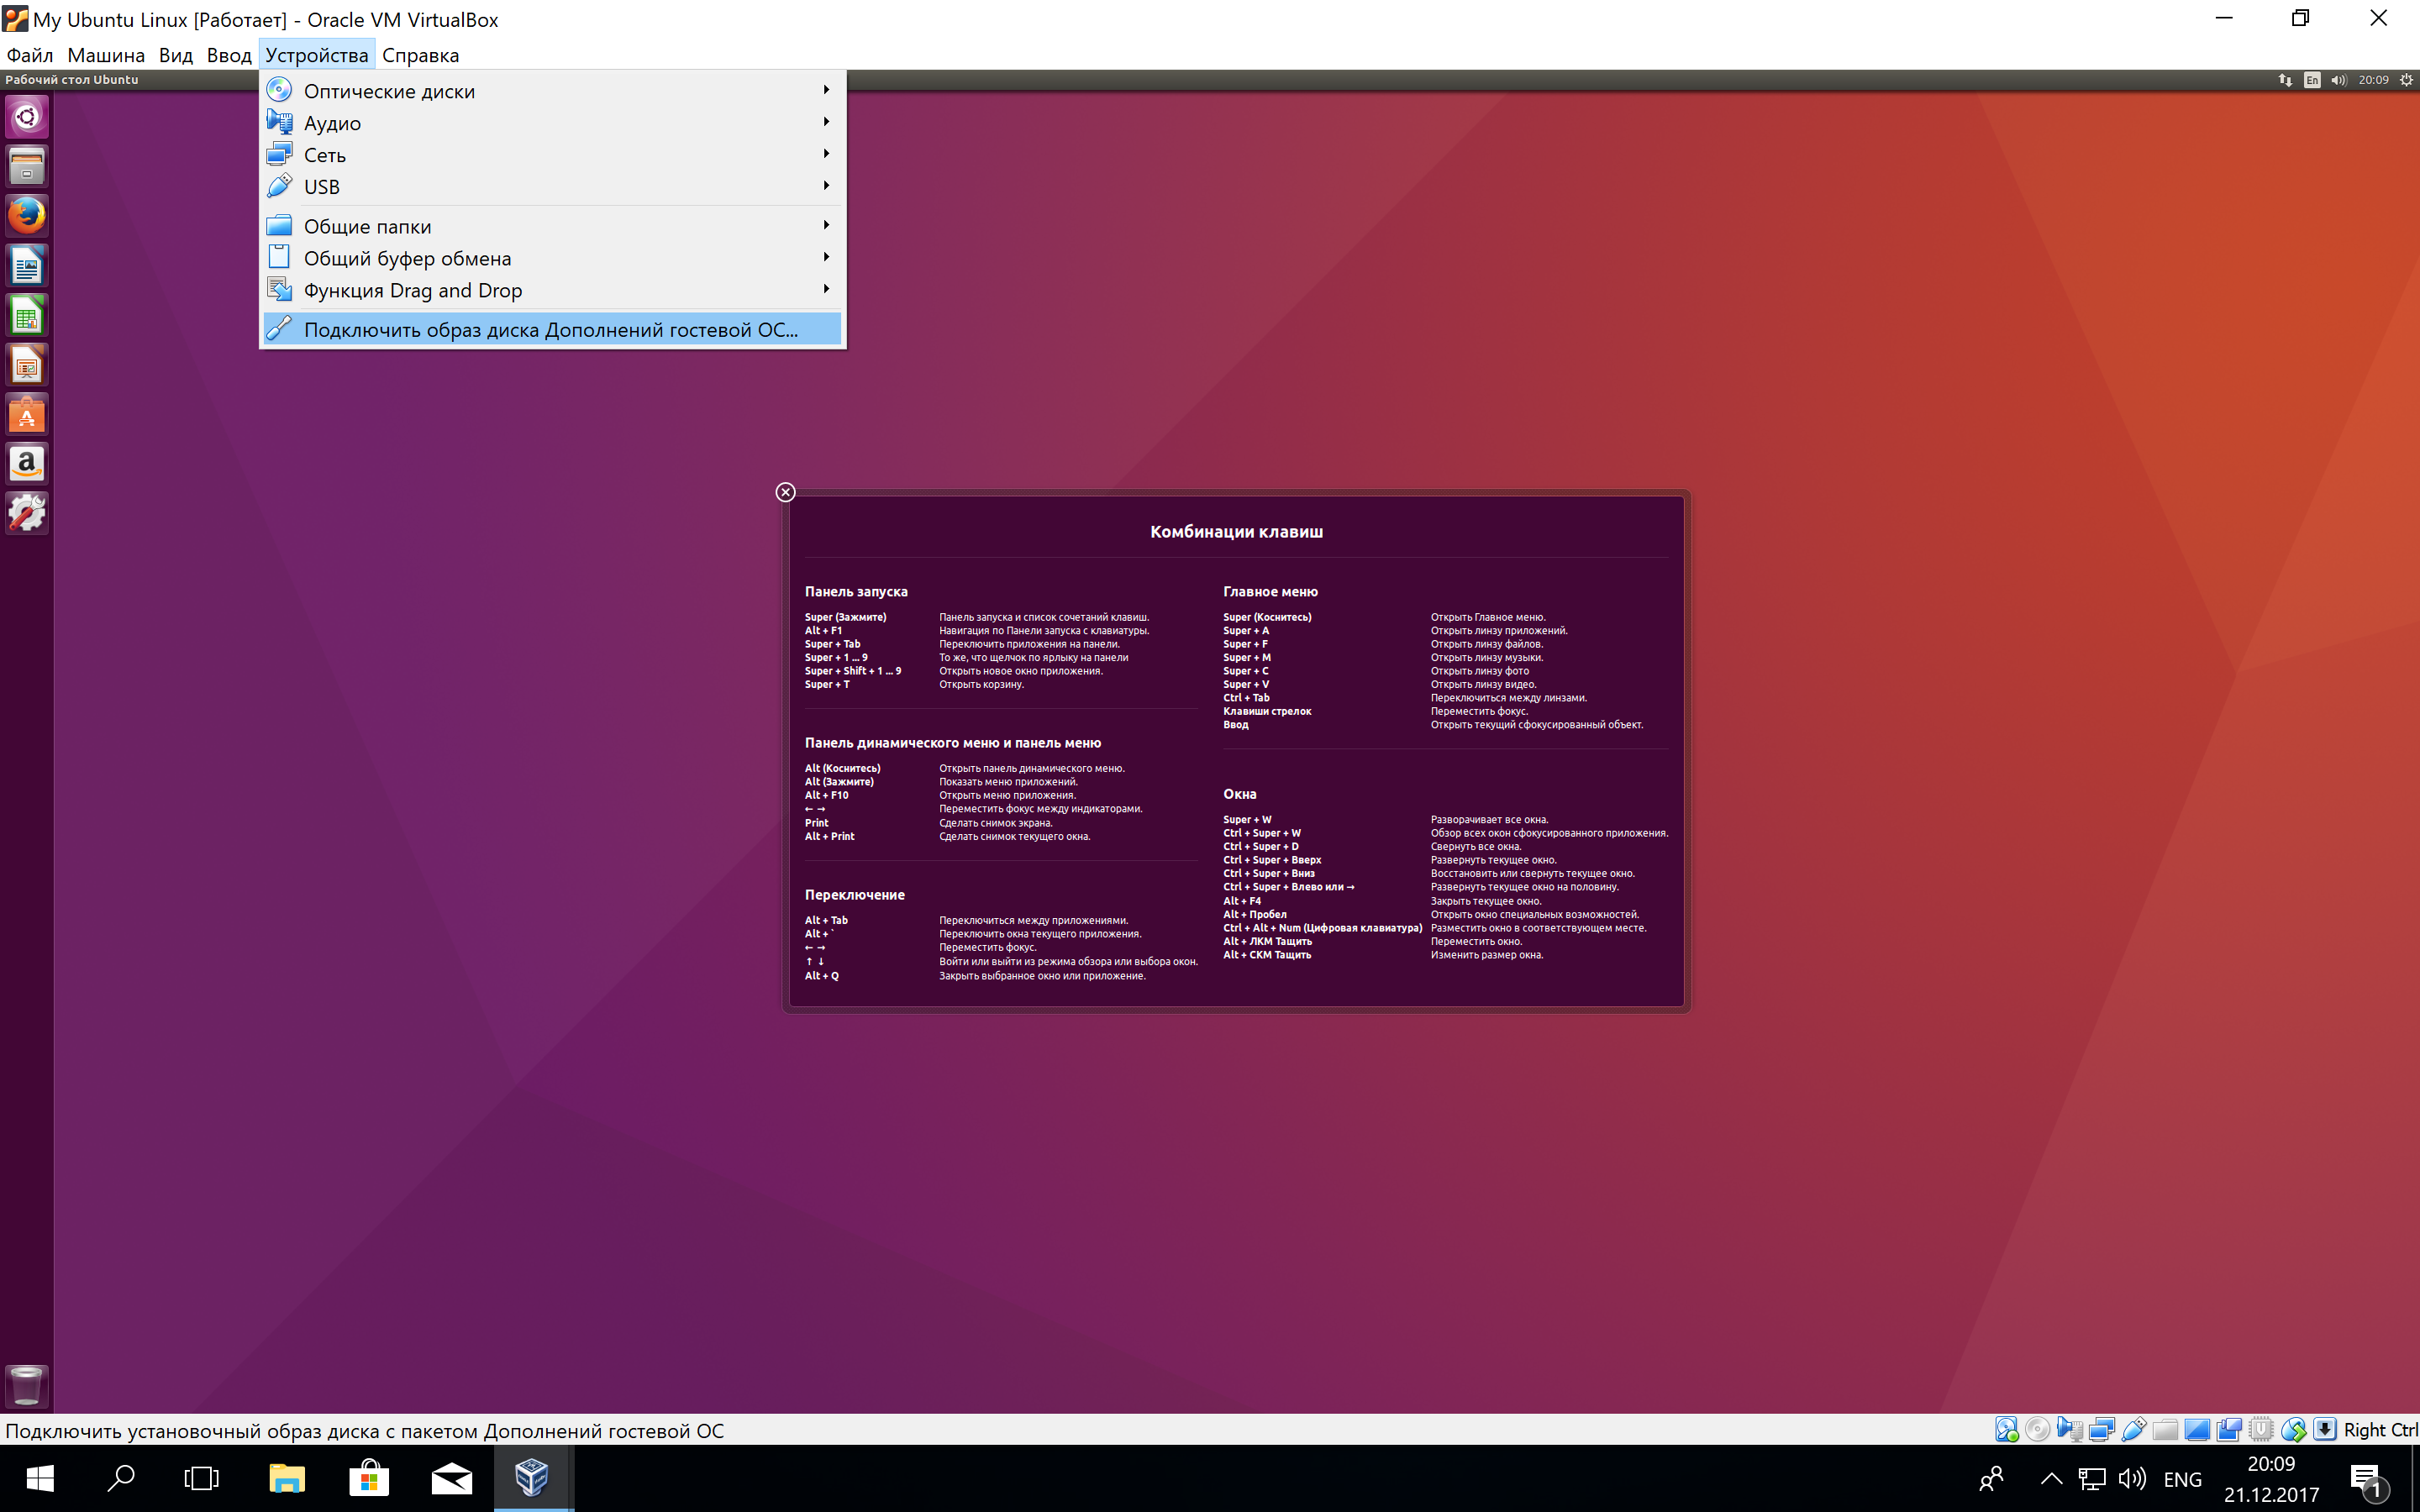
Но это ещё не всё. Весьма желательно установить так называемые «Дополнения гостевой ОС». Они содержат драйверы и прочие системные файлы, необходимые для наилучшей производительности и обеспечения дополнительных функциональных возможностей между виртуальной и гостевой операционными системами.
Выберите пункт меню «Устройства» программы VirtualBox, подпункт «Подключить образ диска Дополнений гостевой ОС…» и дождитесь предложение запустить приложение для автоматического запуска с виртуального привода.
Виртуальная ОС Ubuntu Linux установлена и готова к работе.
Ссылка на официальную документацию: Oracle VM VirtualBox User Manual
How to Install a Linux Virtual Machine on Windows 10


By Crystal / Last Updated March 8, 2023
Can you run a Linux virtual machine on Windows 10
Starting with the recently released Windows 10 2004 Build 19041 or higher, you can run real Linux distributions. However, running Linux natively on Windows 10 can be somewhat limited in features and tools. Also, you can only pick from three distros, including Ubuntu, SUSE Linux Enterprise, and OpenSUSE Leap, and you’re stuck with the command-line interface, which means that you can’t run any of the graphical experiences (e.g., GNOME, KDE, XFCE) or Linux-based graphical applications.
Therefore, you may want to run Linux in a virtual machine to get the better experience. Is this possible? The answer is yes — you can create a Linux virtual machine running on Hyper-V with Windows 10 for testing.
In this Windows 10 guide, I will offer the steps to install Linux on virtual machines using Microsoft’s Hyper-V virtualization feature.

Make sure your PC is capable of running a Linux VM
To run a Linux virtual machine on Windows 10, you’ll need the following:
- The OS with support for Hyper-V. You need to have a Pro, Enterprise or Education version of Windows 10.
Check if your machine is capable of running a Linux virtual machine, open the command prompt, then type in ‘systeminfo’ and press Enter.

How to install a Linux VM on Windows 10
You should enable Hyper-V on your device first, then use the following steps to create a Linux VM on your Windows 10.
1. Open Hyper-V Manager, click Action at the top, select New >> Virtual Machine.
2. Click Next to the Specify Name and Location window, you can change the name of the new virtual machine and store the virtual machine in a different location, and then click Next.
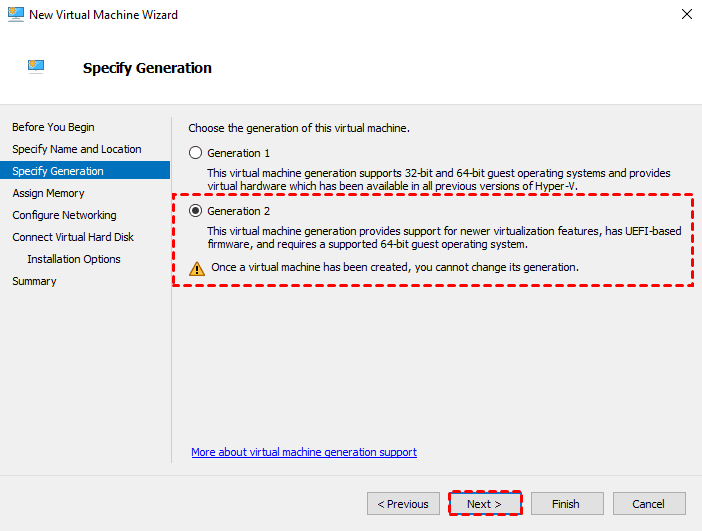
3. In the Specify Generations window, you can select Generation 1 or Generation 2 virtual machines according to the actual situation, and click Next.
4. Specify the amount of memory for your virtual machine. In the case of Ubuntu, you need a minimum of 2GB of memory. Then select the virtual switch.
5. In Connect Virtual Hard Disk window, select a location and specify the size of virtual hard disk (at least 25GB).
Then go to Installation Options wizard, select Install an operating system from a bootable CD/DVD-ROM. Select the Image file(.iso) >> path for the ISO file with the Ubuntu installation files.

6. Click Next to create a Linux virtual machine on your Windows 10.
You can use this method to install and run any other VM on Windows 10 as well. To protect your virtual environment, you should prepare Linux VM backup for long-time data archive, and complete VM backup helps to quickly restore data to a usable state.
Note: If you prefer to use snapshot as backup, you are exposed to risky operation. It is not recommended to manually manipulate a single snapshot file, as this can result in seriously data loss.
How to backup and restore Linux VM in Hyper-V
You are recommended to utilize a powerful and reliable host-level backup tool. Here, AOMEI Cyber Backup is a free Hyper-V backup software that supports backing up any virtual machines with Linux or any other guest OS. It offers a flexible and agentless solution for Linux VM backup, such as:
Support Free ESXi: support both paid and free versions of VMware ESXi.
Easy-to-use: backup and restore multiple Linux virtual machines via central console without complicated configuration and re-installation.
Auto image backup: schedule Linux VM backups flexibly, and provide full/incremental/differential backup as you need.
Centralized Backup: Perform multiple VMs backup simultaneously without installing agent on each VM.
Restore from history version: For VMs that have been backed up multiple times, you can select any of the history versions to restore.
Hit the button below to download and use AOMEI Cyber Backup Free Edition with no time limit. You can install it either on Windows or Linux OS.
How to backup and restore Linux VM step by step
To show you how to complete the operation, I will give an example to back up VMs with Linux guest OS.
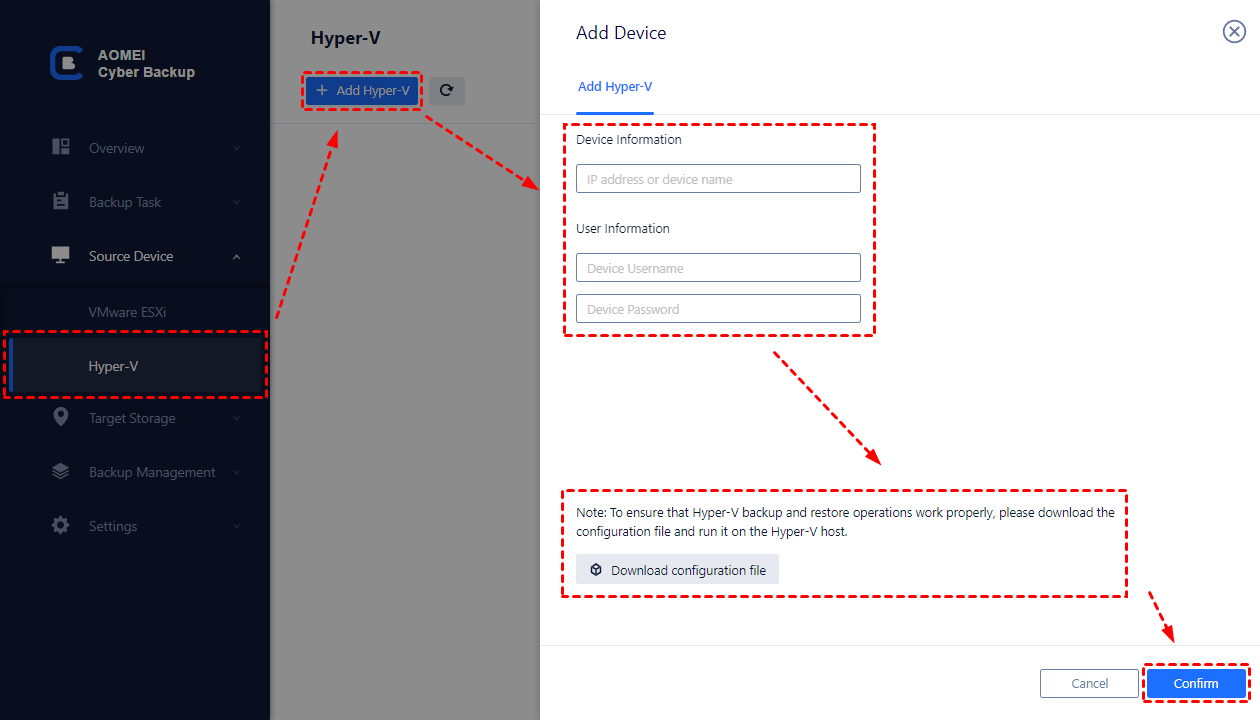
1. Navigate to AOMEI Cyber Backup, then add your Hyper-V device and click Backup Task >> Create New Task.
2. In the opened wizard, do as followings to complete Linux backup in Hyper-V at image level.
✦ Enter a Task Name and select Hyper-V Backup as an example.
✦ On Device Name section, select guest VMs with Linux OS.
✦ On Target section, specify a location to store virtual machines.
For example, you can easily back up VM to network or local directory. According to 3-2-1 backup rule, you should save VM backups to two different storage devices or locations.
✦ On Schedule section, choose full/incremental/differential backup to keep tracking virtual machine data and select the time and frequency (daily/weekly/monthly), which protects business security all the time.

✦ Click Start Backup. It allows you to select start backup now or later.
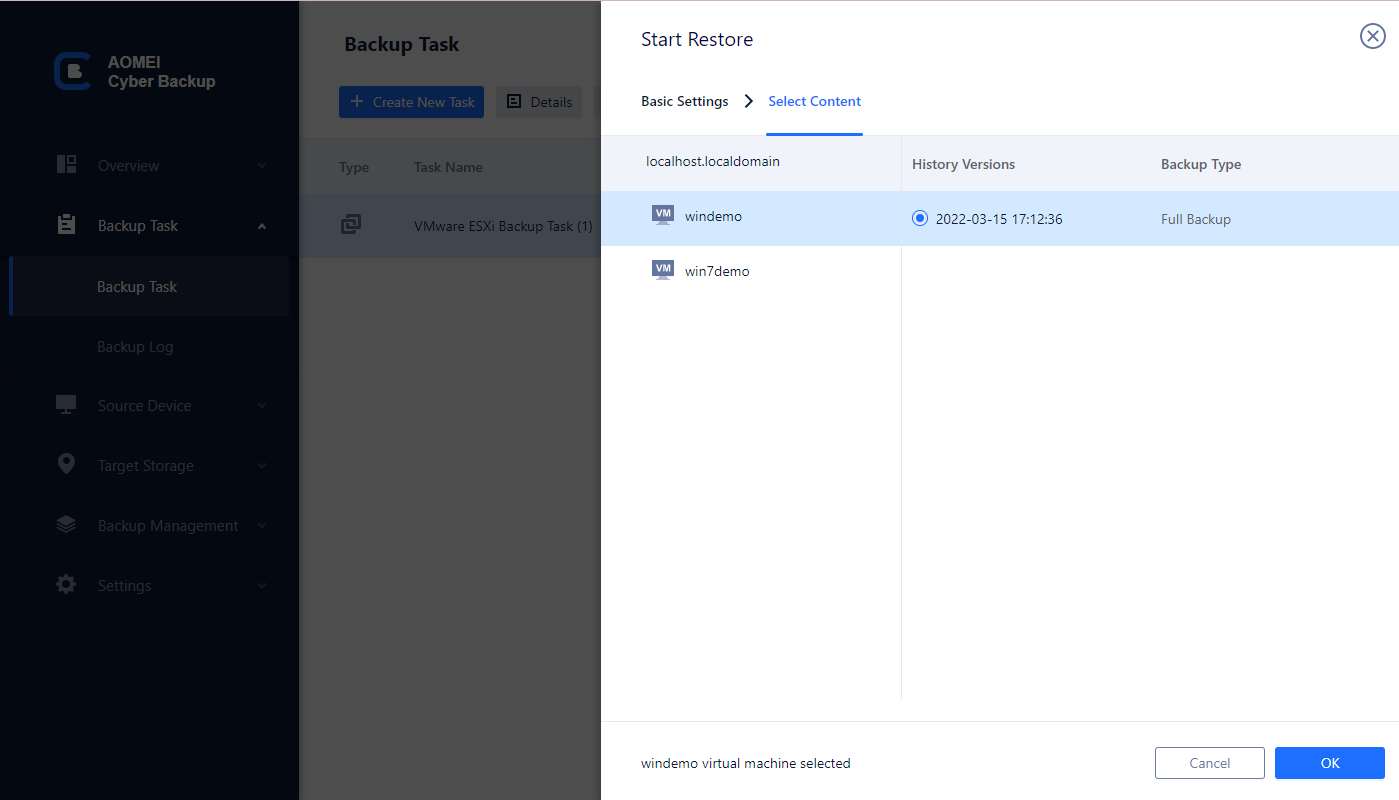
3. When a backup is completed, you can restore VM from any selected backups, which saves time to restore the required VM data.
✦ For example, you can select a VM backup and click Restore to original location. It allows you to restore entire VM to its precious state easily and quickly.
✍ While the Free Edition covers most VM backup needs, you can also upgrade to enjoy more:
▶ Batch VM backup & restore: batch backup and restore large numbers of VMs managed by vCenter Server or on standalone ESXi hosts.
▶ Backup cleanup: Configure a retention policy to auto delete old backup files and save storage space.
▶ Restore to new location: Create a new VM in the same or another datastore/host directly from the backup to perform out-of-space recovery, saves the trouble of re-configuring the new VM.
Summary
For network administrators, programmers, and AI and ML developers, they may want to install Linux on Windows. This article offers you the detailed steps to create Linux VM on Windows 10. You need to check the requirements before running Linux virtual machine on Windows 10. Meanwhile, make sure you have a reliable and available Linux backup in case of disaster.
How to create an Ubuntu VM on Windows 10

Windows 10 is not just a modern desktop operating system, and it also has some great IT Pro and Developer related features build in. One of them is client Hyper-V. This is the same hypervisor which powers virtualization in Windows Server and the Microsoft Azure datacenters. With Hyper-V, you can create virtual machines running on Windows 10, without the need for third-party software. You can not just run Windows virtual machines, and you can also run Linux virtual machines. In this blog post, I am going to show you how you can create an Ubuntu VM on Windows 10 using Hyper-V.
If you want to know more about Hyper-V on Windows 10, check out the Microsoft Docs.
Install Hyper-V
First, you will need to install Hyper-V on your Windows 10 computer. Hyper-V on Windows 10 has the following requirements:
- Windows 10 Enterprise, Professional, or Education (Home does not have the Hyper-V feature included)
- 64-bit Processor with Second Level Address Translation (SLAT)
- CPU support for VM Monitor Mode Extension (VT-c on Intel CPU’s)
- Minimum of 4 GB memory
The easiest way to enable Hyper-V on Windows 10 is to run the following PowerShell command as an administrator:
Enable-WindowsOptionalFeature -Online -FeatureName:Microsoft-Hyper-V -All
After you have installed Hyper-V, you need to restart your computer.
Create an Ubuntu virtual machine on Windows 10
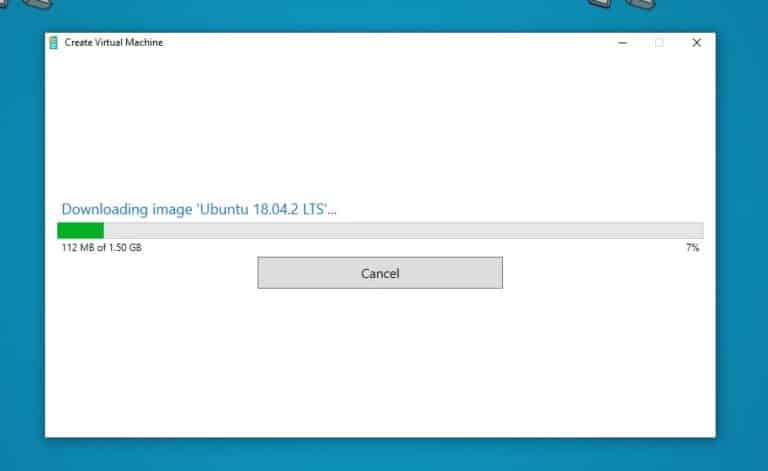
To create an Ubuntu virtual machine on Windows 10 Hyper-V, you could download the Ubuntu ISO file and install it like any operating system. However, there is a much easier way, using the Hyper-V Quick Create feature. In the Hyper-V VM Gallery, you will find not just two Windows 10 virtual machines; you will also currently find Ubuntu 18.04 LTS and Ubuntu 19.04. These are prepared Hyper-V virtual machines images, ready for you to download and install.
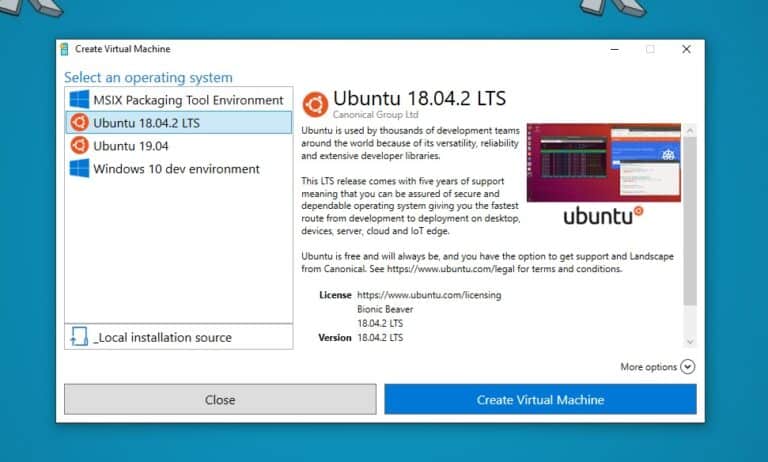
Select the Ubuntu version you want to install and click on Create Virtual Machine. This will start downloading the virtual machine image.
After the image is downloaded, you can either connect to the virtual machine and start it, or you can first modify the virtual machine settings.
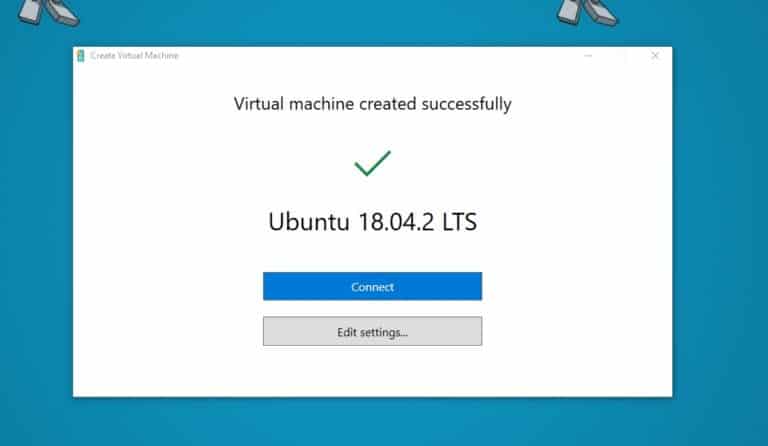
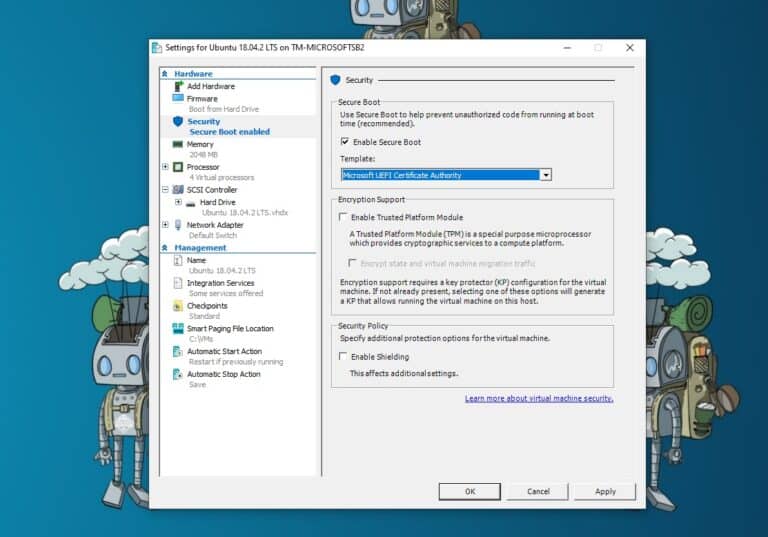
Optional: If you click on Edit settings, you will be able to configure the virtual machine hardware settings like vCPU or vRAM. You can also enable Secure Boot. If you enable Secure Boot for a Linux virtual machine, make sure you change the Secure Boot template to Microsoft UEFI Certificate Authority.
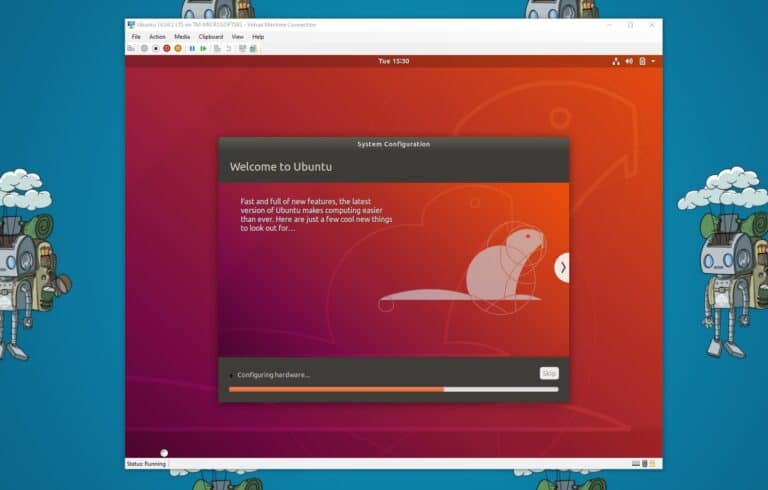
You can now start the Ubuntu VM.
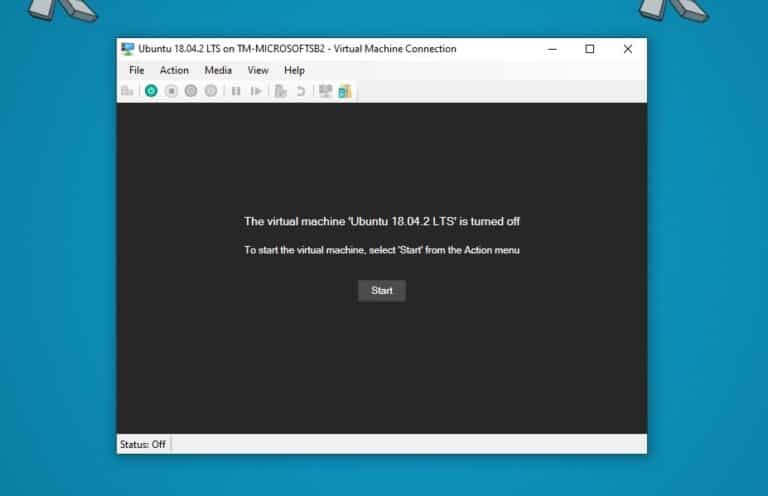
This will boot you in the Ubuntu installation, where you can set up your Ubuntu operating system.
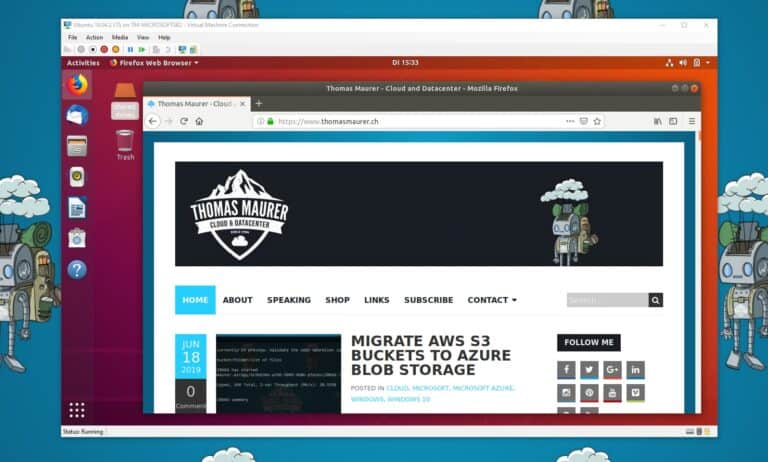
All the specific Hyper-V drivers for Ubuntu, are already included in the image. This allows you to use features like Hyper-V Enhanced Session Mode, which enables you also to use copy-paste, and others.
I hope this gives you a step-by-step guide, how you can create an Ubuntu VM on Windows 10 using Hyper-V. If you have any questions, please let me know in the comments.