How to Mount and Unmount Filesystems in Linux
The Linux operating system is basically a file system and without these files’ formats and structures, the definition of this operating system environment would be incomplete.
In other words, files are the central units of the Linux operating system architecture. The Linux filesystem stores OS-associated files and directories. Filesystems are also evident in USB and hard disk drives and a properly configured network can also permit the sharing of these filesystems among different machines.
This article seeks to expose us to the mount and umount commands primarily used in attaching and detaching file systems from various mount points.
Listing Mounted Filesystems in Linux
Linux makes it possible for a filesystem to be mounted on any directory location. A successfully mounted filesystem makes it possible for its associated/stored files and directories to be accessible from that mount directory. The directories are also referred to as the filesystem mount points.
By default, your Linux operating system already has some filesystems mounted. To get a preview of these mounted filesystems, execute the Linux mount command without any flags or arguments.
Consider the following last entry from the execution of the above mount command.
/dev/sdb5 on /media/dnyce/117137A85FFD287C type fuseblk (rw,nosuid,nodev,relatime,user_id=0)
- /dev/sdb5 is the mounted filesystem/device name.
- /media/dnyce/117137A85FFD287C is the mount point.
- fuseblk is the filesystem type.
- (rw,nosuid,nodev,relatime,user_id=0) is the mount options.
To review the mounting information associated with a specific filesystem type like fuseblk, vfat, ext4, fuseblk, etc., we can implement a mount command (with a -t flag) similar to the following:
Mounting Filesystems in Linux
To successfully mount a filesystem, we have to adhere to the following two rules:
- Make sure a mount point exists or create one using the Linux mkdir command.
- Reference the following command syntax to successfully mount the filesystem.
$ sudo mount -t Type Device MountPoint
A Linux operating system can automatically detect the type of filesystem associated with a device hence the use of the -t option is not explicitly needed.
However, in cases where a partition is not formatted or is corrupted and/or mandatory filesystem tools like the ntfs-3g package (needed for read and write access for NTFS partitions) are not installed, the inclusion of the -t option is necessary to successfully mount that filesystem.
For security reasons, Linux only allows sudoer/root users to perform mounting operations. Other users will be able to have directory access after the mounting point directories are set with the needed permissions (by root/sudoer users).
Mounting USB Drive/Stick in Linux
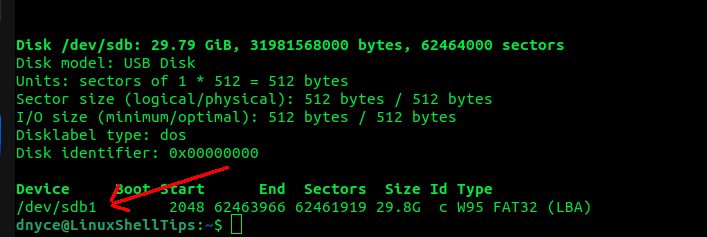
First, identify the USB block device with the Linux fdisk command.
Create a mount point if you do not have one yet.
$ sudo mount /dev/sdb1 /mnt/usb32G
The USB drive should now be accessible from the /mnt/usb32G directory.
Mounting ISO Files in Linux
A pseudo-device known as a loop device is effective in mounting an ISO image since it is not restricted to a physical device. This loop device makes the ISO image files accessible.
Create a mount point directory:
$ sudo mkdir /mnt/CorePlusIso
Mount the ISO image and make sure to check the absolute path to the ISO file.
$ sudo mount $HOME/Downloads/CorePlus-current.iso /mnt/CorePlusIso -o loop
You will notice that ISO images have read-only permission access. To make modifications, you will need to duplicate the ISO files from the mount directory to another directory location before making your needed changes.
$ ls -l /mnt/CorePlusIso $ sudo mount | grep CorePlusIso
Useful Mount -o Options
The -loop is for mounting loop devices.
$ sudo mount -t Type Device MountPoint -o loop
The -rw enables read-write on the mounted filesystem.
$ sudo mount -t Type Device MountPoint -o rw
The -ro enables read-only on the mounted filesystem.
$ sudo mount -t Type Device MountPoint -o ro
The -noauto disables automatic mounting of the filesystem during system reboot.
$ sudo mount -t Type Device MountPoint -o noauto
Mount File System Automatically in Linux
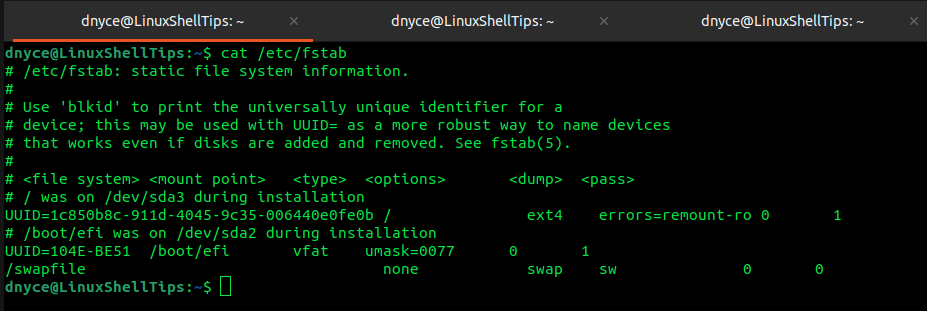
Use the /etc/fstab file when you want your filesystem to automatically mount after a successful system reboot.
For instance, to make the CorePlus-current.iso file mount automatically after mounting it in the /mnt/CorePlusIso directory, first run the command:
$ sudo mount | grep CorePlusIso
The above command execution produces an output like:
/home/dnyce/Downloads/CorePlus-current.iso on /mnt/CorePlusIso type iso9660 (ro,relatime,nojoliet,check=s,map=n,blocksize=2048,iocharset=utf8)
Edit the above output to be something like:
/home/dnyce/Downloads/CorePlus-current.iso /mnt/CorePlusIso iso9660 ro,relatime,utf8
The above line can then be added as an entry in the /etc/fstab file.
Once the Linux system reboots, mounting the above file will be as easy as pointing to its file system directory.
$ sudo mount /home/dnyce/Downloads
Unmounting a Filesystem in Linux
If it is a USB device labeled /dev/sdb1, we can unmount it with the command:
For an iso image, unmount it from its mount point directory:
$ sudo umount /mnt/CorePlusIso
To unmount multiple filesystems adhere to the command:
$ sudo umount /dev/sdb1 /mnt/CorePlusIso
When wanting to unmount a filesystem and still unsure whether it is operational, use the -l flag which will make sure the pending read and write operation completes before successfully unmounting the filesystem.
If you want to force a filesystem to unmount, implement the command:
We have successfully covered how to mount various filesystems in Linux both temporarily and permanently. We have also demonstrated to effectively unmount the same filesystems. Hope this article guide was useful. Feel free to leave a comment or feedback.


