- How to burn a Windows .iso to a USB device? [duplicate]
- 10 Answers 10
- Как создать загрузочную флешку Windows в Linux
- Сначала получите ISO-файл Windows!
- Создайте загрузочный USB-накопитель Windows в Linux с помощью WoeUSB
- Установите WoeUSB в Linux
- Создайте загрузочный USB-накопитель Windows в Linux с помощью WoeUSB
- Создайте загрузочный USB-накопитель Windows в Linux с помощью balenaEtcher
- Как использовать balenaEtcher в Linux
- Почему вы должны придерживаться Linux
How to burn a Windows .iso to a USB device? [duplicate]
I want to burn a Windows ISO to a USB device in Ubuntu. How do I do this? I know how to burn a Ubuntu ISO into a USB device, but with a Windows ISO it’s not the same.
@jazzpi And he also made it Windows specific under the pretext that in the «Answers» somebody mentions NTFS.
10 Answers 10
Or you could try a bit-by-bit copy:
- Insert the USB device and then open Disk Utility (in 10.10 and older, System -> Administration -> Disk Utility).
- Select the USB device from the list in the left of the program and detect where it was mounted: /dev/sd[1 letter][optionally 1 number] . For example, /dev/sdc or /dev/sdc1 .
- Make sure the USB device is unmounted (not safely removed, but unmounted) If it is mounted you can unmount it:
sudo umount /dev/sd[1 letter][optionally 1 number] sudo dd bs=4M if=[ur .iso] of=/dev/sd[that 1 letter] sudo dd bs=4M if=windows7.iso of=/dev/sdc And wait for it to finish. (The «bs=4M» — bit is optional, just makes it faster.)
Another way I detect which driver is it: I write «sudo dd if=kubuntu.iso of=/dev/sd» and press Tab a few times before inserting the USB, than I insert the USB stick and press Tab a few times again, and detect which one was added, for example sdc and sdc1 appeared, than I add c at the end and press enter.
@LilianA.Moraru UNetbootin allows you to create bootable Live USB drives for Ubuntu, Fedora, and other **Linux distributions** without burning a CD. . Have you ever succeeded to make a windows usb with it?
If you’ve got a slow USB drive, you can check the current state of dd by sending it a USR1 kill msg: sudo kill -USR1 $(pidof dd) from another terminal. It will then print its status in its own terminal.
You can add a status=progress option to dd to see progress output in real time. Also, you can see the list of all drives by running lsblk and use it to find out the identifier of your USB flash drive.
- Insert the USB device, then run gparted.
- Select the USB device from the list near the upper-right corner of the GParted window and detect where it was mounted: /dev/sd[1 letter] (mine was /dev/sdc ).
- Make sure the USB device is unmounted (right-click and select unmount).
- sudo dd if=[PATH TO YOUR .iso FILE] of=/dev/sd[THAT 1 LETTER]
You must run dd as su or sudo. It’s worth mentioning that gparted requires su as well, but will typically use gksudo to prompt for the password.
This means you can lock gparted to the launcher on a persistent liveboot USB for field diagnostics.
didn’t work for me just using /dev/sdc[letter], also needed to specify the partition like /dev/sdb1 for dd to copy. however, usb booting won’t work
Why are you formatting it to NTFS? When you dd to the block device, it’s going to wipe out whatever formatting you have there.
Doing the direct dd copy (on Ubuntu 14.04) with a Win10 iso was a little surprise for me, as it created an UDF file system on the flash (I was expecting it to be the iso file system). It didn’t boot on my Lenovo P50, though (but I have to admit I might have too restrictive boot settings in the BIOS :)) Using winusb by this article eventually did the trick.
If you boot with UEFI (not BIOS or UEFI with BIOS compatibility mode (a.k.a. CSM)) all you’ll need is GParted and a file manager.
The ISO must be configured for UEFI boot for this to work. I’ve successfully done this with both Windows 8.1 and Ubuntu 14.04, but I can’t vouch for any other OS. (Edit: I just tried this with Windows 10 without success. Don’t know why, but WinUSB worked so I didn’t investigate further.)
This is what I do to create a bootable USB drive for UEFI firmware:
- Create a GPT partition table on your USB drive. In GParted, chose «Device» and then «Create partition table. «. Choose gpt in the dropdown.
- Format a partition on the USB drive to FAT32 using GParted. All UEFI compliant firmwares must support FAT12, FAT16 and FAT32, so any of these should be fine, but NTFS will not work.
- Mount the USB drive like you would any other external storage so you can access the filesystem on the partition you created.
- Mount the ISO you wish to add to the USB drive so you can access the files in there.
- Now, when you have access to both the ISO and the USB drive as filesystems in your file manager (Nautilus or whatever) just copy and paste all files in the ISO to the USB drive.
- Add the ‘boot’ flag to the partition you’ve created and added the files to. In GParted, right click the partition, choose «manage flags» and then check the «boot» option.
(While testing this I couldn’t mount the USB drive anymore after setting the boot flag. I don’t know why, but GParted could still see it and the end result was still a bootable USB drive, so I guess it doesn’t really matter.)
Once again: Please note that for this to work, your computer’s firmware must be UEFI compliant and the ISO must be ready for UEFI boot.
If you find an EFI directory in the ISO that’s usually a good sign.
To see whether you’re currently using UEFI boot, run sudo efibootmgr -v in a terminal. If it lists a number of boot options you’re good to go. If you’re using BIOS compatibility mode you’ll see something like this:
Fatal: Couldn't open either sysfs or procfs directories for accessing EFI variables. Try 'modprobe efivars' as root. Also, I don’t think Ubuntu will work with Secure Boot enabled, so you’ll have to disable that to be able to use UEFI boot with Ubuntu.
Как создать загрузочную флешку Windows в Linux
Хотите перейти с Linux на Windows? Вот руководство по созданию загрузочного USB-накопителя Windows в Linux, которое охватывает все, от загрузки ISO-файла Windows до прошивки USB-накопителя с помощью WoeUSB и balenaEtcher. Проверять 8 причин, почему вам стоит перейти с Windows 10 на Linux.

Сначала получите ISO-файл Windows!
Прежде чем приступить к созданию загрузочного USB-накопителя Windows в Linux, необходимо загрузить файл образа (ISO). Который содержит все необходимые установочные файлы, необходимые для установки операционной системы.
В этом случае, чтобы получить последнюю версию Windows 10 ISO, перейдите на официальный сайт загрузки Windows и получите свою копию Windows 10.
Поскольку размер ISO-файла составляет примерно 5 ГБ, убедитесь, что на вашем USB-накопителе есть не менее 8 ГБ свободного места. Если это не так, вы можете легко настроить его с помощью терминала. Проверять Как отформатировать флешку и зачем это нужно делать.
Создайте загрузочный USB-накопитель Windows в Linux с помощью WoeUSB
Для первого метода вы можете использовать WoeUSB, который является инструментом командной строки и дополнительно имеет утилиту с графическим интерфейсом, которая позволяет вам создать загрузочный USB-накопитель Windows из файла ISO. Это простая и заметная альтернатива Linux для Rufus, его аналога для Windows.
С помощью WoeUSB вы можете настроить загрузочный USB-накопитель Windows в Linux с помощью нескольких щелчков мыши или команд, если вы предпочитаете интерфейс командной строки.
Установите WoeUSB в Linux
Для начала вам необходимо установить некоторые необходимые зависимости, чтобы обеспечить плавную и успешную установку. Выберите и запустите соответствующий фрагмент для вашей системы из следующих команд, чтобы установить все зависимости.
Для систем на базе Debian/Ubuntu:
sudo apt install git p7zip-full python3-pip python3-wxgtk4.0 grub2-common grub-pc-bin
sudo pacman -S p7zip python-pip python-wxpython
Для Fedora/CentOS и других дистрибутивов на основе RPM:
sudo dnf install git p7zip p7zip-plugins python3-pip python3-wxpython4
Затем скопируйте репозиторий WoeUSB-ng в свою систему и перейдите в каталог с помощью команды cd.
git clone https://github.com/WoeUSB/WoeUSB-ng cd WoeUSB-ng
Установите WoeUSB с помощью установщика пакета pip3:
Создайте загрузочный USB-накопитель Windows в Linux с помощью WoeUSB

- Запустите WoeUSB либо из списка приложений в используемом вами дистрибутиве, либо из командной строки с помощью:
- Нажмите с образа диска И перейдите к ISO-файлу Windows.
- В разделе «Целевое устройство» выберите USB-накопитель, на который вы хотите записать файл ISO.
- Нажмите Установки И подождите, пока программа установки Windows запишет ISO на USB-накопитель.
В итоге у вас будет загрузочная флешка Windows, которую вы сможете использовать для установки Windows на свой компьютер.
Создайте загрузочный USB-накопитель Windows в Linux с помощью balenaEtcher
Двигаясь дальше, давайте теперь рассмотрим, как создать загрузочный USB-накопитель Windows в Linux с помощью balenaEtcher. Это кроссплатформенное приложение, доступное для загрузки в Windows, macOS и Linux.
Записать ISO-файл Windows на USB-накопитель в Linux с помощью balenaEtcher так же просто, если не проще, как метод WoeUSB, поскольку обычно вам не нужно устанавливать balenaEtcher в Linux. Вам просто нужно скачать Файл AppImage его и работает.
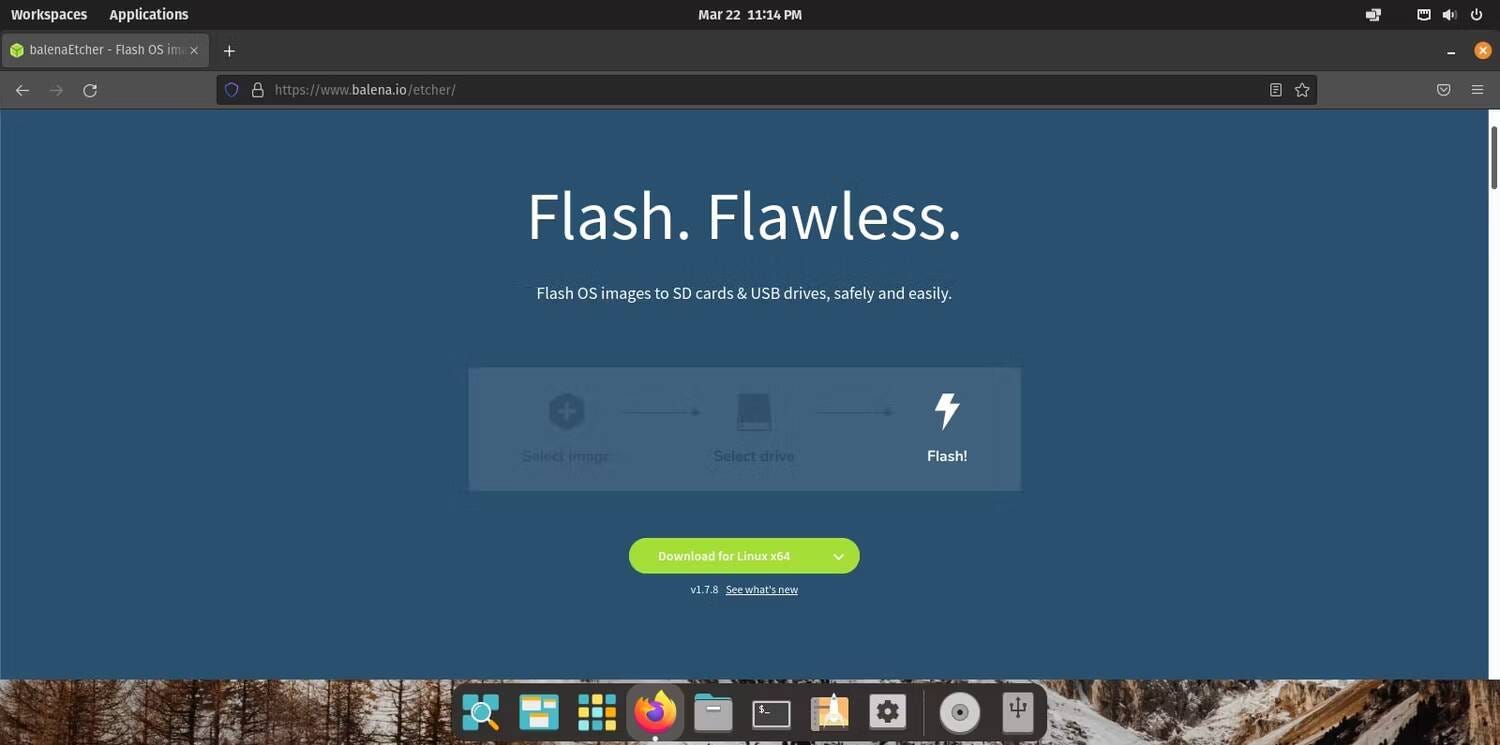
Чтобы продолжить, загрузите файл AppImage Linux_x64 с официального сайта и сохраните его в своей системе. После загрузки щелкните правой кнопкой мыши файл и выберите Реализация Для запуска balenaEtcher. Проверять Загрузка Linux с USB-накопителя: правильно ли вы это делаете?
Как использовать balenaEtcher в Linux
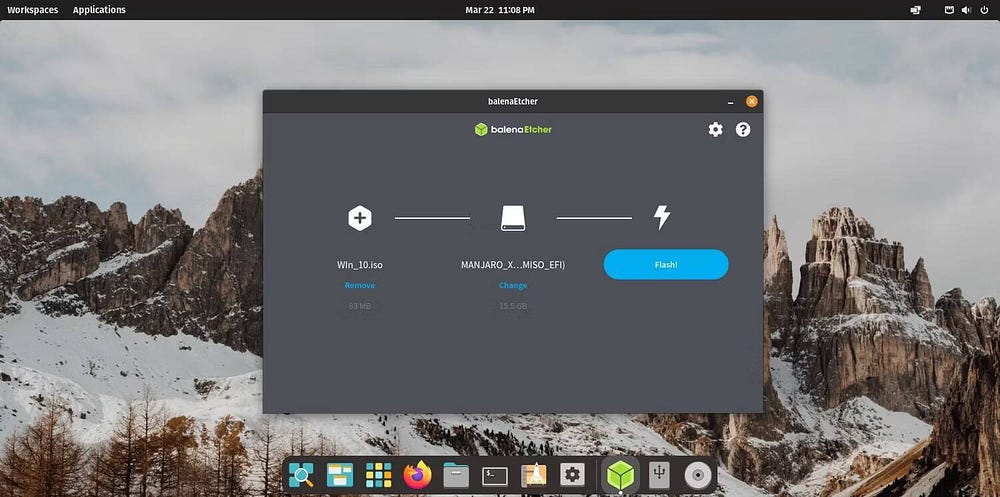
- Запустите AppImage balenaEtcher.
- Выберите файл ISO, который вы хотите использовать, в данном случае Windows ISO.
- Внимательно выбирайте USB-накопитель, поскольку содержимое выбранного устройства хранения данных будет стерто, а все данные на нем будут потеряны.
- Нажмите Flash И дождитесь окончания процесса. Вскоре у вас должен быть загрузочный USB-накопитель Windows, который вы сможете использовать для установки Windows на любой компьютер.
Почему вы должны придерживаться Linux
Linux может стать немного сложным или даже подавляющим. Вы можете испытывать стресс и усталость от устранения неполадок, или, возможно, вам мешает отсутствие необходимых приложений.
Какой бы ни была причина, мы действительно считаем, что вам следует перевести дух, переосмыслить ее и снова попробовать Linux. Хотя это может пугать новичков, Linux превосходит Windows по многим параметрам. Вы можете просмотреть сейчас Причины, по которым Linux может догнать Windows и macOS в этом году.