- How to install WordPress on Xampp (Ubuntu)?
- WordPress installation on XAMPP in Ubuntu
- 1. Install XAMPP on Ubuntu
- 2. Start Apache and MySQL servers
- 3. Download WordPress on Ubuntu
- 4. Create MySQL Database
- 5. Start WordPress XAMPP installation
- FAQ:
- How to open my WordPress dashboard in localhost XAMPP?
- Which localhost is best for WordPress?
- Can I use XAMPP to host a website?
- What are the disadvantages of XAMPP?
- Leave a Comment Cancel reply
- Установка XAMPP под Linux Mint 17
- Пакет инсталляции XAMPP под Linux Mint
- Установка WordPress под XAMPP в Linux Mint
- Install WordPress on Localhost XAMPP (Linux)
- Setup XAMPP
- Download WordPress
- XAMPP Virtual Host Configuration
- Create Database
- Install WordPress
How to install WordPress on Xampp (Ubuntu)?
XAMPP is not a new software that needs a detailed introduction. It has been around for quite some time, now. The main purpose of XAMPP is to provide a single package that offers an AMPP stack (Apache, MySQL, PHP, and Perl). In the XAMPP, ‘X’ stands for Cross-Platform (X).
This free software is available for Windows, macOS as well as Linux. Here in this tutorial, we learn the steps for installing WordPress on Xampp which is already running on Ubuntu.
Ubuntu is a popular Linux distro widely used on Desktop and server hardware and known for its huge community. Let’s start with the article:
Note: XAMPP is meant to use for development and testing only hence one must not use it as a production environment.
WordPress installation on XAMPP in Ubuntu
It doesn’t matter if you are using Ubuntu 20.04, 22.04, or any other latest version, this step-by-step guide to install WordPress on XAMPP for Linux will be the same.
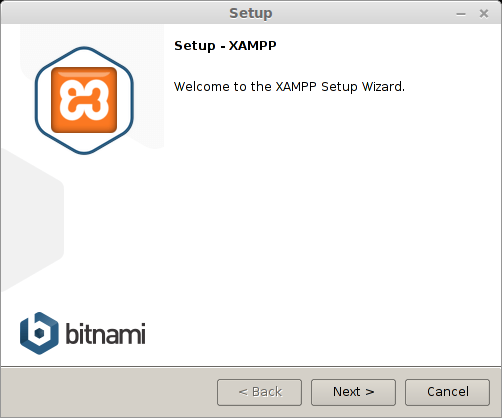
1. Install XAMPP on Ubuntu
The first thing we need to ensure is that our Ubuntu system already has XAMPP installed. Well, if you don’t have it then check out this tutorial: Install XAMPP on Ubuntu and follow the instructions given there. By following the link, you will learn how to download the latest version of XAMPP for Linux from the Apache Friends website.
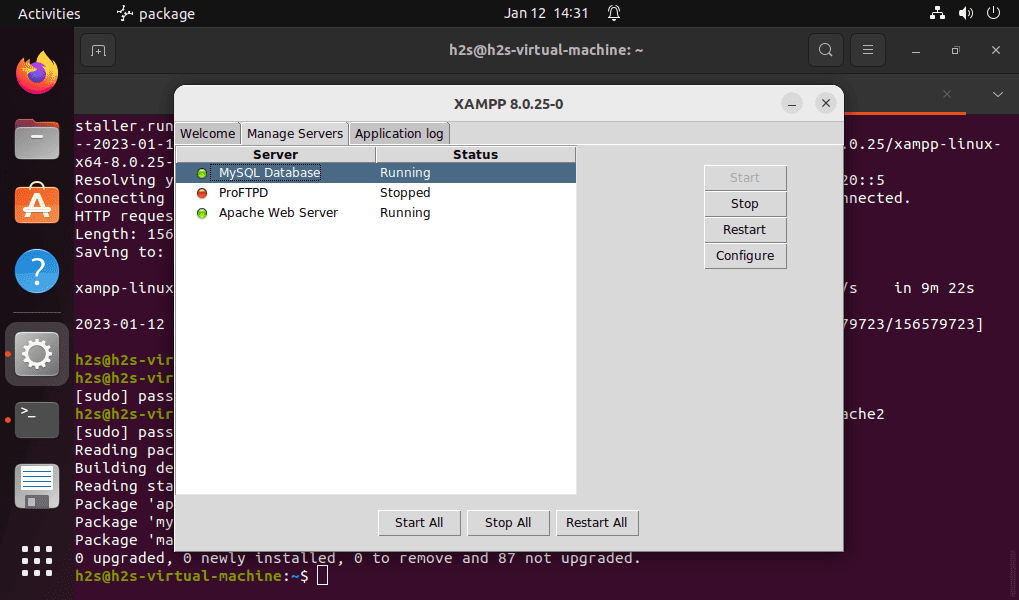
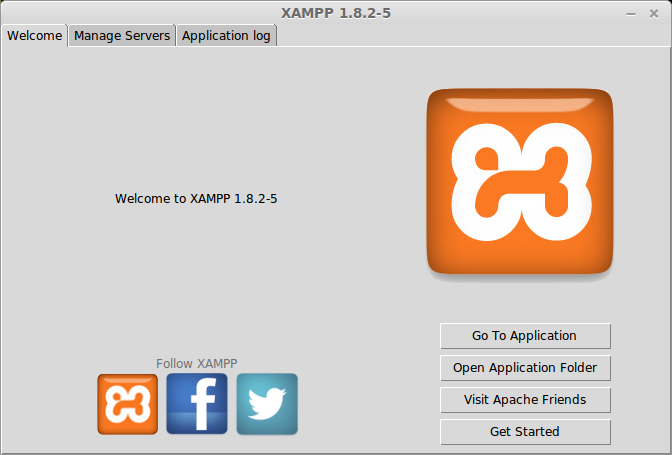
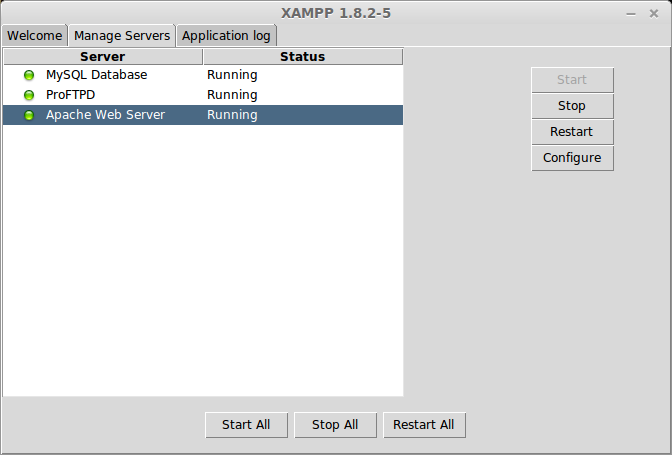
2. Start Apache and MySQL servers
Once the installation of XAMPP is completed, open it and go to Manager Servers Tab, and click on the Start ALL button given at bottom of the XAMPP control panel. After that, we can use PHP and Perl to develop web applications on our local machine.
3. Download WordPress on Ubuntu
To install and set up WordPress on XAMPP we first need its latest version archive file. For that, visit wordpress.org and download it.
Alternatively, the best way is to use the command terminal using the wget tool, here is the way to use it.
wget https://wordpress.org/latest.zipAfter that extract the file in the /opt/lampp/htdocs directory created by the XAMPP:
sudo unzip latest.zip -d /opt/lampp/htdocs/Also, change the permission and make the WordPress files writable:
cd /opt/lampp/htdocs/wordpresssudo find . -type d -exec chmod -R 775 <> \;sudo find . -type f -exec chmod -R 664 <> \;4. Create MySQL Database
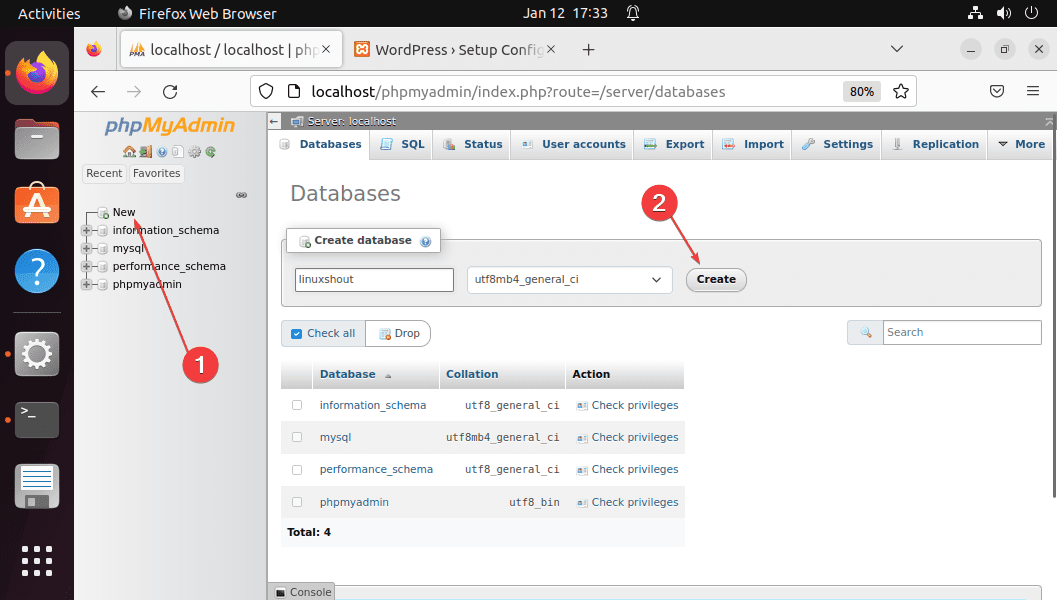
The WordPress files are in their place, the next thing we need is a MySQL database for storing the website data. For that open Mozilla or any other browser, you are using on your Ubuntu. And point it to –
http://localhost/phpmyadmin/Step 1: The main page of phpMyAdmin will open.
Step 2: There click on New and then under the ‘Create Database‘ option add a name for your new database. After that hit the Create button. A new Database will be added to the MySQL server.
We don’t need to create a user because we are going to use the existing root one.
5. Start WordPress XAMPP installation
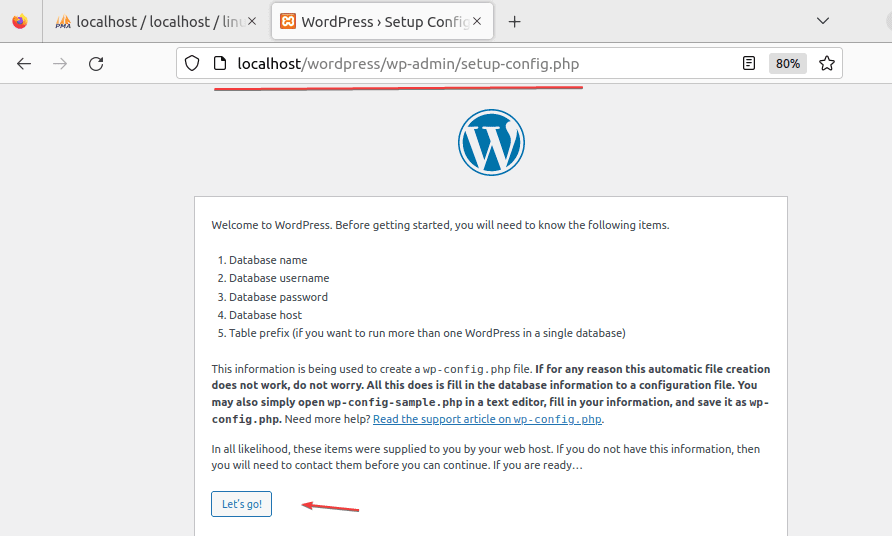
We have the WordPress Archive on our Ubuntu inside the htdocs folder and also a database. Now, in your browser URL type –
Step 1: Click on the Let’s go button to start Ubuntu’s XAMPP WordPress setup.
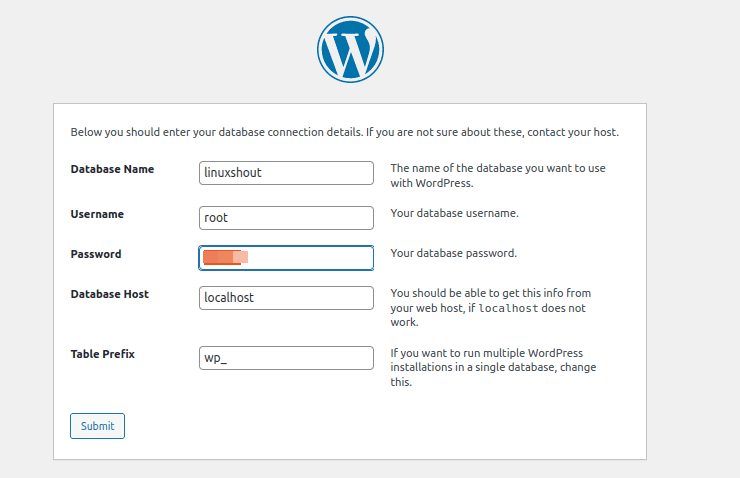
Step 2: In the Database name- Enter the name of the Database, you created earlier in this tutorial using phpMyAdmin.
In the username type- root and in the password column use the password you have for the root user on your Ubuntu system where you are using the XAMPP.
Leave the rest of things as they are and click on the Submit button.
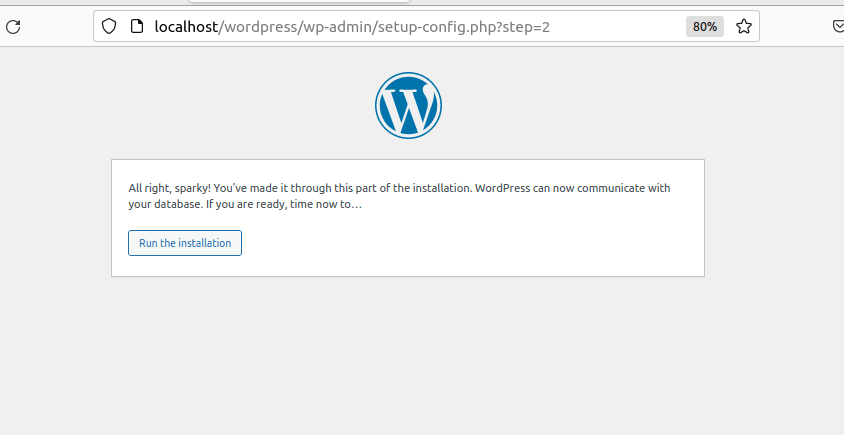
Step 3: Click on the “Run the Installation” button.
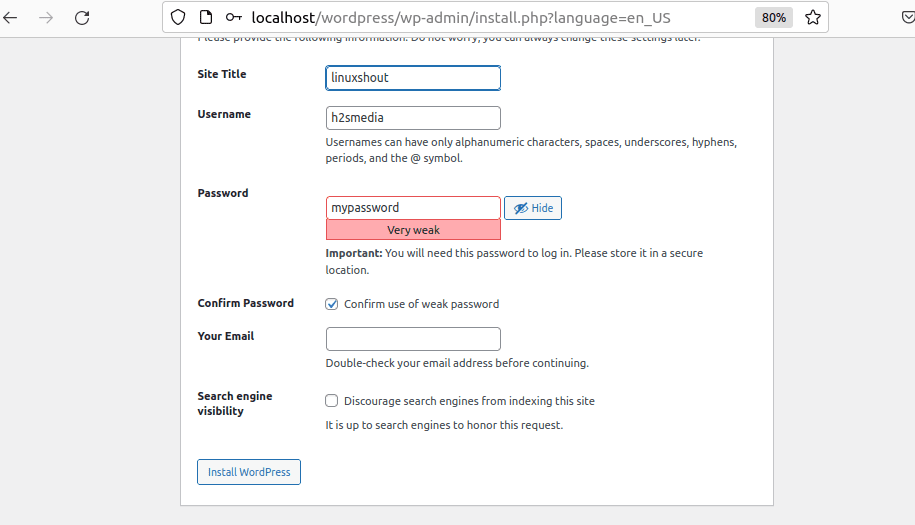
Step 4: Create a WordPress Admin user and password. Finally, once you are ready, click on the Install Worpdress button.
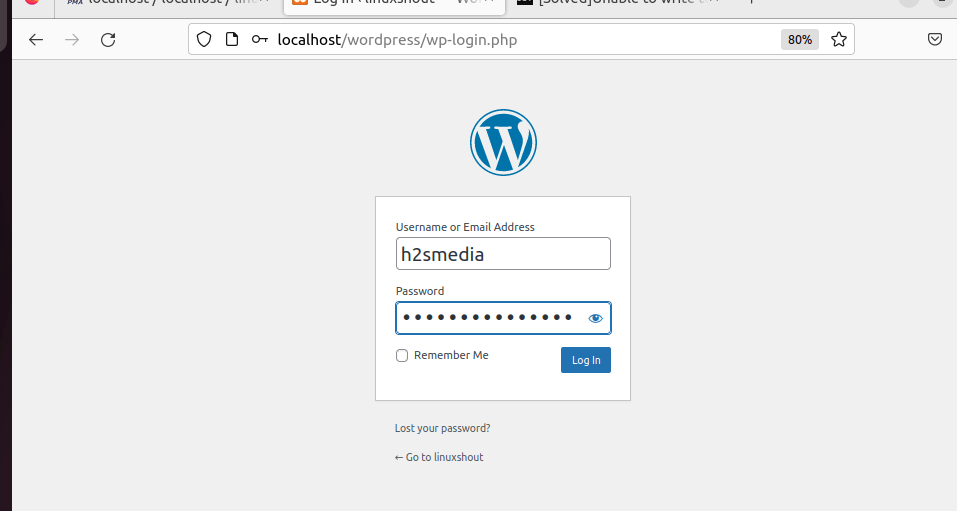
Step 5: Log in with the details you have created in the previous step.
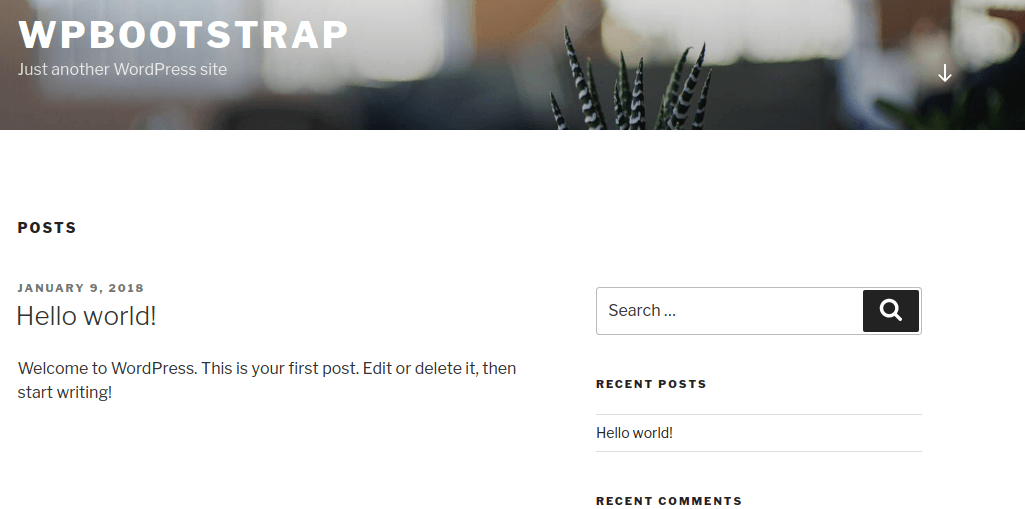
Step 6: WordPress Dashboard
FAQ:
How to open my WordPress dashboard in localhost XAMPP?
After setting up WordPress on XAMPP, open your browser and type – http://localhost/wordpress/wp-admin This will open the Login Interface where enter the username and password. Soon you will have the WordPress Dashboard. However, l ocalhost/wordpress/wp-admin – in this URL, replace WordPress with your folder name in htdocs where the core files of this CMS are placed by you.
Which localhost is best for WordPress?
Here are some popular software tools to install and run WordPress locally on Windows, Linux, or macOS.
Can I use XAMPP to host a website?
No, XAMPP is an application that creates to test websites locally for development purposes. If you want to host a website for production then it is better to go for hosting or cloud services.
What are the disadvantages of XAMPP?
Here are a few disadvantages that make XAMPP not suitable for production use.
- XAMPP is not scalable and can be crashed on heavy loads.
- Not meant to serve as a web server for public use.
- Difficult to use with certain web applications or programming languages
- Not secure as a full-fledges configured LAMP or LEMP server.
- It can be resource-intensive.
- May not include all the components or features, we have in the LAMP stack.
- By default, Database Administrator is not secure including phpMyAdmin
Leave a Comment Cancel reply
This site uses Akismet to reduce spam. Learn how your comment data is processed.
Установка XAMPP под Linux Mint 17
В этой статье будет рассмотрен вопрос установки локального сервера XAMPP под операционной системой Linux Mint 17.
Почему этот локальный сервер и, тем более, почему именно Linux? Ответы просты — для меня лично сервер XAMPP является наиболее интуитивно понятным. А Linux — потому что в ней мне более удобно кодить на HTML&CSS, нежели под Windows.
Хотя бы взять удобный и полноценный терминал Linux, который всегда под рукой. Также, локальный сервер под Linux, по моим субъективным оценкам, работает гораздо быстрее, нежели под Windows.
С преимуществами работы кодера под Linux разобрались — осталось установить и настроить локальный сервер под эту операционную систему. В этом вопросе нет ничего сложного и есть даже локализованная версия инструкции на официальном сайте Apache Friends -FAQ Linux. В этой статье я постараюсь дать более подробное описание этого процесса, с картинками.
Локальный сервер под Linux выполнен в виде пошагового графического инсталлятора наподобие того, как это делается под Windows. С одной стороны это несколько непривычно для Linux; но с другой стороны так можно быстро и легко установить пакет для новичков в этой операционной системе.
Пакет инсталляции XAMPP под Linux Mint
Скачиваем пакет инсталлятора по ссылке Download официального сайта “Apache Friends”. При этом определяемся, под 32 или 64-битную систему необходим пакет — такой и выбираем. Помимо этого есть две версии пакета — стабильный 1.8.2/PHP 5.4.27 и более новый 1.8.3/PHP 5.5.11.
Мною был выбран пакет 1.8.2/PHP 5.4.27 (именно из-за его стабильности) версии 64-бита, под операционную систему Linux Mint 17 “Qiana” Cinnamon 64-bit.
xampp-linux-x64-1.8.2-5-installer.run
В этом же терминале делаю этот файл исполняемым:
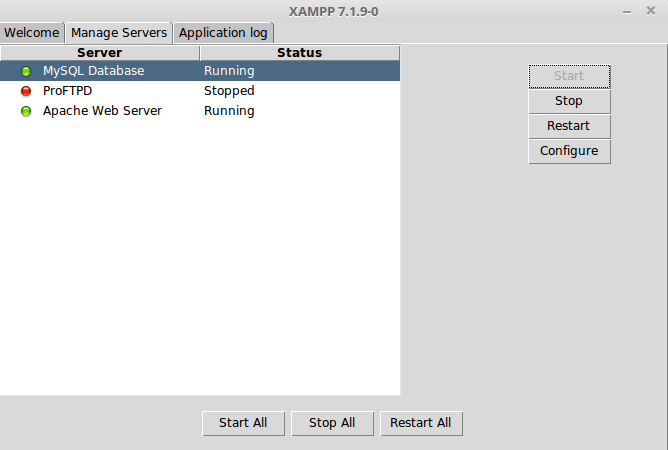
Переходим в этом приложении на вкладку “Manage Servers” и видим список служб локального сервера. Напротив каждой службы в виде лампочки показан ее статус — запущена она (Running) или остановлена (Stopped).

Первоначально запущен только локальный сервер Apache; база данных “MySQL Database” и FTP-сервер “ProFTPD” остановлены. Их можно запустить из данного приложения, просто нажав кнопку “Start”, но я поступлю более Linux-way и воспользуюсь терминалом. Для этого я введу в нем всего одну комадну:
Установка WordPress под XAMPP в Linux Mint
С установкой локального сервера под Linux Mint разобрались. Стоит еще раз оговориться, что по моим субъективным оценкам он работает гораздо шустрее под Linux, нежели под Windows.
Install WordPress on Localhost XAMPP (Linux)
The above are the official requirements for a system to install WordPress. Since in this tutorial we are using XAMPP to install WordPress, XAMPP should take care of the requirements.
Setup XAMPP
First of all we need to download and install XAMPP. Download it from the apache friends official website. Download the XAMPP version > 7.0.0 which contains PHP version 7.0.0

Follow the steps to install the XAMPP. If you are on Linux Machine , the install location for XAMPP will be /opt/lampp
Once the XAMPP is Installed, you should be able to access the XAMPP Console from where you can start or stop the necessary services.
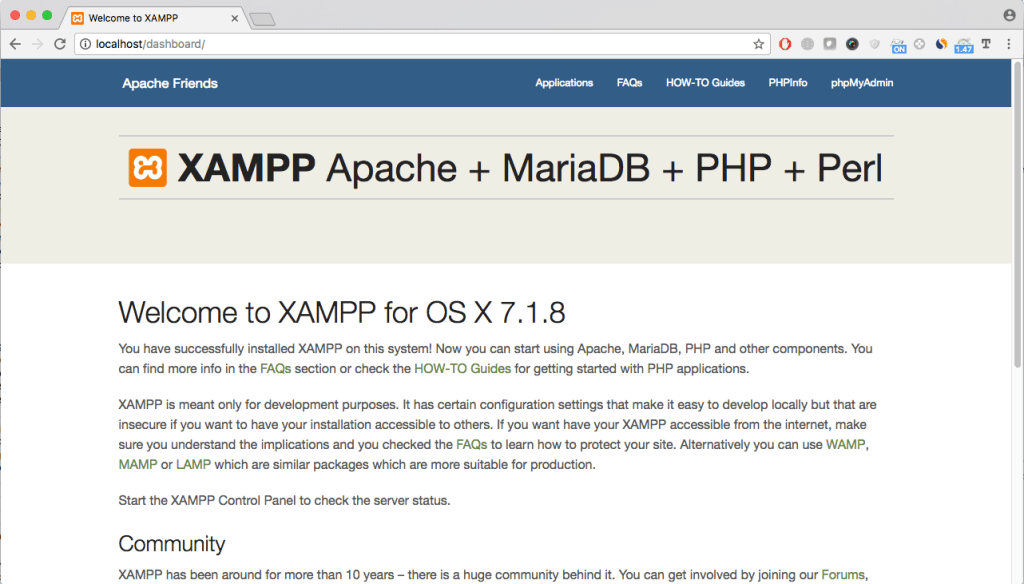
If you XAMPP is installed correctly and if you have the apache service running under it.
You should see the following page when you access localhost on your browser.
Download WordPress
As the next step, Let’s go ahead and download the latest release of WordPress code from the official WordPress website.
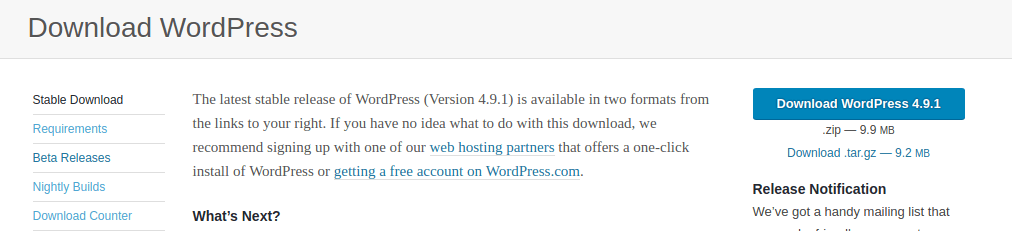
The wordpress source code will be download as a zip compressed file. Go ahead and extract the zip with your favorite zip extractor.
The files will be extracted in a folder named wordpress. Change the name of the folder to your desired project name.
Let’s call it myProject for this demo.
Now we need a home for the wordpress source code from where they can be executed. With XAMPP all the PHP source code to be executed goes into the htdocs directory.
Move your downloaded wordpress folder (myProject) to /opt/lampp/htdocs directory
XAMPP Virtual Host Configuration
Let’s go ahead and create a Virtual Host for the WordPress Site, Before we start with the wordpress installation in our browser.
Open file /opt/lampp/etc/extra/httpd-vhost.conf and add the following virtual host entry into the file.
DocumentRoot "/opt/lampp/htdocs/myProject" ServerAdmin myproject.local Options Indexes FollowSymLinks AllowOverride All Require all granted
Notice the above VirtualHost entry. We are adding a new host myproject.local in the virtualHost and we will access the directory /opt/lampp/htdocs/myProject with it.
You can modify these two according to the name of the domain you want to access your local wordpress site with, and the folder name in which you kept the wordpress code.
Now open file /etc/hosts and add following entry into it.
/etc/hosts file translate our domain names to IP address. Thus when we enter myproject.local in our browser it will get the connect to the local IP address 127.0.0.1 on which your XAMPP apache server is running
That’s all is required to start executing WordPress code on your localhost via XAMPP.
Just couple of steps more before you can begin working with WordPress.
Create Database
As wordpress installation will ask us for the database details where it will generate the initial tables and data. Let’s create a new database on our mysql
Open localhost/phpmyadmin and visit Databases tab.
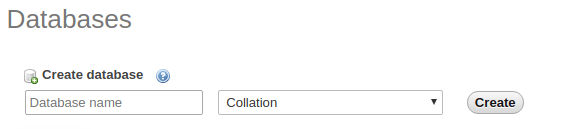
Create a database with your desired named. Let’s call it myProject for this demonstration.
Keep the database details with you (database name, mysql username and password), We will use this database details in our wordpress installation
Install WordPress
Open myproject.local in your browser, It should start the wordpress installation for you.
You should see the following page.
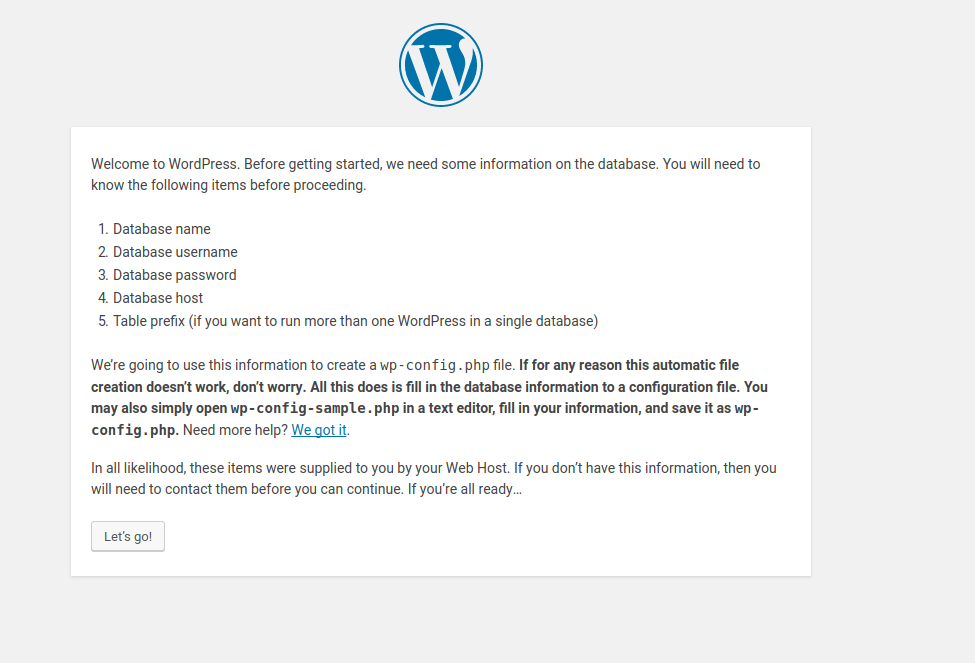
Click Let’s go.
In the next step wordpress will ask you enter the database details. Enter the following details.
- Database Name (myProject which we created in the last step)
- Username ( your mysql username , default is root)
- Password ( your mysql password, leave blank for default)
- Database host (localhost)
- Table Prefix (wp_ )
Click Submit
Note: As the next step wordpress tries to create a wp-config.php file in your wordpress directory where it keeps all the database details you just submitted.
If there are directory permission restrictions, WordPress won’t be able to create the file by its own and will present you with this page.
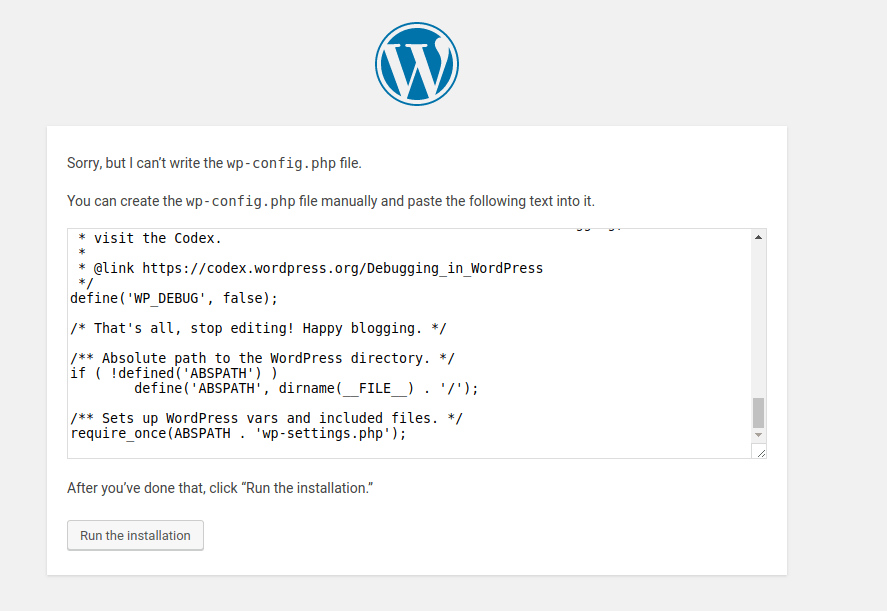
Go to folder /opt/lampp/htdocs/myProject/ and create a new blank file named wp-config.php and put the contents given by wordpress.
Now Click Run the Installation
Next, wordpress will present you with this page.
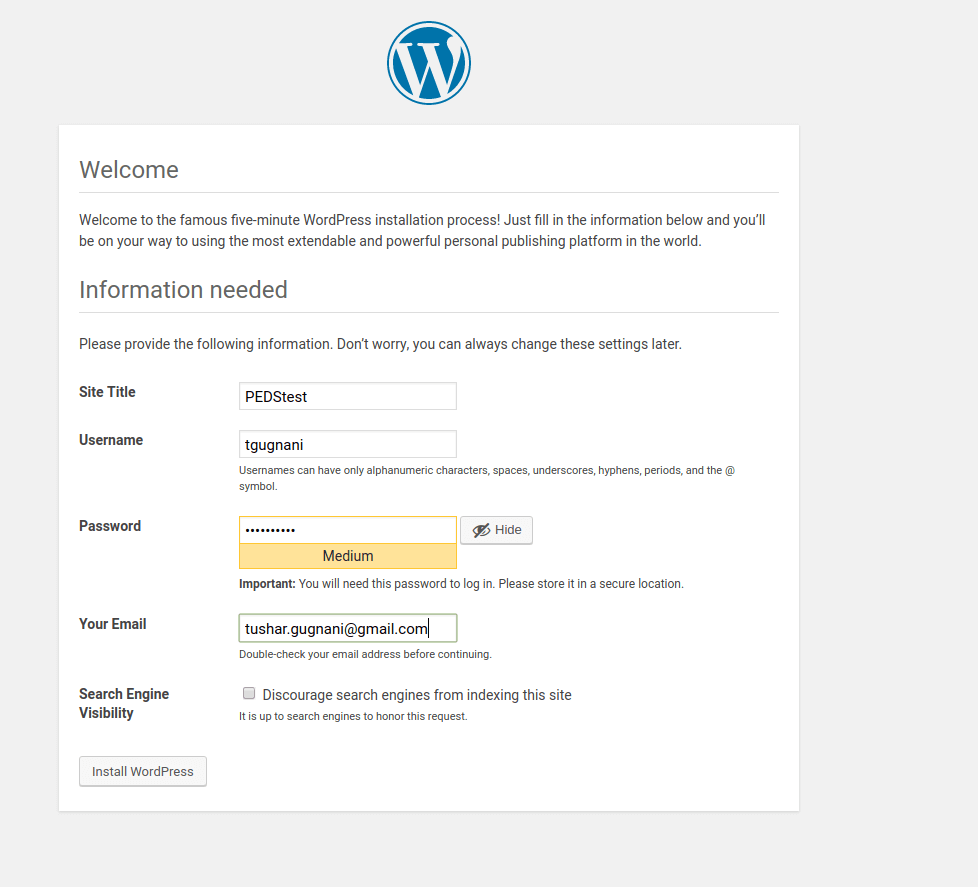
Enter your website name, Username and Password for your wordpress admin section and email address.
And Click on Install WordPress
There you go ! Installation will now be completed and you should be able to access the wordpress home page as well should be able to login to wordpress admin page.