- 2 Agent
- Supported platforms
- Agent on UNIX-like systems
- Agent on Windows systems
- Other agent options
- Agent process types
- Process user
- Configuration file
- Locale
- Exit code
- Установка и настройка zabbix агента в Ubuntu Linux
- Шаг 1: Включите репозиторий Zabbix на удаленном хосте
- Шаг 2: Установка Zabbix агента
- Шаг 3: Настройка Zabbix агента
- Шаг 4: Настройка брандмауэра
- Шаг 5: Добавление Хоста на Zabbix — Server Ubuntu Linux
- Заключение
2 Agent
Zabbix agent is deployed on a monitoring target to actively monitor local resources and applications (hard drives, memory, processor statistics, etc.).
The agent gathers operational information locally and reports data to Zabbix server for further processing. In case of failures (such as a hard disk running full or a crashed service process), Zabbix server can actively alert the administrators of the particular machine that reported the failure.
Zabbix agents are extremely efficient because of use of native system calls for gathering statistical information.
Passive and active checks
Zabbix agents can perform passive and active checks.
In a passive check the agent responds to a data request. Zabbix server (or proxy) asks for data, for example, CPU load, and Zabbix agent sends back the result.
Active checks require more complex processing. The agent must first retrieve a list of items from Zabbix server for independent processing. Then it will periodically send new values to the server.
Whether to perform passive or active checks is configured by selecting the respective monitoring item type. Zabbix agent processes items of type ‘Zabbix agent’ or ‘Zabbix agent (active)’.
Supported platforms
Zabbix agent is supported on the following platforms:
- Windows (all desktop and server versions since XP)
- Linux (also available in NetBSD and HP-UX, and those are compatible with current Zabbix server/proxy version.
Agent on UNIX-like systems
Installation
See the package installation section for instructions on how to install Zabbix agent as package. Alternatively see instructions for manual installation if you do not want to use packages.
If installed as package
shell> service zabbix-agent start shell> /etc/init.d/zabbix-agent start shell> service zabbix-agent stop shell> service zabbix-agent restart shell> service zabbix-agent statusStart up manually
If the above does not work you have to start it manually. Find the path to the zabbix_agentd binary and execute:
Agent on Windows systems
Preparation
Zabbix agent is distributed as a zip archive. After you download the archive you need to unpack it. Choose any folder to store Zabbix agent and the configuration file, e. g.
Copy bin\zabbix_agentd.exe and conf\zabbix_agentd.conf files to c:\zabbix. Edit the c:\zabbix\zabbix_agentd.conf file to your needs, making sure to specify a correct «Hostname» parameter.
Installation
C:\> c:\zabbix\zabbix_agentd.exe -c c:\zabbix\zabbix_agentd.conf -iNow you should be able to configure «Zabbix agent» service normally as any other Windows service. See more details on installing and running Zabbix agent on Windows.
Other agent options
It is possible to run multiple instances of the agent on a host. A single instance can use the default configuration file or a configuration file specified in the command line. In case of multiple instances each agent instance must have its own configuration file (one of the instances can use the default configuration file). The following command line parameters can be used with Zabbix agent:
| Parameter | Description |
|---|---|
| UNIX and Windows agent | |
| -c —config | Path to the configuration file. You may use this option to specify a configuration file that is not the default one. On UNIX, default is /usr/local/etc/zabbix_agentd.conf or as set by compile-time variables —sysconfdir or —prefix On Windows, default is c:\zabbix_agentd.conf |
| -p —print | Print known items and exit. Note: To return user parameter results as well, you must specify the configuration file (if it is not in the default location). |
| -t —test | Test specified item and exit. Note: To return user parameter results as well, you must specify the configuration file (if it is not in the default location). |
| -h —help | Display help information |
| -V —version | Display version number |
| UNIX agent only | |
| -R —runtime-control | Perform administrative functions. See runtime control. |
| Windows agent only | |
| -m —multiple-agents | Use multiple agent instances (with -i,-d,-s,-x functions). To distinguish service names of instances, each service name will include the Hostname value from the specified configuration file. |
| Windows agent only (functions) | |
| -i —install | Install Zabbix Windows agent as service |
| -d —uninstall | Uninstall Zabbix Windows agent service |
| -s —start | Start Zabbix Windows agent service |
| -x —stop | Stop Zabbix Windows agent service |
- printing all built-in agent items with values
- testing a user parameter with «mysql.ping» key defined in the specified configuration file
- installing a «Zabbix Agent» service for Windows using the default path to configuration file c:\zabbix_agentd.conf
- installing a «Zabbix Agent [Hostname]» service for Windows using the configuration file zabbix_agentd.conf located in the same folder as agent executable and make the service name unique by extending it by Hostname value from the config file
shell> zabbix_agentd --print shell> zabbix_agentd -t "mysql.ping" -c /etc/zabbix/zabbix_agentd.conf shell> zabbix_agentd.exe -i shell> zabbix_agentd.exe -i -m -c zabbix_agentd.confRuntime control
With runtime control options you may change the log level of agent processes.
| Option | Description | Target |
|---|---|---|
| log_level_increase[=] | Increase log level. If target is not specified, all processes are affected. | Target can be specified as: process type — all processes of specified type (e.g., listener) See all agent process types. process type,N — process type and number (e.g., listener,3) pid — process identifier (1 to 65535). For larger values specify target as ‘process-type,N’. |
| log_level_decrease[=] | Decrease log level. If target is not specified, all processes are affected. | |
| userparameter_reload | Reload values of the UserParameter and Include options from the current configuration file. |
- increasing log level of all processes
- increasing log level of the third listener process
- increasing log level of process with PID 1234
- decreasing log level of all active check processes
shell> zabbix_agentd -R log_level_increase shell> zabbix_agentd -R log_level_increase=listener,3 shell> zabbix_agentd -R log_level_increase=1234 shell> zabbix_agentd -R log_level_decrease="active checks"Runtime control is not supported on OpenBSD, NetBSD and Windows.
Agent process types
- active checks — process for performing active checks
- collector — process for data collection
- listener — process for listening to passive checks
The agent log file can be used to observe these process types.
Process user
Zabbix agent on UNIX is designed to run as a non-root user. It will run as whatever non-root user it is started as. So you can run agent as any non-root user without any issues.
If you will try to run it as ‘root’, it will switch to a hardcoded ‘zabbix’ user, which must be present on your system. You can only run agent as ‘root’ if you modify the ‘AllowRoot’ parameter in the agent configuration file accordingly.
Configuration file
For details on configuring Zabbix agent see the configuration file options for zabbix_agentd or Windows agent.
Locale
Note that the agent requires a UTF-8 locale so that some textual agent items can return the expected content. Most modern Unix-like systems have a UTF-8 locale as default, however, there are some systems where that may need to be set specifically.
Exit code
Before version 2.2 Zabbix agent returned 0 in case of successful exit and 255 in case of failure. Starting from version 2.2 and higher Zabbix agent returns 0 in case of successful exit and 1 in case of failure.
Установка и настройка zabbix агента в Ubuntu Linux
Zabbix agent устанавливается на удаленном хосте для мониторинга жесткого диска, процессора памяти и т. д. Агент собирает данные и отправляет их обратно на Zabbix — сервер.
Агенты Zabbix могут использовать пассивные или активные проверки для передачи информации. При пассивной проверке Zabbix-сервер (poller) запрашивает у агента определенную информацию, и агент отправляет обратно значение. В активной проверке агент обрабатывает все данные и отправляет их на Zabbix-сервер. Однако агент периодически подключает сервер для сбора метрики, которую необходимо отслеживать.
Эту инструкцию мы начнем с установки Zabbix агента на удаленный хост Ubuntu 20.04, а затем добавим Хост на панель мониторинга Zabbix server.
Рекомендую. к прочтению:
Шаг 1: Включите репозиторий Zabbix на удаленном хосте
Как всегда начните с обновления списков пакетов на удаленном хосте.
Затем загрузите Zabbix файл из репозитория Центра загрузки Zabbix. Делается это следующим образом.
Затем включите его с помощью команды dpkg следующим образом:
$ sudo dpkg -i zabbix-release_5.0-1+focal_all.deb
Далее обновите индекс пакетов Ubuntu, чтобы убедиться, что репозиторий синхронизирован
Шаг 2: Установка Zabbix агента
Как только репозиторий будет создан, установите Zabbix агент в Ubuntu Linux.
После завершения установки проверьте, работает ли демон Zabbix-agent следующим образом:

Zabbix — agent прослушивает порт 10050. Возможно, вы захотите проверить это. Сделать проверку можно с помощью команды netstat:

На изображении выше видно, что Служба Zabbix agent запущена и работает.
Шаг 3: Настройка Zabbix агента
Мы установили агент Zabbix и работает он как ожидалось. Но этого недостаточно. Нам нужно внести несколько изменений в конфигурационный файл. Сделайте изменения в файле /etc/zabbix/zabbix_agentd.conf, чтобы агент мог взаимодействовать с сервером Zabbix..
$ sudo vim /etc/zabbix/zabbix_agentd.conf
Здесь мы собираемся включить пассивные проверки агента. Сначала найдите переменные “server” и “Hostname” в файле zabbix_agentd.conf.
Например, мой IP адрес Zabbix-сервера — 10.128.0.16, а имя хоста (client system).
Сохраните изменения и выйдите из файла. Затем перезапустите службу Zabbix agent для внесения изменений.
$ sudo systemctl restart zabbix-agent
Примечание: Если вы настраиваете активную проверку, то ищите переменную “ServerActive” и используйте порт 10051.
Шаг 4: Настройка брандмауэра
Последним шагом в настройке хоста является разрешение порта, который Zabbix агент слушает через брандмауэр. Если у вас включен брандмауэр UFW, выполните следующие команды:
Затем перезагрузите брандмауэр
А так же убедитесь, что порт был открыт и разрешен на брандмауэре.
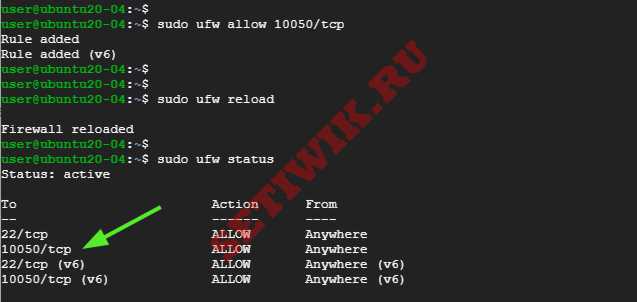
Идеально! Теперь zabbix — агент должен работать.
Шаг 5: Добавление Хоста на Zabbix — Server Ubuntu Linux
По умолчанию Zabbix отслеживает только тот сервер, на котором он установлен. В этом разделе мы добавим Zabbix-Host на Zabbix-Server через браузер.
Итак, войдите в свой экземпляр Zabbix-сервера используя браузер.
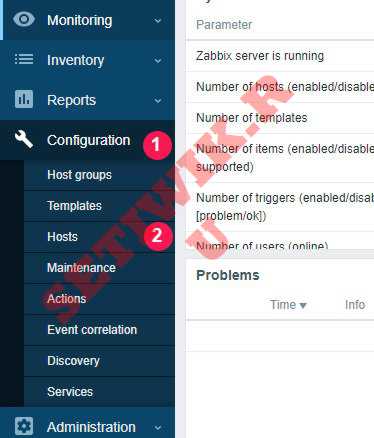
В левой навигационной панели выберите пункт Configuration > > Hosts
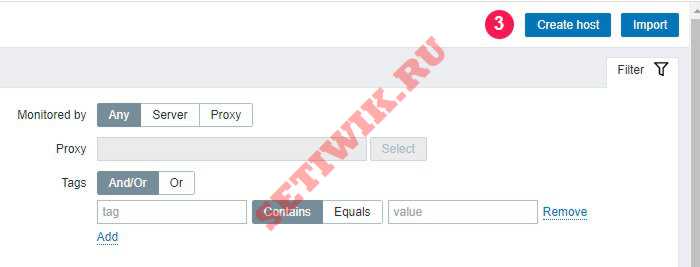
Перейдите в правый верхний угол и нажмите кнопку «Создать хост«. (Create host)
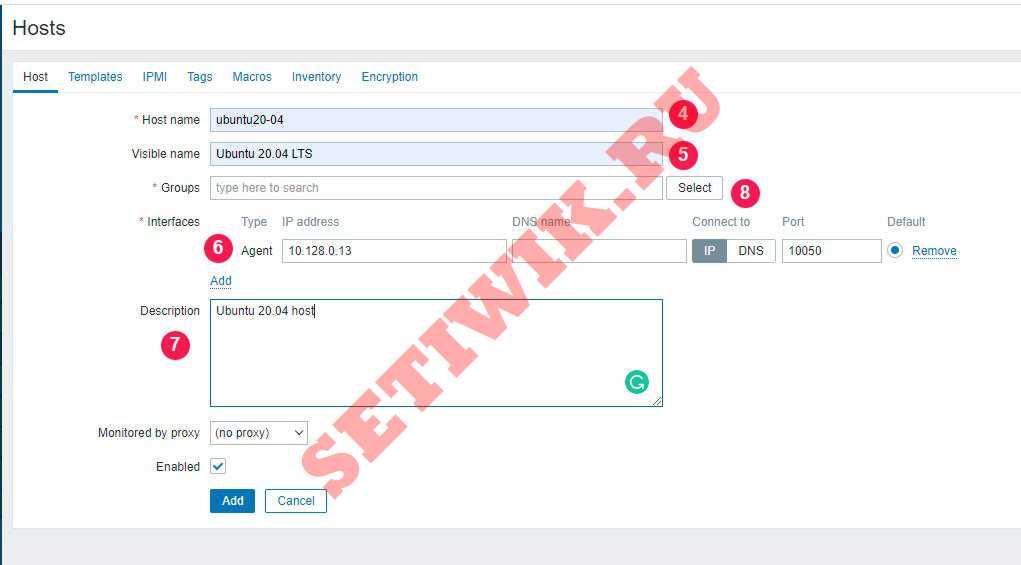
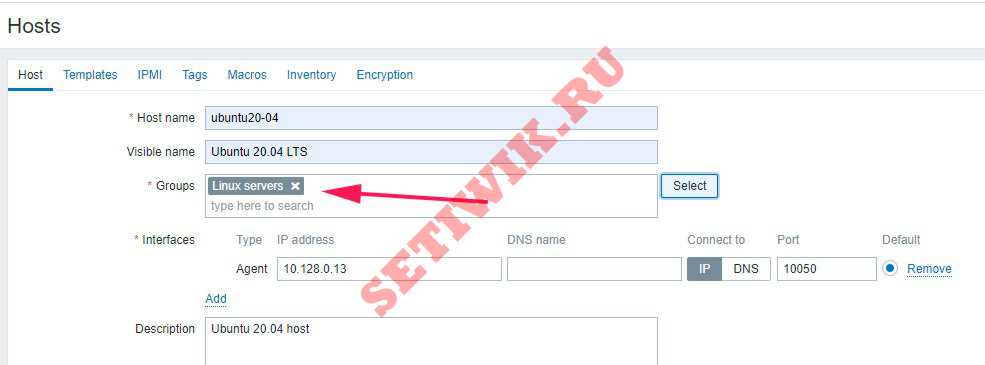
В появившемся окне заполните данные удаленного хоста, такие как имя хоста. видимое имя, IP-адрес, краткое описание и нажмите на кнопку «Выбрать» (Select) рядом с текстовым полем «Группы«.
В появившемся списке выберите пункт «Серверы Linux‘ и нажмите кнопку «Выбрать«.
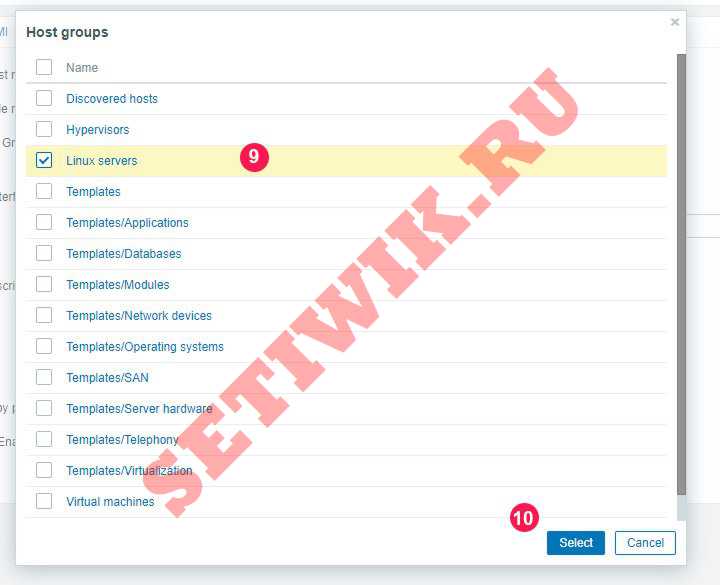
Это приведет вас обратно, и вы сможете просмотреть только что добавленную группу, как показано ниже.
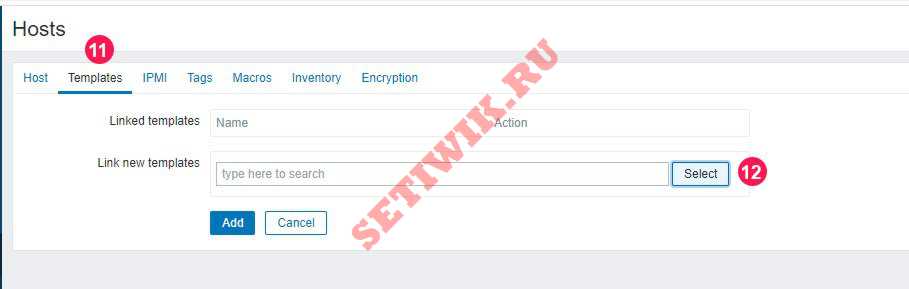
Затем перейдите на вкладку «шаблоны» (Templates) и нажмите кнопку «Выбрать» рядом с текстовым полем «Связать новые шаблоны» (Link new Templates).
Нажмите на кнопку «Выбрать«(Select) рядом с текстовым полем «Группа хостов«, как показано на рисунке.
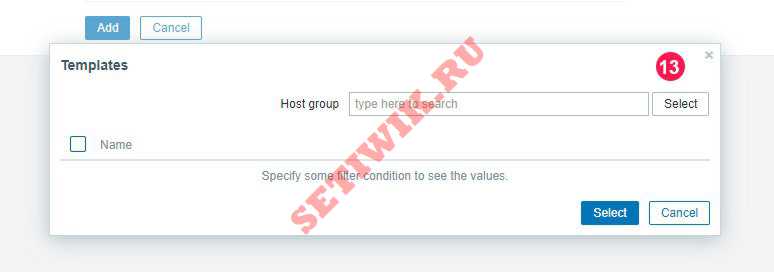
Нажмите на опцию «Шаблоны/операционные системы» (Templates/Operating systems), как показано на рисунке.
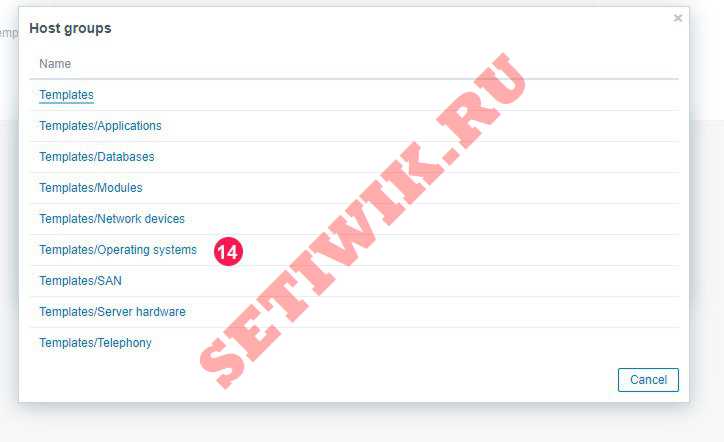
Затем выберите опцию «Template OS Linux by Zabbix agent’ и нажмите кнопку «Выбрать» (Select).

Затем нажмите на кнопку «Добавить» (Add).

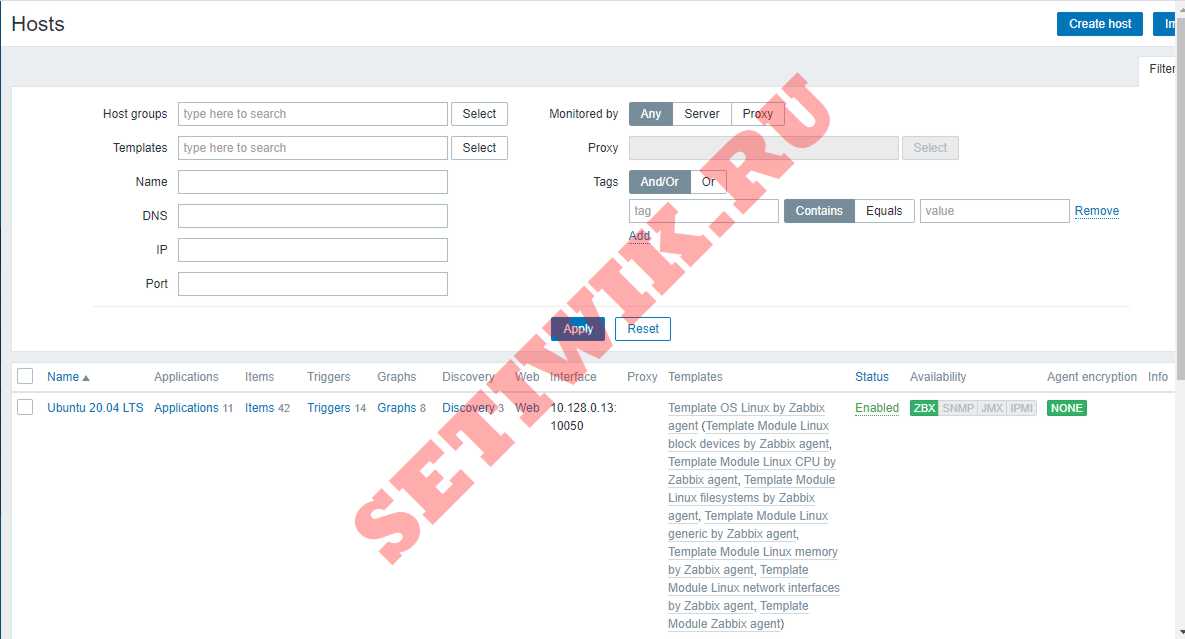
Теперь ваш хост будет указан на панели мониторинга, как показано на рисунке ниже.
Заключение
В этой инструкции мы подробно показали, как установить агент Zabbix в системе Ubuntu 20.04 Linux. А так же как настроить его для связи с сервером Zabbix. Это поможет вам активно отслеживать целевые локальные ресурсы и приложения.