How to ssh to remote server using a private key?
I have two servers. Both servers are in CentOS 5.6. I want to SSH from Server 1 to Server 2 using a private key I have (OpenSSH SSH-2 Private Key). I don’t know how to do it over unix. But what I did on windows using Putty was to feed my OpenSSH private key to putty-gen and generate a private key in PPK format. However, I would be creating a bash script from server 1 that will execute some commands on server 2 via SSH. How do I SSH to Server 2 using my private key file from Server 1?
5 Answers 5
You need your SSH public key and you will need your ssh private key. Keys can be generated with ssh-keygen . The private key must be kept on Server 1 and the public key must be stored on Server 2.
This is completly described in the manpage of openssh, so I will quote a lot of it. You should read the section ‘Authentication’. Also the openSSH manual should be really helpful: http://www.openssh.org/manual.html
Please be careful with ssh because this affects the security of your server.
~/.ssh/identity ~/.ssh/id_dsa ~/.ssh/id_rsa Contains the private key for authentication. These files contain sensitive data and should be readable by the user but not acces- sible by others (read/write/execute). ssh will simply ignore a private key file if it is accessible by others. It is possible to specify a passphrase when generating the key which will be used to encrypt the sensitive part of this file using 3DES. ~/.ssh/identity.pub ~/.ssh/id_dsa.pub ~/.ssh/id_rsa.pub Contains the public key for authentication. These files are not sensitive and can (but need not) be readable by anyone. This means you can store your private key in your home directory in .ssh. Another possibility is to tell ssh via the -i parameter switch to use a special identity file. Also from man ssh :
-i identity_file Selects a file from which the identity (private key) for RSA or DSA authentication is read. The default is ~/.ssh/identity for protocol version 1, and ~/.ssh/id_rsa and ~/.ssh/id_dsa for pro- tocol version 2. Identity files may also be specified on a per- host basis in the configuration file. It is possible to have multiple -i options (and multiple identities specified in config- uration files). This is for the private key. Now you need to introduce your public key on Server 2. Again a quote from man ssh :
~/.ssh/authorized_keys Lists the public keys (RSA/DSA) that can be used for logging in as this user. The format of this file is described in the sshd(8) manual page. This file is not highly sensitive, but the recommended permissions are read/write for the user, and not accessible by others. The easiest way to achive that is to copy the file to Server 2 and append it to the authorized_keys file:
scp -p your_pub_key.pub user@host: ssh user@host host$ cat id_dsa.pub >> ~/.ssh/authorized_keys Authorisation via public key must be allowed for the ssh daemon, see man ssh_config . Usually this can be done by adding the following statement to the config file:
How to Use Public Key Authentication with SSH
Public Key Authentication is a secure logging method using SSH. Instead of a password, the procedure uses a cryptographic key pair for validation. Although using a strong password helps prevent brute force attacks, public key authentication provides cryptographic strength and automated passwordless logins.
This guide gives step-by-step instructions on how to implement public key authentication from scratch.
- Command line/terminal access with administrator privileges.
- SSH enabled. Follow our guides to turn on SSH on Linux: Ubuntu 20.04, Debian 9 or 10.
- A local and remote server.
Using SSH Key for authentication
The SSH public key authentication has four steps:
1. Generate a private and public key, known as the key pair. The private key stays on the local machine.
2. Add the corresponding public key to the server.
3. The server stores and marks the public key as approved.
4. The server allows access to anyone who proves the ownership of the corresponding private key.
The model assumes the private key is secured. Adding a passphrase to encrypt the private key adds a layer of security good enough for most user-based cases. For automation purposes, key management software and practices apply since the private key stays unprotected otherwise.
Generating SSH Key Pair
Generate the SSH key pair on the local server using OpenSSH. The basic instructions for Linux, macOS, and Windows are outlined below.
Note: For a more detailed OS-specific tutorials, check out our in-depth guides:
Linux and macOS
1. Open the terminal (CTRL+ALT+T).
2. Check for existing keys with:
If there are keys already, the output shows the directory contents:

Generating new keys overwrites the current ones by default. However, stating a new name for the keys saves them to different files.
If there are no existing keys, the output indicates the folder does not exist:

5. The following command starts the key generator:
The output prints out a message, indicating the command ran successfully. Next, the program asks where to save the file:

The default directory and file for key storage is /home//.ssh/id_rsa. If you have existing keys you want to keep, enter a new file name. Otherwise, press Enter to save in the default location. If any keys already exist in this location, the program overwrites the data.
6. Finally, enter a passphrase to secure the key. Press Enter and confirm the passphrase once more when requested. The password is required any time you use the key for authentication.

7. Lastly, the program prints out information about where the keys are stored. Additionally, a digital and a graphic representation print to the console too.
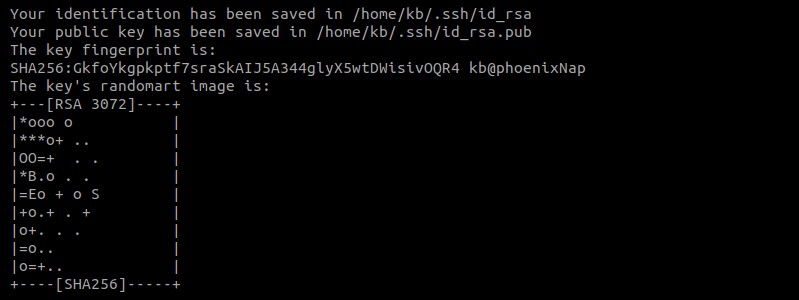
8. Confirm the keys are in the directory by checking the contents:

The directory now contains two files:
- id_rsa is the private key.
- id_rsa.pub is the public key.
1. Use the Windows search box to find cmd and open the Command Prompt window.
The command starts the program for generating the key pair.
Note: Command not working? Don’t worry. There are other ways to generate the keys. Try following our detailed tutorial for generating an SSH key pair on Windows 10.
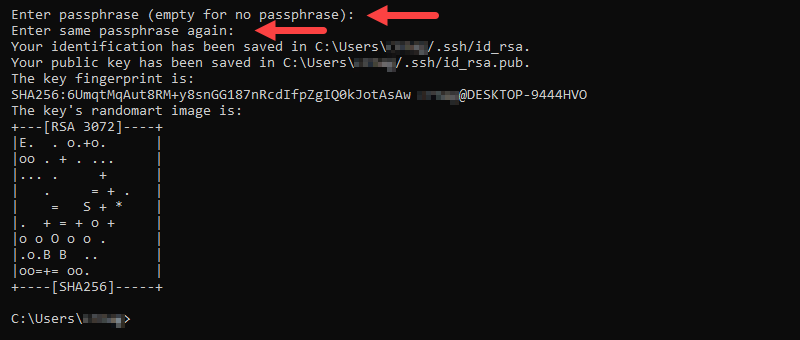
3. If you set up a specific location for the keys, type in the path now. Otherwise, press Enter to save the keys in the default path.

If keys exist in this location, the output asks to confirm the overwrite. Type Y to confirm and press Enter to continue the setup.
4. Enter the passphrase to encrypt the private key. Re-enter the same passphrase and press Enter to finish generating the key pair.
Configuring one or multiple SSH/SFTP Users for Your Key
After generating a key pair, the next step is to configure the server machine for SSH and SFTP users for the key.
1. On the server machine, check if the ~/.ssh folder exists:
If the directory is non-existent, create the folder:
Next, change the permissions with:
2. Create a file called authorized_keys in the ~/.ssh directory:
chmod 600 ~/.ssh/authorized_keys3. Next, open the authorized_keys file using a text editor. Copy the public key contents into the authorized_keys file. For multiple users and keys, copy each new key onto a new line. Save the file and close.
In Linux, use this command to copy the key automatically:
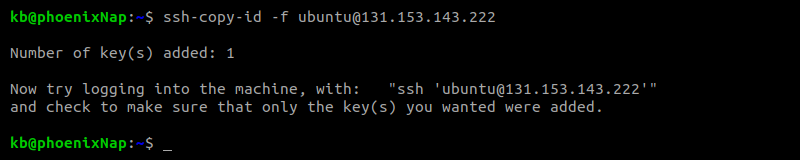
The output shows the number of keys automatically copied to the server along with further instructions.
For transferring files via SSH, multiple solutions exist:
Logging in
After generating and copying the keys, log into your server from the local machine using the following command:
Note: If you do not specify a username, SSH uses the currently logged in user.
The command brings up a prompt for entering the private key password:
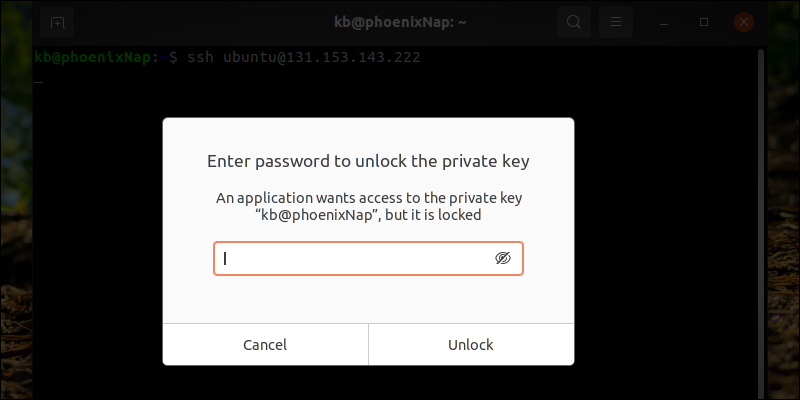
Lastly, enter the password to unlock the key:
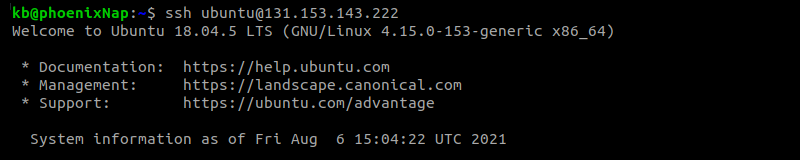
Once verified, the command logs you into the server via SSH.
Why should you use Public Key Authentication with SSH?
Public key authentication is a safer and recommended way to connect with SSH instead of a regular password login.
- The SSH key pair is harder to hack. Since most SSH keys are at least 1024 bits long, which is equivalent to a password with 12 characters, the connection is secure. To improve security even further, increase the number of bits when generating the keys.
- The contents of the keys are generated using a computer algorithm, making them harder to predict.
- Only the machine where the private key resides has access.
- Public key authentication never shows the contents of the private key to the server. In case of server compromise, the local machine stays safe.
- An added password to the private key adds multi-factor authentication.
At the end of this tutorial, you should have set up public key authentication for SSH. Whether you’re accessing a remote server via SSH or using SFTP to transfer files between two locations, the key pair provides additional security.