- How to Install TightVNC to Access Remote Desktops in Linux
- Step 1: Installing the Desktop Environment
- Step 2: Installing TightVNC Server
- Step 3: Create a Normal VNC User
- Step 4: Set VNC Password for User
- Step 5: Configure VNC for Gnome
- Step 6: Starting the Tigervnc Server
- Step 7: Open VNC Ports on Firewall
- Step 8: Download VNC Client
- Step 9: Connect to Remote Desktop Using Client
- Related Posts
- 44 thoughts on “How to Install TightVNC to Access Remote Desktops in Linux”
How to Install TightVNC to Access Remote Desktops in Linux
Virtual Networking Computing (VNC) is a kind of remote sharing system that makes it possible to take control of any other computer connected to the internet. Keyboard and mouse clicks can easily transmit from one computer to another. It helps administrators and technical staff to manage their servers and desktops without being to the same location physically.
VNC is an open-source application created in the late 1990s. It is independent and is compatible with Windows and Unix/Linux. This means a normal Windows-based user can interact with Linux based system without any hazel.
To use VNC you must have a TCP/IP connection and a VNC viewer client to connect to a computer running the VNC server component. The server transmits a duplicate display of a remote computer to the viewer.
This article demonstrates how to install VNC Server using TightVNC a much-enhanced version of an older VNC program, with remote desktop access on RHEL-based Linux distributions and Debian-based distros.
Step 1: Installing the Desktop Environment
If you’ve installed a minimal version of the operating system, which gives only a command-line interface not GUI. Therefore, you need to install a GUI (Graphical User Interface) called GNOME or XFCE desktop which works very well on remote VNC access.
$ sudo dnf groupinstall "Server with GUI" [On RHEL/CentOS/Fedora and Rocky Linux/AlmaLinux] OR $ sudo apt install xfce4 xfce4-goodies [On Debian, Ubuntu and Mint]
Step 2: Installing TightVNC Server
TightVNC is a remote desktop control software that enables us to connect to remote desktops. To install, use the following yum command as shown below.
$ sudo yum -y install tigervnc-server xorg-x11-fonts-Type1 [On RHEL/CentOS/Fedora and Rocky Linux/AlmaLinux] $ sudo apt install tightvncserver [On Debian, Ubuntu and Mint]
Step 3: Create a Normal VNC User
Create a normal user, that will be used to connect to a remote desktop. For example, I’ve used “tecmint” as a user, you can choose your own username.
$ sudo useradd tecmint OR $ sudo adduser tecmint $ sudo passwd tecmint
Step 4: Set VNC Password for User
First, switch to the user using (su – tecmint) and run ‘vncpasswd‘ to set the VNC password for the user.
Note: This password is for accessing VNC remote desktop, and the password we created in step 3 is for accessing the SSH session.
[[email protected] ~]# su - tecmint [[email protected] ~]$ vncpasswd Password: Verify:
The above command asks you to supply a password twice and creates the “.vnc” directory under the user’s home directory with a passwd file inside it. You can check the password file is created, by using the following command.
# ls -l /home/tecmint/.vnc -rw------- 1 tecmint tecmint 8 Jul 14 21:33 passwd
If you are adding another user, just switch to the user and add the vnc password with the vncpasswd command.
Step 5: Configure VNC for Gnome
Here, we will configure TigerVNC to access Gnome using the user configuration settings from the ~/.vnc/config file.
Add the following configuration to it.
session=gnome geometry=1920x1200 localhost alwaysshared
The session parameter defines the session you want to access, and the geometry parameter adds the resolution of the VNC desktop.
Now exit from user login and return to root user login.
TigerVNC comes with default configuration settings that allow you to map a user to a specific port in the /etc/tigervnc/vncserver.users file:
# vim /etc/tigervnc/vncserver.users
The configuration file uses = parameters. In the following example, we are assigning display port :1 to user tecmint.
# This file assigns users to specific VNC display numbers. # The syntax is =. E.g.: # # :2=andrew # :3=lisa :1=tecmint
If you are adding another user, just set the display port to :2 followed by the username.
Step 6: Starting the Tigervnc Server
After making all changes, run the following command to start the VNC server. Before starting the VNC session with a “tecmint” user, let me give you a small intro about Port Numbers and ids.
By Default VNC runs on Port 5900 and ID:0 (which is for the root user). In our scenario, I’ve created tecmint, ravi, Navin, and avishek. So, the ports and id’s are used by these users as follows
User's Port's ID's 5900 root :0 5901 tecmint :1 5902 ravi :2 5903 navin :3 5904 avishek :4
So, here user “tecmint” will get port 5901 and id as :1 and so on. If you’ve created another user says (user5) then he will get port 5905 and id:5 and so on for each user you create.
To start and enable the VNC service for the user assigned to the display port :1 , enter:
# systemctl start [email protected]:1 --now # systemctl enable [email protected]:1 --now
You can confirm that the VNC service is successfully started with:
To allow VNC access for other users, simply replace 1 with the display port number.
Step 7: Open VNC Ports on Firewall
Open port on iptables, firewalld or ufw, say for the user (tecmint) at 5901.
# iptables -A INPUT -m state --state NEW -m tcp -p tcp --dport 5901 -j ACCEPT OR # firewall-cmd --zone=public --add-port=5901/tcp OR $ sudo ufw allow 5901/tcp
For multiple users, ravi, navin, and avishek. I open ports 5902, 5903, and 5904 respectively.
# iptables -I INPUT 5 -m state --state NEW -m tcp -p tcp -m multiport --dports 5902:5904 -j ACCEPT OR # firewall-cmd --zone=public --add-port=5902-5904/tcp OR $ sudo ufw allow 5901:5910/tcp
Restart Iptables service.
# service iptables save # service iptables restart Or # firewall-cmd --reload # systemctl restart firewalld
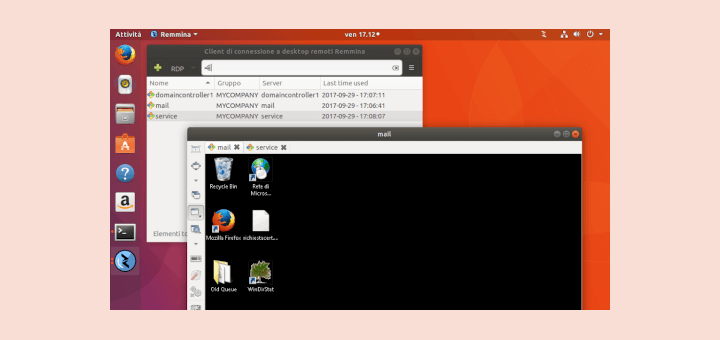
Step 8: Download VNC Client
Now go to your Windows or Linux machine and download the VNC Viewer client and install it in your system to access the desktop.
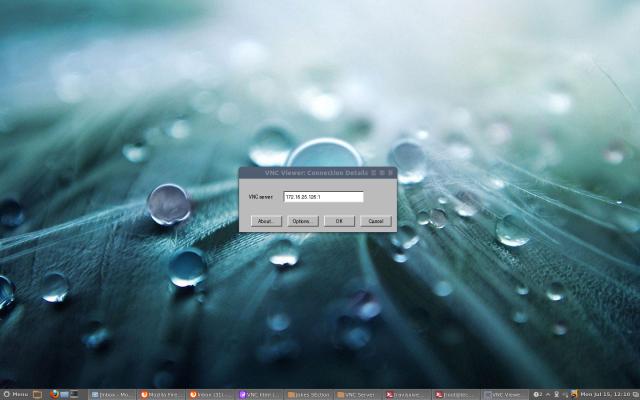
Step 9: Connect to Remote Desktop Using Client
After you installed the VNC Viewer client, open it you’ll get something similar to the below screen. Enter VNC Server IP address along with VNC ID (i.e 1) for user tecmint.
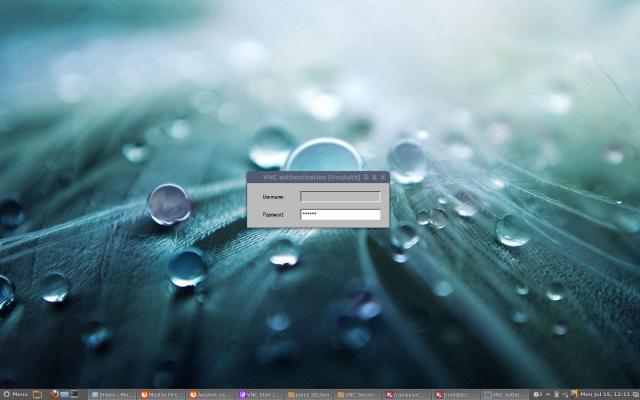
Enter the password that we created with the “vncpasswd” command.
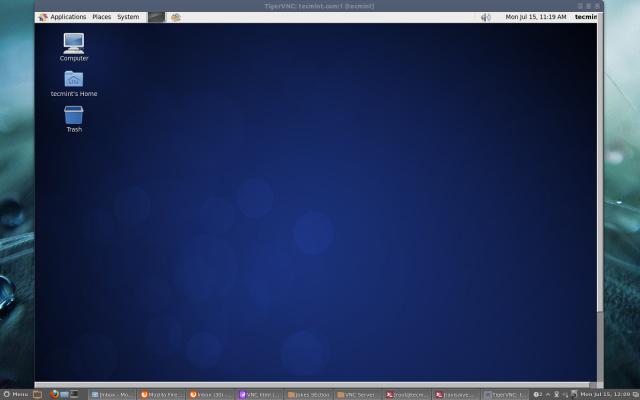
That’s it, you connected to your Remote Desktop.
I am an experienced GNU/Linux expert and a full-stack software developer with over a decade in the field of Linux and Open Source technologies
Each tutorial at TecMint is created by a team of experienced Linux system administrators so that it meets our high-quality standards.
Related Posts


44 thoughts on “How to Install TightVNC to Access Remote Desktops in Linux”
This is not accurate. TightVNC != TigerVNC. TigerVNC is a fork of TightVNC from 2009. Now, TigerVNC has a different feature set than TightVNC. For instance, TigerVNC has encryption & TightVNC has file transfers. Different configurations also. Reply
Why wouldn’t you create an icon on the desktop and/or an entry in the list of programs to be able to click on and the vnc client starts to run and asks for the address of the machine you want to control? I installed it and don’t see that and I don’t know why. It seems the developers really don’t want people to use it. Reply
Hello Ravi, I am using fedora 27. In this version /etc/sysconfig/vncservers is replaced by /lib/systemd/system/[email protected]. I just followed https://www.server-world.info/en/note?os=Fedora_27&p=desktop&f=6 this document to set up vncserver in my system. It was working fine till version 25. But now all I get is a blank screen after entering the password. What could be the reason ? any idea? Reply
@Rahul, Thanks for updating us about these changes, let me give a try to this TightVNC on my Fedora 28, will get back to you with solution. Reply
@Rahul, Sorry for delay, you will see updated article with instructions tomorrow morning without fail.. Reply
Hi, thanks for the nice tutorial! Unfortunately i have some issues. After following the steps, log in fails from VNC viewer, with error message “the connection was closed unexpectedly”.
Examining the log in /home/my_username/.vnc i notice the lines gnome-session[11753]: WARNING: Could not connect to ConsoleKit: Failed to connec
t to socket /var/run/dbus/system_bus_socket: No such file or directory
GNOME_KEYRING_SOCKET=/tmp/keyring-44DgDf/socket
SSH_AUTH_SOCK=/tmp/keyring-44DgDf/socket.ssh
GNOME_KEYRING_PID=11782 ** (gnome-settings-daemon:11785): WARNING **: Connection failed, reconnecting…
…. Any help much appreciated. Reply
Hi Ravi, I am getting the below error when i am trying to start the vncserver service by /etc/init.d/vncserver start. [[email protected] ~]# /etc/init.d/vncserver start
Starting VNC server: 1:testing xauth: timeout in locking authority file /root/.xauth Reply
Hi Ravi,
I followed your steps.
it worked fine ….
But my requirement was to configure the multiple vnc clients for the same user. For e.g say user techmint.
So i added entry for the same in /etc/sysconfig/vncservers file as:
VNCSERVERS=”1:techmint 2:techmint”
VNCSERVERARGS[1]=”-geometry 1280×1024″
VNCSERVERARGS[2]=”-geometry 1280×1024″ After restarting the service I am getting black and X as cursor.
Could you help me out. Reply
@Aktar, I think you can’t create multiple VNC sessions for same user, have you tried with different multiple users? is the VNC sessions worked for all? Reply
Hi Ravi, Thanks for the reply.
I am able to create multiple VNC sessions for same user and currently I got them working by modifying the xstartup file .
My xstartup file contents are below:
#!/bin/sh # Uncomment the following two lines for normal desktop:
unset SESSION_MANAGER
exec /etc/X11/xinit/xinitrc
gnome-session &
[ -x /etc/vnc/xstartup ] && exec /etc/vnc/xstartup
[ -r $HOME/.Xresources ] && xrdb $HOME/.Xresources
xsetroot -solid grey
vncconfig -iconic &
#xterm -geometry 80×24+10+10 -ls -title “$VNCDESKTOP Desktop” &
#twm & my vncservers file content is :
[[email protected] ~]# cat /etc/sysconfig/vncservers
# The VNCSERVERS variable is a list of display:user pairs.
#
# Uncomment the lines below to start a VNC server on display :2
# as my ‘myusername’ (adjust this to your own). You will also
# need to set a VNC password; run ‘man vncpasswd’ to see how
# to do that.
#
# DO NOT RUN THIS SERVICE if your local area network is
# untrusted! For a secure way of using VNC, see
# . # Use “-nolisten tcp” to prevent X connections to your VNC server via TCP. # Use “-nohttpd” to prevent web-based VNC clients connecting. # Use “-localhost” to prevent remote VNC clients connecting except when
# doing so through a secure tunnel. See the “-via” option in the
# `man vncviewer’ manual page. # VNCSERVERS=”2:myusername”
# VNCSERVERARGS[2]=”-geometry 800×600 -nolisten tcp -nohttpd -localhost”
VNCSERVERS=”1:user1 2:user1 3:user1 4:user1 5:user1 6:user1″
VNCSERVERARGS[1]=”-geometry 1280×1024″
VNCSERVERARGS[2]=”-geometry 1280×1024″
VNCSERVERARGS[3]=”-geometry 1280×1024″
VNCSERVERARGS[4]=”-geometry 1280×1024″
VNCSERVERARGS[5]=”-geometry 1280×1024″
VNCSERVERARGS[6]=”-geometry 1280×1024″ Now my issue is that I am able to invoke only two sessions for third session it flags below error:
A VNC server is already running as :3 Reply
@Aktar, Thanks for sharing your findings and configuration of both files, hope it will help others who looking for similar problems, about multiple VNC sessions for same users, i really don’t have idea, i need to check and get back to you.. Reply
Thanks a lot man, i really like your tutorial, it really makes the installation very easy…
You deserve 100 stars Reply