- How to Run Linux Commands as Another User?
- Method 1: Using the “runuser” Command
- Syntax
- Example 1: Switch the User and then Run Commands
- Example 2: Run the Linux Commands as Another User from the Same Shell
- Method 2: Using the su Command
- Example 1: Switch the User and then Run Commands
- Example 2: Run the Linux Commands as Another User from the Same Shell
- Method 3: Using the “pkexec” command
- Syntax
- Example
- Conclusion
- login
- OPTIONS
- CONFIG FILE ITEMS
- FILES
- BUGS
- AUTHORS
- REPORTING BUGS
- AVAILABILITY
- Login as non-root user in terminal
- 2 Answers 2
How to Run Linux Commands as Another User?
Sometimes, there is a need to run a Linux command from another user account, and to do so, the conventional approach is to switch to that user and then run the command. However, Linux distributions also support a feature to run a command as another user without logging out of the current user.
This blog will explore different approaches to run the Linux commands as another user.
Method 1: Using the “runuser” Command
The “runuser” command allows running the command as the substitute user in Linux distributions. The general syntax of using the “runuser” command to run Linux commands as another user:
Syntax
$ sudo runuser -[options] [username] [command]
According to the above general usage of the runuser command, we can use this command as the root user or with super-user privilege by using the “sudo”.
Then, we can use the different options of the runuser, which can be explored with the command:
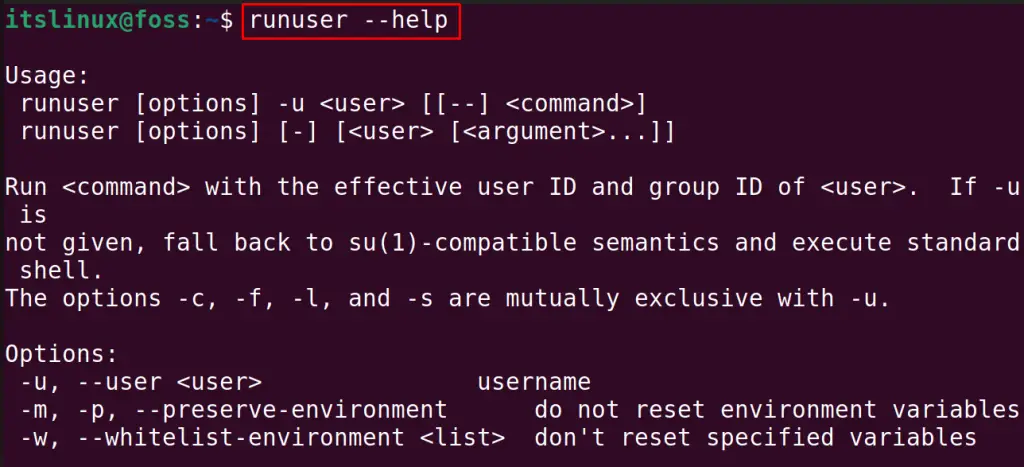
The options and their application will be displayed on the screen.
Coming back to the general syntax of the “runuser” command, after specifying options, you have specified the user name to which you want to use and then the command.
Example 1: Switch the User and then Run Commands
For example, we will log in to another user, “john,” by using the runuser command’s option “-l”:
Now, we can run the multiple commands in the user john and then exit the shell by using the command:
The shell of john user has been logout.
Example 2: Run the Linux Commands as Another User from the Same Shell
If you want to run the command as John user from the same shell:
The contents of the john user directory have been displayed.
Method 2: Using the su Command
Next is switching the specified user account using the “su” command. The general syntax of using the “su” command:
$ su [options] - [username] [arguments]
The above general syntax of switching to another account is simple to understand. Use the su command with the “-” sign and specify the username. It will ask you for the user account’s password and log in to another user account.
Example 1: Switch the User and then Run Commands
To understand it more clearly, we will use the su command to log in to the “john” user account:
After asking for the password, it is logged in to the john user shell. Run the ls command in the new shell:
To go back to the “itslinux” user, again use the su command:
We are back to the shell of our user account.
Example 2: Run the Linux Commands as Another User from the Same Shell
To run the command without logging into another user shell, use the command:
First, it asks for a password, and then the result of the command is printed.
Method 3: Using the “pkexec” command
The “pkexec” command can also be used to run Linux commands by another user. The usage of the pkexec command is visualized in the following syntax:
Syntax
$ sudo pkexec --user [username] [command]
Example
Following the above general syntax, we will log in to the john account and run the command:
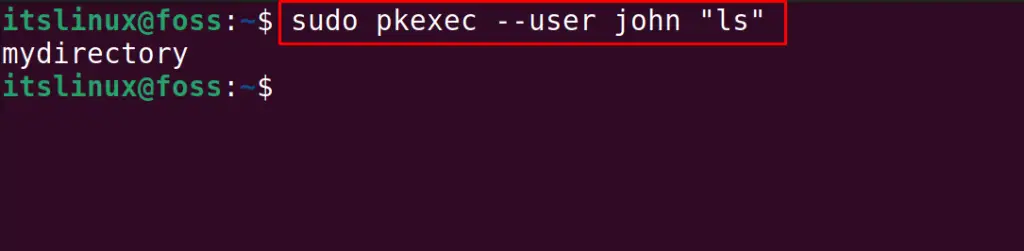
The command has been executed in the “john” user account.
Conclusion
To run Linux commands as another user, we can use the “runuser” command and “pkexec” command and can log in to another user with the “su” command. All these commands switch to another user (either while execution or before execution) to run the command from a specific user’s account. This post has briefly explained the methods to run Linux commands as another user.
login
login is used when signing onto a system. If no argument is given, login prompts for the username.
The user is then prompted for a password, where appropriate. Echoing is disabled to prevent revealing the password. Only a number of password failures are permitted before login exits and the communications link is severed. See LOGIN_RETRIES in the CONFIG FILE ITEMS section.
If password aging has been enabled for the account, the user may be prompted for a new password before proceeding. In such case old password must be provided and the new password entered before continuing. Please refer to passwd(1) for more information.
The user and group ID will be set according to their values in the /etc/passwd file. There is one exception if the user ID is zero. In this case, only the primary group ID of the account is set. This should allow the system administrator to login even in case of network problems. The environment variable values for $HOME, $USER, $SHELL, $PATH, $LOGNAME, and $MAIL are set according to the appropriate fields in the password entry. $PATH defaults to /usr/local/bin:/bin:/usr/bin for normal users, and to /usr/local/sbin:/usr/local/bin:/sbin:/bin:/usr/sbin:/usr/bin for root, if not otherwise configured.
The environment variable $TERM will be preserved, if it exists, else it will be initialized to the terminal type on your tty. Other environment variables are preserved if the -p option is given.
The environment variables defined by PAM are always preserved.
Then the user’s shell is started. If no shell is specified for the user in /etc/passwd, then /bin/sh is used. If there is no home directory specified in /etc/passwd, then / is used, followed by .hushlogin check as described below.
If the file .hushlogin exists, then a «quiet» login is performed. This disables the checking of mail and the printing of the last login time and message of the day. Otherwise, if /var/log/lastlog exists, the last login time is printed, and the current login is recorded.
OPTIONS
Used by getty(8) to tell login to preserve the environment.
Used to skip a login authentication. This option is usually used by the getty(8) autologin feature.
Used by other servers (such as telnetd(8) to pass the name of the remote host to login so that it can be placed in utmp and wtmp. Only the superuser is allowed use this option.
Note that the -h option has an impact on the PAM service name. The standard service name is login, but with the -h option, the name is remote. It is necessary to create proper PAM config files (for example, /etc/pam.d/login and /etc/pam.d/remote).
Used by other servers (for example, telnetd(8)) to tell login that printing the hostname should be suppressed in the login: prompt. See also LOGIN_PLAIN_PROMPT below.
CONFIG FILE ITEMS
login reads the /etc/login.defs configuration file (see login.defs(5)). Note that the configuration file could be distributed with another package (usually shadow-utils). The following configuration items are relevant for login:
Specifies a «:» delimited list of «message of the day» files and directories to be displayed upon login. If the specified path is a directory then displays all files with .motd file extension in version-sort order from the directory.
The default value is /usr/share/misc/motd:/run/motd:/etc/motd. If the MOTD_FILE item is empty or a quiet login is enabled, then the message of the day is not displayed. Note that the same functionality is also provided by the pam_motd(8) PAM module.
The directories in the MOTD_FILE are supported since version 2.36.
Note that login does not implement any filenames overriding behavior like pam_motd (see also MOTD_FIRSTONLY), but all content from all files is displayed. It is recommended to keep extra logic in content generators and use /run/motd.d rather than rely on overriding behavior hardcoded in system tools.
MOTD_FIRSTONLY (boolean)
Forces login to stop display content specified by MOTD_FILE after the first accessible item in the list. Note that a directory is one item in this case. This option allows login semantics to be configured to be more compatible with pam_motd. The default value is no.
LOGIN_PLAIN_PROMPT (boolean)
Tell login that printing the hostname should be suppressed in the login: prompt. This is an alternative to the -H command line option. The default value is no.
LOGIN_TIMEOUT (number)
Maximum time in seconds for login. The default value is 60.
LOGIN_RETRIES (number)
Maximum number of login retries in case of a bad password. The default value is 3.
LOGIN_KEEP_USERNAME (boolean)
Tell login to only re-prompt for the password if authentication failed, but the username is valid. The default value is no.
Delay in seconds before being allowed another three tries after a login failure. The default value is 5.
The terminal permissions. The default value is 0600 or 0620 if tty group is used.
The login tty will be owned by the TTYGROUP. The default value is tty. If the TTYGROUP does not exist, then the ownership of the terminal is set to the user’s primary group.
The TTYGROUP can be either the name of a group or a numeric group identifier.
HUSHLOGIN_FILE (string)
If defined, this file can inhibit all the usual chatter during the login sequence. If a full pathname (for example, /etc/hushlogins) is specified, then hushed mode will be enabled if the user’s name or shell are found in the file. If this global hush login file is empty then the hushed mode will be enabled for all users.
If a full pathname is not specified, then hushed mode will be enabled if the file exists in the user’s home directory.
The default is to check /etc/hushlogins and if it does not exist then ~/.hushlogin.
If the HUSHLOGIN_FILE item is empty, then all the checks are disabled.
DEFAULT_HOME (boolean)
Indicate if login is allowed if we cannot change directory to the home directory. If set to yes, the user will login in the root (/) directory if it is not possible to change directory to their home. The default value is yes.
LASTLOG_UID_MAX (unsigned number)
Highest user ID number for which the lastlog entries should be updated. As higher user IDs are usually tracked by remote user identity and authentication services there is no need to create a huge sparse lastlog file for them. No LASTLOG_UID_MAX option present in the configuration means that there is no user ID limit for writing lastlog entries. The default value is ULONG_MAX.
LOG_UNKFAIL_ENAB (boolean)
Enable display of unknown usernames when login failures are recorded. The default value is no.
Note that logging unknown usernames may be a security issue if a user enters their password instead of their login name.
If set, it will be used to define the PATH environment variable when a regular user logs in. The default value is /usr/local/bin:/bin:/usr/bin.
ENV_ROOTPATH (string), ENV_SUPATH (string)
If set, it will be used to define the PATH environment variable when the superuser logs in. ENV_ROOTPATH takes precedence. The default value is /usr/local/sbin:/usr/local/bin:/sbin:/bin:/usr/sbin:/usr/bin.
FILES
BUGS
The undocumented BSD -r option is not supported. This may be required by some rlogind(8) programs.
A recursive login, as used to be possible in the good old days, no longer works; for most purposes su(1) is a satisfactory substitute. Indeed, for security reasons, login does a vhangup(2) system call to remove any possible listening processes on the tty. This is to avoid password sniffing. If one uses the command login, then the surrounding shell gets killed by vhangup(2) because it’s no longer the true owner of the tty. This can be avoided by using exec login in a top-level shell or xterm.
AUTHORS
Derived from BSD login 5.40 (5/9/89) by
for HP-UX. Ported to Linux 0.12:
Rewritten to a PAM-only version by
REPORTING BUGS
AVAILABILITY
The login command is part of the util-linux package which can be downloaded from Linux Kernel Archive .
Login as non-root user in terminal
This is a question that I would expect to quickly get an answer from google. However somehow google is failing me. Let’s assume I’m logged in to a terminal session and I would like temporarily work as another non-root user whose password I know without leaving my session. When logged as this user I want the home directory, etc, for this user set up correctly until I log out. How do I do that? I tried
and then keying in the password, it did not produce any error but I saw no visible changes of the command prompt it would still say myname@myhost. The home directory also was that of myname and not the new login I tried to login as. I’m — as it’s apparent now — quite inexperienced in linux/Ubuntu, so any info is welcome.
2 Answers 2
To which user you want to change to?
The problem is that you are trying to «su» into a user that does not have a shell assigned to it. Most of the users such as mysql, pulse, etc, created by the system or by some packages when you install software does not have a shell assigned.
You can check if a user has a shell assigned by looking into the /etc/passwd file, just look at the end of the line of each user, if it says /bin/false it means that it does not have a shell assigned, if it has something like /bin/bash or any other shell, then you should be able to «su» into that user.
When i say «shell assigned» it basically means that it has «shell access»
still if the user does not have shell access, you can always execute commands as that user with