- Login to wifi network
- How to Login to 192.168.1.1?
- Forgot IP Address Username and Password?
- How to Change Route IP Address?
- TP-Link Router Login
- How to change the password of the TP-Link WiFi Network?
- How to change the TP-Link Login password?
- Netis Router Login
- How to login to Netis Router?
- How to change Netis Network Name (SSID)?
- How to change Netis WiFi Password?
Login to wifi network
192.168.1.1 is a private IP address used to login the admin panel of a router. 192.168.l.l is pre-specified by the router companies as the default gateway address and can be used to make different changes to the router’s settings.
How to Login to 192.168.1.1?
To login into 192.168.1.1 follow these steps –
- Open a web browser and go to http://192.168.1.1 or type 192.168.1.1 into the browser’s URL bar.
- A login page will appear asking you to enter the login username and password.
- Enter the username and password in the designated fields.
- You will now be logged in into the Admin Panel of the router.
Note: If you are unable to access the router’s admin panel at 192.168.1.1, try using a different IP address – 192.168.0.1 or 10.0.0.1.
Forgot IP Address Username and Password?
If you have forgotten the IP Address Username and Password or if they are not working then you can –
- Look at the manual/box or back of router. (or check default username and password list).
- If you changed the password and have lost it or forgotten it then you need to perform a factory reset. To do that, look for a small hidden RESET button on the back of your router. Press and hold that button for about 10-15 seconds using a paper clip or a needle. The router will reboot itself and will be back to default settings.
How to Change Route IP Address?
The default gateway IP address comes pre-assigned by your internet service provider, however, a user can configure it par to needs. It is often changed to prevent bad guys access your admin panel, prevent DDoS attacks, or just to add an additional layer of safety. Here’s how to do it –
- Login to your default admin panel at 192.168.0.1 or 192.168.1.1 (admin/admin is username and password)
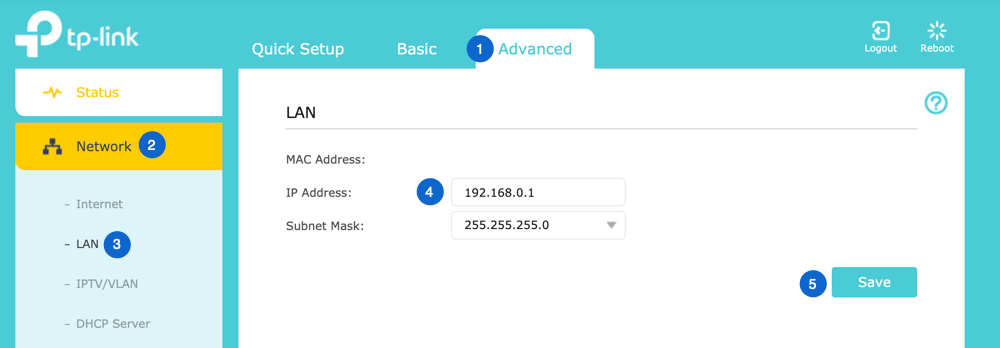
- Go to Advanced settings > Network > LAN.
- Under “IP Address” field you may change it to your desired address such as 192.168.1.2.
- Save it and the router will reboot to apply the changes.
- Login to your router configuration page (username: admin & password: admin/blank)
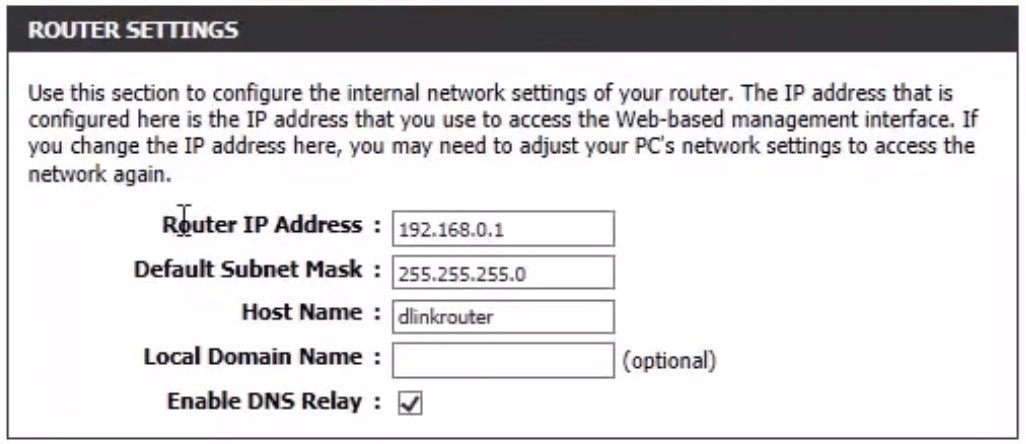
- Go to Setup > Network Settings.
- Now you will find Router IP Address field.
- Change it as preferred and Save Settings.
- Login to NetGear router settings page via 192.168.1.1 or 192.168.0.1 or you can access via http://www.routerlogin.net or http://www.routerlogin.com.
- By default, the username is admin and password is password.
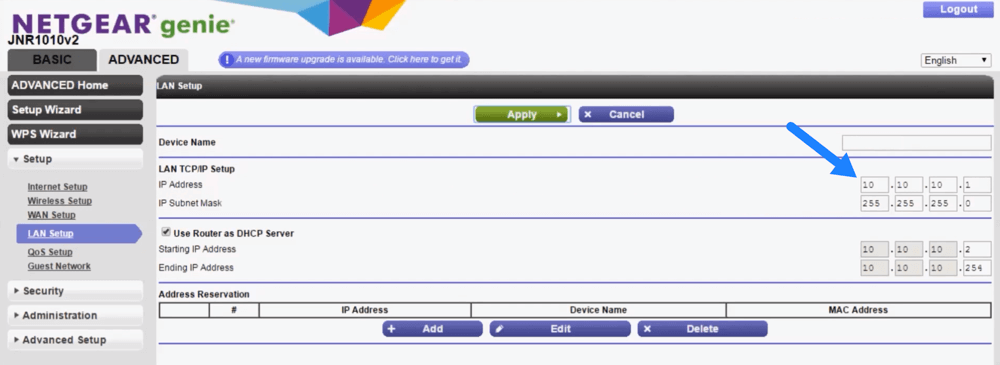
- Once logged in navigate to Advanced > from left side menu go to “Setup” > LAN Setup.
- Under LAN TCP/IP Setup, you will see IP Address. Change 10.10.10.1 as preferred.
- Apply Changes and the system will reboot to update settings.
In any case during the process something goes wrong, then you may reset your router to default factory settings so all customization will be reverted back.
Protecting your WiFi network is important to prevent unauthorized access. Follow basic rules such as enabling WPA2 encryption, setting up strong password, disabling WPS adds more security since it is an old method of synchronization between networks, enable MAC-address filtering and update your router firmware occasionally. Here is a complete guide on how to protect your WiFi network.
TP-Link Router Login
By logging to your TP-Link router settings page you will be able to change the password of your WiFi network and other settings such as SSID, LAN, and WAN Settings.
Before you can log in, you need to have the following:
Here is how you can log in to the TP-Link Router Admin Panel and change desired settings:
- The first thing is to connect your device to the TP-Link Network, either wirelessly using the WiFI network or using an Ethernet cable.
- Once connected, open a web browser and in the address bar, type http://tplinkwifi.net/ or you can use the Router’s IP address http://192.168.0.1 or http://192.168.1.1 to login instead of tplinkwifi.net.
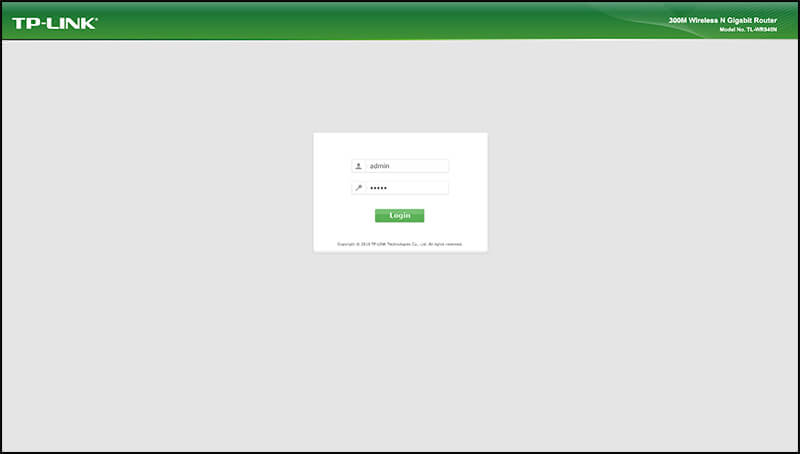
- Once the login page appears, you will be asked to enter the login credentials
- Enter admin for username and password for password. In case you have changed the login password then enter as configured. You can find the default TP-Link login username and password on a label at the side or underneath the TP-Link Router.
- If the login details are correct, you will be logged into the TP-Link Admin interface. From there you can change different settings of your router including the password of your WiFi network and also the password of your Router Login.
How to change the password of the TP-Link WiFi Network?
Changing the password of the TP-Link WiFi network is important because any new router that you buy uses the default credentials for your WiFi including default WiFi SSID and Password. So you should change the password of your WiFi network to keep it secure. Here is how you can change the password of your TP-Link WiFi network:
- Log in to the Admin Panel of your TP-Link Router.
- Once logged in, go to Wireless ->Wireless Security.
- Scroll down to the WPA-PSK/WPA2-PSK section.
- In the PSK Password field, type your new Wi-FI Password. (8-63 characters, including alphabets, digits, and special symbols)
- Now, click on Save to save the changes and reboot your router.
How to change the TP-Link Login password?
Your Admin Panel holds the key to all the settings of your router and it is important that you change the login password of your Admin Panel, otherwise, anyone connected to your network can change the login password and mess up the settings of your Router and you will have to reset your router to factory defaults. To avoid all this, here is how you can change your TP-Link Login Password:
- Log in to the Admin Panel of your TP-Link Router.
- Once logged in, go to Management->Access Control->Password.
- There, enter your old password and then enter your new password & re-enter it again for verification.
- Click on Save/Apply to save the changes.
Netis Router Login
Netis router web interface allows you to change WiFi password, Network Name (SSID), and default settings at http://netis.cc or http://192.168.1.1.
How to login to Netis Router?
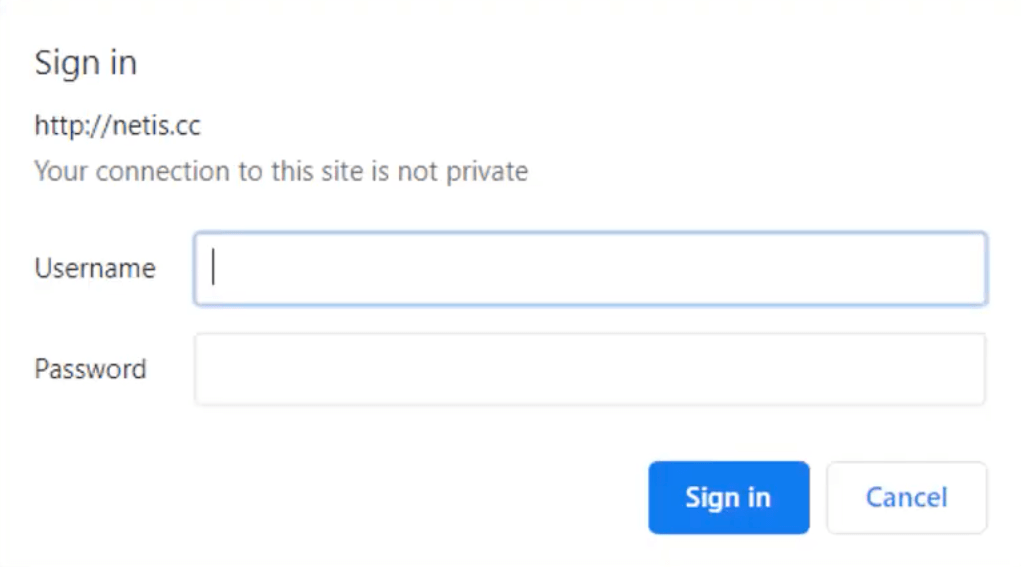
- Open a browser and type netis.cc or 192.168.1.1 in the address bar.
- Enter Username and Password (if required) and click Sign in.
- You will be logged in to Netis router interface.
How to change Netis Network Name (SSID)?
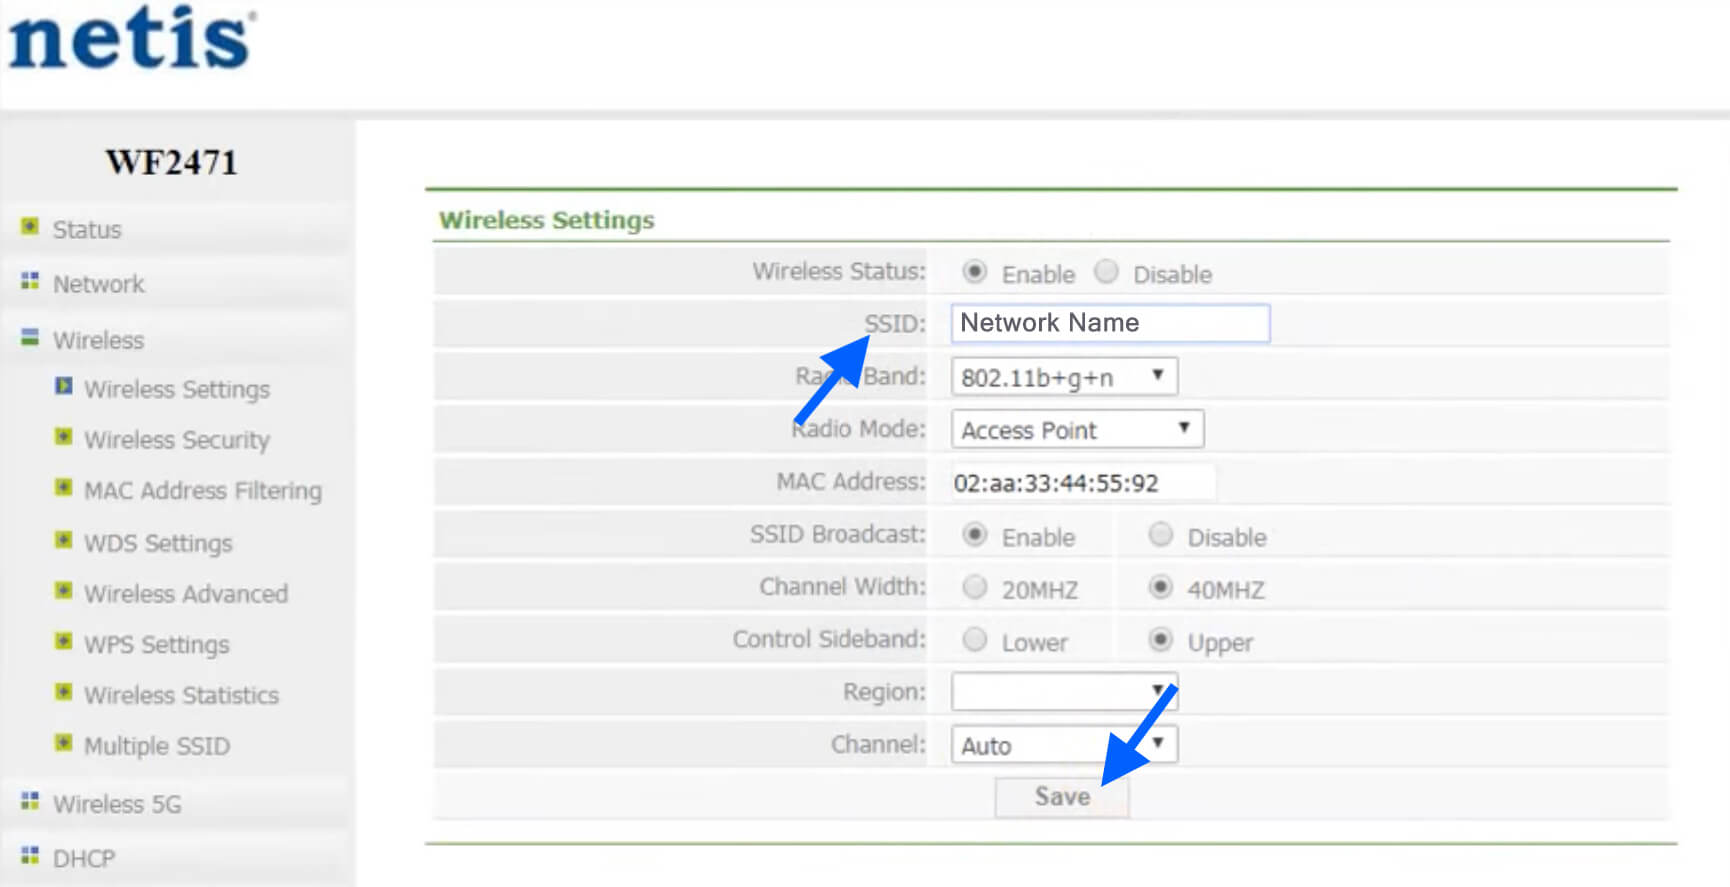
- Open a browser and type netis.cc or 192.168.1.1 in the address bar and Login.
- Once logged in, click on Wireless >Wireless Settings (2.4G) from the left column menu. Optionally, if you want to setup your 5G network, select the Wireless 5G option.
- In the SSID field, enter the new WiFi Network SSID/Name.
- Click on the Save button to save the changes.
How to change Netis WiFi Password?
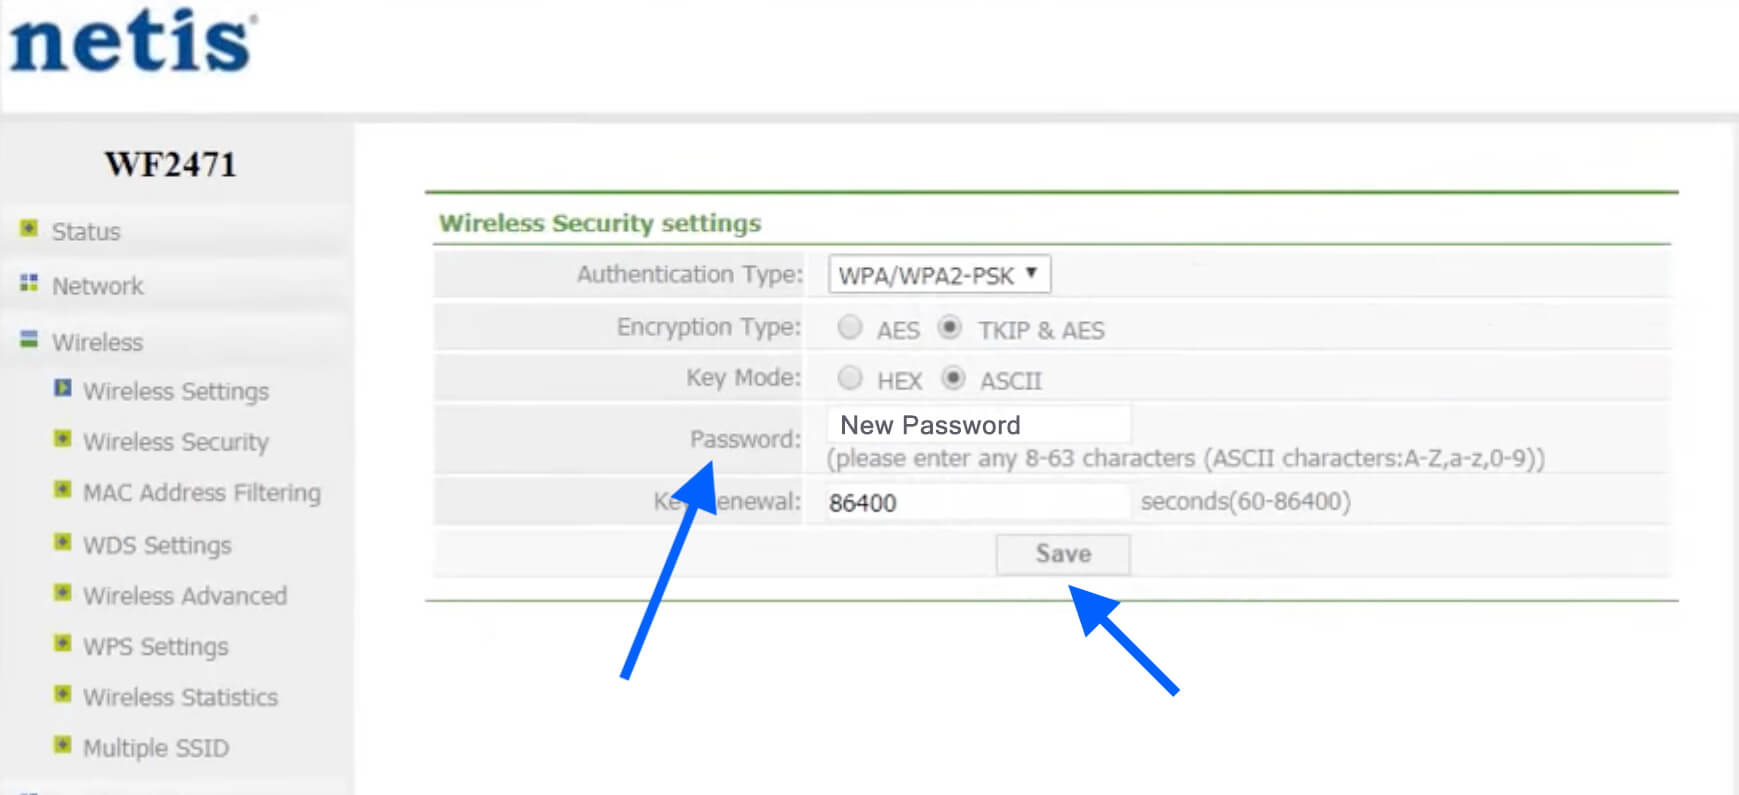
- Open a browser and type netis.cc or 192.168.1.1 in the address bar and Login.
- Go to Wireless >Wireless Security from the left column menu.
- Select Authentication Type as WPA/WPA2-PSK.
- In the Password field, enter the new WiFi Password.
- Now, click on the Save button to save the changes.