- How do I access my remote Ubuntu server via X-windows from my Mac?
- 3 Answers 3
- Connecting to a Remote Server Over SSH on a Mac
- Before You Begin
- Open the Terminal
- Connecting to the Remote Server Over SSH
- Ending the SSH Session
- Sending Commands Over SSH
- Sending a Single Command
- Sending Multiple Commands
- Using sudo
- Going Further
- Troubleshooting SSH Connection Issues
- Increasing Security
- Доступ через MAC с Ubuntu 18.04 Server
- От ekzorchik
How do I access my remote Ubuntu server via X-windows from my Mac?
I have an Ubuntu server (12.04 LTS) running remotely on a cloud hosting service. I have installed ubuntu-desktop via apt-get :
$ sudo apt-get install ubuntu-desktop It appears to have installed no problem. I have confirmed that /etc/ssh/ssh_config on the server contains the lines
ForwardAgent yes ForwardX11 yes ForwardX11Trusted yes I then rebooted the server. It came back up no problem. Now, starting X11.app on my Mac I am presented with an Xterm. I connect to my server from this terminal using:
but I get a «no screens found» error. I don’t have screens because its a headless cloud server, but I just want to acces it from my Mac through X. What now?
3 Answers 3
There are several methods to accomplished that, depending of what you really need to do.
In order to forward remote apps to local X environment, you need to install X11 on your Mac (you can find it at apple support site): http://support.apple.com/kb/DL1605?viewlocale=en_US&locale=en_US
From the X11 app, open the terminal, and then access the remote host with:
Then, when logged, simply run the command for the desired app, ex: firefox, nautilus, thunderbird, whatever.
You can even launch only the system (Ubuntu, Xubuntu, Mint, etc..) Main Menu, and interact with the remote system from there, without the need of a full graphical front-end. On a remote Linux Mint env, i simply run:
If you really need it, you can even start the remote graphical environment locally at your Mac’s X11, simply running:
ubuntu-session xubuntu-session etc. (depends of your remote environment) Better than any VNC, even better than an X11VNC connection! Secured and compressed connection FTW.
Connecting to a Remote Server Over SSH on a Mac
Estamos traduciendo nuestros guías y tutoriales al Español. Es posible que usted esté viendo una traducción generada automáticamente. Estamos trabajando con traductores profesionales para verificar las traducciones de nuestro sitio web. Este proyecto es un trabajo en curso.
A secure shell (SSH) is used for secure communication between devices. When most people refer to SSH, it is within the context of connecting from a local computer to a remote server, commonly for administration tasks related to website hosting.
This article covers the basics of connecting to a remote server (such as a Linode) over SSH on macOS.
Before You Begin
Ensure you have a Linux server with an SSH server (like OpenSSH) installed. Most Linux distributions have an SSH server preinstalled. If you wish to deploy a new server, follow the Creating a Compute Instance guide to create a Linode.
Open the Terminal
On your local computer, open the terminal application you wish to use. The terminal allows you to access your operating system’s shell environment and run programs through the command line.
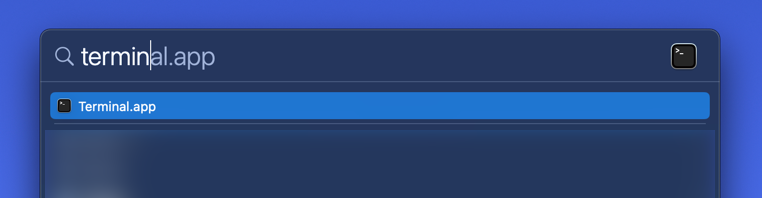
The default terminal emulator for macOS is called Terminal. To open this program, access Spotlight by pressing Cmd + Space on the keyboard and type “Terminal” in the search box. In the search results, click on Terminal.app. Refer to Apple’s Open or Quit Terminal on Mac guide for additional methods of opening Terminal.
As alternatives to the Terminal app, other popular and highly customizable macOS compatible terminal applications include iTerm2 and Hyper.
Connecting to the Remote Server Over SSH
- Within the terminal, enter the following command, replacing [username] with the username of the remote user and [ip-address] with the IP address or domain name of the remote server.
If the server’s SSH port is something other than 22, it needs to be specified in the SSH command. To do this, use the -p option as shown in the command below. Replace [port-number] with the port number that the remote SSH server is using.
The authenticity of host ‘example.com (93.184.216.34)’ can't be established. ECDSA key fingerprint is SHA256:d029f87e3d80f8fd9b1be67c7426b4cc1ff47b4a9d0a84. Are you sure you want to continue connecting (yes/no)?You can verify the fingerprint by following the instructions on the Verifying the Authenticity of a Remote Server guide.
If you recently rebuilt your server, you might receive an error message when you try to connect. This happens when the remote host key changes. To fix this, revoke the key for that IP address.
Warning: Permanently added 'example' (ECDSA) to the list of known hosts.Once you have successfully connected, your terminal should be using the remote shell environment for the server. Your command prompt should now show the username and hostname configured for the server. You can now run any commands that you have available on that server. This includes many of the basic Linux commands, such as ls , cd , rm , and those covered in Using the Terminal guide. Getting to know these commands will help you navigate around your server.
Ending the SSH Session
After you are done, log out of the session by typing exit . The terminal then shows something similar to:
logout Connection to 93.184.216.34 closed.At this point, the shell prompt returns to the one for the local workstation and the terminal application can be closed if it’s no longer needed.
Sending Commands Over SSH
Instead of using SSH to open your remote server’s console, you can run commands on your server without leaving your local shell environment. This can enable you to quickly run commands both locally and remotely in the same terminal window.
Sending a Single Command
To run a single command on your remote server, use the following command. Replace [username] with the username of the remote user, [ip-address] with the IP address or domain name of the remote server, and [command] with the command you wish to run.
As an example, running ssh me@192.0.2.0 ls lists all the files in the home directory of the user called me . This can be useful to find the uptime of the server ( ssh me@192.0.2.0 uptime ) or maybe determine its Linux distribution and version ( ssh me@192.0.2.0 lsb_release -a ).
Sending Multiple Commands
To run multiple commands on your remote server (one after the other), use the following command. Replace [command-1], [command-2], and [command-3] with the commands you wish to run.
The commands should be separated by a semi-colon ( ; ) and all of the commands together should be surrounded by double quotation marks ( » ). For example, if you wanted to create a file named bar.txt in a directory called foo within the user me’s home directory, run: ssh me@192.0.2.0 «mkdir foo; cd foo; touch bar.txt .
Using sudo
It’s recommended to disable root access over SSH and only log in to your remote server through a limited user account. However, some commands require elevated privileges, which can usually be accomplished by prepending the command with sudo . If you attempt to do this while running commands directly through the SSH command, you may receive an error such as “no tty present” or there isn’t a “stable CLI interface”. To run the sudo command in these instances, use the -t option, which forces a psuedo-terminal allocation. For example, to update your packages on a Debian-based system, run ssh linode@example.com -t «sudo apt update» .
Going Further
Troubleshooting SSH Connection Issues
If SSH isn’t connecting you to your Linode, you may need to investigate the state of your server. See the guide Troubleshooting SSH for assistance.
Increasing Security
- Now that you can connect from your Linux machine to the Linode over SSH, save not only time but also make the connection even more secure by using SSH public key authentication. For more information, see SSH add keys.
- See the “Harden SSH Access” section of Setting Up and Securing a Compute Instance guide to review how to secure SSH on the server’s side, and the Advanced SSH Server Security for more information on making it even more secure.
This page was originally published on Friday, June 25, 2021.
Доступ через MAC с Ubuntu 18.04 Server
В утилите winbox есть такая возможность к настраиваемому оборудованию фирмы Mikrotik подключаться, как через IP&MAC , вот второй способ интересен. Я порой сталкивался, что есть какие-то скрипты позволяющие с системы Ubuntu 18.04 Server подключаться через mac соединение с устройством . Меня это заинтересовало и я начал копать. Пакет mactelnet-client использует разработку Mikrotik (MAC-Telnet protocol) на которой работает подключение через MAC адрес.
ekzorchik@srv-bionic:~$ apt-cache search mactelnet
mactelnet-client — Console tools for telneting and pinging via MAC addresses
mactelnet-server — Telnet daemon for accepting connections via MAC addresses
ekzorchik@srv-bionic:~$ apt-cache show mactelnet-client | grep Version
ekzorchik@srv-bionic:~$ sudo apt-get install mactelnet-client -y
ekzorchik@srv-bionic:~$ whereis mactelnet
mactelnet: /usr/bin/mactelnet /usr/share/man/man1/mactelnet.1.gz
За справкой следует обращаться:
ekzorchik@srv-bionic:~$ mac mactelnet
ekzorchik@srv-bionic:~$ zcat /usr/share/man/man1/mactelnet.1.gz
Чтобы просканировать текущую сеть на наличии устройств к которым можно подключиться через MAC— адрес:
ekzorchik@srv-bionic:~$ mactelnet -l
Searching for MikroTik routers. Abort with CTRL+C.
IP MAC-Address Identity (platform version hardware) uptime
192.168.88.108 64:d1:54:5:bc:ce MikroTik (MikroTik 6.42.6 (stable) RB951Ui-2HnD) up 22 days 7 hours K2RF-4I3T bridge1
192.168.88.254 64:d1:54:66:55:ce slk/office (MikroTik 6.42.6 (stable) RB952Ui-5ac2nD) up 21 days 5 hours 5IC2-8QK6 bridge1
^C → по сочетанию клавиш «Ctrl + C» прерываем выполнение утилиты.
Итак утилита обнаружила, два микротика в локальной сети которые поддерживают подключение через mac-адрес, по сути это как-бы использование утилиты winbox. Ну по крайней мере я пока так себе это вижу.
Попробую подключиться из консоли к одному из Mikrotik:
ekzorchik@srv-bionic:~$ mactelnet 64:d1:54:66:55:ce
Connecting to 64:d1:54:66:55:ce. Connection failed.
Почему не подключилось — не могу знать, может в этот момент устройство было в перезагрузке в связи с обновлением к пример.
В составе установленного пакета mactelnet-client присутствует еще одна утилита именуемая, как macping :
ekzorchik@srv-bionic:~$ sudo macping 64:d1:54:66:55:ce
64:d1:54:66:55:ce 56 byte, ping time 4.15 ms
64:d1:54:66:55:ce 56 byte, ping time 1.78 ms
^C
2 packets transmitted, 2 packets received, 0% packet loss
round-trip min/avg/max = 1.78/2.96/4.15 ms
Проверка роутера на доступность через L2— уровень посредством использования утилиты macping:
ekzorchik@srv-bionic:~$ macping 64:d1:54:66:55:ce -c 2
You need to have root privileges to use macping.
Ага, для запуска нужно использовать повышение привилегий через sudo.
Ниже пример проверки доступности устройства и если нет ответа то уведомление о тот что нет ответа.
ekzorchik@srv-bionic:~$ sudo macping 64:d1:54:66:55:ce -c 2 >/dev/null 2>&1 || ( echo «No answer for 2 pings»)
вывода нет значит команда отработала успешно, но если добавить еще команду которая будет при настроенном почтовом клиенте на системе (к примеру ssmtp) уведомлять заинтересованных людей о проблеме с хостом:
ekzorchik@srv-bionic:~$ sudo macping 64:d1:54:66:55:ce -c 2 >/dev/null 2>&1 || ( echo «No answer for 2 pings» | mail -s «router down» support@ekzorchik.ru )
Пока на этом всё, с уважением автор блога Олло Александр aka ekzorchik.
От ekzorchik
Всем хорошего дня, меня зовут Александр. Я под ником — ekzorchik, являюсь автором всех написанных, разобранных заметок. Большинство вещей с которыми мне приходиться разбираться, как на работе, так и дома выложены на моем блоге в виде пошаговых инструкции. По сути блог — это шпаргалка онлайн. Каждая новая работа где мне случалось работать вносила новые знания и нюансы работы и соответственно я расписываю как сделать/решить ту или иную задачу. Это очень помогает. Когда сам разбираешь задачу, стараешься ее приподнести в виде структурированной заметки чтобы было все наглядно и просто, то процесс усвоения идет в гору.