- TechnoZeal
- Video and Wifi Driver
- Preparing USB Boot Drive
- Booting Up Linux Mint from USB
- Installing Linux Mint 19
- Install Wifi Driver
- Related Post
- Comments
- Post a Comment
- Popular posts from this blog
- Revive Old Mac Mini (2009) with Linux
- Install and Configure RealVNC in Linux Ubuntu 18.04 LTS
- Configure Unattended Upgrades on Raspberry Pi
- Ubuntu 10.04 и Windows 7 на Mac Mini
TechnoZeal
This post is part of a series of installation guide to install Linux on Mac Mini (late 2009) version. For other Linux distribution, please refer to the list at the bottom of this post.
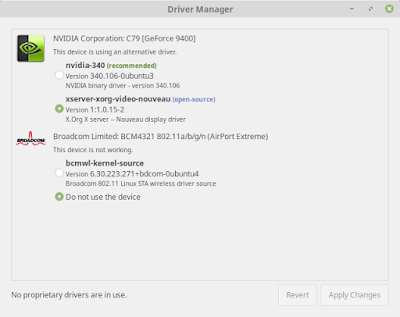
Video and Wifi Driver
As we have mention in the main post, the video and wifi driver will be our main stumbling block. Based on our experience testing with various distribution, same driver can behave differently in different distribution. For Linux Mint, we find that third party driver will cause us more problem. The recommended Broadcom BCM4321 wifi driver does not work at all. We need to install another driver. If we install Nvidia display driver, the windows will not launch if we boot the system with monitor attached. The best solution is use the default nouveau video driver.
Preparing USB Boot Drive
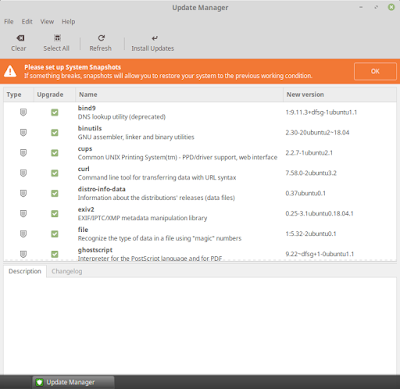
Preparing USB boot drive is quite straight forward. Please be aware that for Linux Mint 19, there are problem with the original installation image (linuxmint-19-cinnamon-64bit). The installer will crash unless we disable network connection. The developer did not remove the original image, instead they introduce another version (linuxmint-19-cinnamon-64bit-v2). Please download version 2 of Linux Mint 19 instead of the original one. Preparing USB driver is the same as Ubuntu, download Etcher and burn to USB driver using this tool.
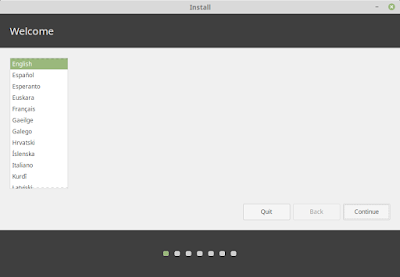
Booting Up Linux Mint from USB
To boot up from Mac, press option key (Alt for windows keyboard) when the Mac chimes during startup. The boot menu will show various boot drive. Select the USB drive.
Please note that if the OS hang during boot up, we might need to clear SMC or reset PRAM. Please search the web on the shortcut or check out our main post here. If SMC and PRAM has been reset and you still encounter problem, you might need to check the package or change USB driver.
Installing Linux Mint 19
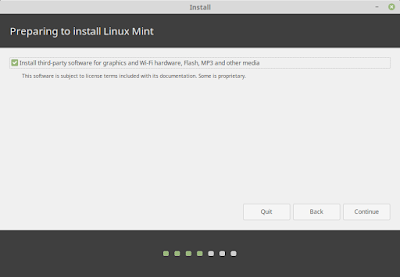
Make sure third party software are checked so that we can install other software such as vlc. Click Continue.

Select Erase data and install Linux Mint and click Install Now. The system will present to us how the system will partition the drive. Basically Linux Mint need 2 partition. The first partition is about 500MB formatted with FAT32. It will mount /boot/efi with boot flag as boot, esp. The rest of the dis space is use to mount the root system.

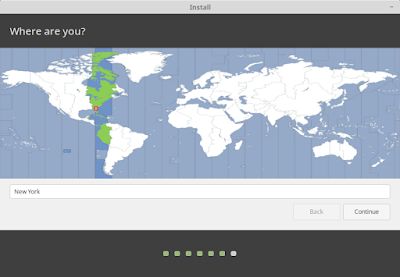
The location map is used to set your time zone. Select your appropriate time zone and click Continue.

Enter host name, user name and password. Click Continue. The system will proceed to install the software.


Install Wifi Driver
As mention earlier, the driver recommended for us in Driver Manager is not good. Please make sure we do not install these driver.
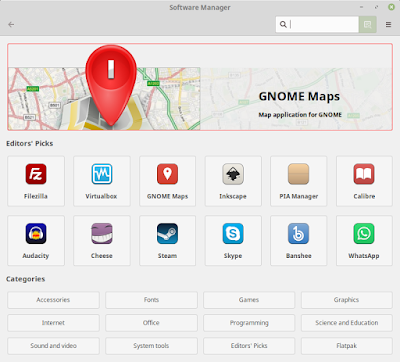
Since third party repository are included, we can install gparted or vlc from the app.
Related Post
Please also check out the main post on re-purposing old Mac Mini. This post also include the installation of Ubuntu on Mac Mini. We have also include hardware specification and other consideration in the main post.
Please also check out the summary result of testing various Linux distribution on Mac Mini (late 2009).
Install Linux on Mac Mini (late 2009) Result Summary
- Get link
- Other Apps
Comments
Post a Comment
Popular posts from this blog
Revive Old Mac Mini (2009) with Linux

We have an old Mac Mini (late 2009 version) lying around. The latest Mac OS X it could support was Mac OS X El Capitan. The machine is still good although the DVD drive does not worked anymore. Apple will drop security update for El Capitan very soon. Running OS X El Capitan without any security update is not an option. Instead of disposing a good piece of hardware, we can install Linux. However, before we start playing around with the Linux installation, we need to take stock of the hardware capability. We might need to upgrade some hardware so that we can run Linux smoothly. Mac Mini 2009 Specification This Mac has Core 2 Duo CPU (P8700) running at 2.53GHz. It support PC3-8500 DDR3 RAM running at 1066MHz. This Mac Mini has a Nvidia Geforce 9400M video card. It support 2 display output. Wifi specification is 802.11a/b/g/n. This is pretty high end at the time. However, this WiFi uses Broadcom chipset (BCM4321), which is not very well supported in Linux since it
Install and Configure RealVNC in Linux Ubuntu 18.04 LTS

RealVNC is a commercial company that sell VNC license for the enterprise market. However, the company allow home user to setup VNC server for personal use. The limitation is that you are only allow 5 connection. User must register an ID with the company. The configuration of your VNC will be stored on the company’s server. Since RealVNC is professionally produce, it is much better compare to the open source product in Linux. The main advantage is easy configuration although there are steps to install and start the server especially on Linux platform. We do not need to worry about ip address and port number. What the server and client required is our RealVNC ID which we have created. Unlike the default Vino server that comes with Ubuntu, RealVNC will start without user login. The system is created with security in mind. Encryption is done transparently without any intervention from user. We will be showing a simple guide on how to install and Configure RealVNC Connect (serv
Configure Unattended Upgrades on Raspberry Pi
If we were to run Raspberry Pi headless (without attached monitor), it would be nice if we can perform unattended system upgrades. In Debain/Ubuntu class of software, we can perform unattended upgrades using the software package unattended-upgrades. To install the software, use the command below: sudo apt-get install unattended-upgrades # Following are additional software required # we only need mailutils or bsd-mailx, choose 1 sudo apt-get install mailutils sudo apt-get install bsd-mailx sudo apt-get install update-notifier-common Next, we need to edit the configuration files: sudo nano /etc/apt/apt.conf.d/50unattended-upgrades The configuration should be similar as below: Unattended-Upgrade::Origins-Pattern < // Codename based matching: // This will follow the migration of a release through different // archives (e.g. from testing to stable and later oldstable). // "o=Debian,n=jessie"; // "o=Debian,n=jessie-update
Ubuntu 10.04 и Windows 7 на Mac Mini
На прошлой неделе я заменил свой старый шумный компьютер на mac mini.
Иногда приходится работать как в Windows, так и в Linux, то долго не думая,
установил на него сразу три операционные системы.

Характеристики железа
Mac Mini MC238RS/A
Процессор Intel Core2Duo P7550 2.24 GHz с 3 Мб кеша второго уровня
Графический акселератор NVIDIA GeForce 9400M
Оперативная память 2 Gb DDR3, работающая на частоте 1066 Mhz.
Жесткий диск емкостью 160 GB производства Fujitsu
Оптический привод SuperDrive (DVD±R DL/DVD±RW/CD-RW)
Сетевой адаптер 10/100/1000BASE-T Gigabit Ethernet
Встроенный динамик
WiFi Airport Extreme, совместимый с IEEE 802.11a/b/g/n
Bluetooth 2.1, IRDA
Доступно 5 USB портов, 1 Firewire 800, аналоговый/цифровой аудиовход и аудиовыход, также Mini DisplayPort и mini-DVI.
Размер 165х50,8х165 мм.

Что потребуется
- Дистрибутивы Mac OS, Windows, Linux
- Программа Bootcamp, и загрузчик rEFIt
- 2-3 часа времени и немного терпения
Установка Windows 7
Так как Apple в своих компьютерах вместо BIOS использует EFI, то необходимо создать гибридную разметку GPT/MBR.
Это можно сделать с помощью программы Bootcamp.
Для этого запускаем мастер, определяем размер раздела под Windows, и нажимаем «разбить на разделы». Настоятельно рекомендуется сделать резервную копию Ваших данных.

Теперь вставляем диск с системой и приступаем к инсталляции.
Нужный нам раздел помечен как BOOTCAMP.
Фотограф из меня плохой, извините.

Все необходимые драйвера находятся на диске с системой Mac OS X.
Кстати, индекс производительности

Проблем с железом нет, также в Windows будет доступен раздел Mac OS в режиме чтения.
Установка Ubuntu 10.04
C Ubuntu посложнее, установщик не умеет работать с гибридной разметкой, поэтому перезагружаемся в OSX, запускаем «Дисковую утилиту» и выделяем партицию под Linux.

Вставляем диск с Ubuntu, перезагружаем компьютер и удерживаем клавишу Option (на PC клавиатурах это Alt), появится меню, в котором нужно выбрать оптический привод.
Дальше устанавливаем систему с LiveCD. Все как обычно, только выбираем ручную разметку, переформатируем созданный FAT раздел под корневую систему.

ВАЖНО, загрузчик GRUB должен быть записан не на MBR, а в начало корневого раздела (например /dev/sda3).

Сбоев и проблем с железом не замечено.
Единственное, с чем я столкнулся — это отсутствие звука.
Лечится добавлением строки options snd-hda-intel model=mb5 в файле /etc/modules.d/alsa-base.conf
rEFIt
Чтобы на старте появилось меню с выбором операционной системы, установим rEFIt.
Его можно установить как с помощью инсталлятора, так и вручную. Для более подробной информации Вы можете обратиться к документации проекта.

Внешний вид настраивается в конфигурационном файле /efi/refit/refit.conf
Например,
hideui banner shell tools label funcs
отключает ненужную графику.
Что в итоге?
В итоге получаем тихий и компактный компьютер, с Mac OS X, Ubuntu и Windows на борту за относительно небольшие деньги (25 тысяч рублей, если сравнивать с другими старшими маками).
Отдельные вложения — стоимость ОС Windows 7 (от трех тысяч рублей)