What are the differences between using the terminal on a mac vs linux? [closed]
I’ve been using Ubuntu for the last four years.
I have a basic knowledge of shell commands and I prefer working in a terminal rather than using a GUI. Recently I’ve started using a Mac. I’ve tried a few terminal commands (that I use on Ubuntu) in the Mac terminal and it seems to respond in mostly the same way. Are there any significant differences in the commands I use, the task(s) they perform or the shell environment that I should be aware of?
2 Answers 2
If you did a new or clean install of OS X version 10.3 or more recent, the default user terminal shell is bash.
Bash is essentially an enhanced and GNU freeware version of the original Bourne shell, sh. If you have previous experience with bash (often the default on GNU/Linux installations), this makes the OS X command-line experience familiar, otherwise consider switching your shell either to tcsh or to zsh, as some find these more user-friendly.
If you upgraded from or use OS X version 10.2.x, 10.1.x or 10.0.x, the default user shell is tcsh, an enhanced version of csh(‘c-shell’). Early implementations were a bit buggy and the programming syntax a bit weird so it developed a bad rap.
There are still some fundamental differences between mac and linux as Gordon Davisson so aptly lists, for example no useradd on Mac and ifconfig works differently.
The following table is useful for knowing the various unix shells.
sh The original Bourne shell Present on every unix system ksh Original Korn shell Richer shell programming environment than sh csh Original C-shell C-like syntax; early versions buggy tcsh Enhanced C-shell User-friendly and less buggy csh implementation bash GNU Bourne-again shell Enhanced and free sh implementation zsh Z shell Enhanced, user-friendly ksh-like shell You may also find these guides helpful:
On a final note, I am on Linux (Ubuntu 11) and Mac osX so I use bash and the thing I like the most is customizing the .bashrc (source’d from .bash_profile on OSX) file with aliases, some examples below. I now placed all my aliases in a separate .bash_aliases file and include it with:
if [ -f ~/.bash_aliases ]; then . ~/.bash_aliases fi in the .bashrc or .bash_profile file.
Note that this is an example of a mac-linux difference because on a Mac you can’t have the —color=auto . The first time I did this (without knowing) I redefined ls to be invalid which was a bit alarming until I removed —auto-color !
# ~/.bash_aliases # ls variants #alias l='ls -CF' alias la='ls -A' alias l='ls -alFtr' alias lsd='ls -d .*' # Various alias h='history | tail' alias hg='history | grep' alias mv='mv -i' alias zap='rm -i' # One letter quickies: alias p='pwd' alias x='exit' alias ='ack-grep' # Directories alias s='cd ..' alias play='cd ~/play/' # Rails alias src='script/rails console' alias srs='script/rails server' alias raked='rake db:drop db:create db:migrate db:seed' alias rvm-restart='source '\''/home/durrantm/.rvm/scripts/rvm'\''' alias rrg='rake routes | grep ' alias rspecd='rspec --drb ' # # DropBox - syncd WORKBASE="~/Dropbox/97_2012/work" alias work="cd $WORKBASE" alias code="cd $WORKBASE/ror/code" # # DropNot - NOT syncd ! WORKBASE_GIT="~/Dropnot" alias ="cd $WORKBASE_GIT" alias ="cd $WORKBASE_GIT/webs" alias ="cd $WORKBASE_GIT/setups_and_docs" alias ="cd $WORKBASE_GIT/webs/rails_v3/linker" # # git alias ='git status' # Warning: gst conflicts with gnu-smalltalk (when used). alias ='git branch' alias ='git checkout' alias ='git checkout -b ' alias ='git add ' alias ='git commit' alias ='git pull ' alias ='git push ' alias glom='git pull origin master' alias ghom='git push origin master' alias gg='git grep ' # # vim alias v='vim' # # tmux alias ='tmux set -g mode-mouse on' alias ='tmux set -g mode-mouse off' # # dmc alias ='cd ~/Dropnot/webs/rails_v3/dmc/' alias wf='cd ~/Dropnot/webs/rails_v3/dmc/dmWorkflow' alias ws='cd ~/Dropnot/webs/rails_v3/dmc/dmStaffing' thanks for reminding me that color behaves differently on linux and macos ls command. I use the same bashrc for both and need to find a way to conditionally use one ls option or the other to make sure ls always gets colors.
I’m going to use this to conditionally use one ls options or the other according to the operating system: _myos=»$(uname)» and then case $_myos in Linux) alias foo=’/path/to/linux/bin/foo’;; FreeBSD|OpenBSD) alias foo=’/path/to/bsd/bin/foo’ ;; *) ;; esac
Bastian, you can have color for ls in both Linux ( —color=all ) and OSX ( -G ) with the following: ls —color=al > /dev/null 2>&1 && alias ls=’ls -F —color=al’ || alias ls=’ls -G’
@Michael Durrant’s answer ably covers the shell itself, but the shell environment also includes the various commands you use in the shell and these are going to be similar — but not identical — between OS X and linux. In general, both will have the same core commands and features (especially those defined in the Posix standard), but a lot of extensions will be different.
For example, linux systems generally have a useradd command to create new users, but OS X doesn’t. On OS X, you generally use the GUI to create users; if you need to create them from the command line, you use dscl (which linux doesn’t have) to edit the user database (see here). (Update: starting in macOS High Sierra v10.13, you can use sysadminctl -addUser instead.)
Also, some commands they have in common will have different features and options. For example, linuxes generally include GNU sed , which uses the -r option to invoke extended regular expressions; on OS X, you’d use the -E option to get the same effect. Similarly, in linux you might use ls —color=auto to get colorized output; on macOS, the closest equivalent is ls -G .
EDIT: Another difference is that many linux commands allow options to be specified after their arguments (e.g. ls file1 file2 -l ), while most OS X commands require options to come strictly first ( ls -l file1 file2 ).
Finally, since the OS itself is different, some commands wind up behaving differently between the OSes. For example, on linux you’d probably use ifconfig to change your network configuration. On OS X, ifconfig will work (probably with slightly different syntax), but your changes are likely to be overwritten randomly by the system configuration daemon; instead you should edit the network preferences with networksetup , and then let the config daemon apply them to the live network state.
A Quick Guide to Shells in macOS
If you’ve read any instructions on the web for how to install something, you’ve likely read a statement about adding something to your $PATH. More specifically, it probably included an export statement, a directory, and then a file into which to pipe the command, right?
In fact, you may see a directive like this:
Make sure the ~ / . composer / vendor / bin directory is in your system’s “PATH”.
Which means that you should do something like the following:
export PATH="$PATH:$HOME/.composer/vendor/bin"
But if you’re new to working in the terminal, let alone environmental variables, how are you supposed to know how to translate the statement into the above command?
Shells in macOS
Before getting into what a shell is, it’s important to note that the terminal is basically the way to access the file system through a series of commands and text-based programs.
They’re popular especially in *nix-based operating systems, through Windows has it, too (if you ever used MS-DOS or the Command Prompt then you know what I mean).
For this post, I’m primarily talking about *nix-based systems and, even more specifically, macOS. So when it comes to talking about shells in macOS, you’re talking about the program that interprets the commands entered into the terminal.
So what are the different shells in macOS? There are typically four shells that come with the operating system (though you can install more, if you like).
macOS Shells
These shells include bash, ksh, tcsh, and zsh. Noe that some people will claim one shell is better than the other whereas others (like myself) are a bit ambivalent. I tend to stick with Bash since that’s what I’ve used the longest and know the best (though I will say Oh My Zsh., which I’ll cover momentarily, has been nice to tinker with, too).
For most macOS installations, this is the default shell. This means that all settings are going to be kept in a .bash_profile file. So any time you want to add anything to your path, this is the file into which it’s written. There are other files, but they are outside the scope of this post.
Understanding Profiles
Whenever you’re working in a terminal and you make a change to the file associated with that terminal session (that is, the instance of the terminal you have open), you have tell the operating system to load those changes via the following command:
…where ~/.profile is the shell’s profile file. Note, however, that for many shells this is only consistent for the session of the terminal. It does not mean that it will persist the next time you open the terminal let alone your operating system.
This is because a given shell may have a hierarchy, so to speak, of files. For Bash, this includes .bashrc, .bash_profile, and .profile. Furthermore, you may be able to define the settings in your operating system’s Terminal settings.
For example, if you’re using Linux:
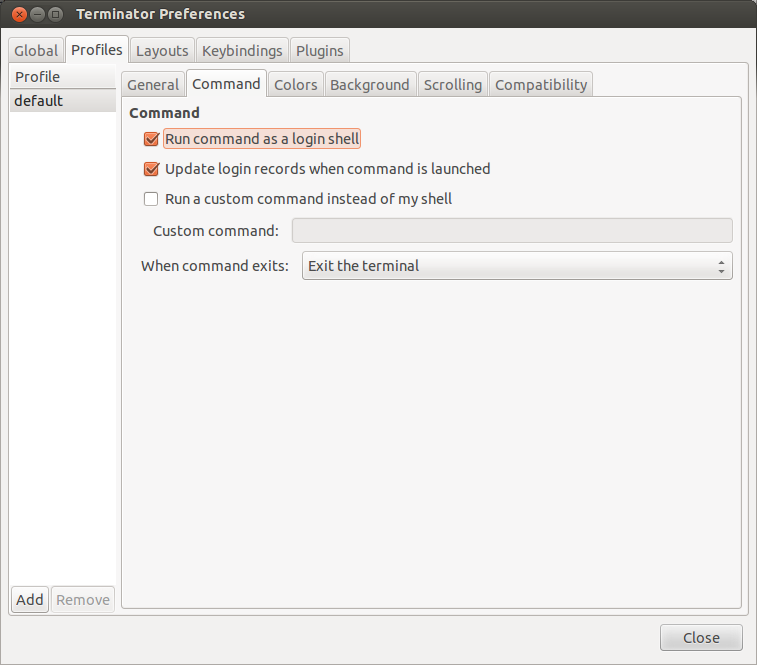
If, on the other hand, you’re using macOS, then you’d need to use one of the aforementioned files. Using bash as an example, I’ll break down how they all fit together:
- .profile is the login script. If one doesn’t exist, you can create one and this will execute the commands you have upon login to the session. If you want to have something execute or something available just during login, this is the file. This is also system-wide.
- .bashrc is a file that’s read during a terminal session (or even when the GUI is being used). Think of this is both login and interactive. So if you want something available during login and when using the OS, this is a file you can use.
- .bash_profile is available run during login and it’s dedicated towards an individual’s account.
Is There More?
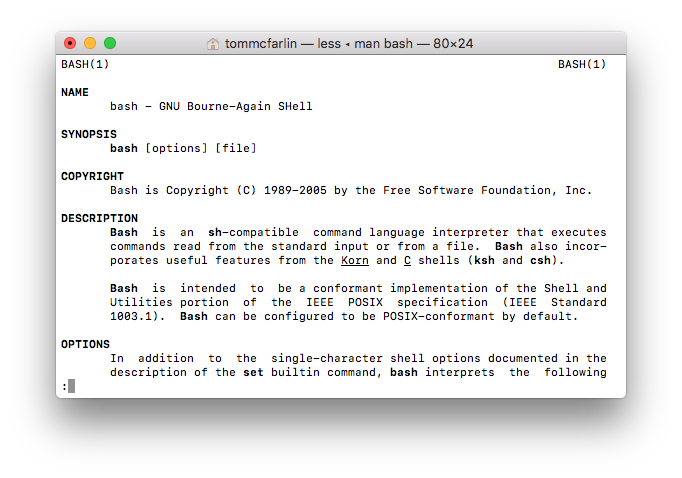
Since this is a quick guide, yes, there’s more. You can read them in the man page specific to your terminal. For bash, simply enter
In your terminal and you’ll be given the complete guide to the terminal.
As a take away, here’s what you may stumble across when it comes to the profile files:
- /bin/bash. The bash executable
- /etc/profile. The systemwide initialization file, executed for login shells
- ~/.bash_profile. The personal initialization file, executed for login shells
- ~/.bashrc. The individual per-interactive-shell sta. rtup file
- ~/.bash_logout. The individual login shell cleanup file, executed when a login shell exits
- ~/.inputrc. Individual readline initialization file
The next time you need to export a path, set a value, or work with your profile, this should hopefully give you a guide as to where the change needs to be made (and how you can do it).