- Saved searches
- Use saved searches to filter your results more quickly
- foxlet/macOS-Simple-KVM
- Name already in use
- Sign In Required
- Launching GitHub Desktop
- Launching GitHub Desktop
- Launching Xcode
- Launching Visual Studio Code
- Latest commit
- Git stats
- Files
- README.md
- About
- Mac OS X в эмуляторе QEMU под Linux
- Using QEMU to create a Ubuntu 20.04 Desktop VM on macOS
- QEMU Installation
- Create the disk image
- Boot machine with Ubuntu ISO mounted
- Boot without ISO mounted
- Conclusion
Saved searches
Use saved searches to filter your results more quickly
You signed in with another tab or window. Reload to refresh your session. You signed out in another tab or window. Reload to refresh your session. You switched accounts on another tab or window. Reload to refresh your session.
Tools to set up a quick macOS VM in QEMU, accelerated by KVM.
foxlet/macOS-Simple-KVM
This commit does not belong to any branch on this repository, and may belong to a fork outside of the repository.
Name already in use
A tag already exists with the provided branch name. Many Git commands accept both tag and branch names, so creating this branch may cause unexpected behavior. Are you sure you want to create this branch?
Sign In Required
Please sign in to use Codespaces.
Launching GitHub Desktop
If nothing happens, download GitHub Desktop and try again.
Launching GitHub Desktop
If nothing happens, download GitHub Desktop and try again.
Launching Xcode
If nothing happens, download Xcode and try again.
Launching Visual Studio Code
Your codespace will open once ready.
There was a problem preparing your codespace, please try again.
Latest commit
It's also possible to let QEMU control your tun/tap devices. It's only needed to create a bridge device with f.e. netctl.
Git stats
Files
Failed to load latest commit information.
README.md
Documentation to set up a simple macOS VM in QEMU, accelerated by KVM.
By @FoxletFox, and the help of many others. Find this useful? You can donate on Coinbase or Paypal!.
New to macOS and KVM? Check the FAQs.
You’ll need a Linux system with qemu (3.1 or later), python3 , pip and the KVM modules enabled. A Mac is not required. Some examples for different distributions:
sudo apt-get install qemu-system qemu-utils python3 python3-pip # for Ubuntu, Debian, Mint, and PopOS. sudo pacman -S qemu python python-pip python-wheel # for Arch. sudo xbps-install -Su qemu python3 python3-pip # for Void Linux. sudo zypper in qemu-tools qemu-kvm qemu-x86 qemu-audio-pa python3-pip # for openSUSE Tumbleweed sudo dnf install qemu qemu-img python3 python3-pip # for Fedora sudo emerge -a qemu python:3.4 pip # for Gentoo Run jumpstart.sh to download installation media for macOS (internet required). The default installation uses Catalina, but you can choose which version to get by adding either —high-sierra , —mojave , or —catalina . For example:
Note: You can skip this if you already have BaseSystem.img downloaded. If you have BaseSystem.dmg , you will need to convert it with the dmg2img tool.
Create an empty hard disk using qemu-img , changing the name and size to preference:
qemu-img create -f qcow2 MyDisk.qcow2 64G and add it to the end of basic.sh :
-drive \ -device ide-hd,bus=sata.4,drive=SystemDisk \ Note: If you’re running on a headless system (such as on Cloud providers), you will need -nographic and -vnc :0 -k en-us for VNC support.
Then run basic.sh to start the machine and install macOS. Remember to partition in Disk Utility first!
Step 2a (Virtual Machine Manager)
- If instead of QEMU, you’d like to import the setup into Virt-Manager for further configuration, just run sudo ./make.sh —add .
- After running the above command, add MyDisk.qcow2 as storage in the properties of the newly added entry for VM.
If you’re using a cloud-based/headless system, you can use headless.sh to set up a quick VNC instance. Settings are defined through variables as seen in the following example. VNC will start on port 5900 by default.
HEADLESS=1 MEM=1G CPUS=2 SYSTEM_DISK=MyDisk.qcow2 ./headless.sh To fine-tune the system and improve performance, look in the docs folder for more information on adding memory, setting up bridged networking, adding passthrough hardware (for GPUs), tweaking screen resolution, and enabling sound features.
About
Tools to set up a quick macOS VM in QEMU, accelerated by KVM.
Mac OS X в эмуляторе QEMU под Linux
Здравствуйте хабровчане. Недавно понадобилось писать на Objective C под Mac OS X. Железо у меня не самое подходящее для всяких сборок, да и сидеть полностью в этой ОС религия не позволяет. Решил поставить Mac OS X в на виртуальную машину Qemu в Linux.
Вот список всего, что я использовал:
—Gentoo Linux 64 bit
—Qemu 0.10.5
—KVM (Kernel-based Virtual Machine) 88-r1
—Поддержка KVM в ядре Linux
—Процессор с поддержкой Intel Virtualization Technology (в моем случае это Core2Duo E6400)
—Linux kernel>=2.6.20
-Сборка Mac OS X iATKOS v7 (Leopard 10.5.7)
Переходим к настройке, в ядре необходимо добавить KVM. Качаем исходники, распаковываем, запускаем make menuconfig:
Processor type and features->Paravirtualized guest support
Отмечаем:
—KVM paravirtualized clock
—KVM Guest support
—Paravirtualization layer for spinlocks
Далее в корне настройки ядра появляется новая опция Virtualization
Переходим туда и отмечаем:
—Kernel-based Virtual Machine (KVM) support
—KVM for Intel processors support
—KVM trace support
—PCI driver for virtio devices
—Virtio balloon driver
Собираем, устанавливаем, и перезагружаемся с новым ядром.
Теперь устанавливаем Qemu с поддержкой KVM, и сам KVM
USE=«kvm» emerge qemu
emerge kvm
Теперь переходим к шаманствам с виртуальной машиной.
Создаем виртуальный жесткий диск:
qemu-img create -f raw macos.disk 30G
Если собираемся запускать Qemu не от рута, необходимо дать прав другим пользователям на чтение/запись на устройство /dev/kvm:
chmod 0666 /dev/kvm
Запускаем:
kvm -boot d -hda macos.disk -m 900 -net nic,model=rtl8139 -net tap -usb -no-reboot -no-shutdown -vga std -cpu core2duo -cdrom 10.5.7.iso
-hda путь к нашему виртуальному жесткому диску
-cdrom пусть к образу
-no-shutdown -no-reboot необходимы для того чтобы в случае ошибки окно эмулятора «замораживалось» и можно было прочитать ошибку
-net nic,model=rtl8139 эмулируем сетевую карту Realtek 8139
-net tap чтобы гостевая система видела по сети хостящую необходим TAP девайс
-m 900 количество памяти отдаваемое гостевой системе
-boot d грузимся с сидирома
-usb поддержка USB
-cpu core2duo эмуляция процессора Core2Duo
Грузим диск. Размечаем жесктий диск при помощи Disk Utility (выбираем из меню сверху).
Настройка драйверов.
Перед тем как нажать кнопку Install обратите вниманине на кнопку Customize
Вещи которые нам необходимо выбрать:
x86 ACPI
Disabler
OHR
Remove TyMCE
CardBus
USB
Intel SATA/IDE
Kernels
Apple PS/2
Можно устанавливать. Ждем примерно 30 минут.
Mac OS X установлена, настраиваем.
Теперь в строке для запуска меняем -boot d на -boot c чтобы грузится с жесткого диска.
Загружаемся. Теперь надо придумать чтонибудь с сетью.
Ищем в интернете PCGenRTL8139Ethernet.kext, устанавливаем его, очень легко установить с помощью программы kextinstaller. Пока нету сети необходимые файлы передавать в систему можно через флешку например, добавляем -hdb /dev/sdb (путь к устройству флешки)
Перезагржаем гостевую ОС.
Теперь чтобы сеть в Mac OS X заработала необходимо зайти в управление сетью, выбрать Ethernet девайс, выключить его (Off), а затем включить и настроить нужный IP (например 192.168.1.1), а в хостящей системе настроить девайс tap0:
ifconfig tap0 192.168.1.2

UPD. Автор поста появился на хабре vinnishtein
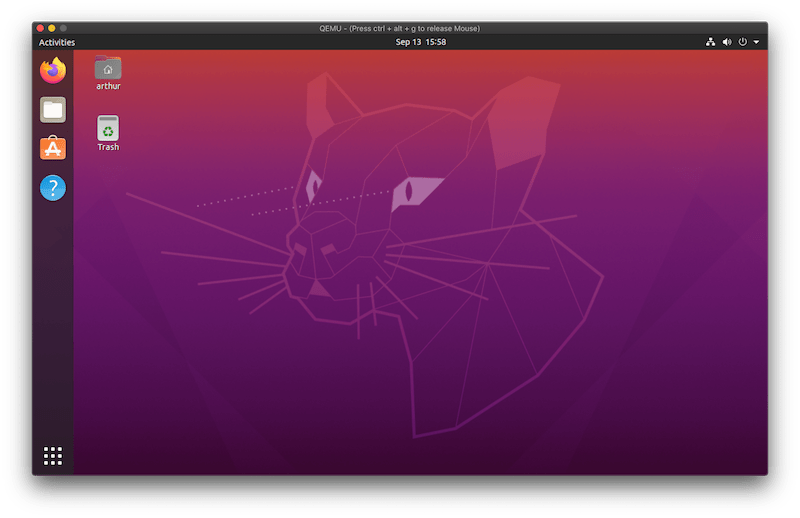
Using QEMU to create a Ubuntu 20.04 Desktop VM on macOS
In this blog post we’re going to create a Ubuntu 20.04 VM using QEMU on MacOS.
Note for users on macOS 11.0: follow this post first to get qemu to run.
QEMU is a hardware emulator which can make use of different accelerators when running VMs. The most popular accelerator is KVM which is built into the Linux kernel and allows Linux hosts to run VMs with native performance.
Using QEMU on macOS used to be very slow as no accelerator was available. This changed 2 years ago when the project added support for the macOS native hypervisor with Hypervisor.framework (HVF) as an accelerator.
Before we begin with the setup I assume that the Ubuntu 20.04 Desktop ISO has been downloaded in the current working directory.
QEMU Installation
We can use Homebrew to install QEMU. The version we’re using in this tutorial is 5.1.0:
$ brew install qemu qemu-system-x86_64 --version QEMU emulator version 5.1.0 Copyright (c) 2003-2020 Fabrice Bellard and the QEMU Project developersIt will pull in a few dependencies (the package depends on 14 other packages) and the installation can take a few minutes.
Create the disk image
Once the installation is done, we can create the disk image that we’re going to install Ubuntu on.
We’re using the QCOW2 format to create a 20GB image. This can be resized later on if needed. The Ubuntu installation took around 5GB of space when I installed it.
qemu-img create -f qcow2 ubuntu-20.04.1-desktop-amd64.qcow2 20GBoot machine with Ubuntu ISO mounted
We can now boot up the machine with the Ubuntu ISO attached as a
In this step we boot up the machine with the Ubuntu ISO mounted in the CD drive:
qemu-system-x86_64 \ -machine type=q35,accel=hvf \ -smp 2 \ -hda ubuntu-20.04.1-desktop-amd64.qcow2 \ -cdrom ./ubuntu-20.04.1-desktop-amd64.iso \ -m 4G \ -vga virtio \ -usb \ -device usb-tablet \ -display default,show-cursor=on- -machine : The emulated machine and the accelerator. q35 is the newest machine type and HVF is the macOS native hypervisor.
- -smp : Number of CPUs to use
- -m : Amount of memory to use
- -hda : Disk drive (the one we created earlier)
- -cdrom : The ISO image to put into the CD drive
- -vga : The graphic card to use. I found virtio (based on Virgil to have the best performance
- -usb : Enable USB host controller
- -device Adding a “usb-tablet” as an input device. I’m running this on a laptop and without this setting the mouse did not work.
- -display : To show the mouse cursor (disabled by default)
During testing I had problems with the Linux kernel as it would panic during the boot process. The issue was the -cpu parameter. I fixed it by specifying the CPU architecture manually (see qemu-system-x86_64 -cpu help for a list of all available architectures).
My machine has an IvyBridge processor (Core i7):
$ sysctl -n machdep.cpu.brand_string Intel(R) Core(TM) i7-3740QM CPU @ 2.70GHzAnd using -cpu IvyBridge would fail. However when using -cpu Nehalem (also an i7 CPU) everything worked well.
Now after the machine is booted up the Ubuntu installer will run. Follow the installation steps and don’t restart the VM at the end of the installation, instead shut it down by stopping the qemu process with CTRL-C on the host.
Boot without ISO mounted
When running the VM we don’t need the Ubuntu ISO mounted and can remove it by leaving out the -cdrom option:
qemu-system-x86_64 \ -machine type=q35,accel=hvf \ -smp 2 \ -hda ubuntu-20.04.1-desktop-amd64.qcow2 \ -m 4G \ -vga virtio \ -usb \ -device usb-tablet \ -display default,show-cursor=onConclusion
In my experience QEMU is faster, more responsive and uses less CPU/RAM than VirtualBox. I didn’t have to configure any display scaling for HiDPI screens as it worked out of the box. The only thing I’m missing are shared clipboards and drag-and-drop of files (which are available when installing the VirtualBox Guest Additions).