- Saved searches
- Use saved searches to filter your results more quickly
- foxlet/macOS-Simple-KVM
- Name already in use
- Sign In Required
- Launching GitHub Desktop
- Launching GitHub Desktop
- Launching Xcode
- Launching Visual Studio Code
- Latest commit
- Git stats
- Files
- README.md
- About
- Mac os virtual machine on linux
- Requirements
- Installation Preparation
- Installation Media
- Virtual Machine Setup
- VM Modification
- Physical Hard Drive Passthrough
- QCOW2 File for Hard Drive
- Install Process
- Post-Installation
- Bridge Networking
- Other Considerations
- Walkthrough Video
- MacOS Monterey на Linux — быстро и просто?
Saved searches
Use saved searches to filter your results more quickly
You signed in with another tab or window. Reload to refresh your session. You signed out in another tab or window. Reload to refresh your session. You switched accounts on another tab or window. Reload to refresh your session.
Tools to set up a quick macOS VM in QEMU, accelerated by KVM.
foxlet/macOS-Simple-KVM
This commit does not belong to any branch on this repository, and may belong to a fork outside of the repository.
Name already in use
A tag already exists with the provided branch name. Many Git commands accept both tag and branch names, so creating this branch may cause unexpected behavior. Are you sure you want to create this branch?
Sign In Required
Please sign in to use Codespaces.
Launching GitHub Desktop
If nothing happens, download GitHub Desktop and try again.
Launching GitHub Desktop
If nothing happens, download GitHub Desktop and try again.
Launching Xcode
If nothing happens, download Xcode and try again.
Launching Visual Studio Code
Your codespace will open once ready.
There was a problem preparing your codespace, please try again.
Latest commit
It's also possible to let QEMU control your tun/tap devices. It's only needed to create a bridge device with f.e. netctl.
Git stats
Files
Failed to load latest commit information.
README.md
Documentation to set up a simple macOS VM in QEMU, accelerated by KVM.
By @FoxletFox, and the help of many others. Find this useful? You can donate on Coinbase or Paypal!.
New to macOS and KVM? Check the FAQs.
You’ll need a Linux system with qemu (3.1 or later), python3 , pip and the KVM modules enabled. A Mac is not required. Some examples for different distributions:
sudo apt-get install qemu-system qemu-utils python3 python3-pip # for Ubuntu, Debian, Mint, and PopOS. sudo pacman -S qemu python python-pip python-wheel # for Arch. sudo xbps-install -Su qemu python3 python3-pip # for Void Linux. sudo zypper in qemu-tools qemu-kvm qemu-x86 qemu-audio-pa python3-pip # for openSUSE Tumbleweed sudo dnf install qemu qemu-img python3 python3-pip # for Fedora sudo emerge -a qemu python:3.4 pip # for Gentoo Run jumpstart.sh to download installation media for macOS (internet required). The default installation uses Catalina, but you can choose which version to get by adding either —high-sierra , —mojave , or —catalina . For example:
Note: You can skip this if you already have BaseSystem.img downloaded. If you have BaseSystem.dmg , you will need to convert it with the dmg2img tool.
Create an empty hard disk using qemu-img , changing the name and size to preference:
qemu-img create -f qcow2 MyDisk.qcow2 64G and add it to the end of basic.sh :
-drive \ -device ide-hd,bus=sata.4,drive=SystemDisk \ Note: If you’re running on a headless system (such as on Cloud providers), you will need -nographic and -vnc :0 -k en-us for VNC support.
Then run basic.sh to start the machine and install macOS. Remember to partition in Disk Utility first!
Step 2a (Virtual Machine Manager)
- If instead of QEMU, you’d like to import the setup into Virt-Manager for further configuration, just run sudo ./make.sh —add .
- After running the above command, add MyDisk.qcow2 as storage in the properties of the newly added entry for VM.
If you’re using a cloud-based/headless system, you can use headless.sh to set up a quick VNC instance. Settings are defined through variables as seen in the following example. VNC will start on port 5900 by default.
HEADLESS=1 MEM=1G CPUS=2 SYSTEM_DISK=MyDisk.qcow2 ./headless.sh To fine-tune the system and improve performance, look in the docs folder for more information on adding memory, setting up bridged networking, adding passthrough hardware (for GPUs), tweaking screen resolution, and enabling sound features.
About
Tools to set up a quick macOS VM in QEMU, accelerated by KVM.
Mac os virtual machine on linux
This shows you all the steps to install a MacOS VM in Linux QEMU using Virtual Machine Manager or virt-manager.
Requirements
- A modern Linux distribution. E.g. Ubuntu 20.04 LTS 64-bit or later.
- QEMU >= 4.2.0
- A CPU with Intel VT-x / AMD SVM support is required ( grep -e vmx -e svm /proc/cpuinfo )
Installation Preparation
Install QEMU and modify your user using https://christitus.com/vm-setup-in-linux Guide.
Clone this repository on your QEMU system. Files from this repository are used in the following steps.
cd ~ git clone --depth 1 --recursive https://github.com/foxlet/macOS-Simple-KVM cd macOS-Simple-KVM Installation Media
This downloads our installation media and I’d recommend using Catalina for compatibility and performance.
Note: Modern NVIDIA GPUs are supported on HighSierra but not on later versions of macOS. Recommended PCI Passthrough GPU is 5700XT as this works on Catalina and above. If you go with a 6000 Series Card only certain ones will work on Big Sur and Monterey, but not earlier releases.
Virtual Machine Setup
I recommend using Virtual Machine Manager (virt-manager) as it has a fantastic interface and Simple-KVM does a great job with their setup script. Simply type the following to get the macOS VM setup:
VM Modification
Before we can start out VM we have to have a hard drive to load it. You have two options: physical hard drive passthrough or qcow2 file.
Obviously, the physical drive is considerably faster, but not possible in some instances such as laptops or if you can’t afford a secondary drive.
Physical Hard Drive Passthrough
This is pretty simple as you just click Add Hardware -> Storage and then specify your hard drive.

Note: while you can use drive short names /dev/sda I’d recommend using /dev/disk/by-id/HARDDRIVESERIAL as this doesn’t ever change.
QCOW2 File for Hard Drive
This is even simpler as you just click Add Hardware -> Storage and create new file. Just make sure you put it on at least a SSD or a nvme drive as it will be super slow if you don’t.
Install Process
Boot your machine and select the OS Install Partition on startup.
Use the Disk Utility tool within the macOS installer to partition, and format the virtual disk attached to the macOS VM.
TIP: Using a non-APFS filesystem is recommended.
Go ahead, and install macOS
Post-Installation
Bridge Networking
First find your card interface name
Example: (Interface name is enp7s0)
1: lo: mtu 65536 qdisc noqueue state UNKNOWN group default qlen 1000 link/loopback 00:00:00:00:00:00 brd 00:00:00:00:00:00 inet 127.0.0.1/8 scope host lo valid_lft forever preferred_lft forever inet6 ::1/128 scope host valid_lft forever preferred_lft forever 2: enp7s0: mtu 1500 qdisc fq_codel state DOWN group default qlen 1000 link/ether 24:bb:ee:55:22:33 brd ff:ff:ff:ff:ff:ff inet 10.0.0.99/24 brd 10.0.0.255 scope global valid_lft forever preferred_lft forever inet6 ::1/128 scope host valid_lft forever preferred_lft forever Second Update /etc/network/interfaces
source /etc/network/interfaces.d/* # The loopback network interface auto lo iface lo inet loopback # The primary network interface - old entry # allow-hotplug enp7s0 # iface enp7s0 inet dhcp # The primary network interface - new entry # DEVICENAME = enp7so for this pc and MYUSERNAME need to be $(whoami) auto br0 iface br0 inet dhcp bridge_ports DEVICENAME tap0 auto tap0 iface tap0 inet dhcp pre-up tunctl -u MYUSERNAME -t tap0 Lastly Restart the networking service or reboot computer. Then change your VM NIC (Network Hardware) to br0 interface.
sudo systemctl restart networking Other Considerations
- GPU Passthrough (Requires two Graphics Cards) — https://github.com/foxlet/macOS-Simple-KVM/blob/master/docs/guide-passthrough.md
- Changing Screen Resolution — https://github.com/foxlet/macOS-Simple-KVM/blob/master/docs/guide-screen-resolution.md
- Optimizing System Performance — https://github.com/sickcodes/osx-optimizer
- Sound — Two methods, Pass the audio through HDMI if using GPU Passthrough OR Pass through a USB sound card that is macOS compatible
- Note: There is a way to use Voodoo kext or AppleALC, but it will crackle and sound terrible
Walkthrough Video
![]()
MacOS Monterey на Linux — быстро и просто?
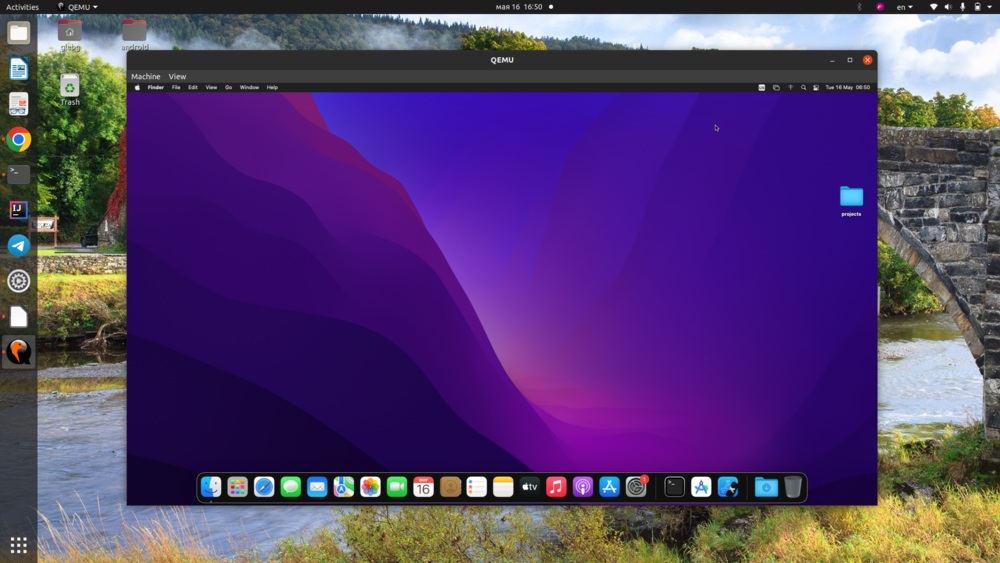
Что делать, если у вас возникло желание или необходимость заняться разработкой под MacOS или iOS, но под рукой нет макбука, а покупать его только чтобы открыть Xcode кажется делом сомнительным? Недавно я столкнулся с такой проблемой в одном из своих пет-проектов и решил ее достаточно просто и быстро. После выполнения нескольких достаточно примитивных шагов, мне удалось запустить MacOS Monterey как на скриншоте ниже.

Никакого Virtualbox, никакого Virtual Machine Manager. Из требований — только 100 Гб свободного места на диске и хотя бы 16 Гб оперативной памяти. В рунете я встречал описание похожих путей установки, вроде Docker-OSX или Sosumi. Но я бы хотел поделиться способом, который позволяет использовать актуальную версию MacOS (Sosumi — сразу минус) и не потратить уйму свободного времени на возню с конфигами и терминалом. Поехали.
Для начала установим все необходимые пакеты и добавим себя в группу kvm и libvirt:
sudo apt-get install qemu uml-utilities virt-manager git wget libguestfs-tools p7zip-full make dmg2img -y sudo usermod -aG kvm $(whoami) sudo usermod -aG libvirt $(whoami) sudo usermod -aG input $(whoami)Теперь склонируем репозиторий проекта OSX-KVM в домашнюю директорию пользователя:
cd ~ git clone --depth 1 --recursive https://github.com/kholia/OSX-KVM.git cd OSX-KVM git pull --rebaseПриступим к самой установке. Скрипт fetch-macOS-v2.py позволит скачать образ операционной системы желаемой версии:
./fetch-macOS-v2.py 1. High Sierra (10.13) 2. Mojave (10.14) 3. Catalina (10.15) 4. Big Sur (11.7) - RECOMMENDED 5. Monterey (12.6) 6. Ventura (13)Скрипт выведет список версий ОС и предложит ввести номер. К сожалению, так и не удалось запустить MacOS Ventura из того образа, который предоставляется репозиторием. Я бы рекомендовал установить Monterey, чтобы пользоваться современными версиями Xcode и других инструментов.
После выбора версии скрипт скачает образ. Подождав завершения скачивания, запустим команду:
dmg2img -i BaseSystem.dmg BaseSystem.imgСледующий, третий, шаг в установке — создадим виртуальный жесткий диск. Желательный объем для установки — не меньше 100 Гб постоянной памяти, чтобы можно было не только установить виртуалку, но и что-то внутри нее.
qemu-img create -f qcow2 mac_hdd_ng.img 128GПеред тем, как запустить последнюю команду — отредактируем скрипт OpenCore-Boot.sh .
… чтобы использовать 8 Гб при запуске виртуальной машины, а не 4 Гб. При этом желательно, чтобы оперативная память виртуальной машины не превышала половины от общей RAM хоста.
Скорее всего, вам понадобится также закомментировать строку…
-global ICH9-LPC.acpi-pci-hotplug-with-bridge-support=off… потому что она была нужна в более ранних версиях, а сейчас выдаст ошибку.
Все, теперь мы полностью готовы к финальной стадии. Запускаем скрипт ./OpenCore-Boot.sh в терминале, который выдаст нам окно Qemu.
Как ни странно, именно на этом этапе что-то может резко пойти не так. Обычно англоязычные туториалы по теме именно в этот момент установки отписываются волшебной фразой «Отлично! Далее следуйте указаниям на экране», но я бы хотел подробно остановиться на основных моментах, на которых сам набил шишки.
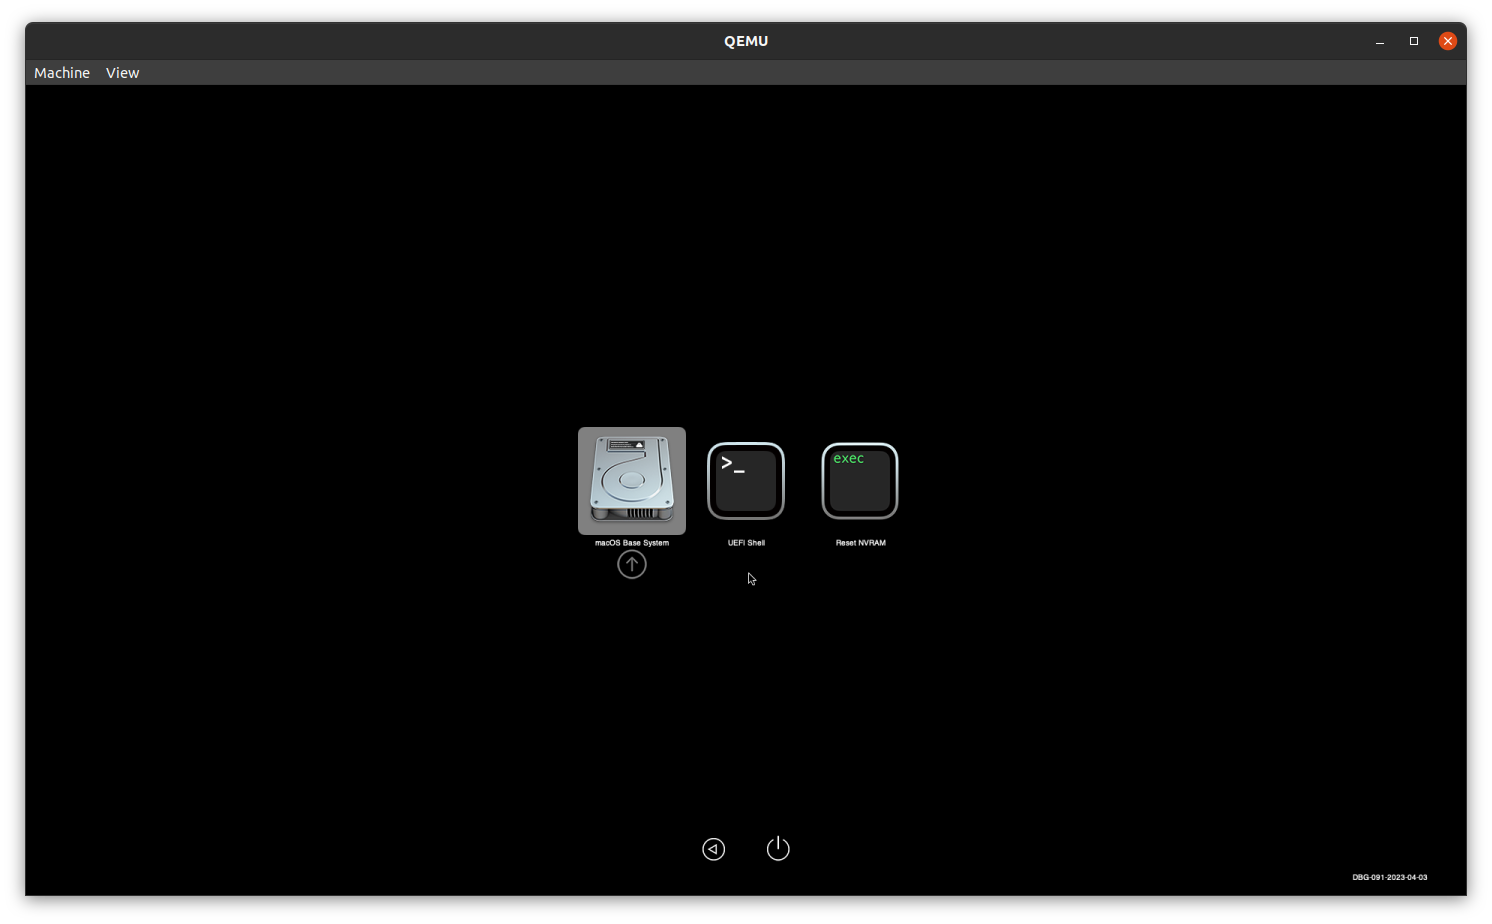
Первым появится экран с тремя опциями, из которых выберем macOS Base System:
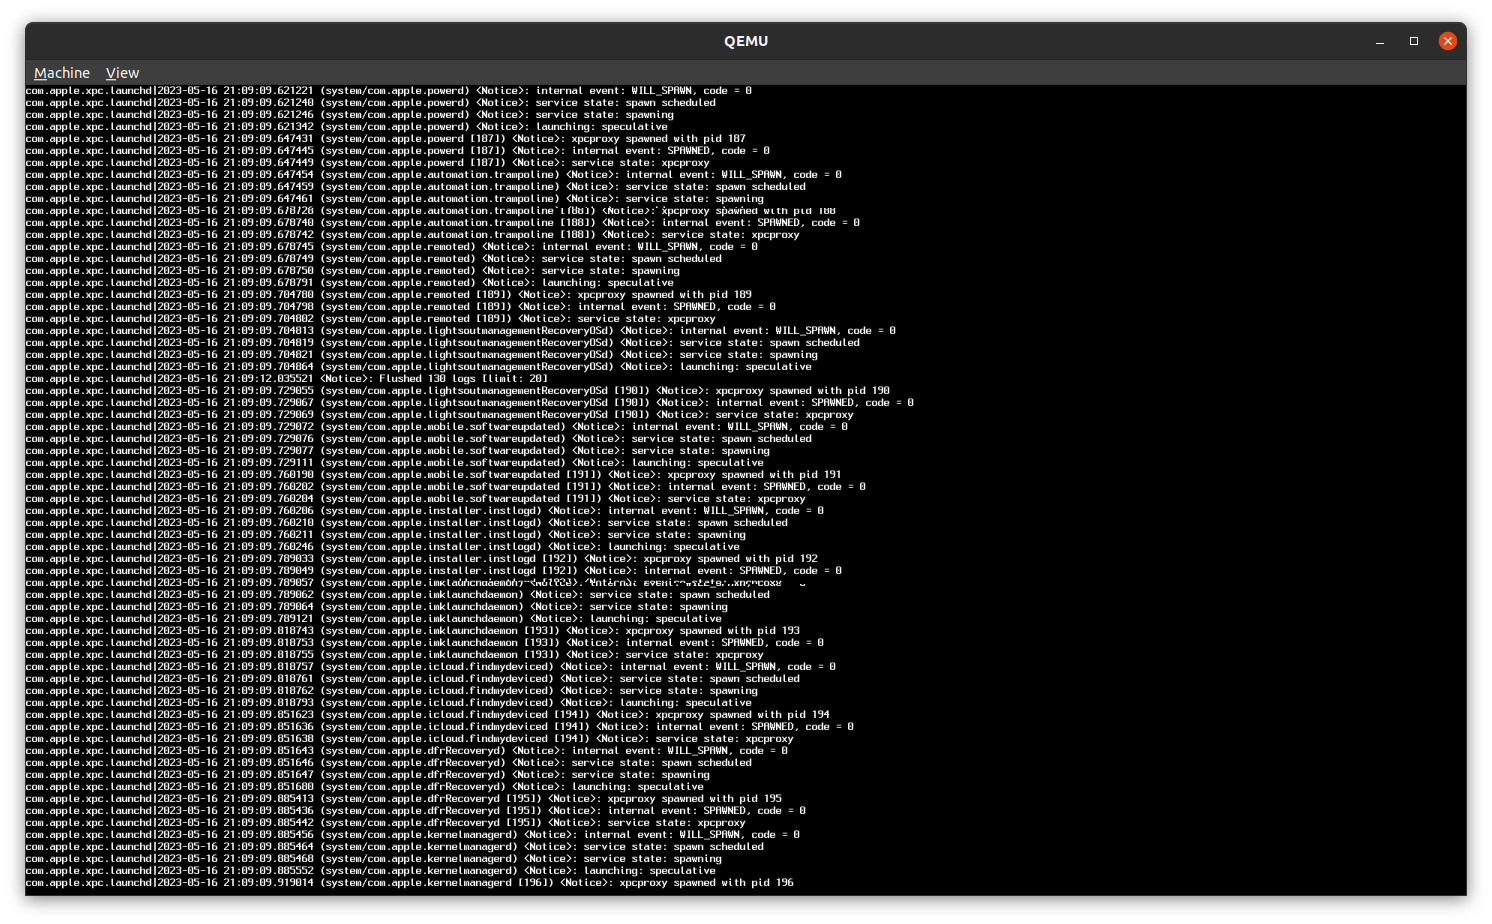
Далее вы увидите юзер-френдли терминал с тысячами строк белого текста на черном фоне — не переживайте, это так и должно быть…
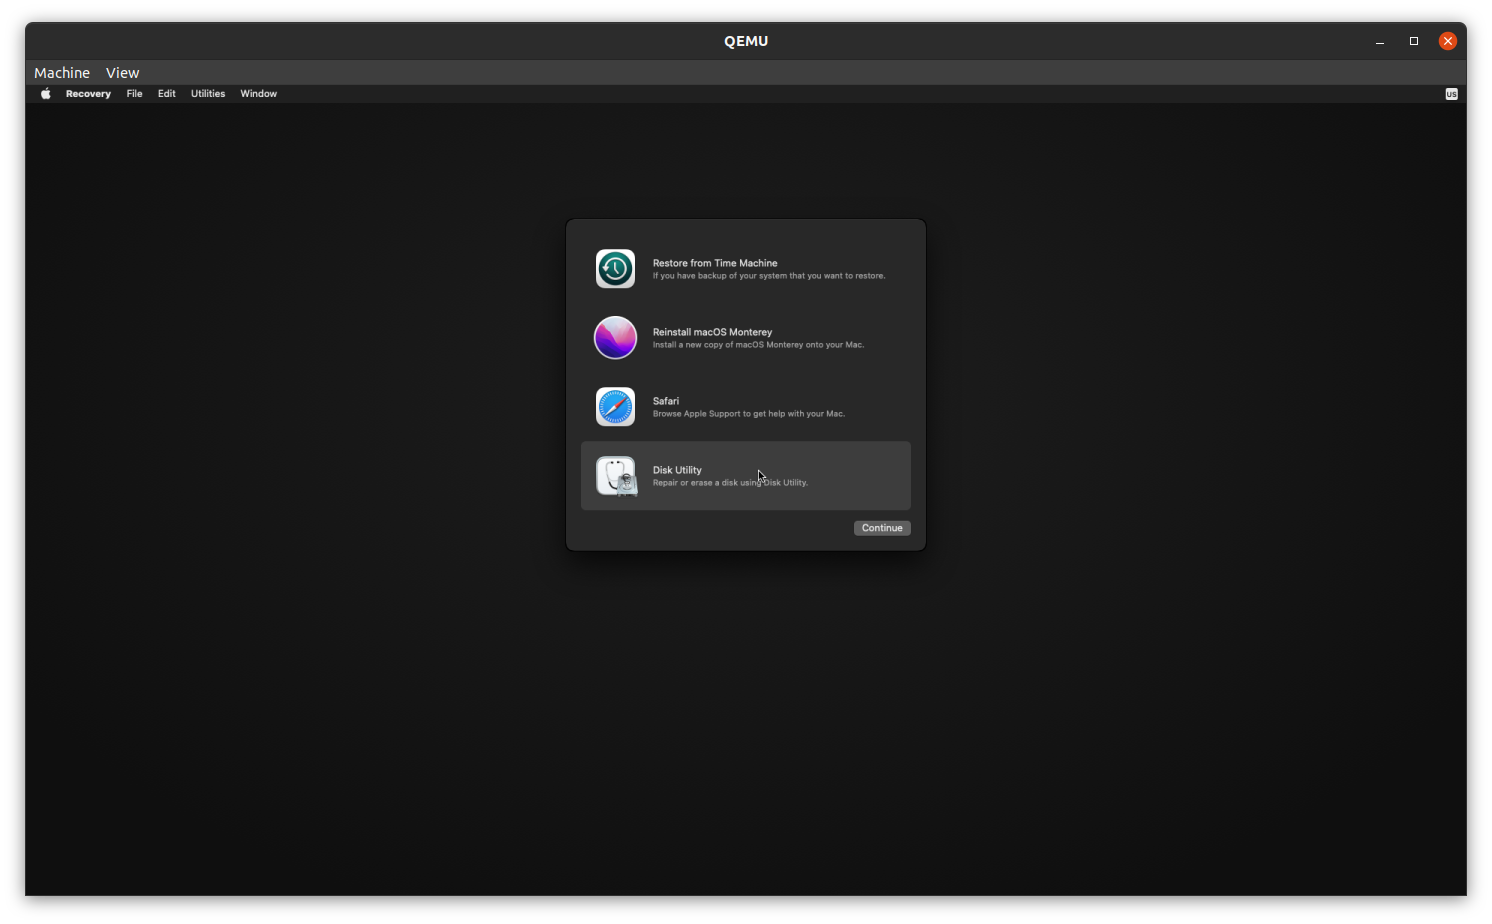
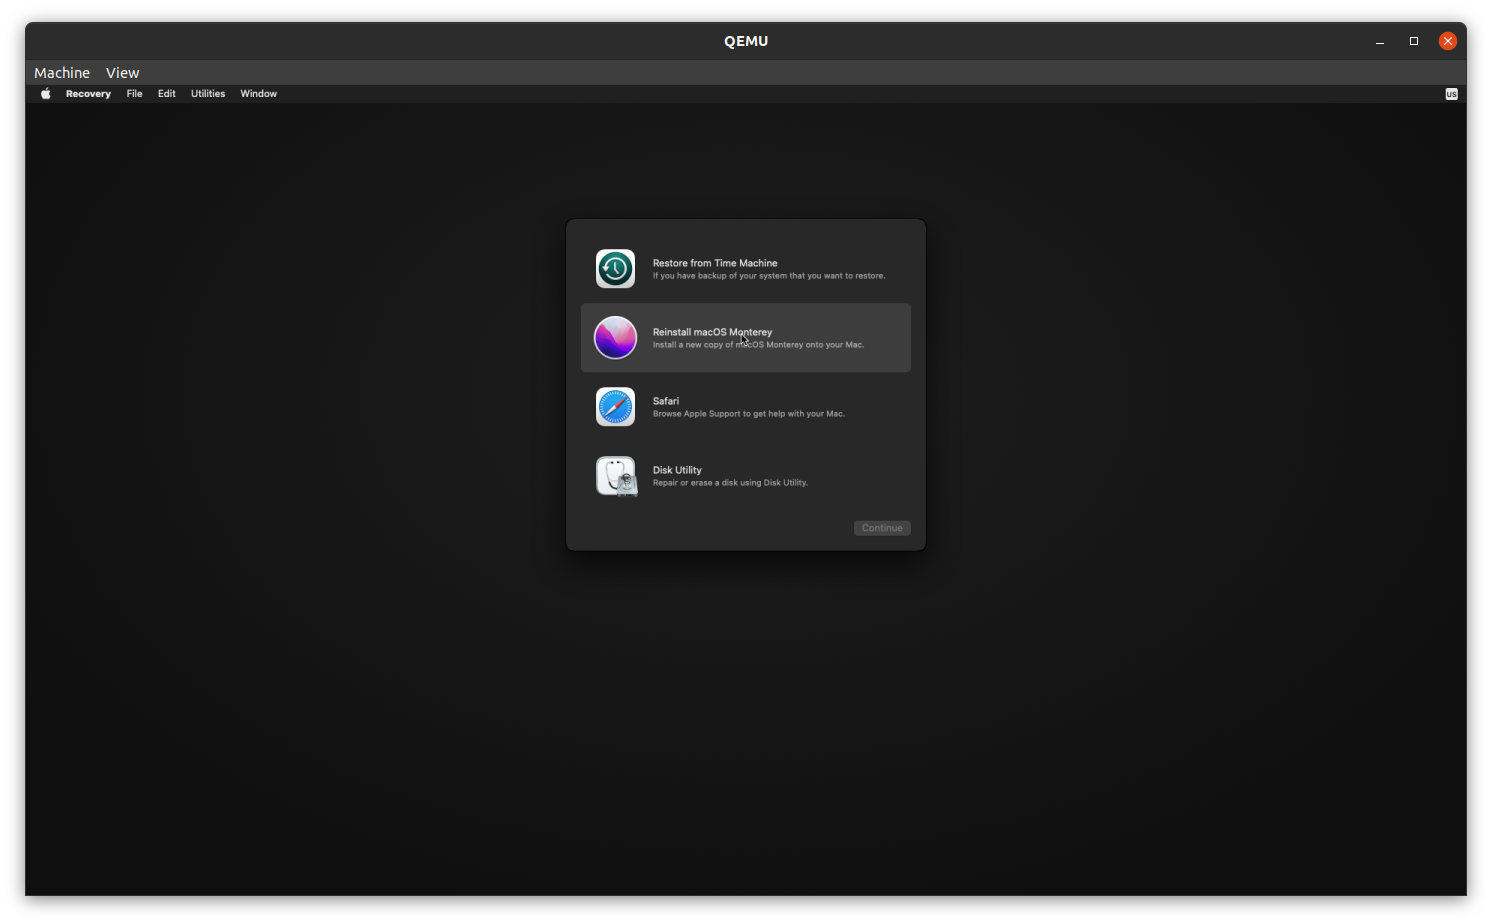
Через буквально несколько секунд появится такая менюшка, в которой нужно перейти в Disk Utility:
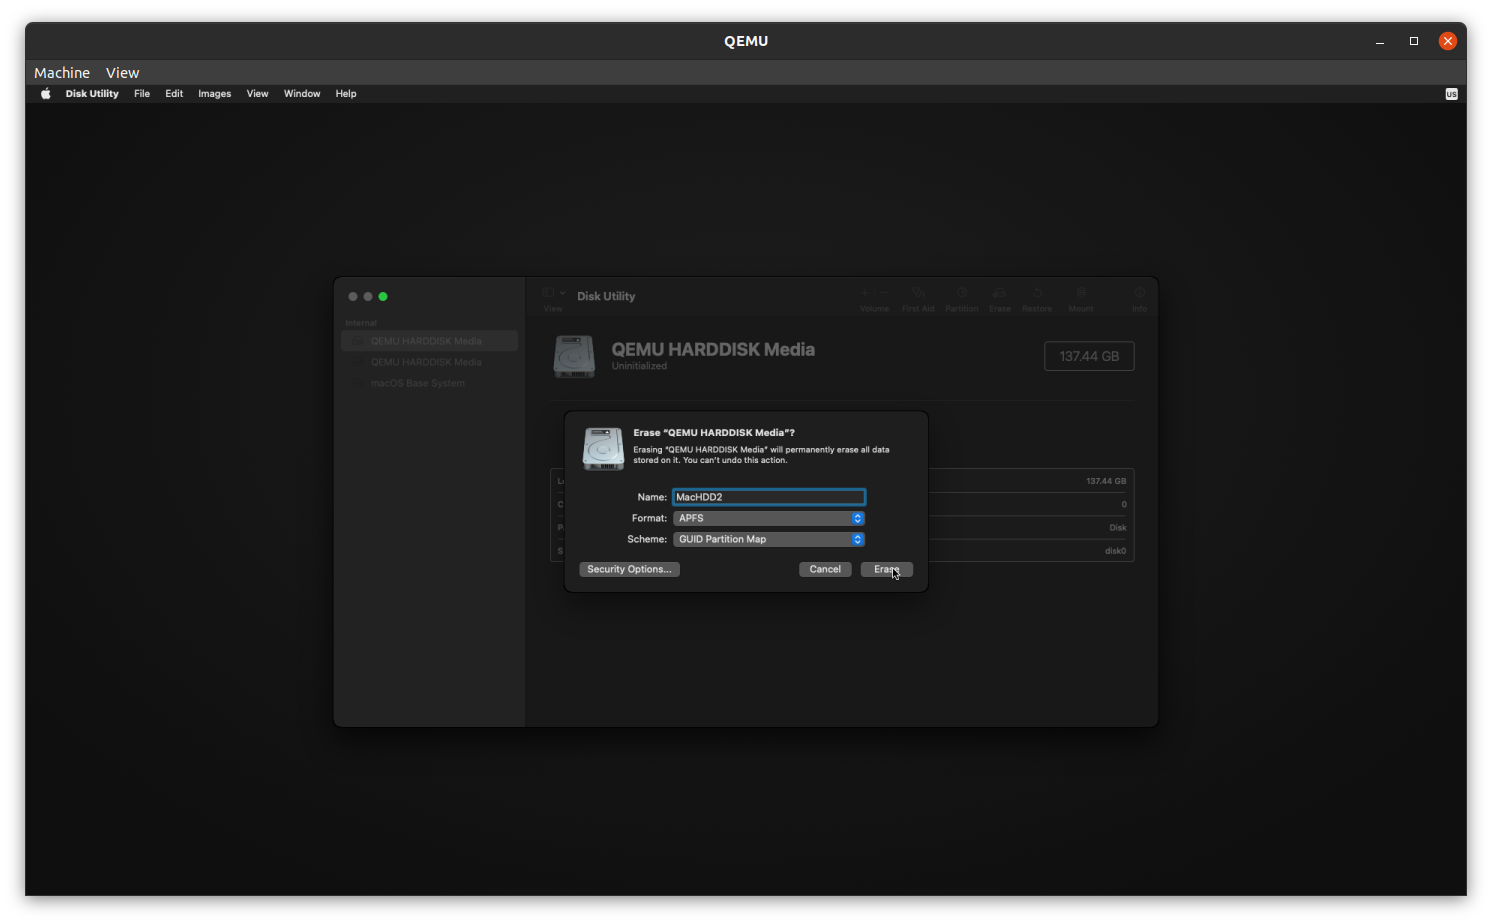
В меню Utility в правой колонке выберем тот диск, который создали командой qemu-img . Самый простой признак — его размер будет больше 100 Гб. Здесь важно не ошибиться и не отформатировать не тот диск. Если это случится, придется начинать установку заново.
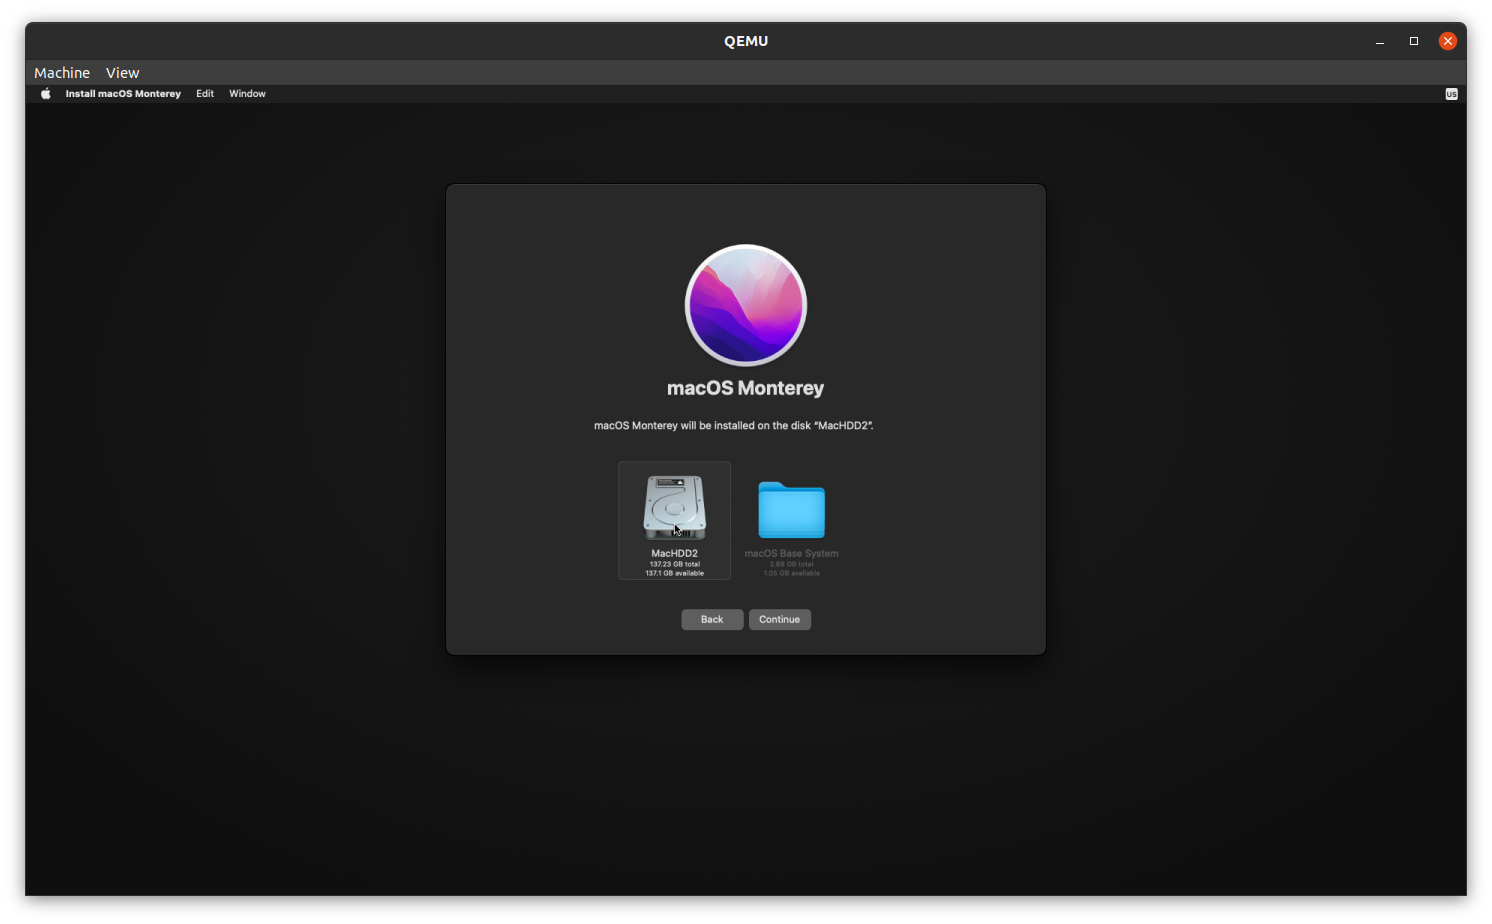
Переименовав диск и нажав Erase, закроем Disk Utility и вернемся к более раннему меню. После выбора Reinstall macOS Monterey нажимаем Agree и выбираем диск, который переименовали и отформатировали в Disk Utility:
Далее появится прогрессбар установки, заполнение которого может занимать много, очень много времени. Рационально отключить у ноутбука спящий режим и оставить его на ночь для успешной установки. После ее окончания вы еще раз увидите немного бегущего белого текста на черном фоне и затем долгожданный экран первоначальной настройки macOS Monterey:
Вот и все, дальнейшие действия — как при обычной настройке macOS. Может быть, существуют еще более простые способы запускать Monterey или даже Ventura из-под линуксового хоста, но этот показался наиболее оптимальным по затратам времени и усилий лично мне.
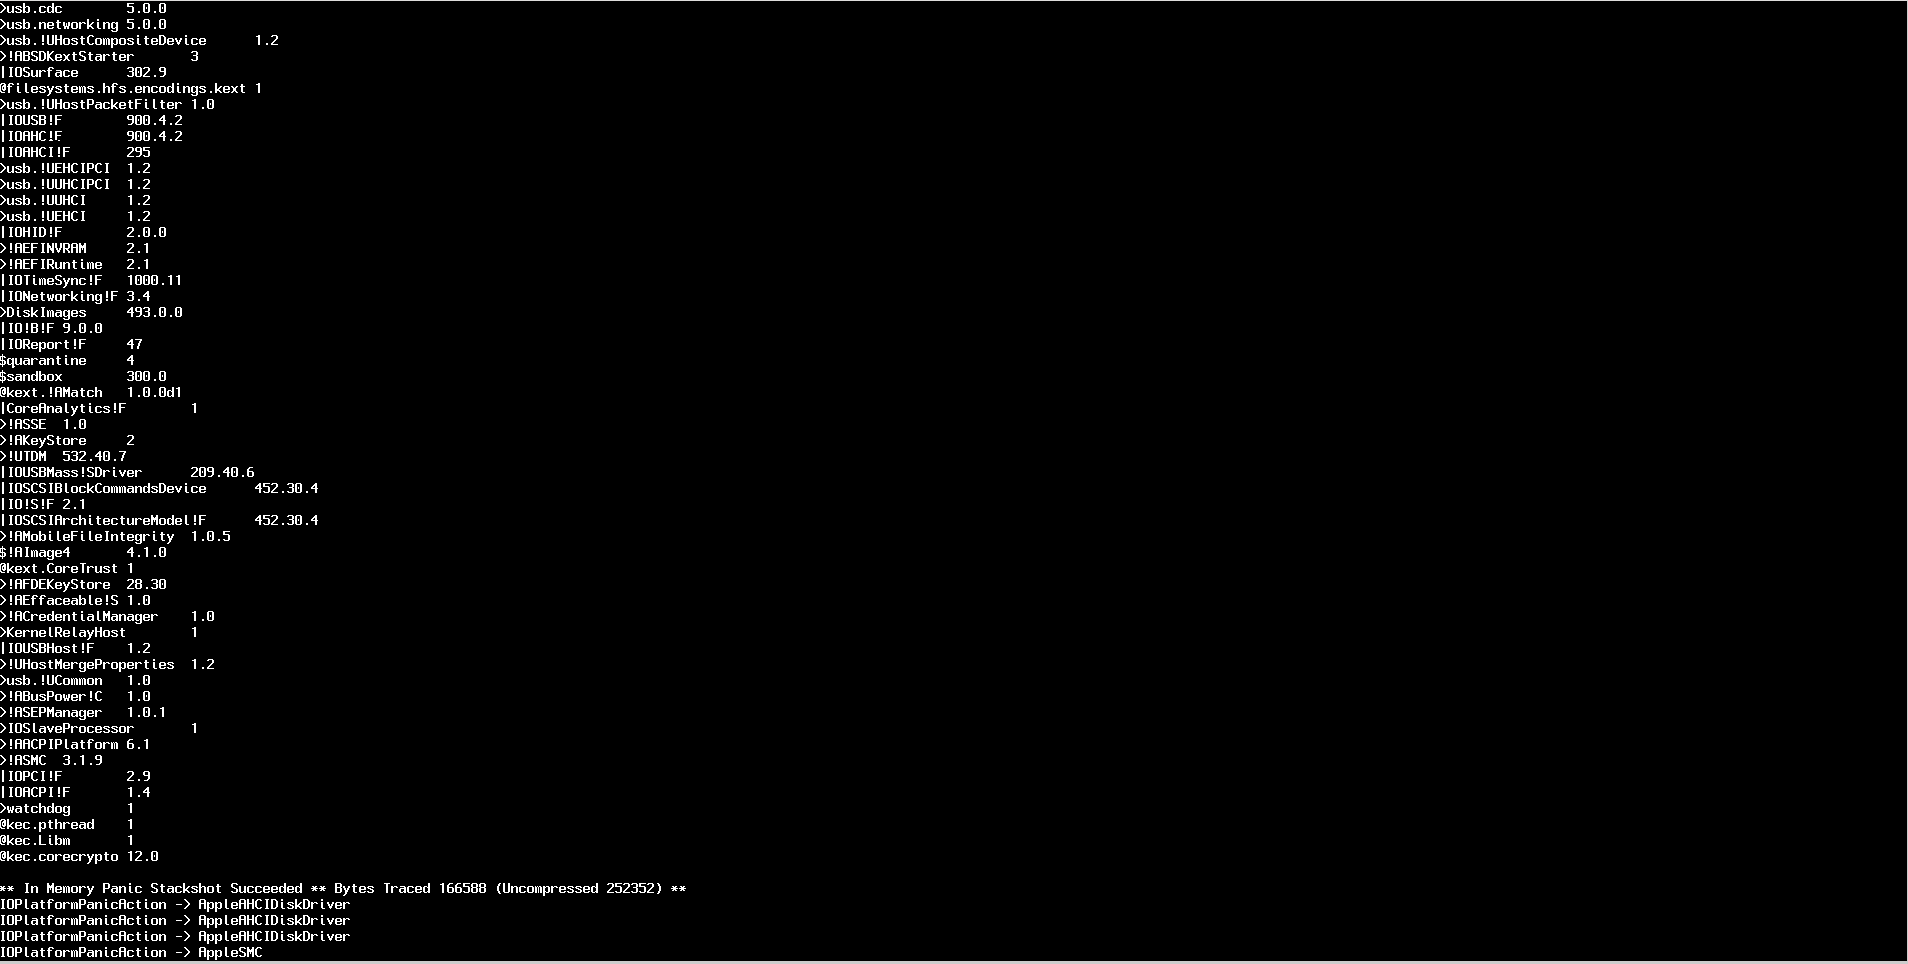
В заключение упомяну, что при запуске уже установленной виртуальной машины можно столкнуться с такой проблемой:В этой ситуации поможет просто перезапустить хост, причем именно выключить, подождать несколько секунд и включить снова, Restart не спас. К сожалению, ничего конкретного о причинах этой ошибки мне узнать не удалось.