Solve ./install no response
First click on the Kali virtual machine icon, select Install Parallels Tools, Mount Disk
Will mount Parallels Tools and move to your desktop:
cp -R /media/cdrom0/ ~/Desktop/pdtools/ At this time, there will be no response, here is the modification
Unzip the compressed package inside KMODS and delete the previous compressed package (if you want the original file to go directly / Media / CDROM0 to drag out):
tar -xzf ./kmods/prl_mod.tar.gz rm ./kmods/prl_mod.tar.gz modify prl_fs/SharedFolders/Guest/Linux/prl_fs/inode.c In the top, add this line:
#define segment_eq(a, b) ((a).seg == (b).seg) modify prl_fs_freeze/Snapshot/Guest/Linux/prl_freeze/prl_fs_freeze.c In the top, add this line:
tar -zcvf ./kmods/prl_mod.tar.gz . dkms.conf Makefile.kmods at this time sudo ./install Can be installed
Solve dependence
In the installation process, the error, prompts the three environments, the solution is as follows:
# apt update # Install the kernel head apt install linux-headers-$(uname -r) 
If the installation is over, but I can’t find the installation prompt here, so we need to install it manually.Here
Ctrl + F Search for your Linux-Headers — $ (uname -r) output content, there is also a common to remember to download
# Download Save as Headers.deb wget -O headers.deb http://old.kali.org/kali/pool/main/l/linux/linux-headers-5.10.0-kali7-arm64_5.10.28-1kali1_arm64.deb # # c c..deb wget -O common.deb http://old.kali.org/kali/pool/main/l/linux/linux-headers-5.10.0-kali7-common_5.10.28-1kali1_all.deb # Install auxiliary DEB installation tool apt install gdebi -y # First install the COMMON tabular gdebi common.deb # gdebi headers.deb # Verify that the installation is successful (this time should be prompted to be installed) apt install linux-headers-$(uname -r) Solve white screen problems
The default XFCE environment successfully installed Parallels Tools, should be a white screen abnormality after restart, so we have to manually install to switch into a classic GNOME desktop environment and then install PD Tools:
apt install kali-desktop-gnome -y 
The installation needs to wait for a while, restart the virtual machine after completion.

Now the kernel head and desktop environment are installed, return to the previous directory, run again sudo ./install I.e.
Get
Reference link
Mac parallels kali linux
This guide is about virtualizing Kali Linux inside of Parallels, allowing you to have a Kali VM. This is a great way to use Kali, as it is completely separate from the host, allows you to interact with other VMs (as well as the host, and other machines on the network), and allows you to revert to snapshots.
Wizard
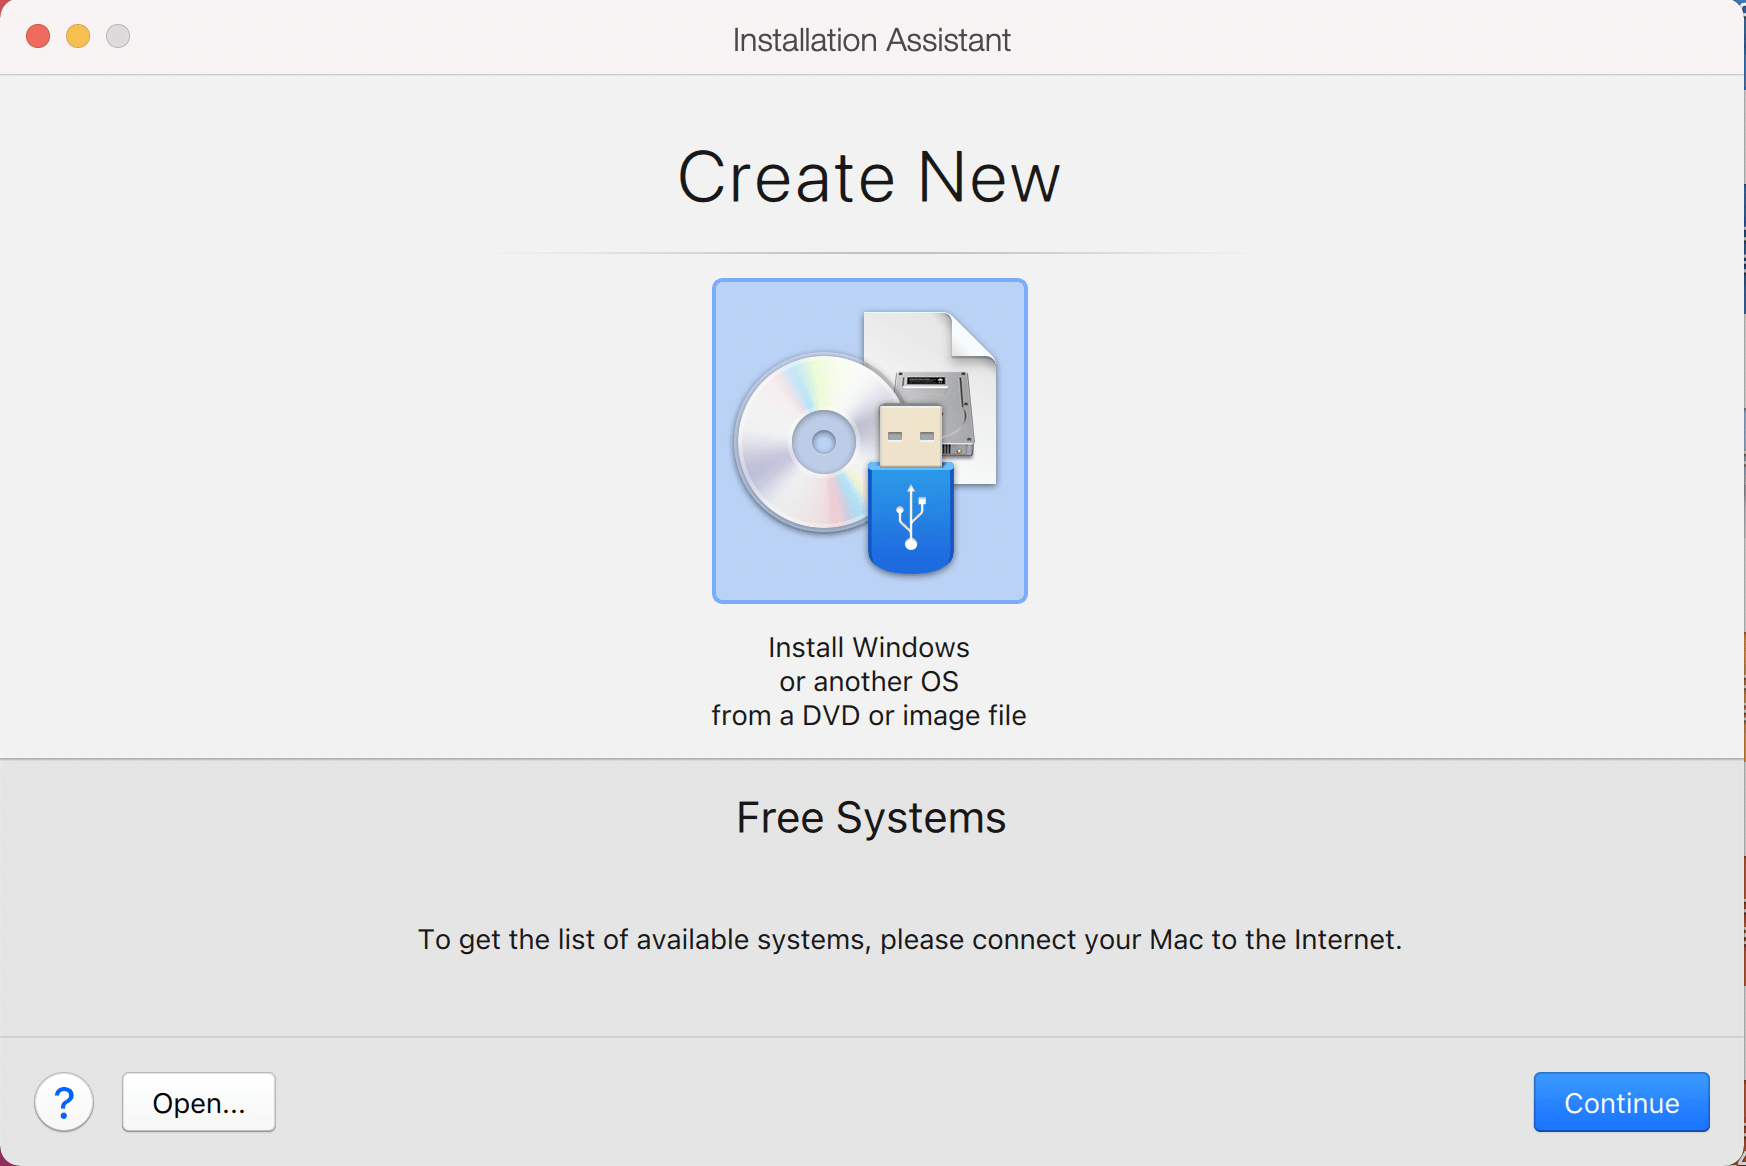
Upon starting up Parallels, select the Plus symbol.

This will launch the Installation Assistant
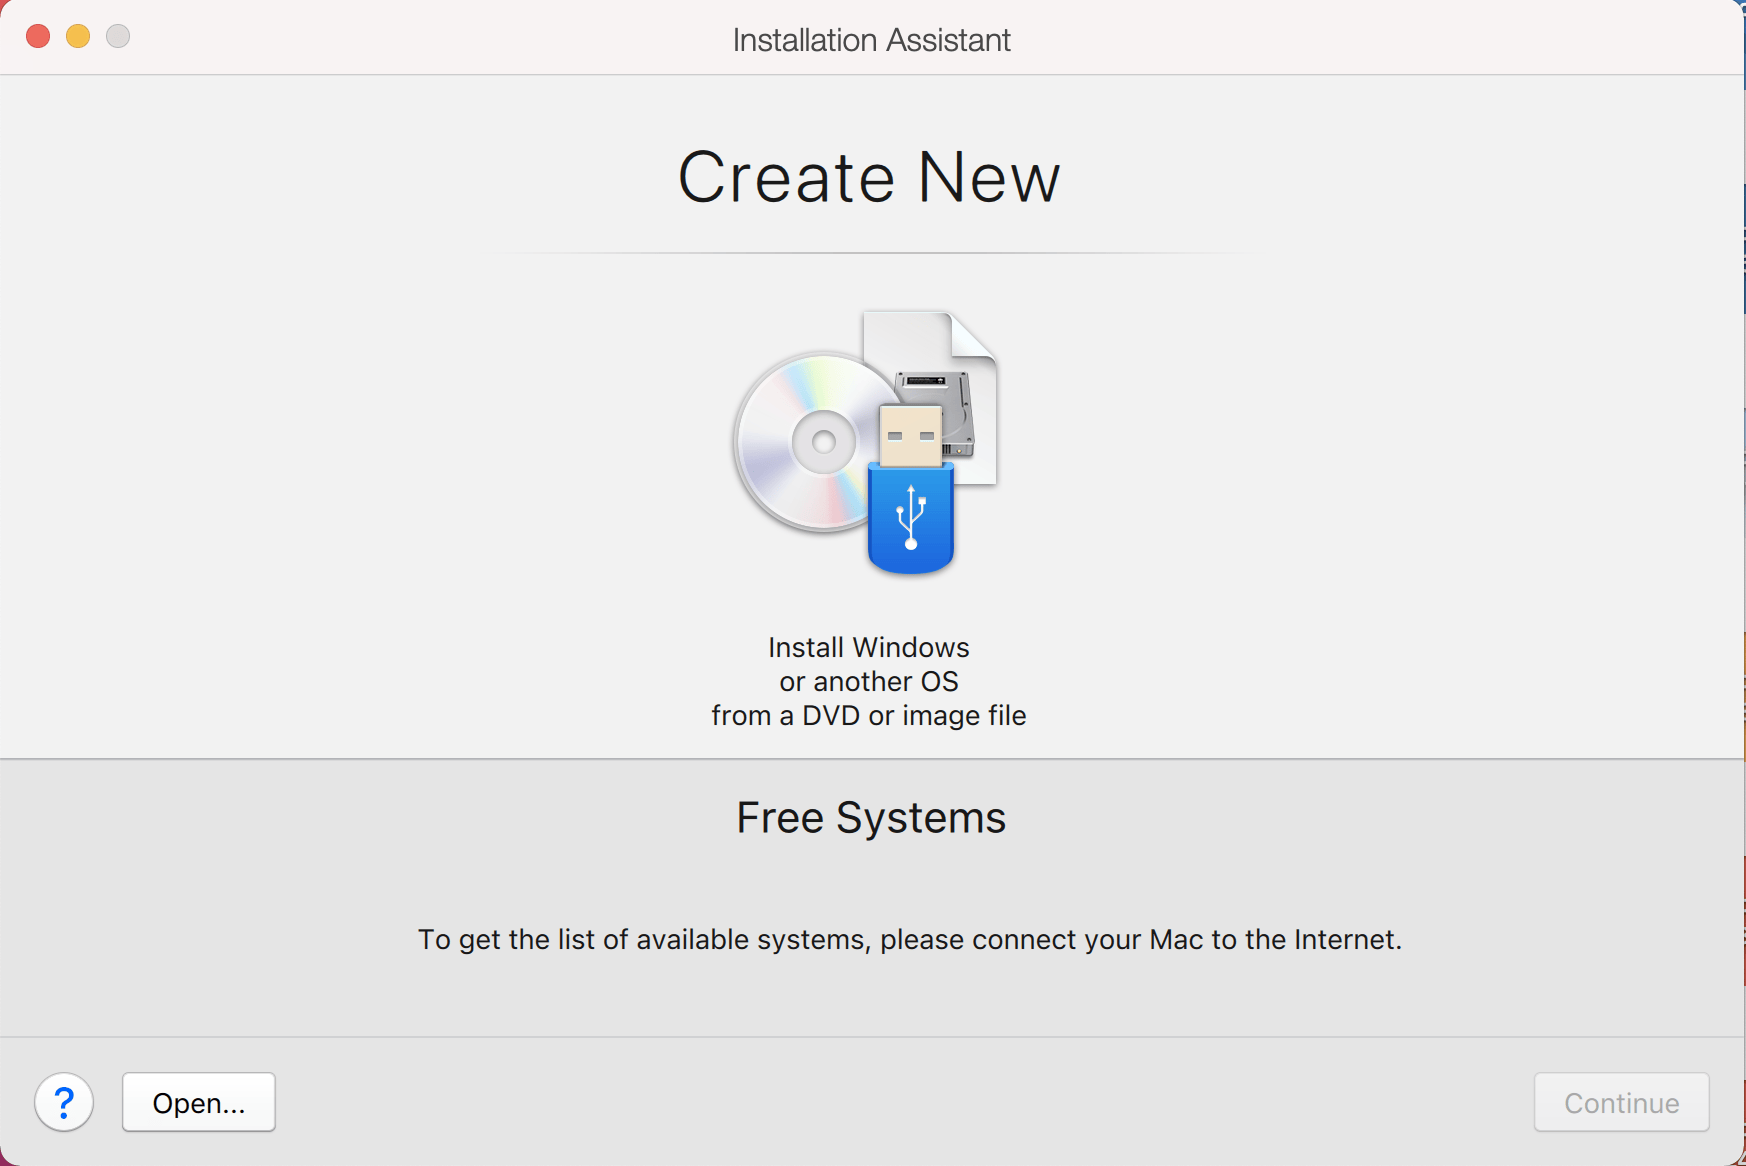
Now we choose Install Windows or another OS from a DVD or image file
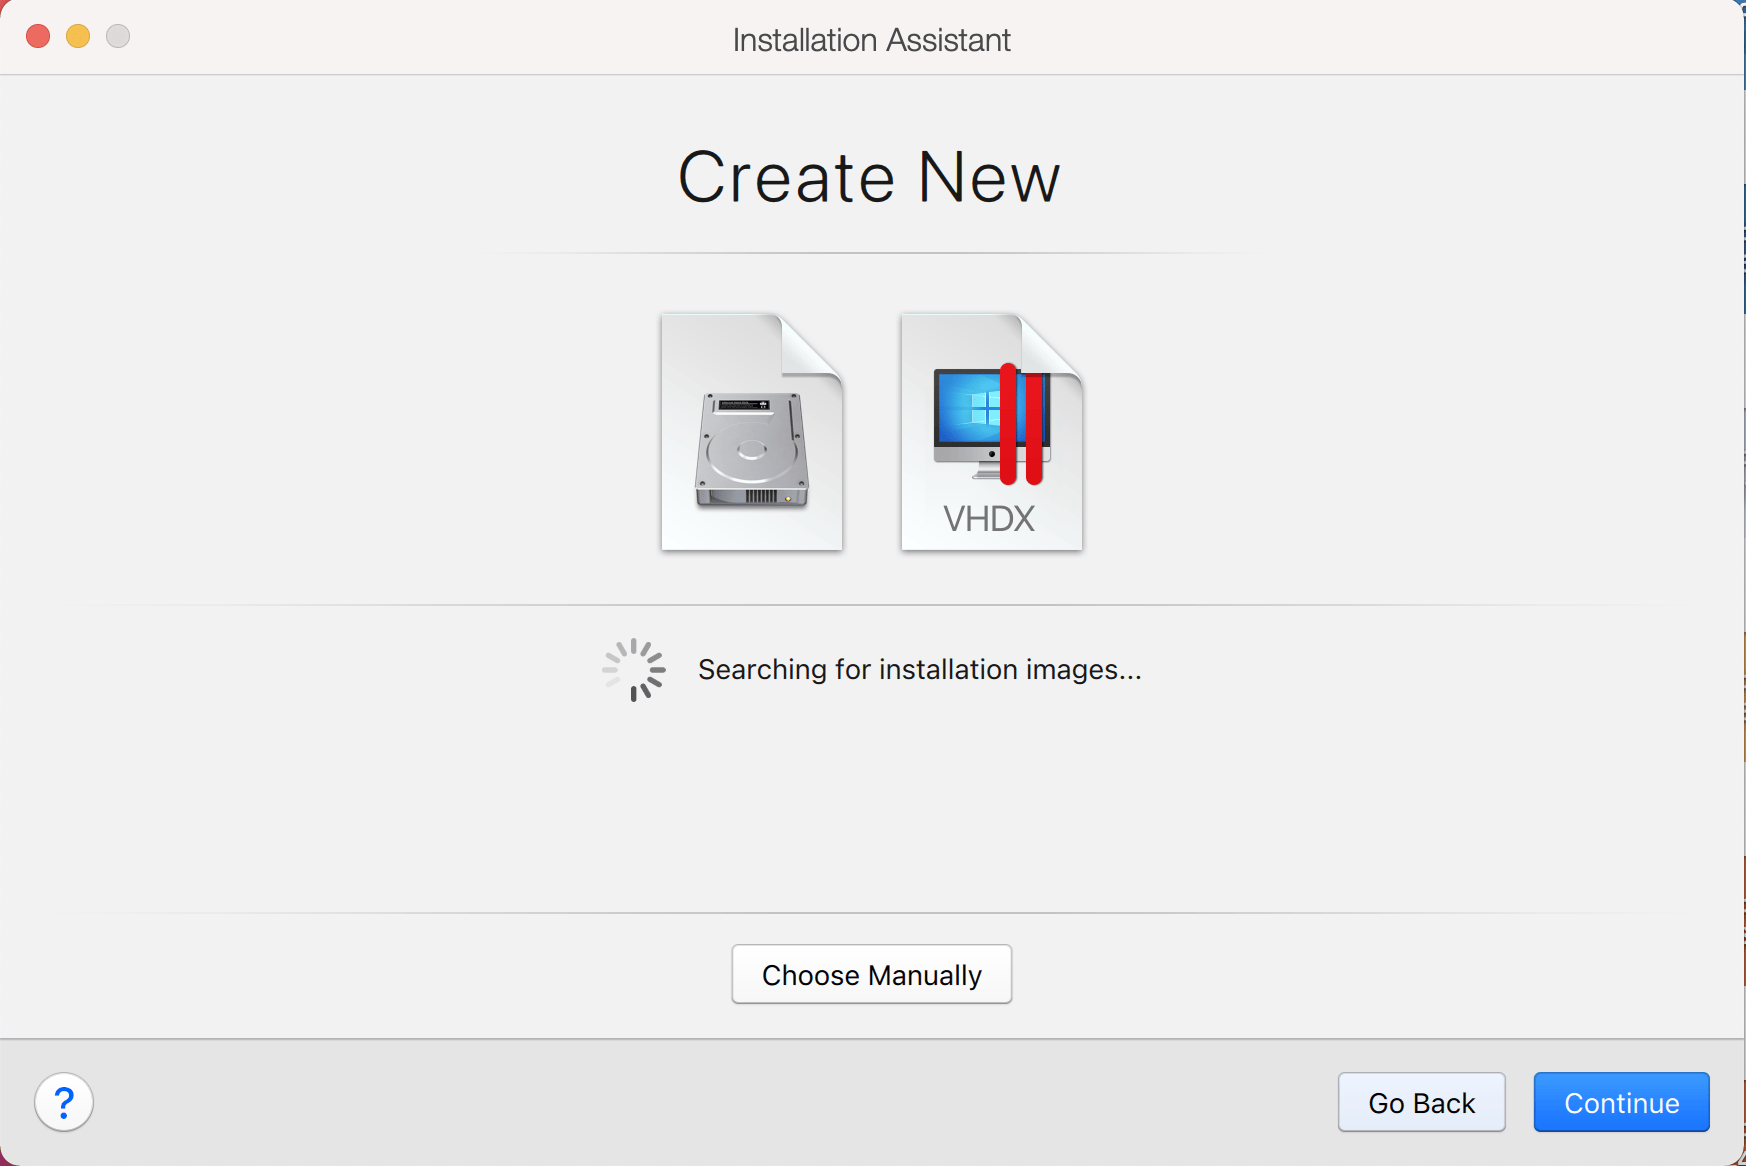
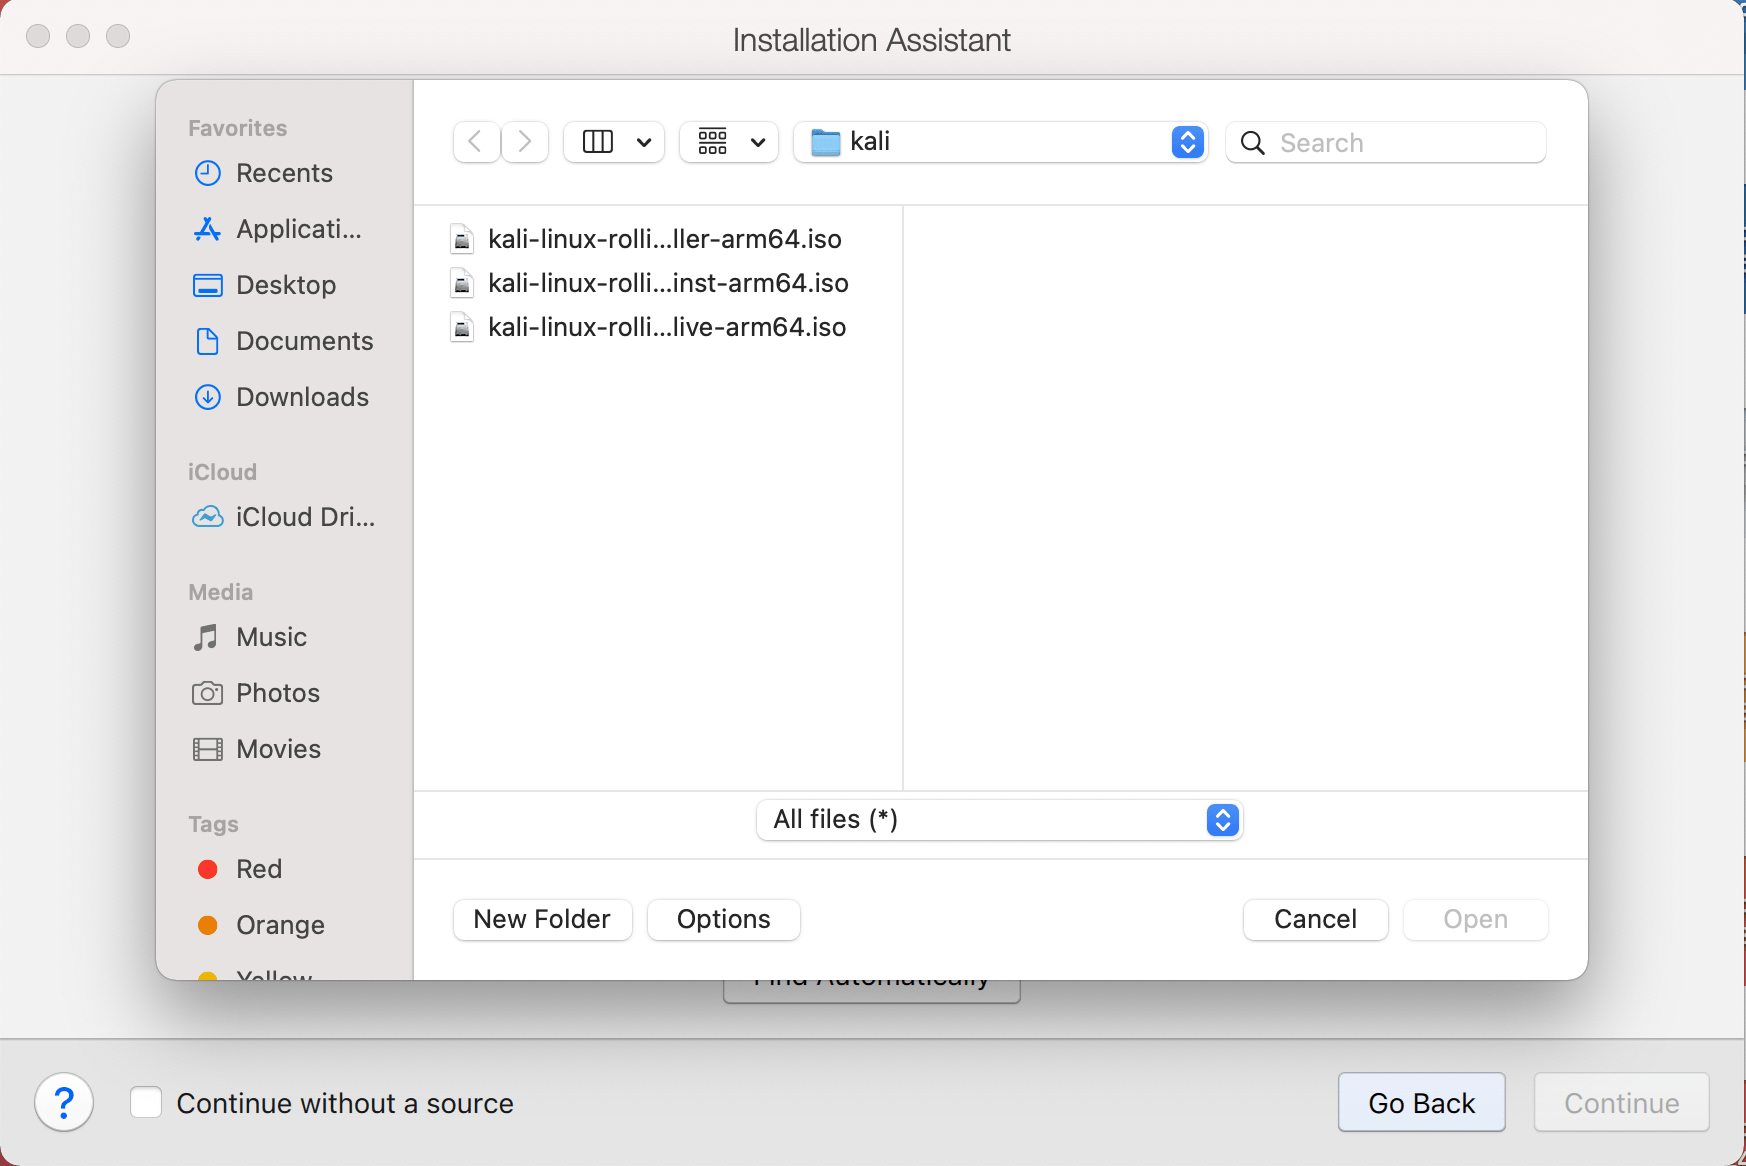
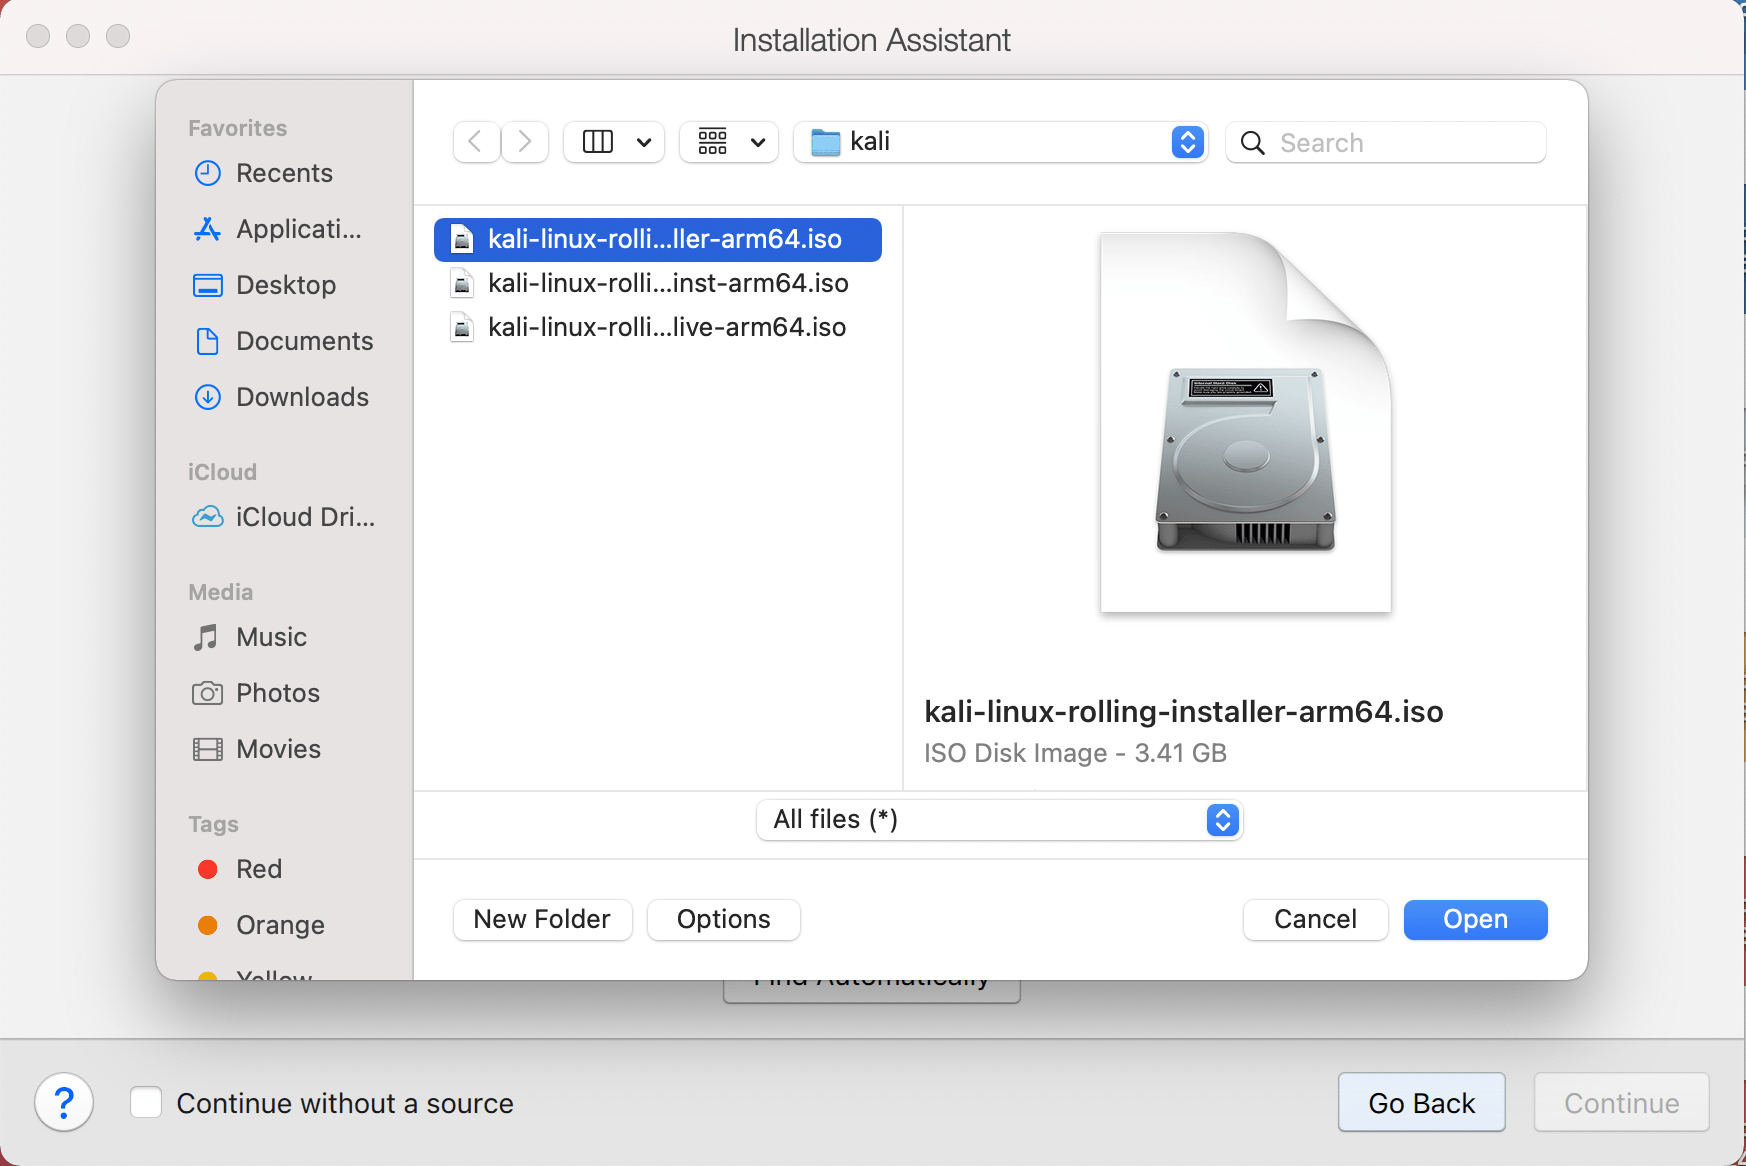
On this screen, we select the Kali Linux image to use to install from. We select “Choose Manually”, and navigate to the location of the ISO that we downloaded. For more information on what image to download, we have written up a guide.
Either drag the ISO file or choose Select a file… to navigate to the downloaded ISO.
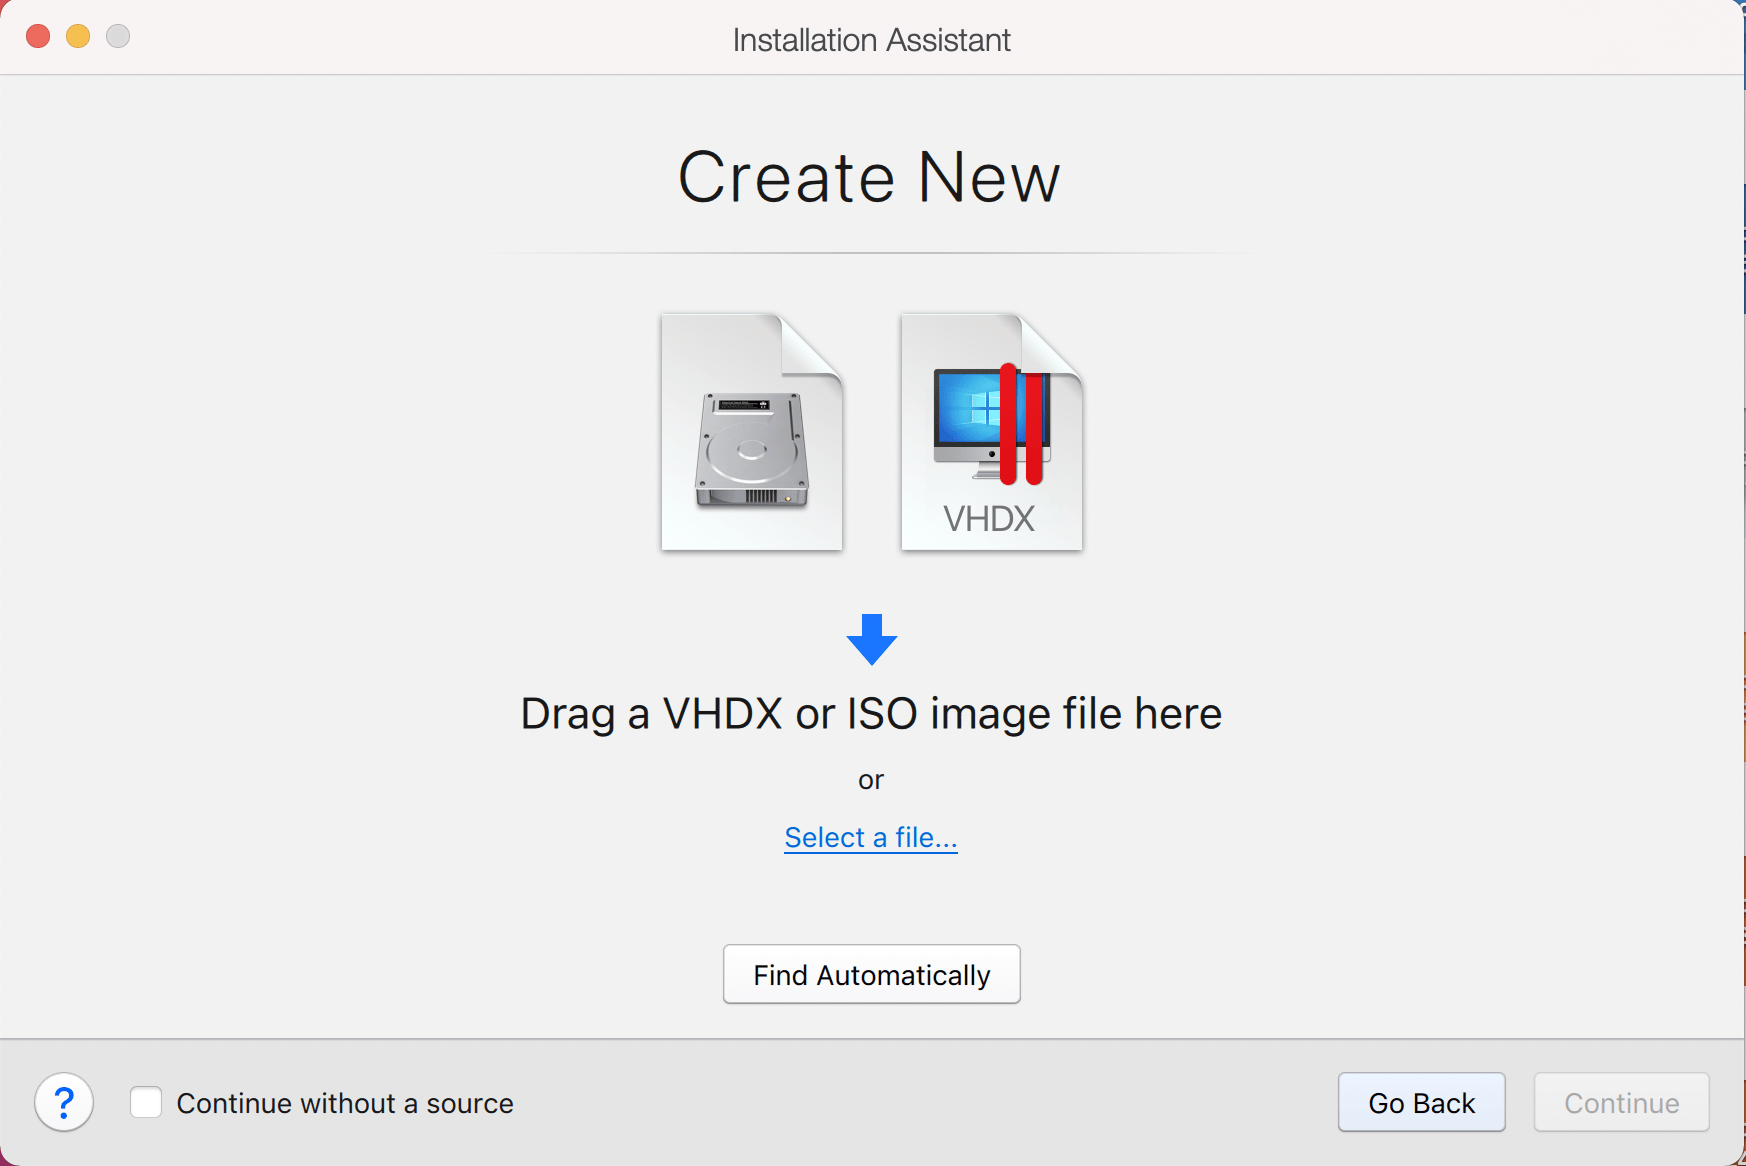
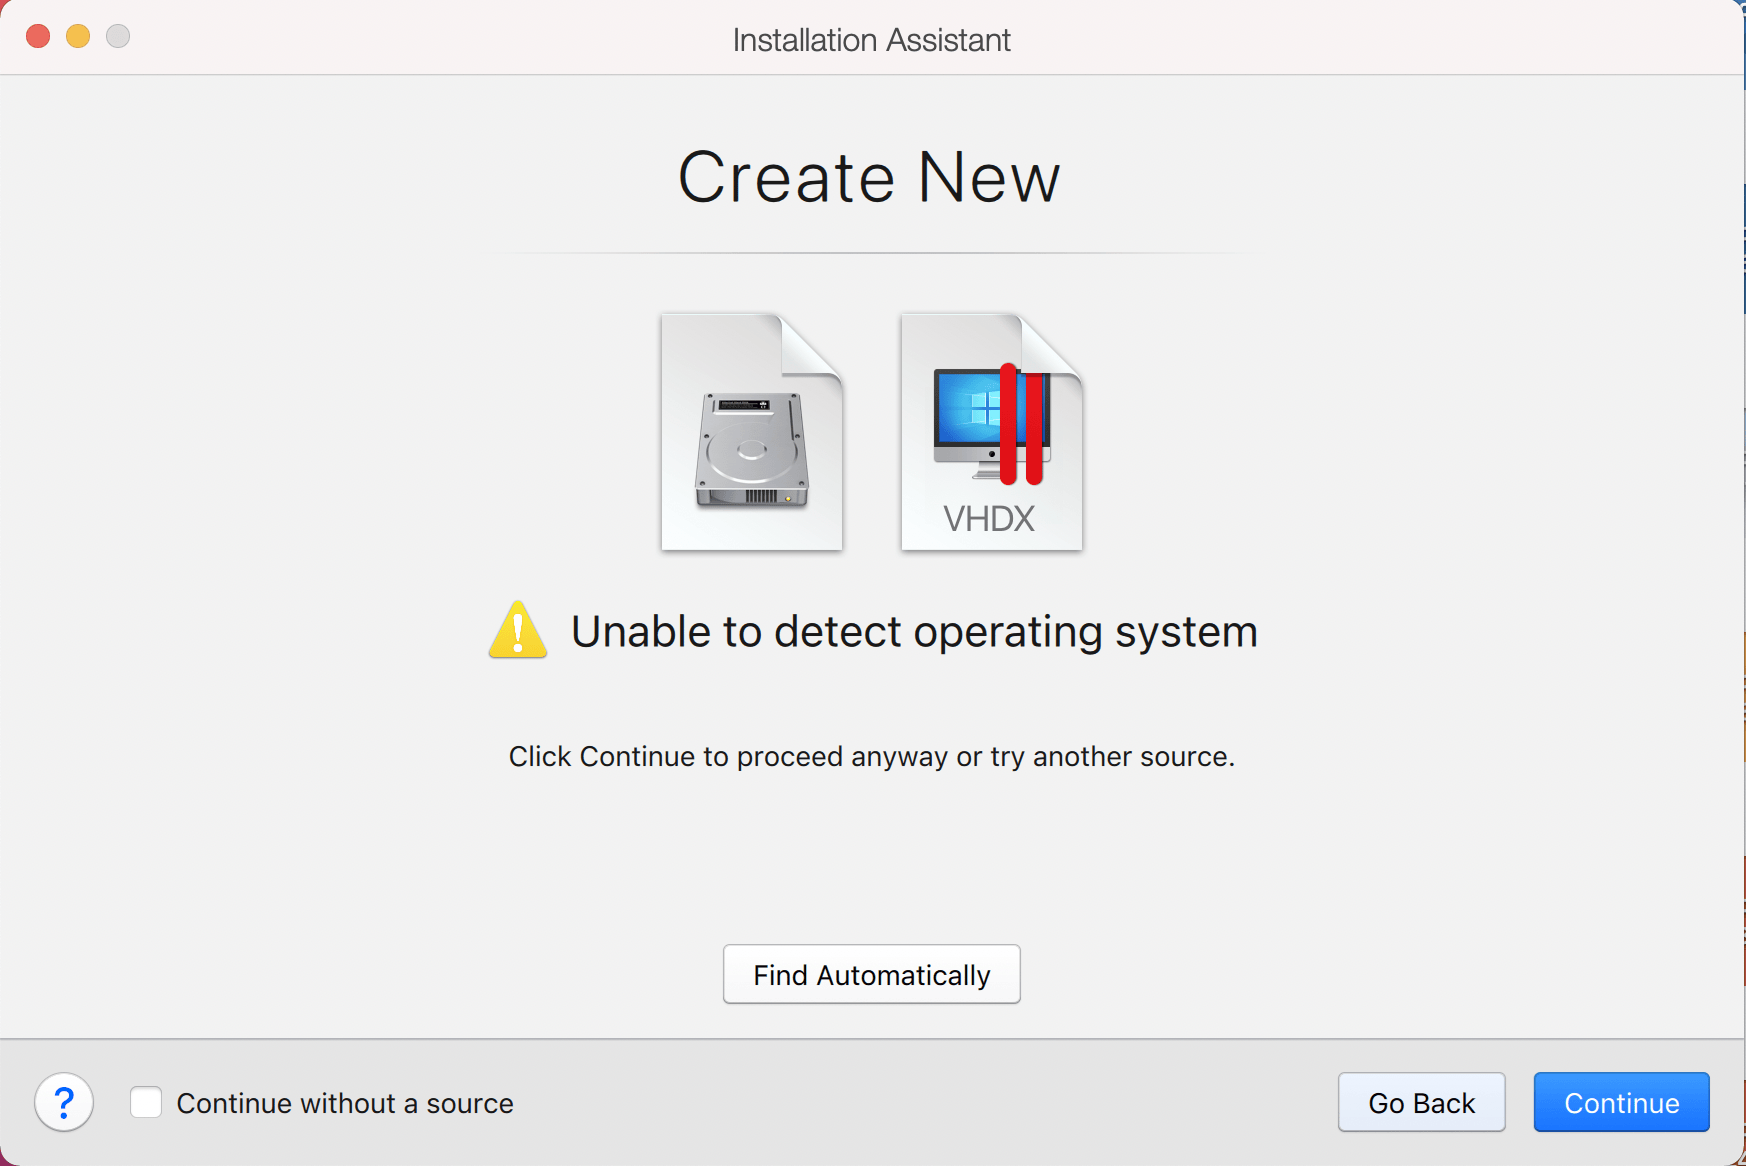
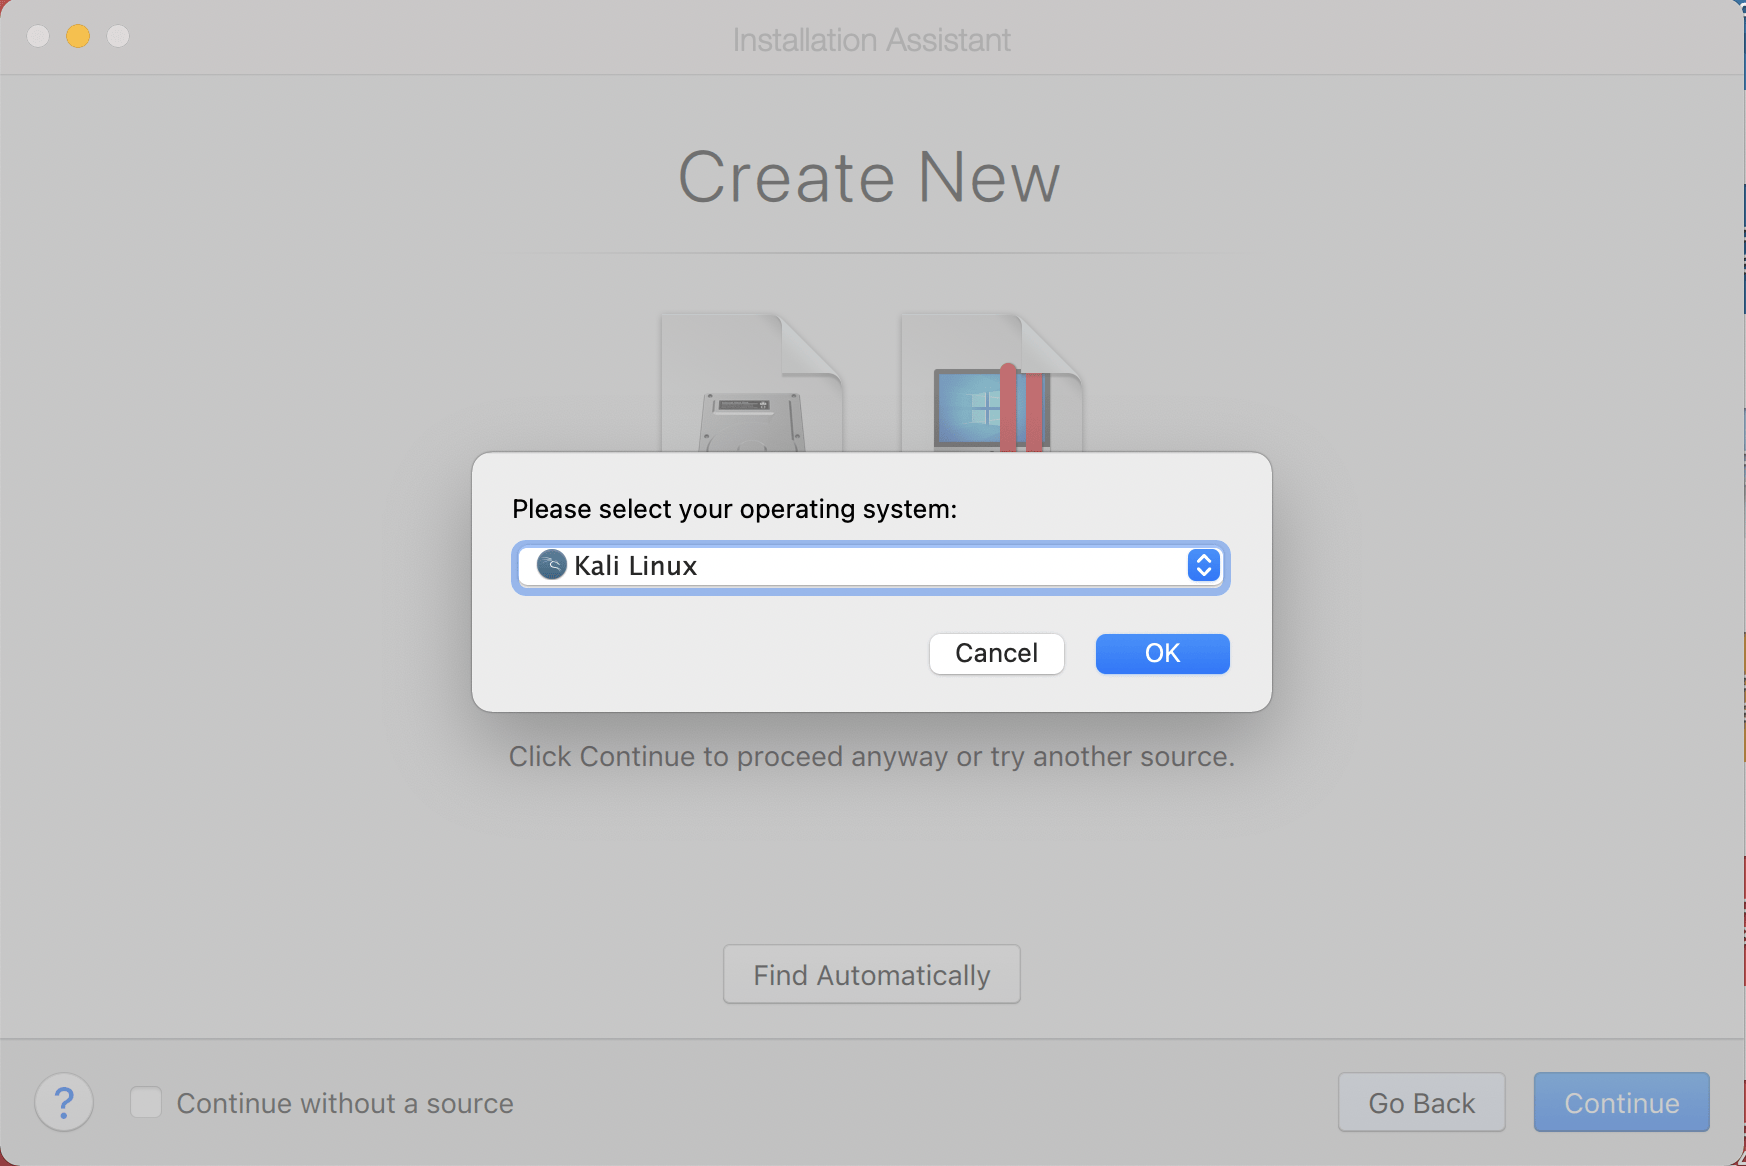
Parallels does not recognize the OS on the ISO, so we will choose Continue to proceed anyway.
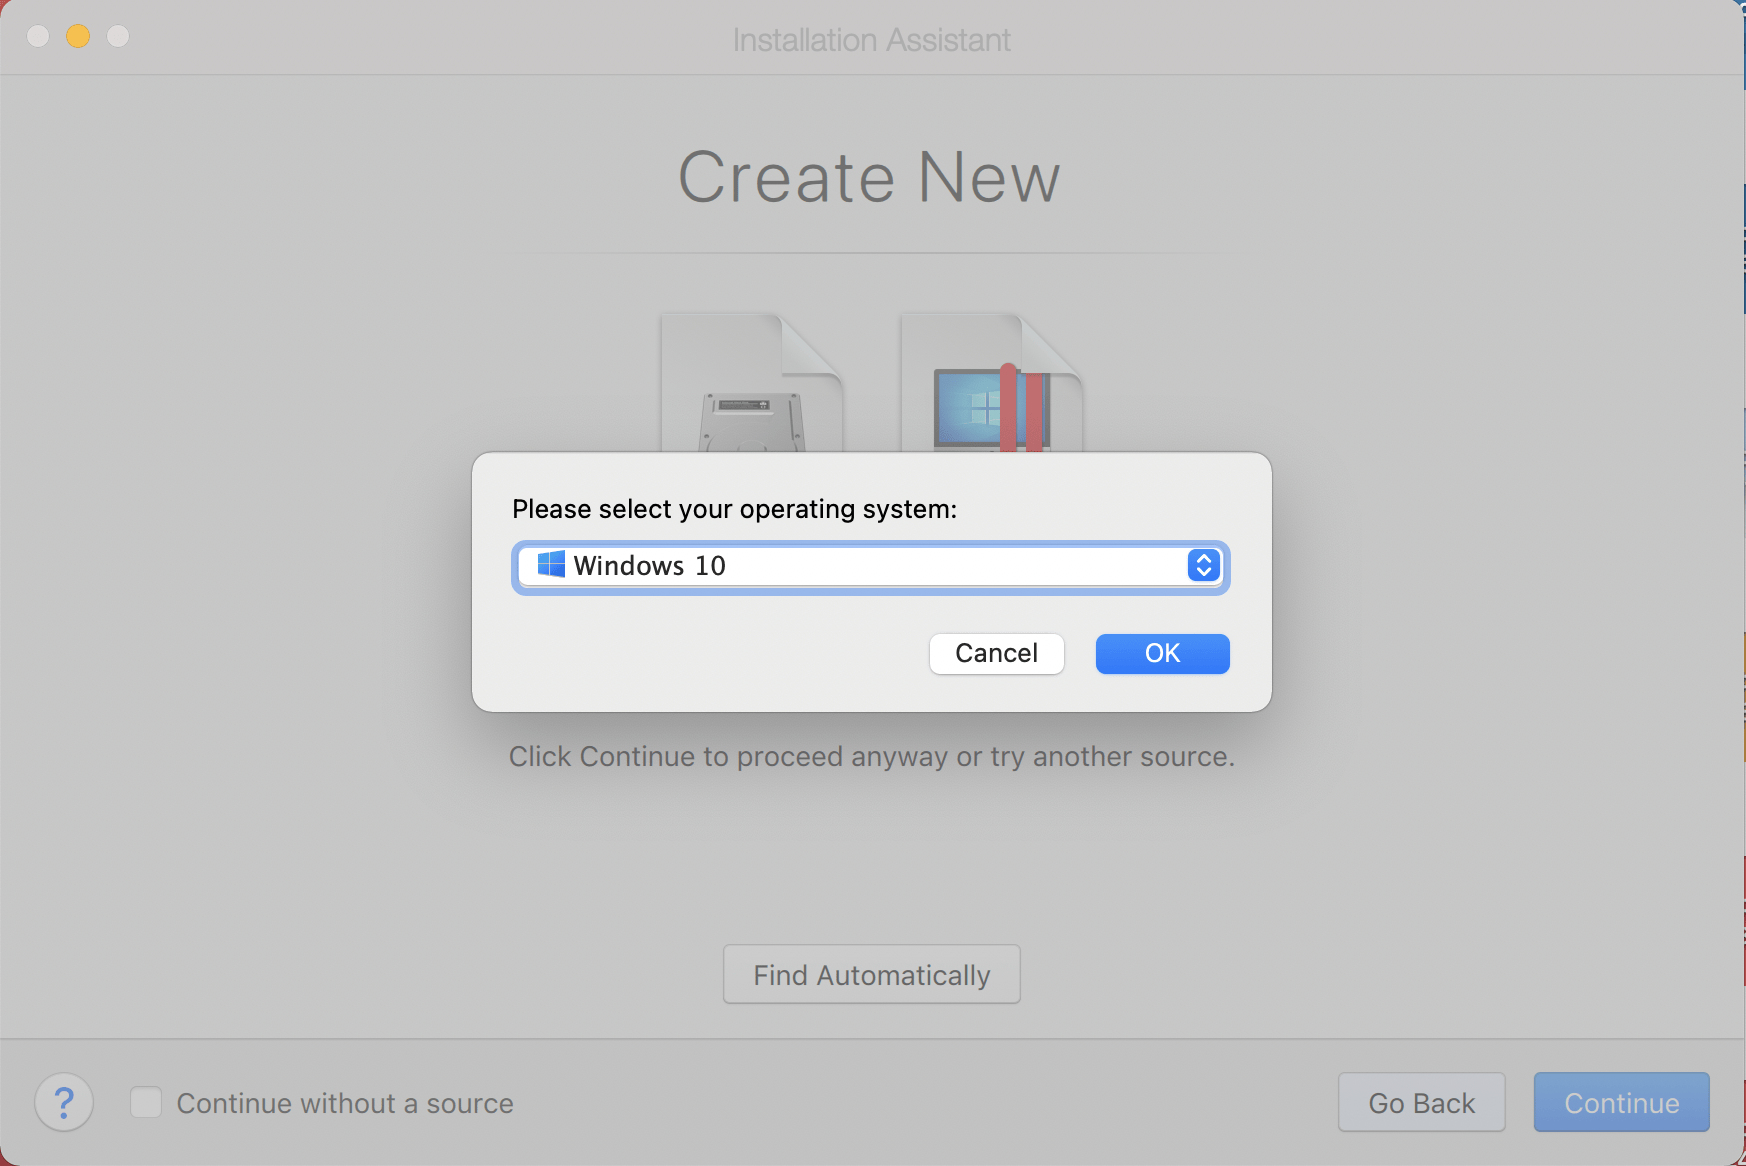
Once we have clicked Continue, we want to choose Ubuntu from the drop down list. Normally we would choose Debian however, there is a bug with the Parallels Tools, that does not occur when using Ubuntu.
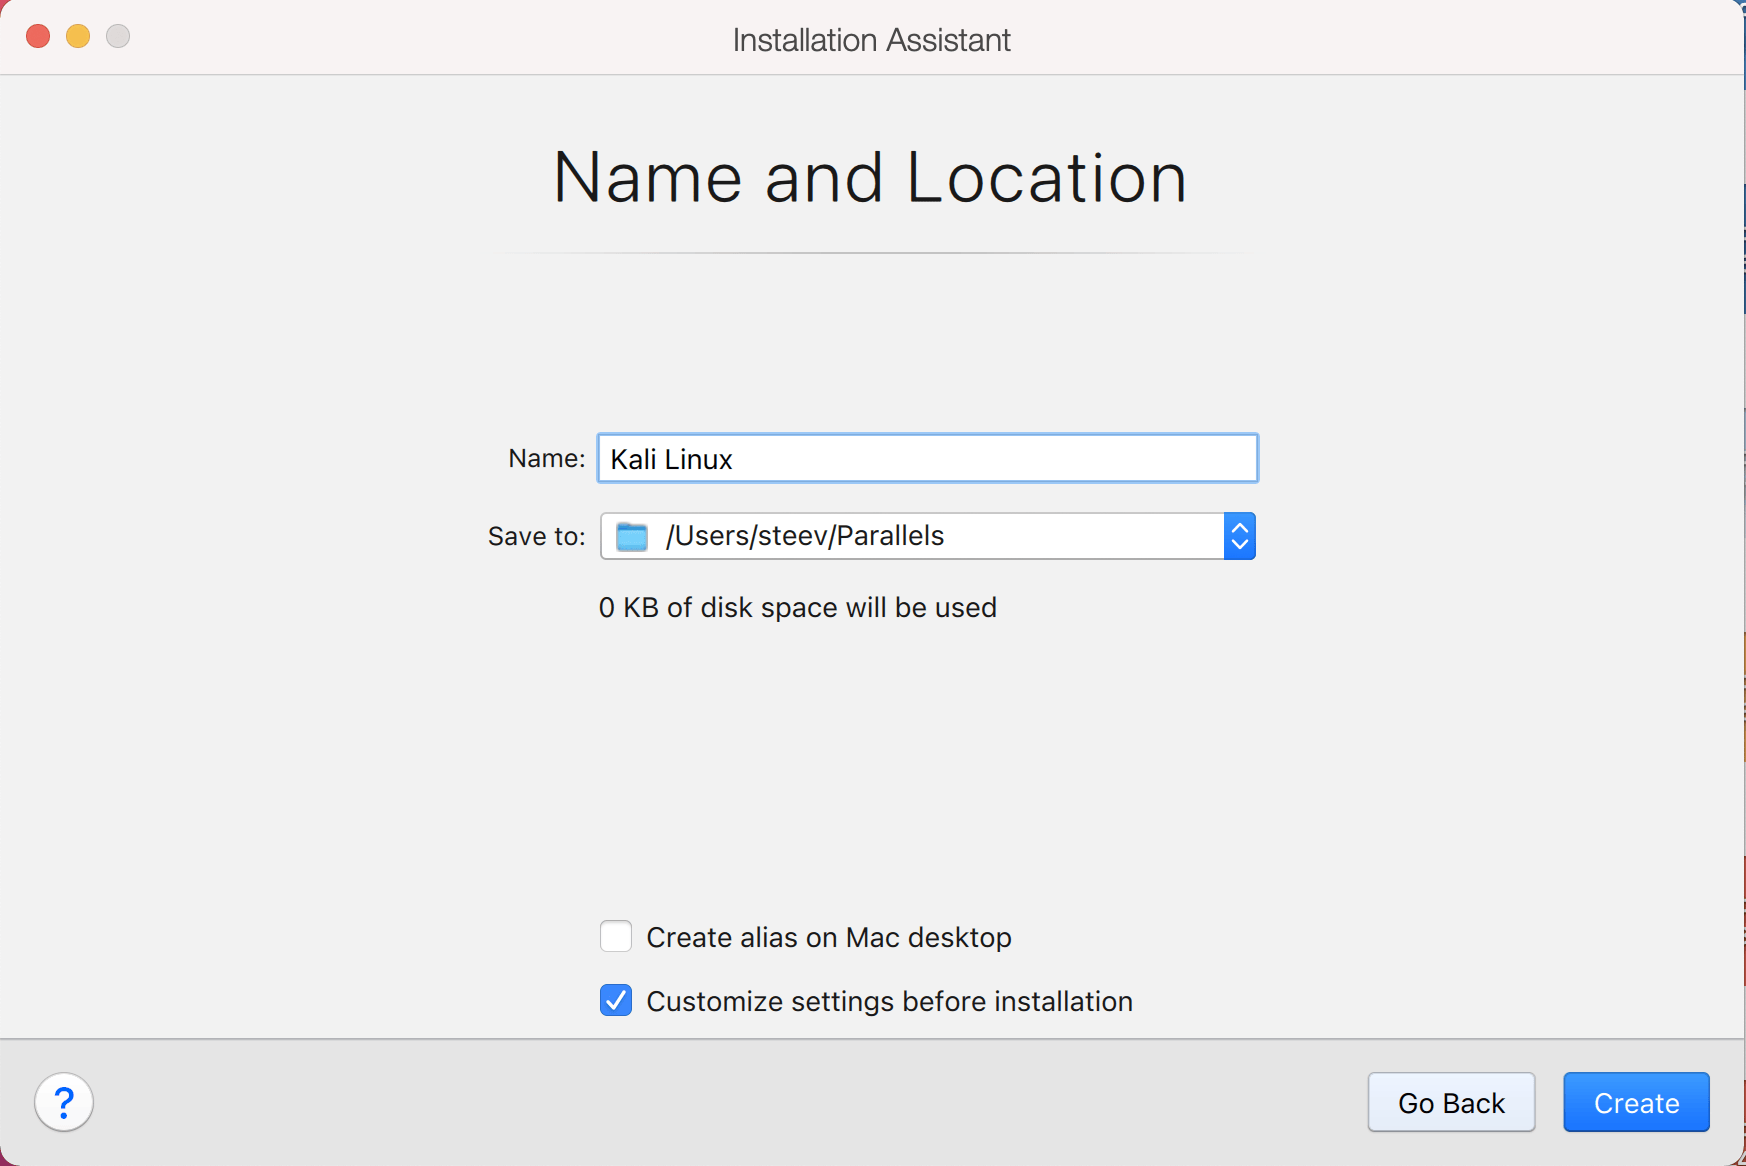
The next screen is “Name and Location”, which is where you name the VM. This name is also used as the filename (such as the configuration, hard disk and snapshot — which is not changed from this point).
We also want to mark the check box for Customize settings before installation
We are keeping it generic in this guide, by using “Kali Linux” (as Kali Linux is a rolling distribution, and we update Kali Linux).
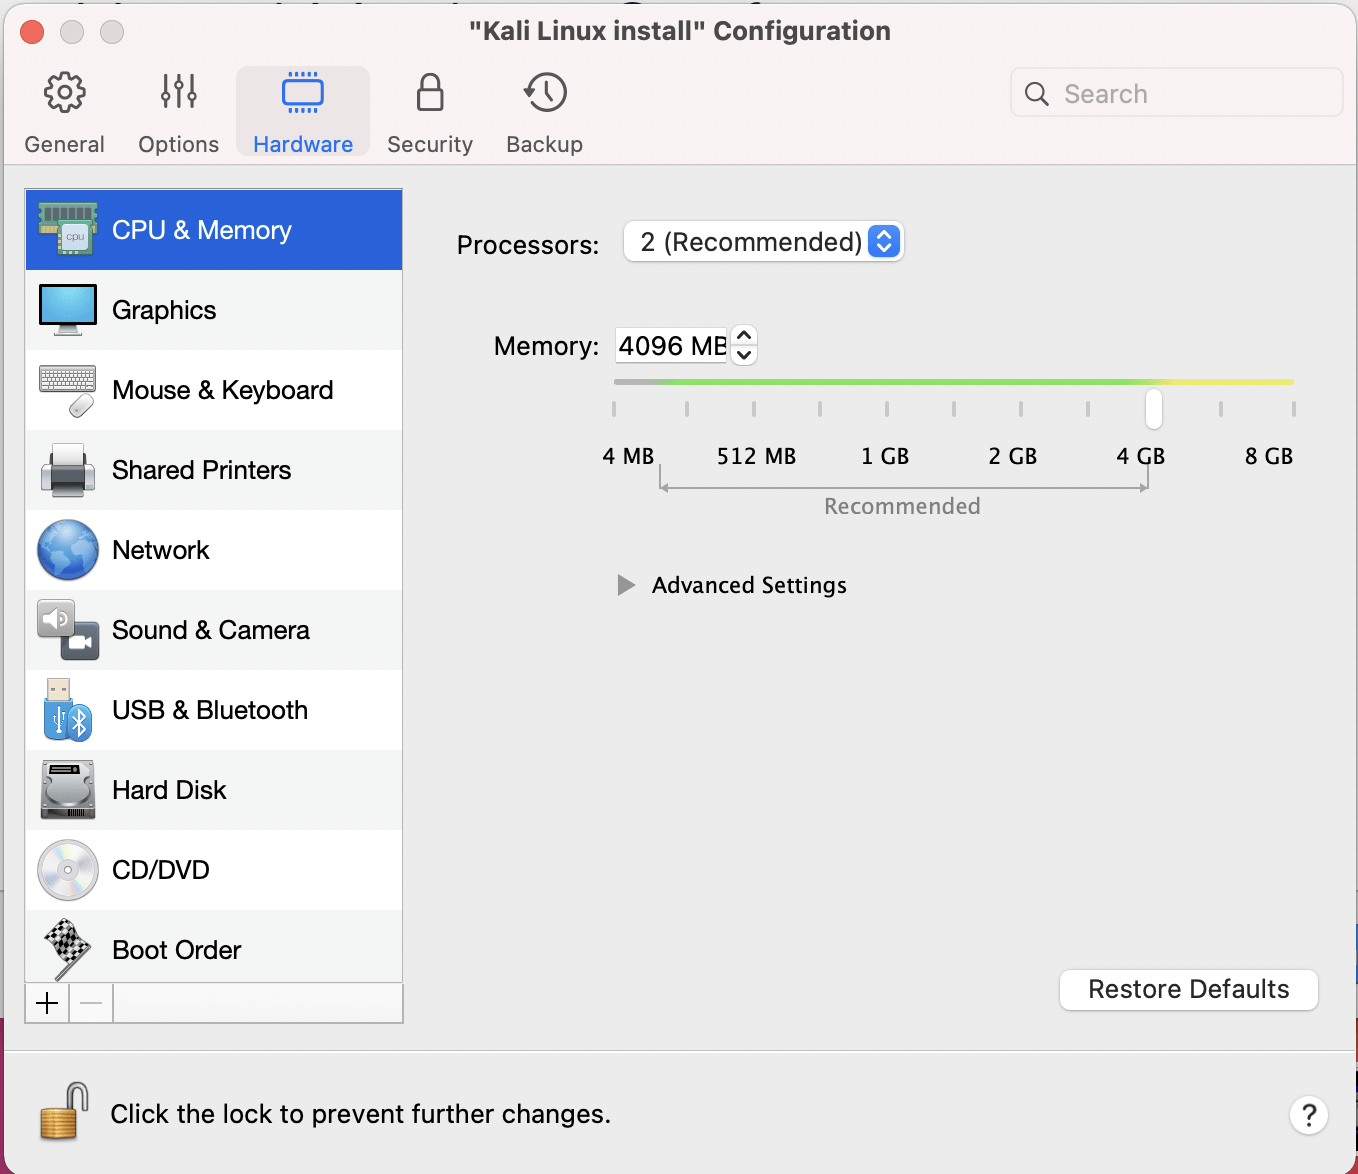
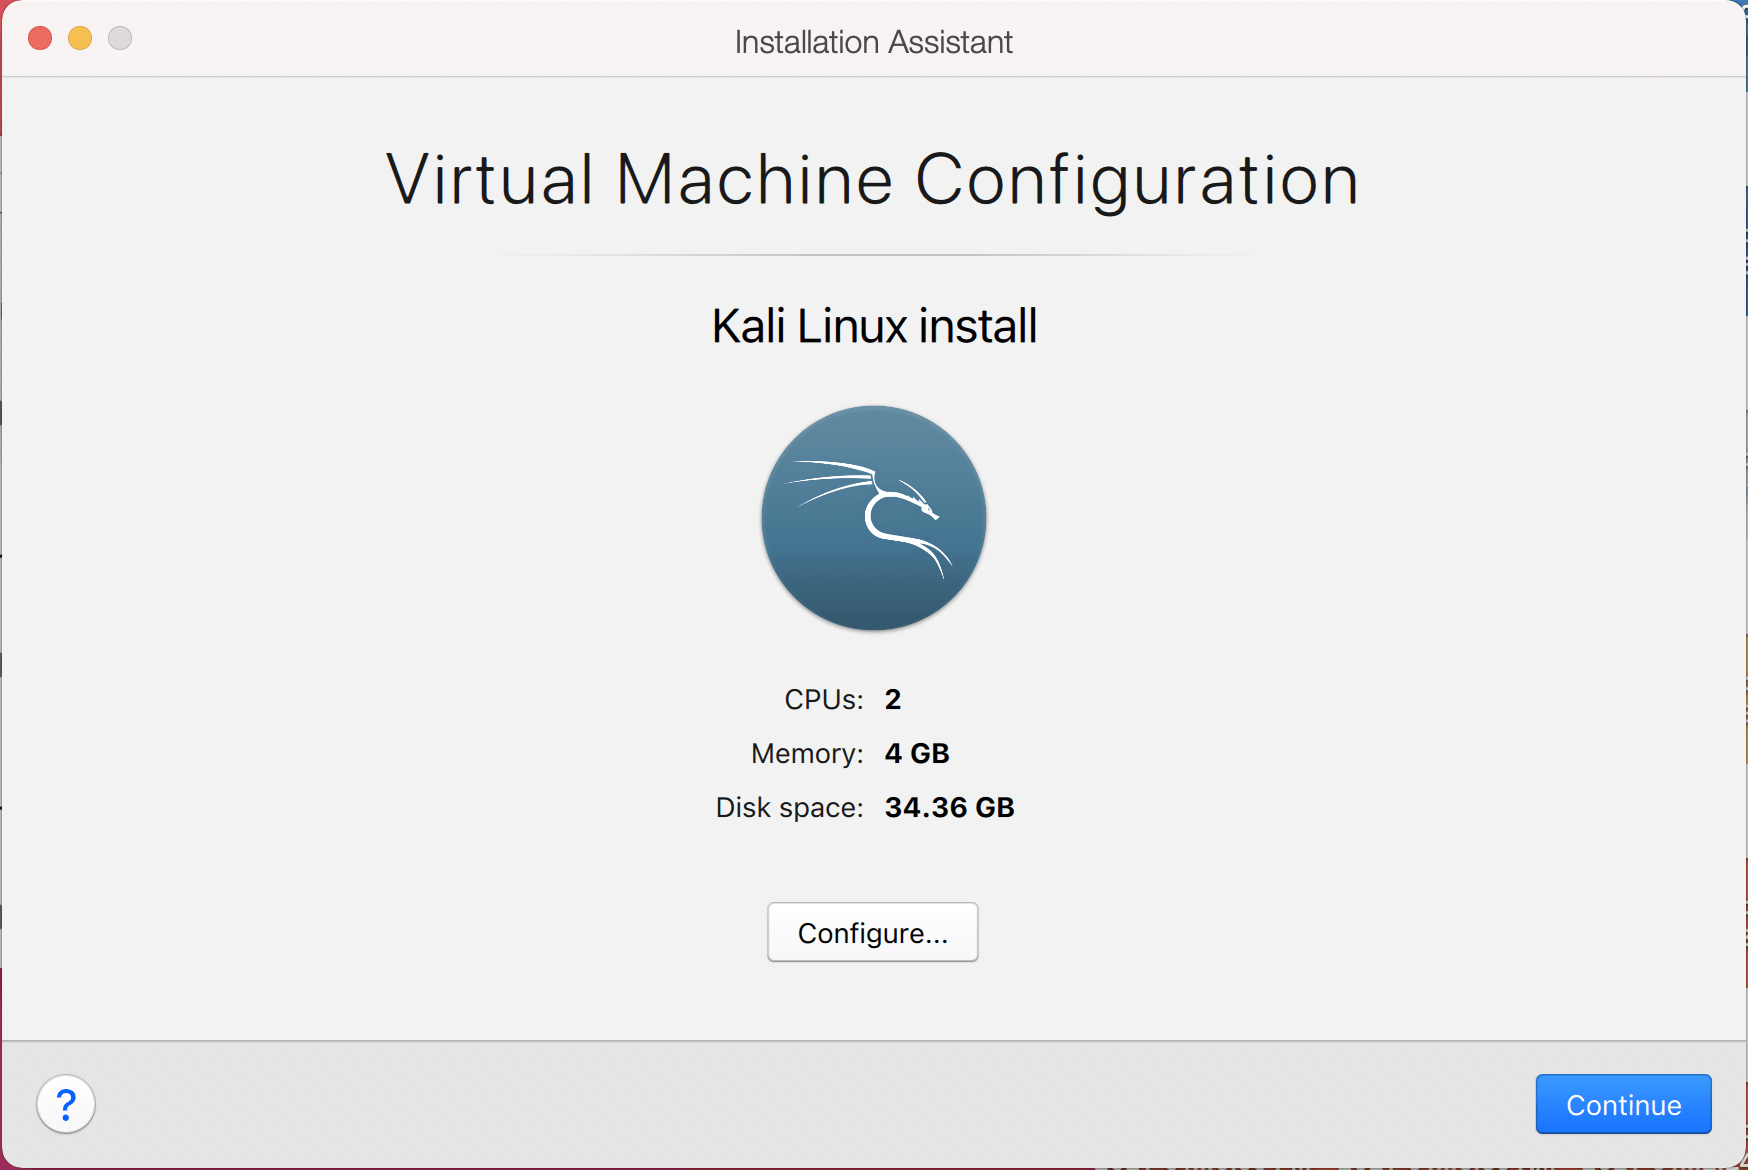
This will bring up the Configuration screen for the Virtual Machine.
The next screen is “Processors”. Here we can start to define how many resources we give the VM. Kali will be able to perform more tasks simultaneously and quicker if it is allocated more resources. We select “2 processors” and “** 2048 MB ** “, giving a total of 2 cores and 2GB of RAM. You may wish to use more or less depending on your system requirements.

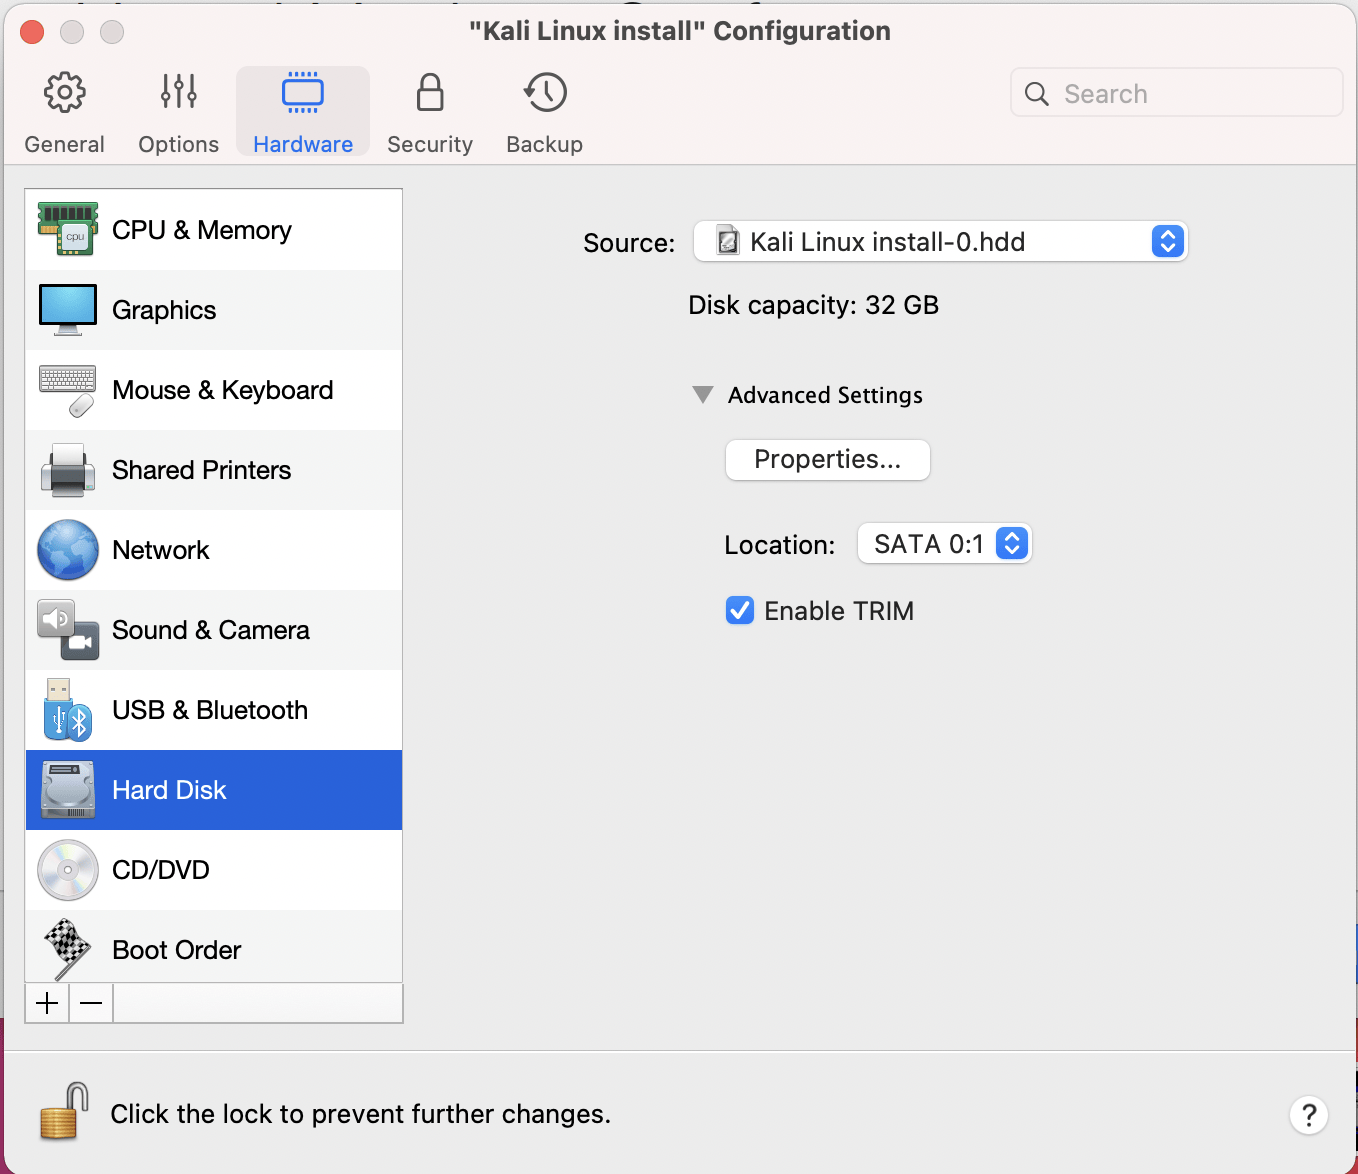
Now we want to choose Hard Disk so we can resize the hard disk.
Select the Properties button

And reduce the size to 32GB. You may wish to leave it at 64GB, or increase it, depending on your system requirements.
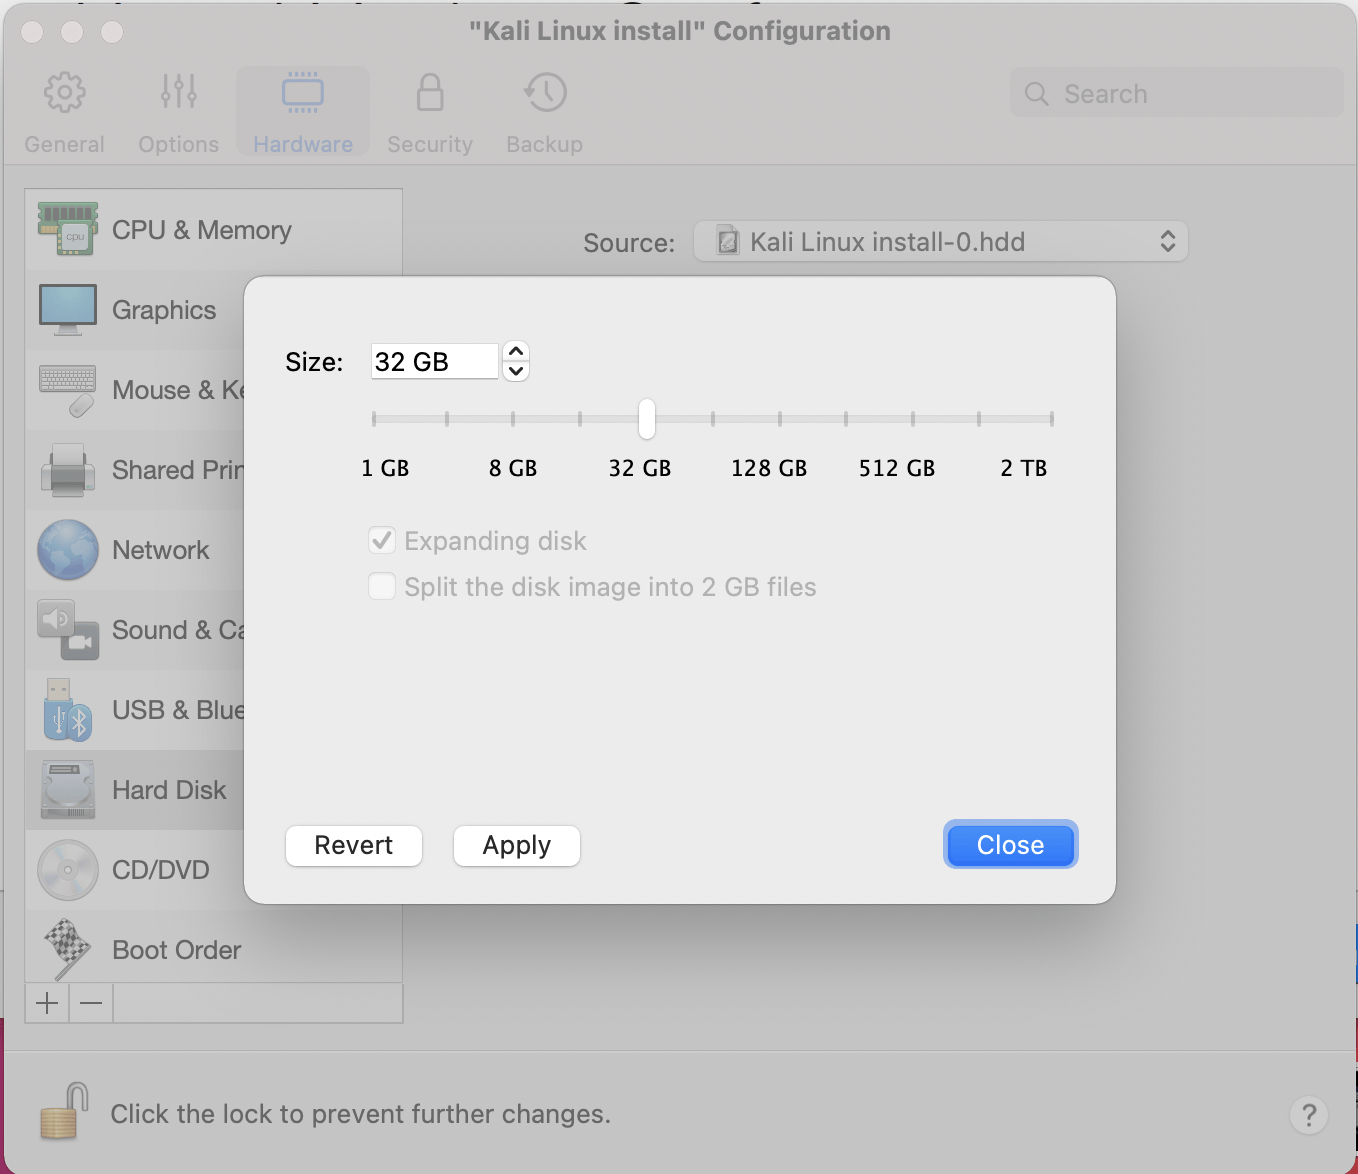
Click Apply and you will be prompted to Continue
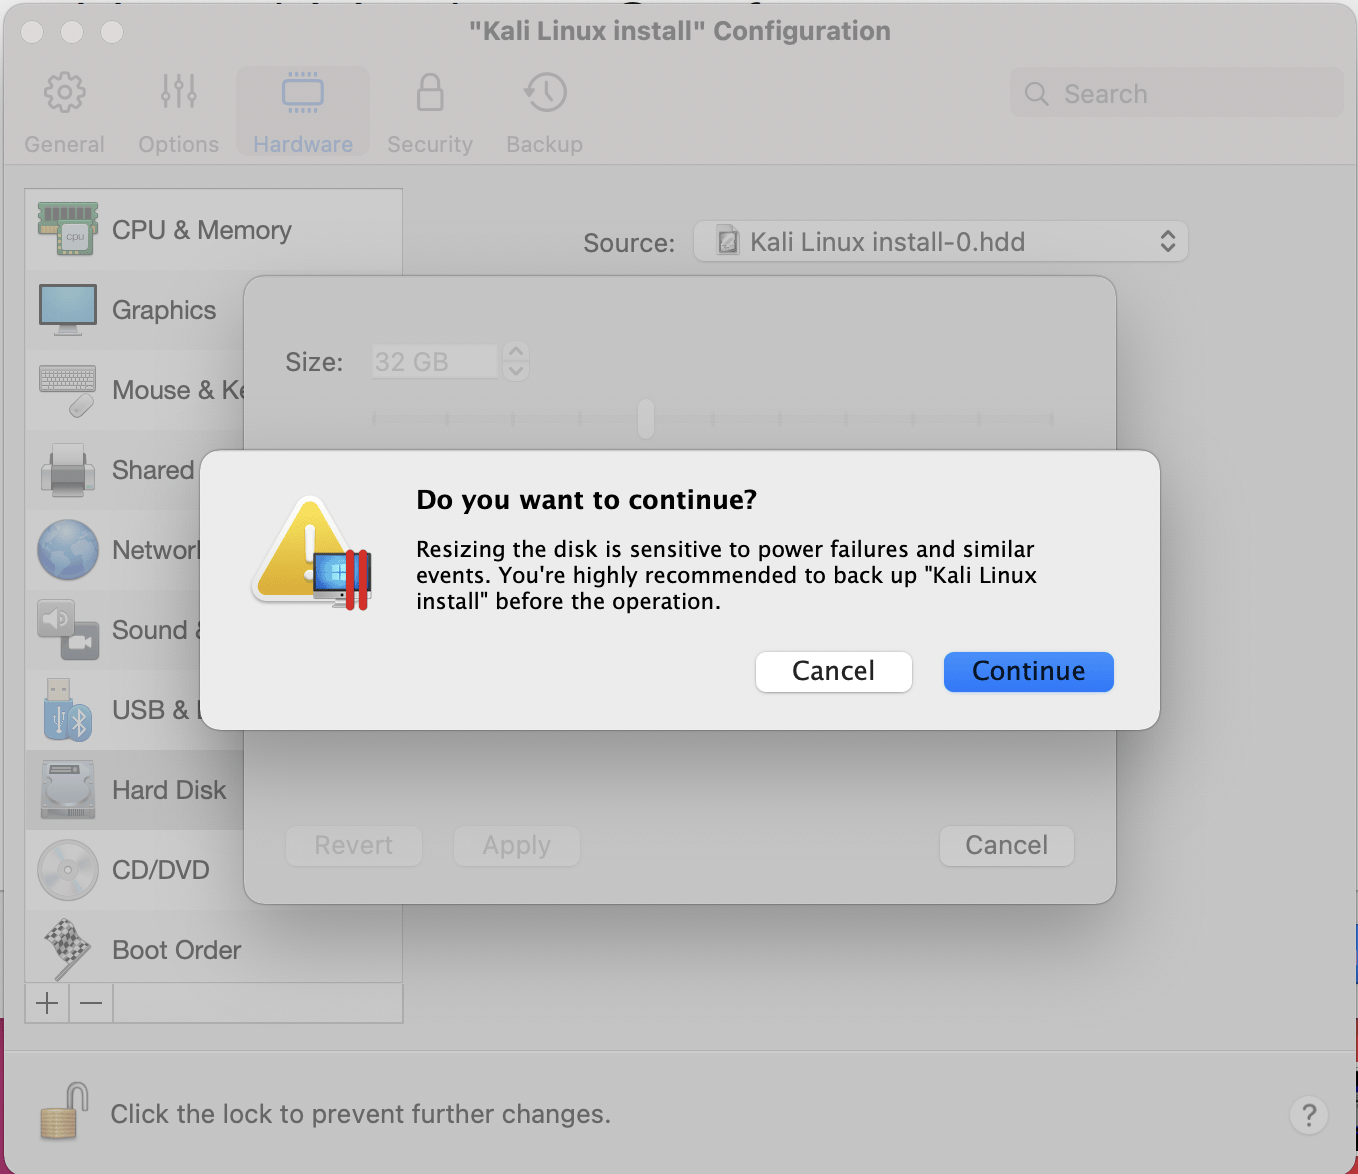
Click Continue
We can now close the Kali Linux Configuration window, and be back at the Installation Assistant screen.
After all this is done, we save, start up the VM, and then continue installing Kali Linux as we normally would for a bare metal install.
Updated on: 2023-Mar-06
Author: steev
Kali linux and Parallels-Tools
Для решение, некоторых задач, на своем старом (2011г) маке поставил kali, но по каким-то неведомым причинам на kali не ставилась «приблуда» от Parallels desktop. Она нужна для синхронизации буфера обмена ну и ряд приятных удобных плюшек (пост не об этом, перечислять не буду)
Для того что бы на кали заработала тулза, нужно сделать следующее:
Обновляем систему:
После рестарта ставим
sudo apt-get install linux-headers-$(uname -r) build-essential dkms
Parallels-Tools
Монтируем Parallels-Tools (если не знаете как, значит вы не в теме, что в этой статье происходит))
sudo mkdir ~/Parallels-Tools
Копируем все с образа в home
*примечание: тут «cdrom0» может быть cdrom1, cdrom2, cdrom3 и тд, что бы выяснить где у вас замонтировался образ выполните команду df -h
sudo cp -r /media/cdrom0/* ~/Parallels-Tools
*Примечание: Все ниже выполняю не через терминал, а использую стандартные графический интерфейс kali.
- Заходим в папку /home/Parallels-Tools/kmods видим файл prl_mod.tar.gz разархивируем его.
- Открываем файл prl_fs/SharedFolders/Guest/Linux/prl_fs/inode.c и добавляем в самом верху #define segment_eq(a, b) ((a).seg == (b).seg)
- Открываем файл prl_fs_freeze/Snapshot/Guest/Linux/prl_freeze/prl_fs_freeze.c
добавляем в самом верху #include - Открываем файлы prl_fs/SharedFolders/Guest/Linux/prl_fs/Makefile и prl_vid/Video/Guest/Linux/kmod/Makefile добавляем в самом верху
После рестарта тулза подцепится и все функции у вас будут работать.
Mac parallels kali linux
![]()
- Актуально для:
- Parallels Desktop for Mac Standard Edition
- Parallels Desktop for Mac Pro Edition
- Parallels Desktop for Mac Business Edition
- Parallels Desktop for Mac App Store Edition
- Последняя проверка: Май 14, 2022
- Доступные переводы:
- Получить обновленияСкачать
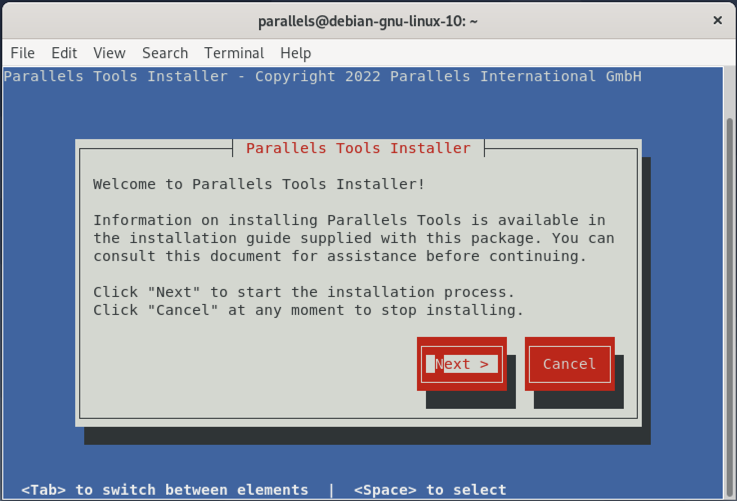
In some cases, Parallels Tools installation in a Debian/Kali Linux virtual machine may not start automatically.
To initiate the installation manually, please perform the following steps:
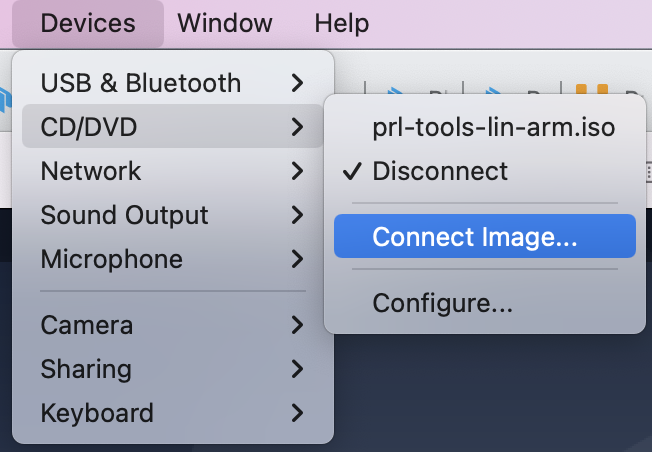
- Connect Parallels Tools image to Debian/Kali:
1.1. In the top menu click Devices >CD/DVD >Connect image.
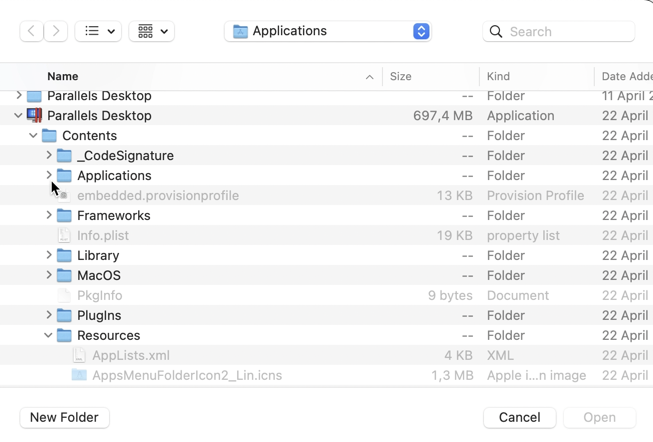
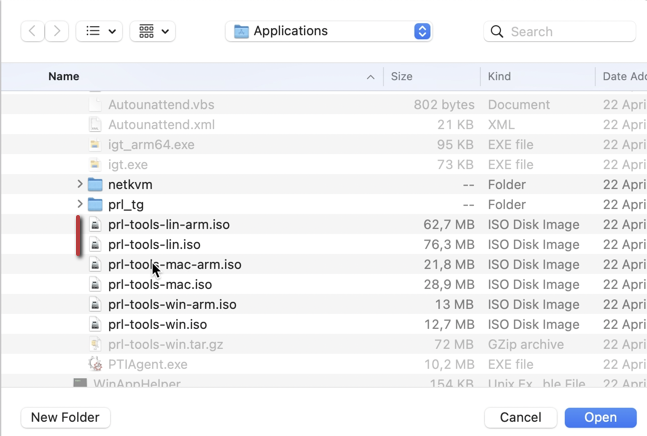
1.2. Navigate to Applications >Parallels Desktop.app >Contents >Resources >Tools and select either prl-tools-lin.iso for an Intel-based Mac or prl-tools-lin-arm.iso if you’re using a Mac computer with Apple M1 Chip. - In the virtual machine, open Terminal and execute the following commands:
sudo mount -oro,exec,remount /media/cdrom sudo /media/cdrom/install
Была ли эта статья полезной?
Как, по вашему мнению, можно улучшить эту статью?