- How to Make Ubuntu Look Like macOS in 5 Easy Steps
- How to give your Ubuntu Linux a macOS makeover
- Step 2: Install macOS like icons
- Step 3: Add macOS like dock
- Step 4: Use macOS wallpaper
- Step 5: Change system fonts
- Bonus Tip: Spotlight like app launcher (if you want to go the extra mile)
- Как сделать Ubuntu 22.04 похожей на MacOS(MacBuntu 22.04)
- 1) Установка необходимых расширений
- Установка иконок и темы
- Как сделать из Gnome 3 подобии MacOS на Ubuntu 20.04
- Установка темы:
- Иконки:
- Doсk панель:
- Прочие настройки и расширения:
- Расширения:
- Вывод:
How to Make Ubuntu Look Like macOS in 5 Easy Steps
Customization is one of the main reasons why I use Linux. There is no end to the kind of customization you can do to your desktop Linux. You can change icons, themes, change fonts, change terminals, add screenlets, indicator applets, extensions and what not.
We have covered numerous desktop customization tips and tricks on It’s FOSS. In this one, I’ll show you how to make Ubuntu look like macOS.
Many people use macOS because of its simplistic and elegant look. You may disagree with it but it remains a popular opinion. Even there are Linux distributions that have macOS like look and feel.
One of the readers requested us to show how to make Ubuntu look like macOS and hence we’ve created this tutorial. In fact, this is a good example to show the customization capability of desktop Linux.
No, you don’t have to install a new distribution just for customizing the looks. You can do some tweaking on your own and give your system mac-like looks.
How to give your Ubuntu Linux a macOS makeover
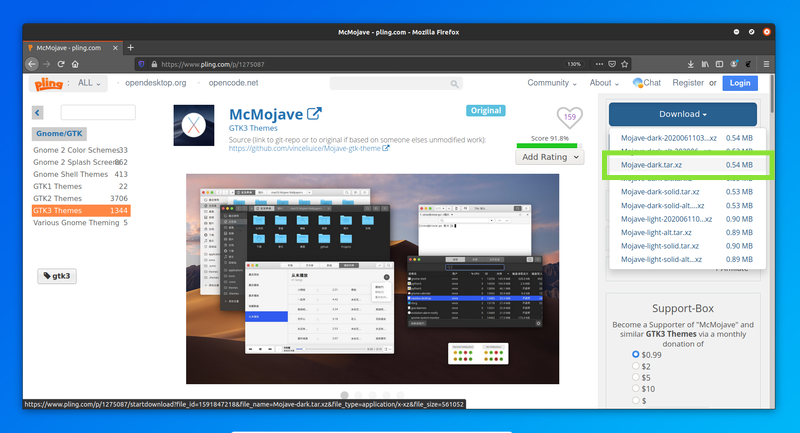
Here you may find various “.tar.xz” files. These different files contain same theme with small differences. Like in “McMojave” we have variations like dark and light theme. You can try them all, or just pick anyone you like from the carousel given in middle.
Set downloaded theme
Extract the downloaded theme and copy this extracted theme folder to .local/share/themes folder.
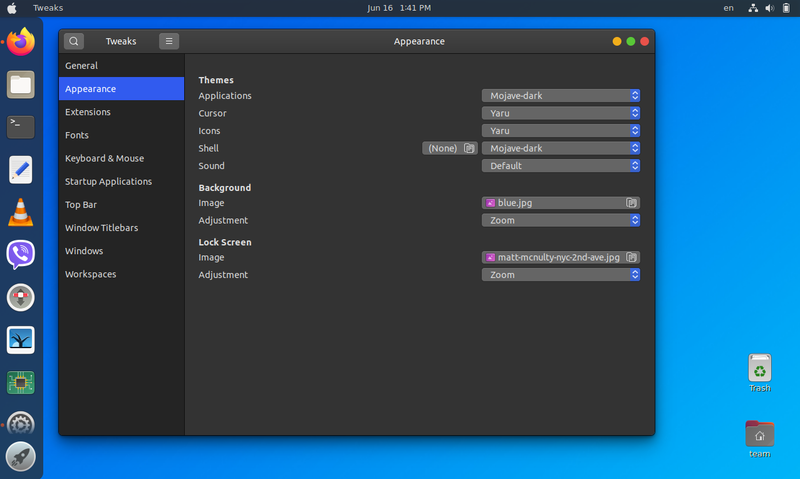
Open GNOME Tweak tool and change the Application and Shell theme. As soon as you change the themes, you can see those three yellow, green and red buttons, and that Apple logo on upper left corner. You can also notice come changes on panel items.
Step 2: Install macOS like icons
The next step in this macOS makeover is to use macOS like icons.
Download icon set
Here are some icon sets I suggest that you can download from Gnome-look website:
I shall be using “McMojave-circle” in this article, feel free to use any icons you like.
Just like the theme, you can download it from “download” dropdown button from right side. Here you may also find various different versions of same icons.
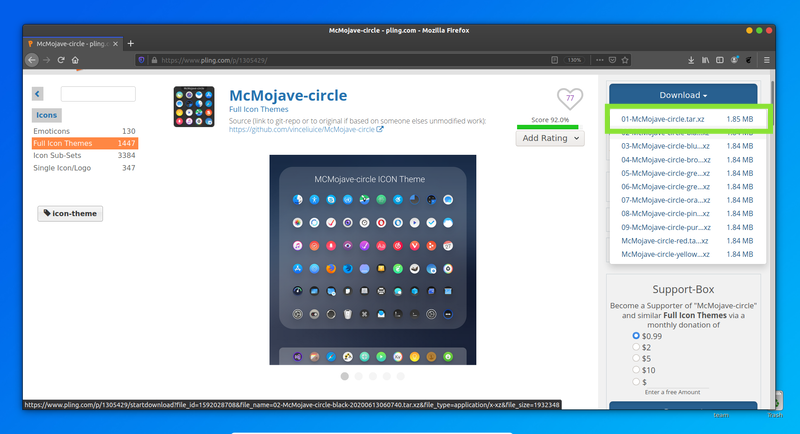
Now set the downloaded icon. For that extarct the download folder and copy it to .icons folder in your home directory. See this article on installing icon themes in Ubuntu.
This is what this icon looks like:
![]()
Step 3: Add macOS like dock
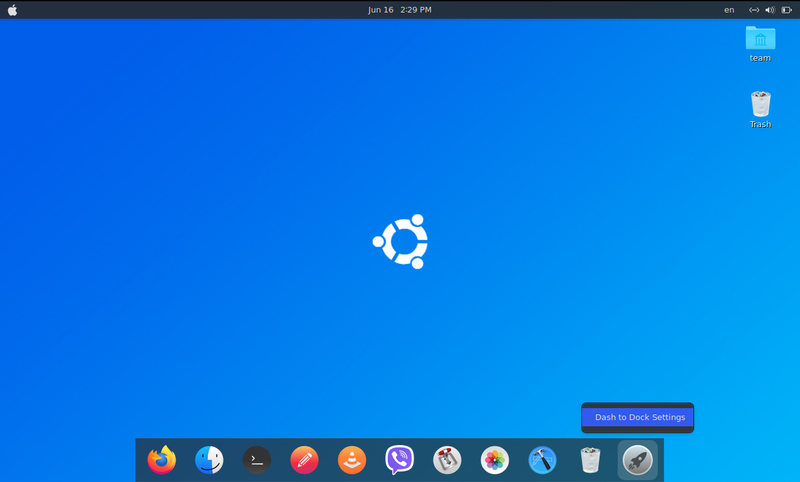
Without macOS like dock, your Ubuntu will not look like macOS. There are various docks available for Linux. I like Dash to Dock and I am going to use it here.
Dash to Dock is a GNOME extension. By now you are familar with GNOME Extensions. Just go to this link and click on toggle button to install it. Your native dock will be automatically replaced with dash-to-dock.
You can change settings by right clicking on “show applications” button (rightmost menu button), and selecting “Dash to dock settings”.
Step 4: Use macOS wallpaper
Most of the complicated stuff are done. Now it’s time to set macOS wallpaper. You can download macOS default wallpapers from the link below:
Change the desktop background
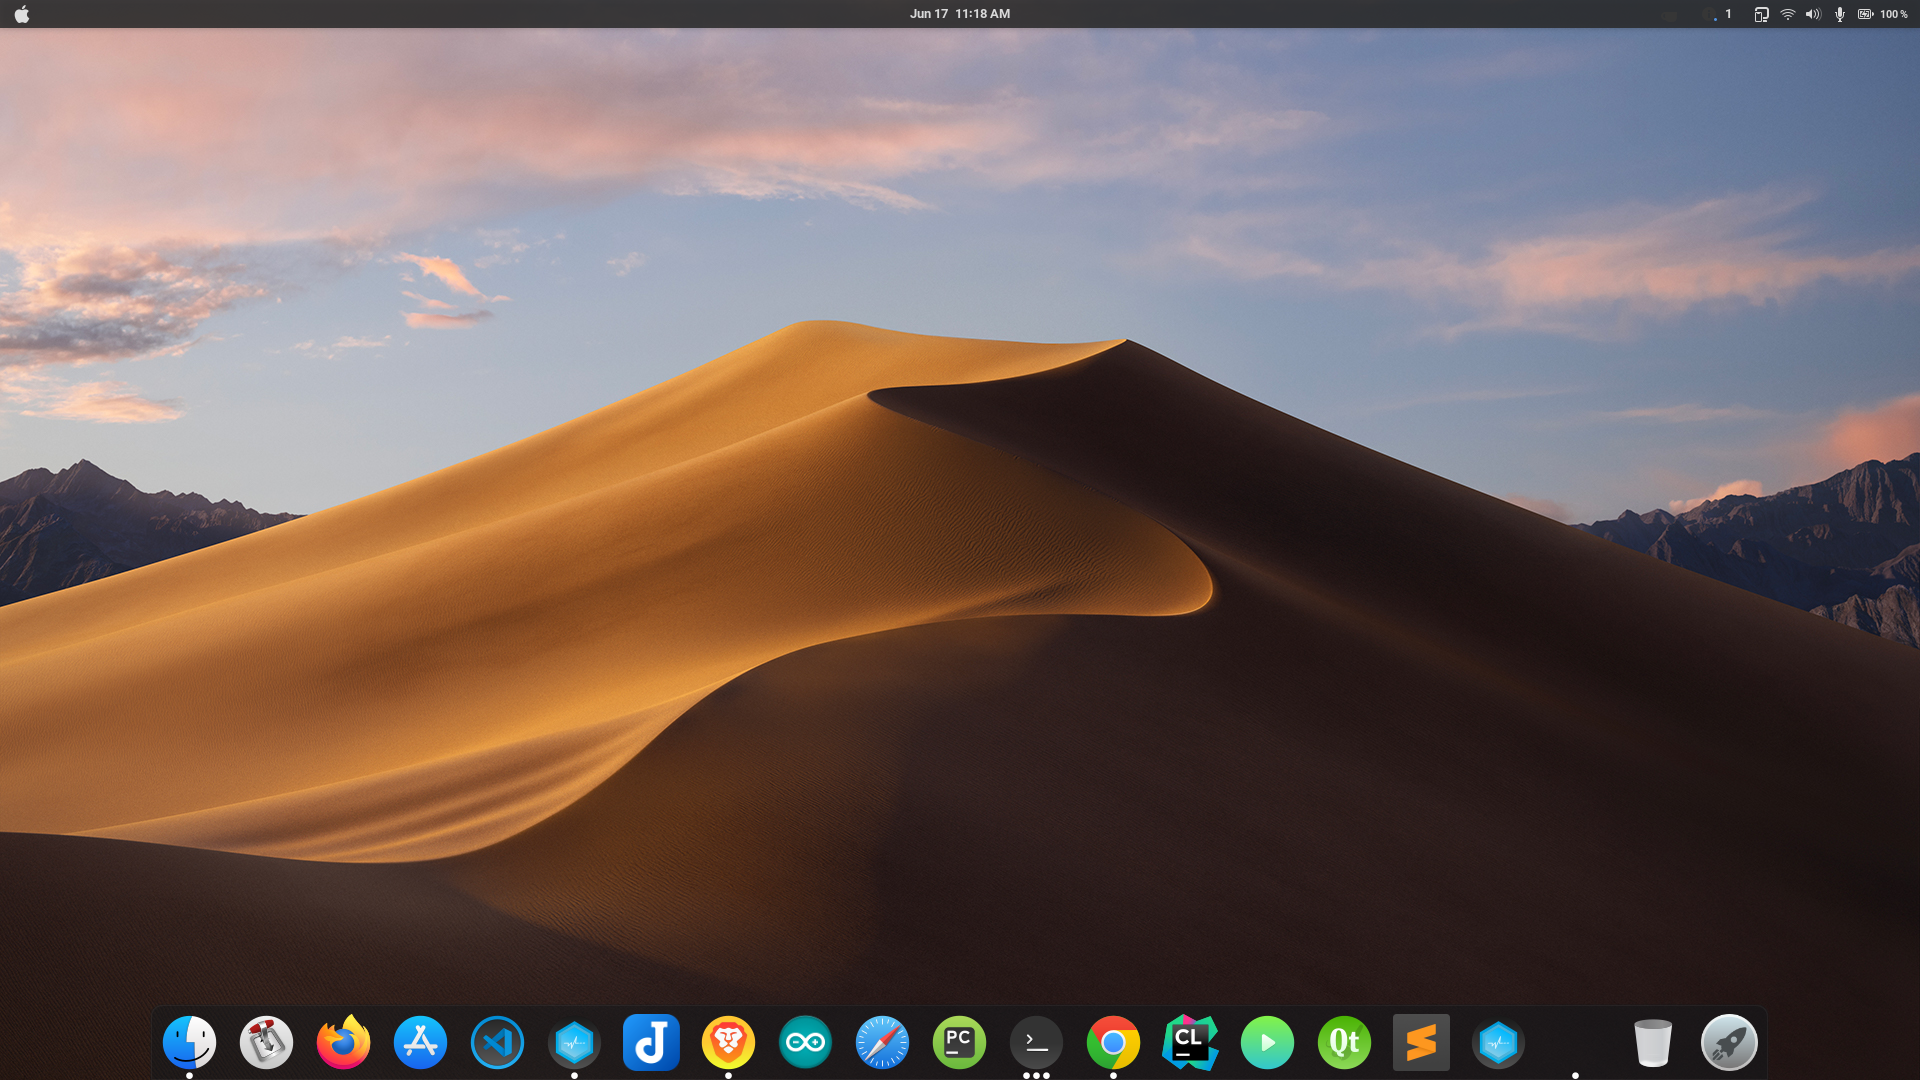
I shall be using “Mojave Day” wallpaper. Right click on the downloaded image and select ‘Set As Wallpaper’ option to change the wallpaper.
After setting this wallpaper, this is how my system looks like:
Change the lock screen Wallpaper
The lock screen background option is removed from the settings of Ubuntu 20.04. Now it uses blurred desktop wallpaper as the background of lock screen.
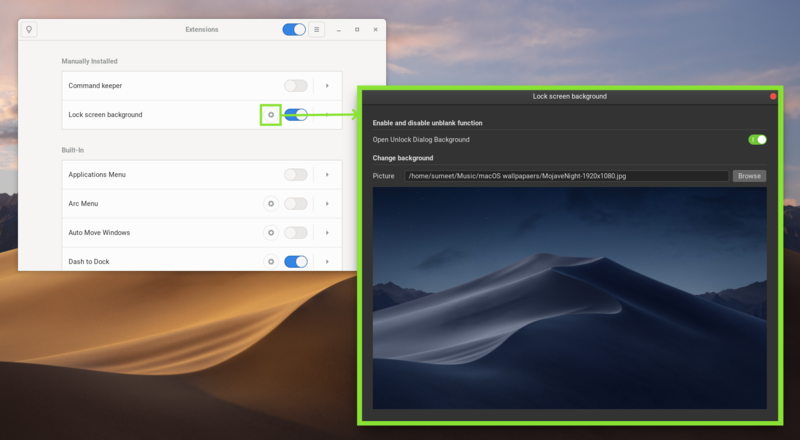
To set a custom lock screen wallpaper, you can use “Lock screen background” extension.
Open “Lock screen background” extension setting, and set lock screen wallpaper.
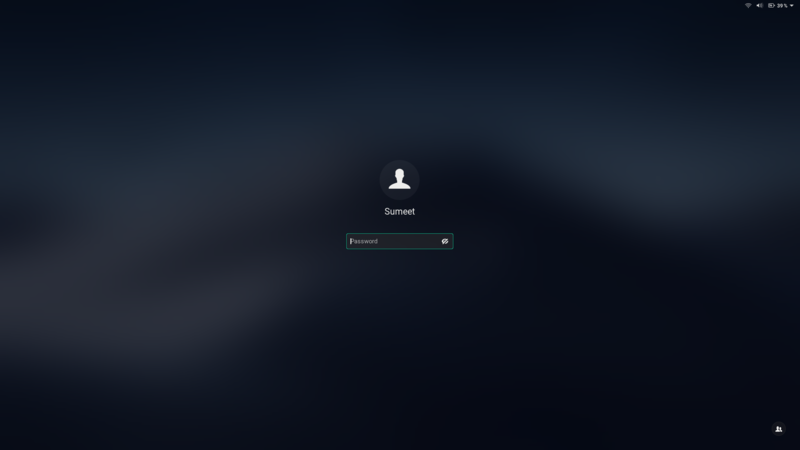
This is how the lockscreen looks now. If you are wondering, here’s how to take screenshot of lockscreen in Ubuntu.

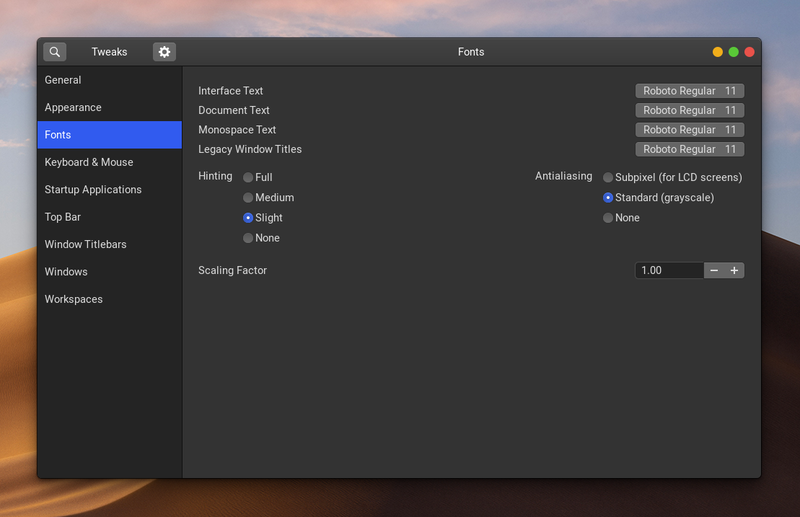
Step 5: Change system fonts
For several years, the primary system font in macOS is ‘San Francisco’. But this San Francisco font is not public domain but proprietary like so many other things in the Apple ecosystem. For this reason, you cannot use this font.
What you can do is to use an open source font that looks similar to the San Francisco fonts. I recommend using Roboto font by Google or Source Sans Pro by Adobe.
Installing fonts is straightforward in Ubuntu. Download the zip files of the fonts and just double-click on the ttf files in the extracted folder. It will give you the option to install the fonts one by one.
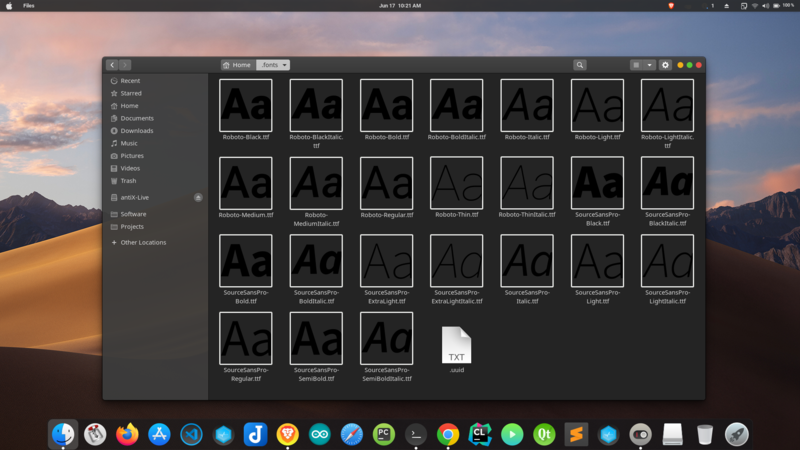
If you want to save time and install all the fonts at once, extract all fonts in it to the “.fonts” directory in your home folder (~/.fonts).
Once you have installed the fonts, you can change the system wide font using GNOME Tweaks tool.
Bonus Tip: Spotlight like app launcher (if you want to go the extra mile)
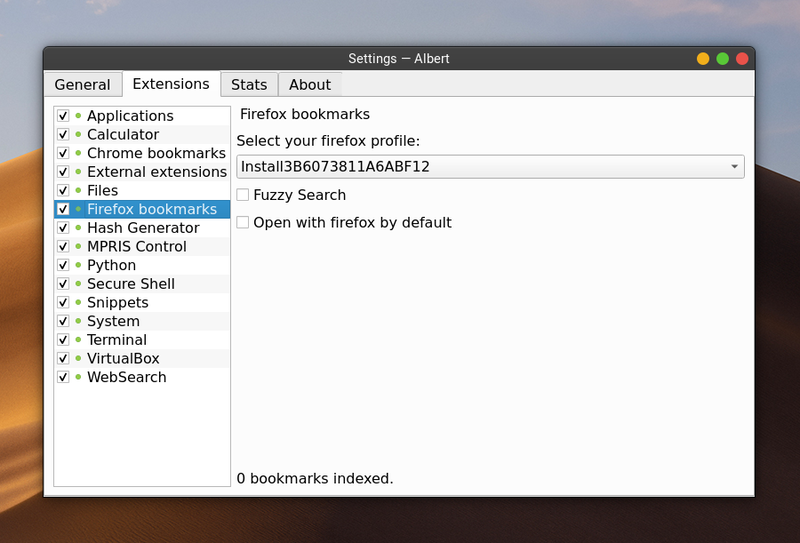
If you are a fan of macOS Spotlight launcher, you may have something similar on Linux also. My favorite package for getting this kind of launcher is “Albert“.
After installing; open “Albert” and set hotkey (key combination you want for opening launcher) and you are good to go. I think in macOS, the Command+Space is to launch Spotlight. You may set Super+Space keyboard shortcut in Ubuntu.
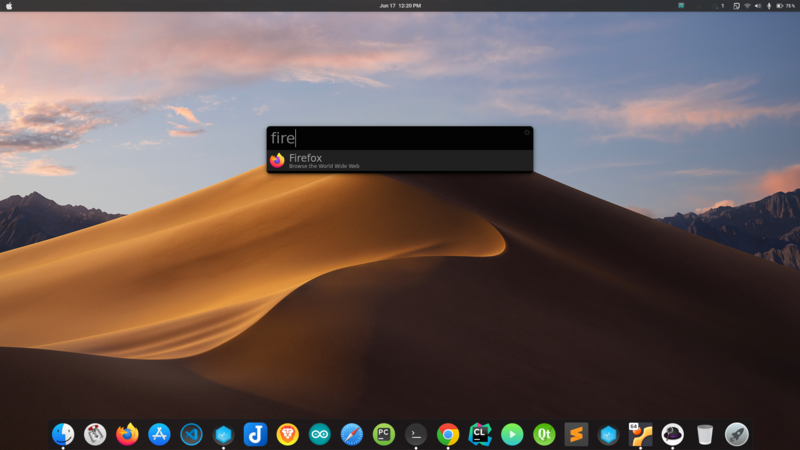
You will get many themes in built, in picture below I’ve used “Spotlight dark”.
Albert won’t be able to launch apps directly, you have to give it permissions for where it can look for search results.
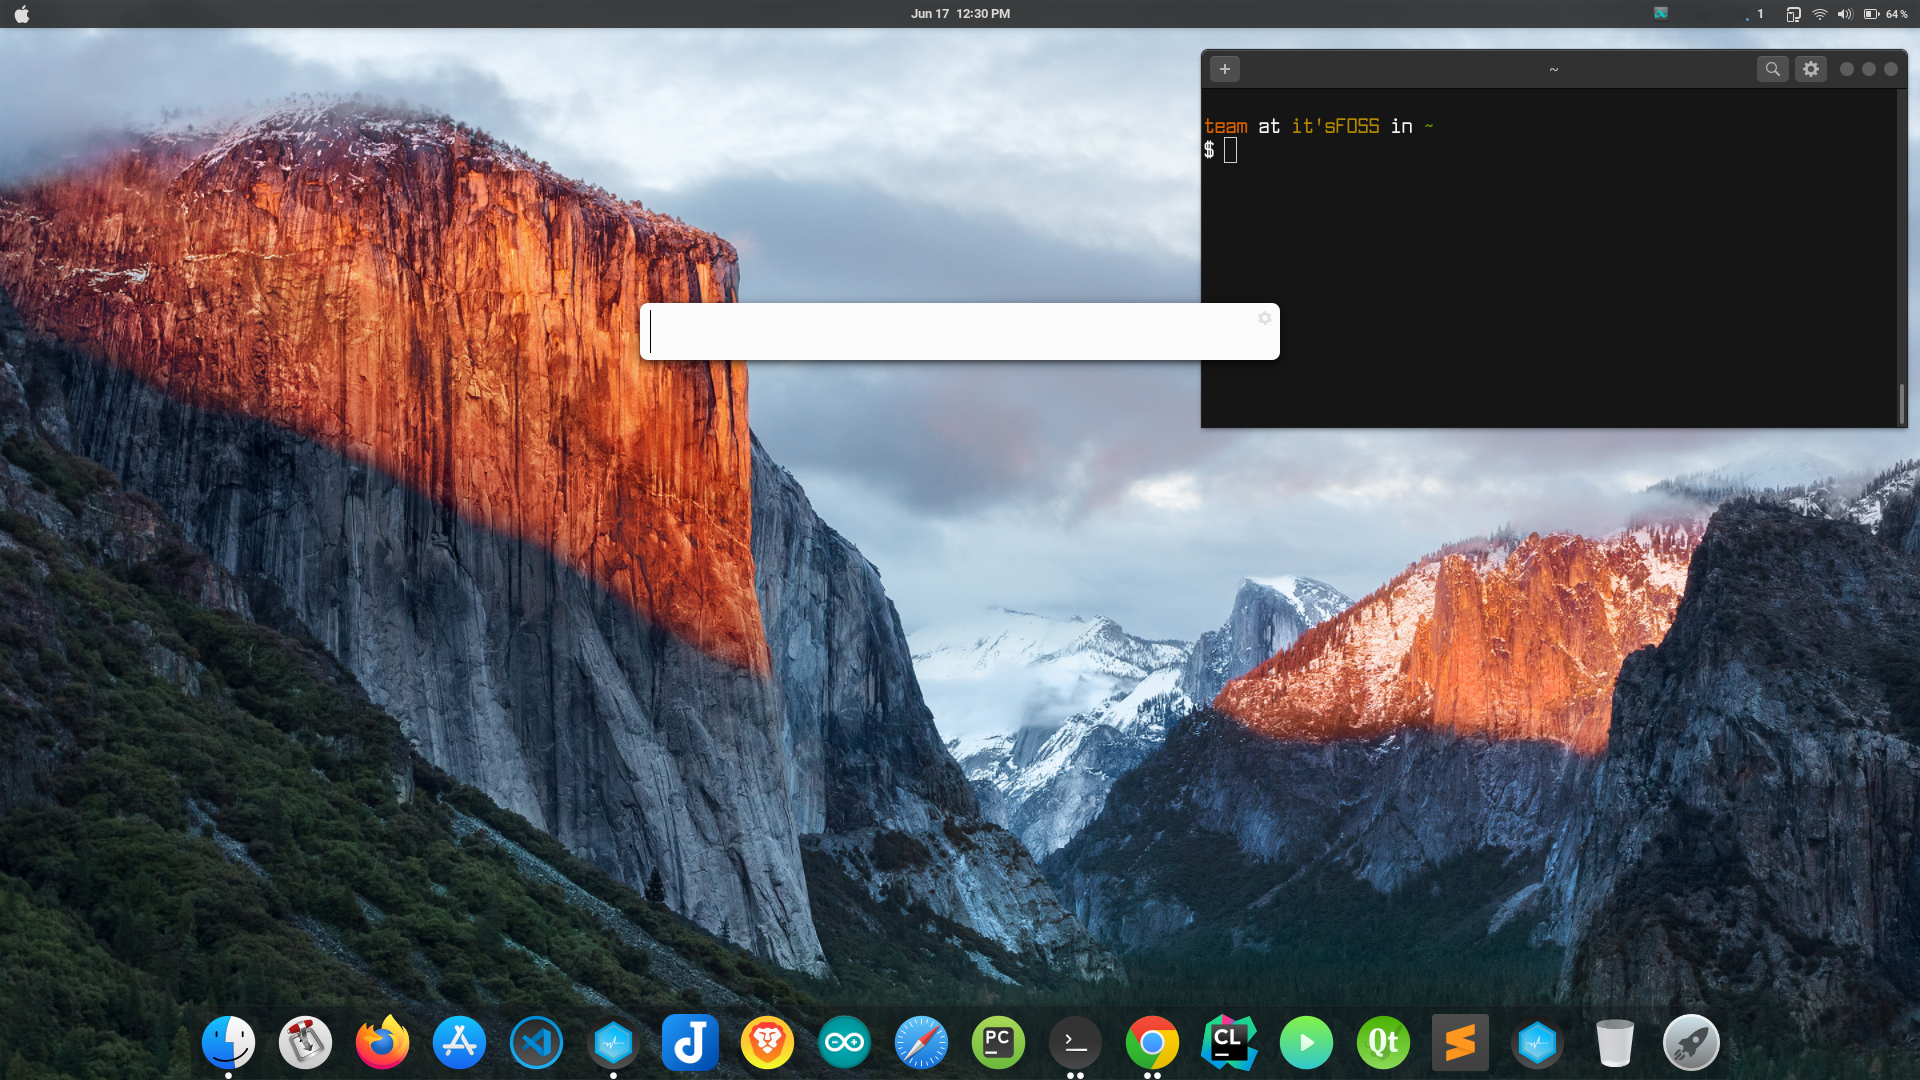
After setting up, this is how it looks:
This is how my Ubuntu 20.04 looks like after making all the customizations. Does it look like macOS? You be the judge.

So, this is how you can make your GNOME desktop look like macOS. As I said in the beginning, this is a good example of Linux desktop’s customization capability.
If you have any new ideas or have any queries; the comment section is all yours.
Written by Sumeet with additional inputs from Abhishek Prakash.
Как сделать Ubuntu 22.04 похожей на MacOS(MacBuntu 22.04)
Не все любят операционную систему MacOS, но все же огромное количество пользователей пишут мне в личку чтобы я сделал сборку CoolOS 22.04, или хотя бы инструкцию как сделать Ubuntu похожей на MacOS.
На самом деле, на моем сайте есть все инструкции, поэтому в этой статье я буду давать ссылки на статьи чтобы не писать лишнего.
1) Установка необходимых расширений
Вы можете посмотреть на Лучшие расширения Gnome 2022 года, но нам нужны определенные.
Чтобы установить расширения в Gnome Ubuntu, отройте терминал и введите следующие команды
sudo apt install chrome-gnome-shell gnome-shell-extension-prefs gnome-shell-extension-manager gnome-tweaksДалее найдите приложение под названием Extensions Manager

Откройте его и перейдите на вкладку Browse

И установите следующие расширения
User Themes — Загрузка тем оболочки из каталога пользователя.
Big Sur Status Area — Это расширение было создано чтобы придать Gnome вид «Системного трея» MacOS Big Sur, переместив значки панели Gnome в «Область состояния», разделив значки и придав им лучший внешний вид. в оболочку гнома.
Coverflow Alt-Tab — Заменяет Alt-Tab, выполняет итерации по окнам в режиме cover-flow.
Logo Menu — Меню, похожее на меню macOS от Apple, для рабочего стола GNOME
Это расширение дает простое меню вместе с возможностью получить иконку вашего дистрибутива в верхней левой части панели для отличного внешнего вида.
Dash to Dock for COSMIC — Форк Dash to Dock для оболочки COSMIC/GNOME Shell, исправляет конфликт с Cosmic Workspace.
После установки всех расширений, вам придется немного их настроить, для этого найдите и откройте приложение «Extensions»

У каждого расширения есть настройки, и давайте начнем с расширения «Big Sur Status Area», где вы должны переместить календарь в правую сторону в самый конец

Далее открываем настройки расширения «Dash to Dock», в котором мы должны переместить док-панель в нижнюю часть, включить интелектуальное скрытие панели, переместить кнопку «Приложений» в левую сторону.
Просто повторите все тоже что на фото ниже


Установка иконок и темы
Далее установите тему WhiteSur Theme. Если вы еще не знаете как установить тему и иконки, перейдите по этой ссылке.
После установки темы и иконок, ваша система уже будет похожа на MacOS, вам останется только установить обои, которые вы можете скачать по ссылке ниже


Вот и все, если останутся какие-либо вопросы, не стесняйтесь, задавайте в комментариях ниже.
Как сделать из Gnome 3 подобии MacOS на Ubuntu 20.04

Я думаю многим нравится как выглядит MacOS, но не у всех есть деньги на компьютер Mac, для таких идеально будет установить Linux и сделать из него подобии MacOS, в этой статье мы разберём как из графической оболочки Gnome 3 сделать подобии MacOS на Ubuntu 20.04.
Такой вариант не заменит её, потому что не будет многих полезных программ и возможностей, поэтому инструкция подойдёт для программистов и простых пользователем, которым кроме браузера и офиса нечего не надо.
Установка темы:
Первым делом нам нужно тема MacOS для Ubuntu 20.04, но для этого вам надо скачать программу Gnome Tweak Tool, её можно скачать через менеджер приложений или используя команду в терминале:
Ещё нужно расширение User Themes, оно вам позволить менять темы оболочки, скачать все темы можно на сайте openDesktop.org, но я вам уже подобрал тему которая похожа на последнюю MacOS (Ссылка на тему).
Там будет два варианта, единственно что отличается это тип темы светлая или тёмная, я скачал тёмную 6.0-dark.zip, вы же можете другую.
После чего разархивируем файлы и перемеcтим их в папку .themes, которая находится в домашней папке, теперь заходим в Доп. настройки GNOME, переходим во внешний вид и меняем параметры: Приложения, тема shell, на тему которую вы установили.

Таким образом у нас заработала тема MacOS для Ubuntu 20.04.
Иконки:
Теперь скачиваем иконки (Ссылка на иконки), я же скачал BigSur-Originals.zip иконки, вы можете другие, разархивируем файлы в папку .icons, её тоже надо будет создать если нет.
Теперь также как с темами заходим в Доп. настройки GNOME, в внешний вид и меняем параметр значки.

Doсk панель:
Надо скачать расширение Dash to Dock, для того что бы сделать панель на подобии MacOS (Ссылка на расширение), yj nfr ;t dj заходим настройки расширения, выставляем их как на скриншотах.


Как видите нам нужно только чуть чуть изменить «Положение и размер» и «Команды», если хотите можете под себя изменить и остальные типы параметров.
Прочие настройки и расширения:
В принципе настроить вы можете как хотите сами, единственно ещё можете установить ряд расширений который улучат работу или просто приблизит к MacOS.
Расширения:
- Dynamic top bar — Позволяет не много менять верхнюю панель;
- Appfolders Management extension — Позволяет делать папки в меню приложений;
- Gnome Global Application Menu — Делает меню приложения такой же как в MacOS, но в последних версия графической оболочки работает с костылями;
- Workspaces to Dock— Позволяет настроить работу с рабочими столами и сделать её на подобии MacOS;
Есть ещё куча расширений, которые могут пригодится, я же показал только самые важные.
Вывод:
Конечно это на 100% не заменит Mac OS, но если вам вообще не нравится Windows и нет денег на Mac, то можете использовать эту инструкцию пока не появится деньги на него.
Надеюсь вам понравилось инструкция как сделать из Gnome 3 подобии MacOS, вот что получилось: