- Saved searches
- Use saved searches to filter your results more quickly
- License
- xreef/beeprint_3d_printer_web_interface
- Name already in use
- Sign In Required
- Launching GitHub Desktop
- Launching GitHub Desktop
- Launching Xcode
- Launching Visual Studio Code
- Latest commit
- Git stats
- Files
- README.md
- Mks wifi web view
- Saved searches
- Use saved searches to filter your results more quickly
- License
- xreef/MKS_WIFI_upgrade_with_BeePrint_web_interface
- Name already in use
- Sign In Required
- Launching GitHub Desktop
- Launching GitHub Desktop
- Launching Xcode
- Launching Visual Studio Code
- Latest commit
- Git stats
- Files
- README.md
- About
- Делаем «Правильный» mks tft Wi-Fi +SD. Без программатора и создания печатных плат!
- Подпишитесь на автора
Saved searches
Use saved searches to filter your results more quickly
You signed in with another tab or window. Reload to refresh your session. You signed out in another tab or window. Reload to refresh your session. You switched accounts on another tab or window. Reload to refresh your session.
The BeePrint web interface was created as Web View of MKS WiFi custom firmware. Developed in React Redux (ReduxLogic)
License
xreef/beeprint_3d_printer_web_interface
This commit does not belong to any branch on this repository, and may belong to a fork outside of the repository.
Name already in use
A tag already exists with the provided branch name. Many Git commands accept both tag and branch names, so creating this branch may cause unexpected behavior. Are you sure you want to create this branch?
Sign In Required
Please sign in to use Codespaces.
Launching GitHub Desktop
If nothing happens, download GitHub Desktop and try again.
Launching GitHub Desktop
If nothing happens, download GitHub Desktop and try again.
Launching Xcode
If nothing happens, download Xcode and try again.
Launching Visual Studio Code
Your codespace will open once ready.
There was a problem preparing your codespace, please try again.
Latest commit
Git stats
Files
Failed to load latest commit information.
README.md
I decided to make the WiFi module of my FlyingBear Ghost 5 more functional. I rewrote the firmware of the Makerbase MKS WiFi module and created a Web interface capable of managing all aspects of the printer and also a camera to control the process.
![]()
Hi all, this is BeePrint the Web Interface for MKS WiFi MISCHIANTI firmware. You can find It here
- Set the correct IP (of MKS WiFi MISCHIANTI module) to the file public/settings.js
- Launch npm run dev
- Launch npm run build
- Copy all the content of folder build to data folder of MKS WiFi MISCHIANTI
- Upload to SPIFFS
- 07/02/2023 1.6.1 Minor fix on Portuguese language
- 01/02/2023 1.6 Add Portuguese language (thanks Ronaldo Risso), remaining time and minor fix
- 03/02/2022 1.5 Fix ru language, add control on filesize upload
- 08/01/2022 1.4 Static IP configuration and mDNS (minor fix)
- 02/01/2022 1.3 Polish language
- 30/12/2021 1.2 GCode sender
- 14/12/2021 1.1 Add Camera rotation features
This work is licensed under a Creative Commons Attribution-NonCommercial-NoDerivs 3.0 Italy License.
Mks wifi web view
Hi, Thank you so much for your work
It’s very cool and convenient
I can see in the video that you are loading FBG5_prova.gcode
Then in the file list widget, we can also observe FBG5_prova.gcode,
but when i load this file on my printer i get FBG5_P~1.GCO in File list
Please advise what could be the problem?
Thanks for the quick response, Renzo, I can see on the internet the same problem on ESP3D, many people complain about it, so I was surprised that your solution does not have this problem, but it works the same for me as it does on ESP3D, I will try another sd card and let you know if the problem is gone
Hi, Renzo, I studied a lot of information and marlin source code, the problem is that marlin uses ms dos file system with names 8.3, in order to not create meta for file, you can find it by the key “marlin ms doc 8.3” in google, it does not depend on the memory card and the file system on it, but I could not find a solution to this problem, I’m interested to understand why you do not have this problem, It is very strange, If it’s not difficult, take a look at the longName2DosName method in the lib\mks_ui\wifi_module.cpp file, I assume this is the place where it happens, but if I change something there, I get an error when uploading the file, What marlin repository are you using?
Hi,
I use the standard Flying Bear Ghost 5 firmware. But I’m going to test my Robin Nano with MKS firmware.
Bye Renzo
Hi Renzo! First of all: Great Work! As an UI-Designer I really like your Screens and Interface that you provide in your update.
Because of that I would like to update my machine as well. – ELEGOO Neptune 2
– MKS Robin Wifi V1.1 Module When I open the IP it looks like yours.
When I upload the new Firmawares NOTHING happen. It tries to load and than give a NO CONNECTION Page.
After a while the original Page is back. What do I do wrong?
I do exactly like in your Video. Please help, as I would like to enjoy your nice Interface. Thank you!
Sascha
Hi Sascha,
So you don’t get the successful message at the end of the upload. I think the WiFi connection is too wake; put your router close. Try to put the firmware file into SD and restart. I don’t know if your firmware does the upload, but we will try. Bye Renzo
Hi Renzo! Thank you for your fast answer.
Which files do I have to put exactly on the SD Card?
Do I have to add a config textfile on the card as well? Sorry for those stupid questions,
but I am still a newbie here. Thank you so much! Sascha
Saved searches
Use saved searches to filter your results more quickly
You signed in with another tab or window. Reload to refresh your session. You signed out in another tab or window. Reload to refresh your session. You switched accounts on another tab or window. Reload to refresh your session.
Firmware for MKS WiFi module from Makerbase with BeePrint Web Interface, tested with Flying Bear Ghost 5/Ghost 4/Reborn
License
xreef/MKS_WIFI_upgrade_with_BeePrint_web_interface
This commit does not belong to any branch on this repository, and may belong to a fork outside of the repository.
Name already in use
A tag already exists with the provided branch name. Many Git commands accept both tag and branch names, so creating this branch may cause unexpected behavior. Are you sure you want to create this branch?
Sign In Required
Please sign in to use Codespaces.
Launching GitHub Desktop
If nothing happens, download GitHub Desktop and try again.
Launching GitHub Desktop
If nothing happens, download GitHub Desktop and try again.
Launching Xcode
If nothing happens, download Xcode and try again.
Launching Visual Studio Code
Your codespace will open once ready.
There was a problem preparing your codespace, please try again.
Latest commit
Git stats
Files
Failed to load latest commit information.
README.md
![]()
I am looking for collaborators for the Web interface created in React / Redux, if you are interested write to renzo@mischianti.org. If we manage to form a small group then I will release that part on GitHub as well.
Version 1.4 Thanks to Aleksandr Shell for the russian language translation. Thanks to reprapy for the polish language translation.
Version 1.6 Thanks to Ronaldo Risso for Portuguese language
- 2023-02-07 BeePrint 1.6.1 MKS WiFi 1.3 Minor fix on Portuguese language and firmware compiled with double MHz (from 80MHz to 160Mhz) for better performance
- 2023-02-04 BeePrint 1.6 MKS WiFi 1.2 Add Portuguese language (thanks Ronaldo Risso), remaining time and minor fix
- 2022-02-03 BeePrint 1.5 MKS WiFi 1.2 Better RU translation, fix preload and check the file length
- 2022-01-08 BeePrint 1.4 MKS WiFi 1.2 Static IP configuration, mDNS, polish translation and minor fix
- 2022-01-02 BeePrint 1.3 Polish language
- 2021-12-30 BeePrint 1.2 Add GCode sender widget
- 2021-12-14 BeePrint 1.1 Add Camera rotation features
- 2021-12-03 BeePrint 1.0 Fix the mobile menu on WebView
I bought a FlyingBear Ghost 5 with integrated WiFi module, but I discover that there is no web interface. I don’t know why they can’t add a basic user interface. Then I went to see the web interface the high-end Makerbase cards and realized that it was better they didn’t develop it.
My solution was to modify the firmware to support the Web Socket and develop the Web interface. This feature is compatible with all Makerbase cards that have an MKS WiFi module.
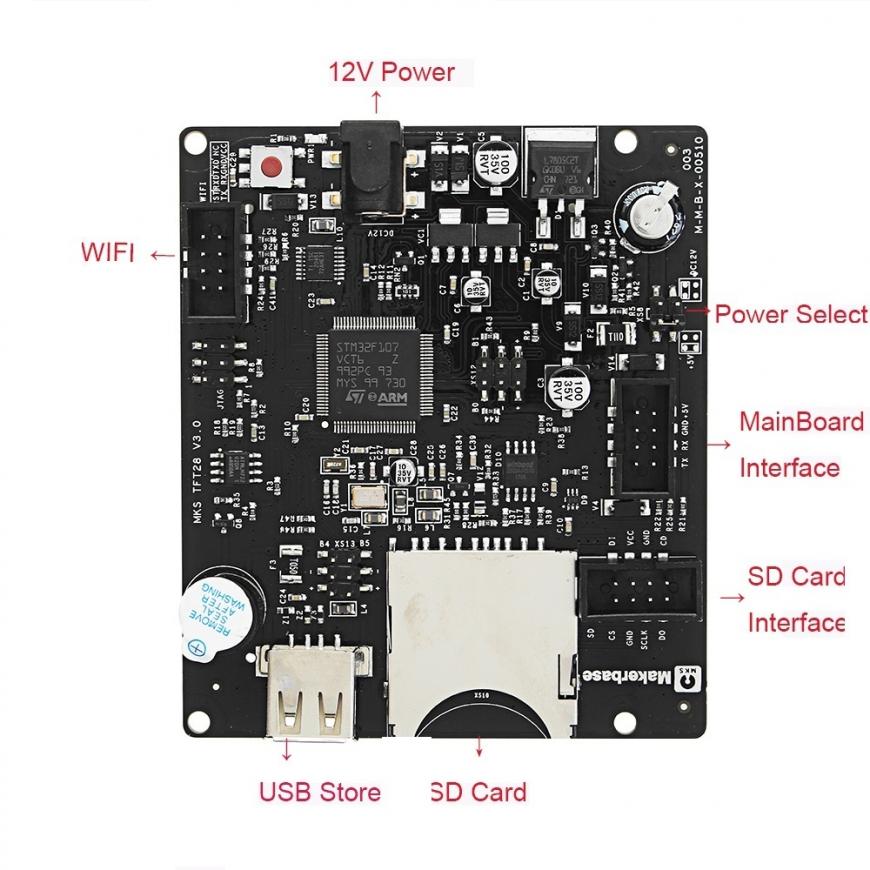
I also decided to explain all the development phases of the project and in this article here I would like to expose the hardware infrastructure of the MKS WiFi card that interfaces with the Makerbase Robin Nano.
I add a Web Socket protocol to manage the communication via Web interface, and I create a responsive and complete Web Interface

To prevent speculation over my work I realease all in CC BY NC ND
About
Firmware for MKS WiFi module from Makerbase with BeePrint Web Interface, tested with Flying Bear Ghost 5/Ghost 4/Reborn
Делаем «Правильный» mks tft Wi-Fi +SD. Без программатора и создания печатных плат!
Подпишитесь на автора, если вам нравятся его публикации. Тогда вы будете получать уведомления о его новых статьях.
Отписаться от уведомлений вы всегда сможете в профиле автора.
Уже около года, как я пользуюсь системой собранной на MKS Sbase+ KMS TFT под управлением Smoothie
Некоторое время назад я, наверное как и многие тут, добавил Wi-Fi модуль. Просто под руку попался в магазине. Решил что лишним не будет.
Но удовольствия от покупки я не получил. Хотелось пореже навещать принтер с целью «передергивания флешки или SD-шки.
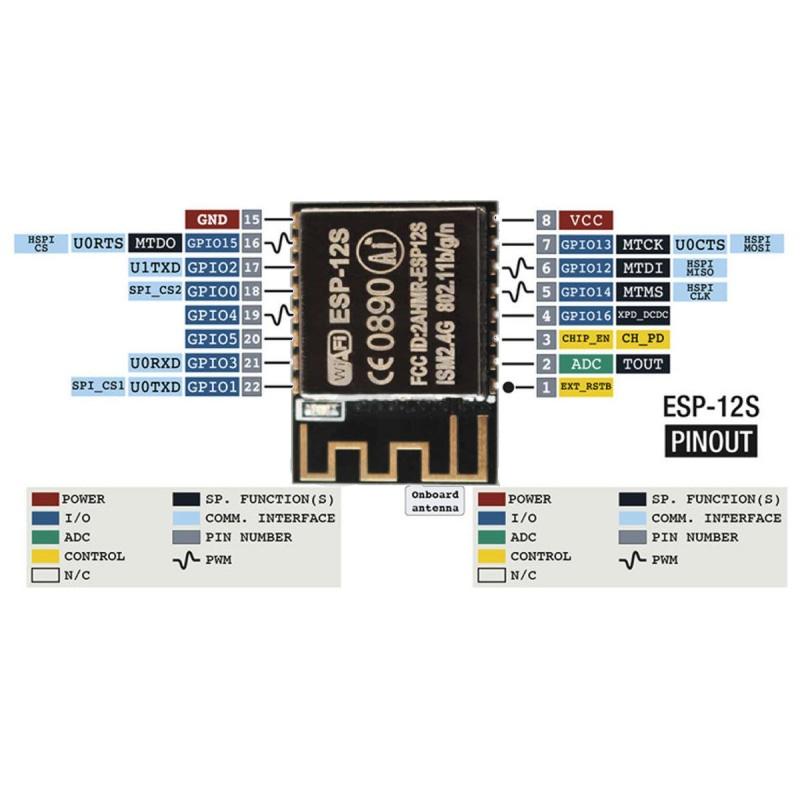
И вот на днях мне автоподботом Гугла выпала статья Massaraksh7 под названием: SD-карта с WiFi на ESP8266 для 3D-принтера (plug-and-play)
Которая подкинула мне идею как убить пару дней времени.
Спасибо огромное автору за идею!
И этому автору тоже спасибо за его труды!
Проведя часа три за «чертежной доской», я плюнул на идею создания «удобной» печатной платы и решил сделать «навесной монтаж».
Уж больно меня угнетала мысль ковыряться долго и малоэффективно.
Программное обеспечение самого модуля MKS Wi-Fi было полностью переписано на базе проекта dav сервера.
Причиной отказа от готового ПО авторов послужили:
-лаги-«подвисания» с этими прошивками у MKS TFT (возможно и у Marlin тоже есть) при обращении к SD карте во время печати.
— отсутствие ДОСТУПНОЙ информации об IP выделенном принтеру. Т.е. надо лезть в список клиентов роутера, или сканить домашнюю локалку.
Для программирования прошивки не требуется программатор!
Дальше кучка фоток с пояснениями как это повторить.
-несколько кусочков тонкого провода(я брал МГТФ)
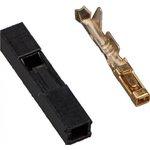
-провода с разъемом BLD(есть у всех кто не выкидывает китайские провода от моторов)
-резисторы 620 Ом (В моём случае показали большую стабильность чем 1 КОм из оригинального проекта)
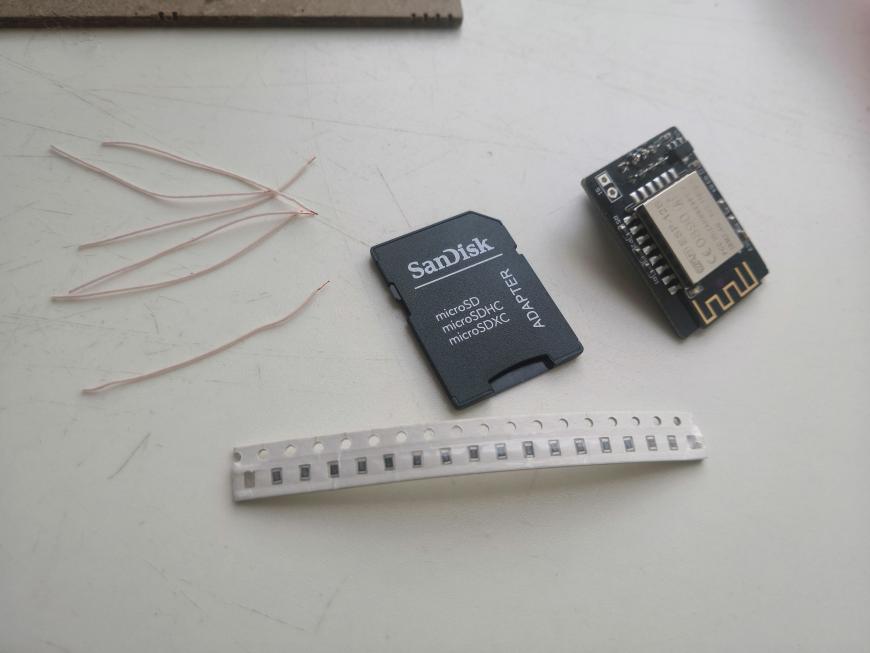
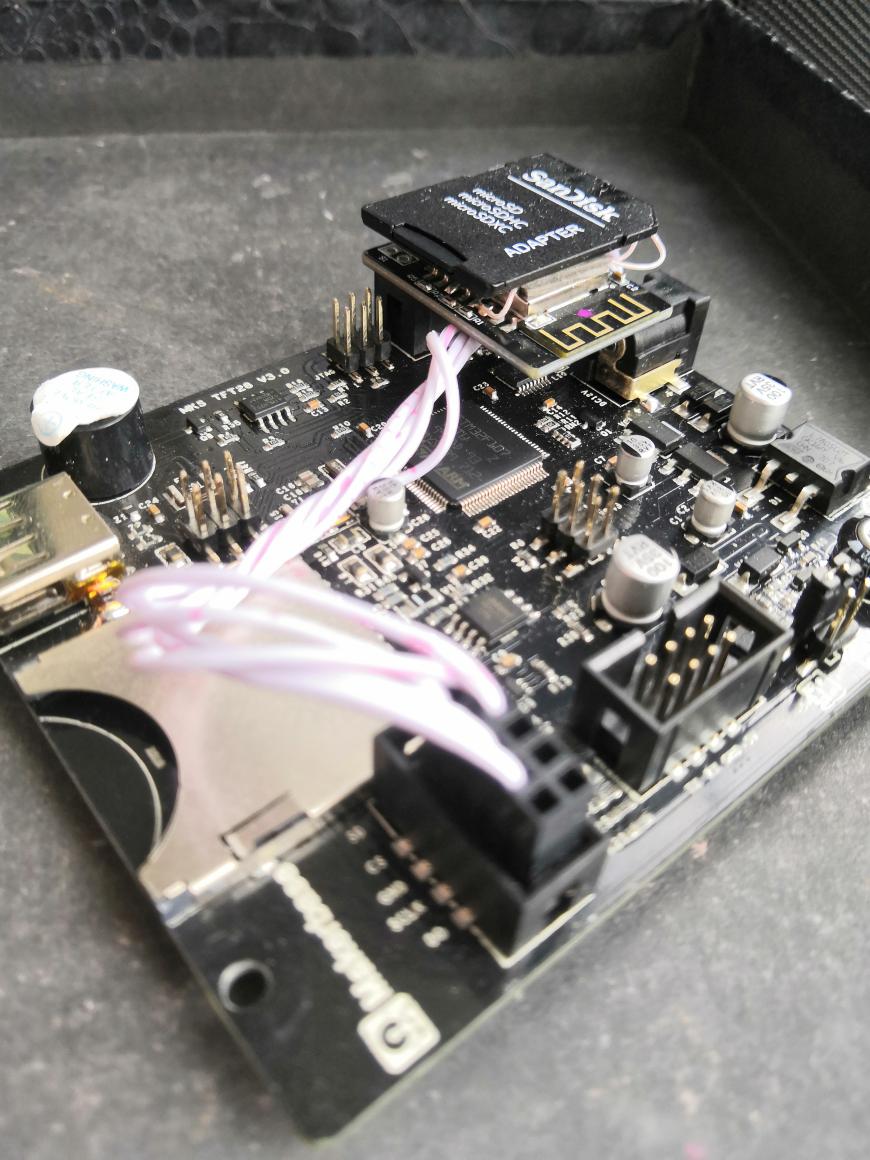
Собираем устройство по схеме оригинальной конструкции.
Сопротивления можно брать любые в диапазоне 620-1000 Ом
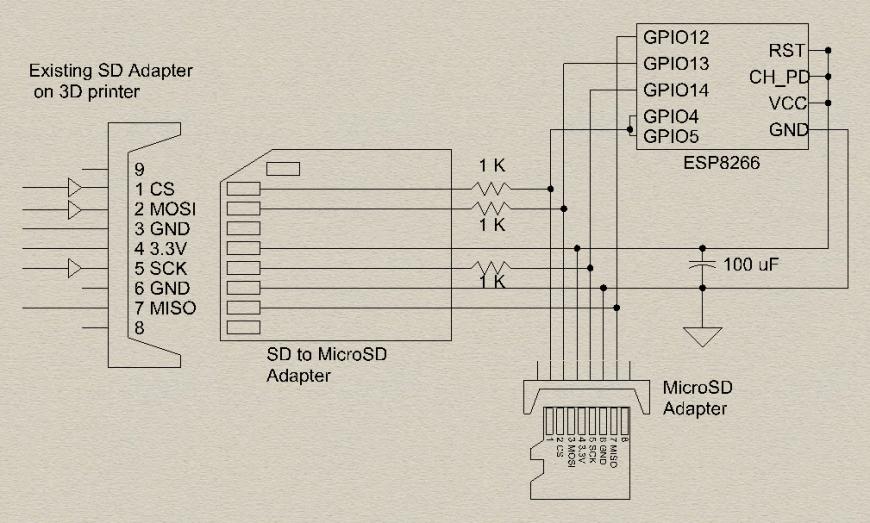
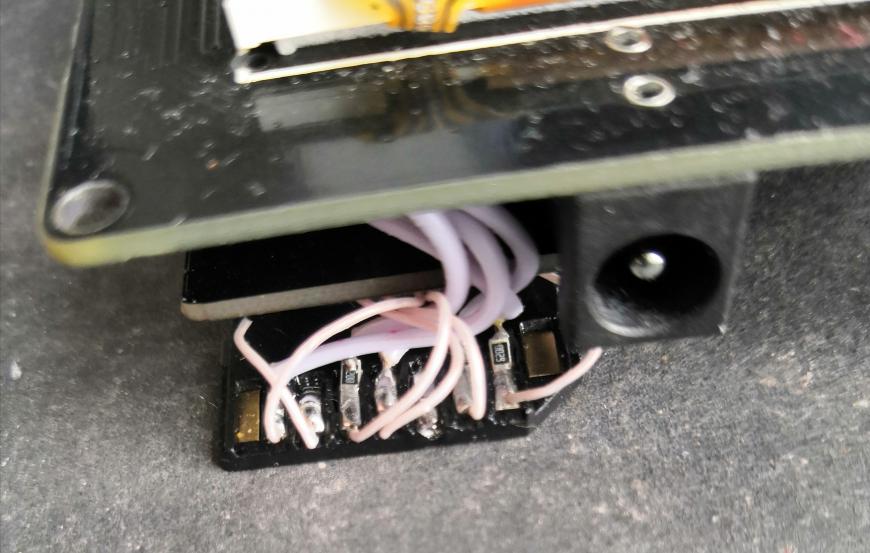
Вместо «MicroSD Adapter» Который внизу справа мы припаиваем провода к переходнику Sd/microSD
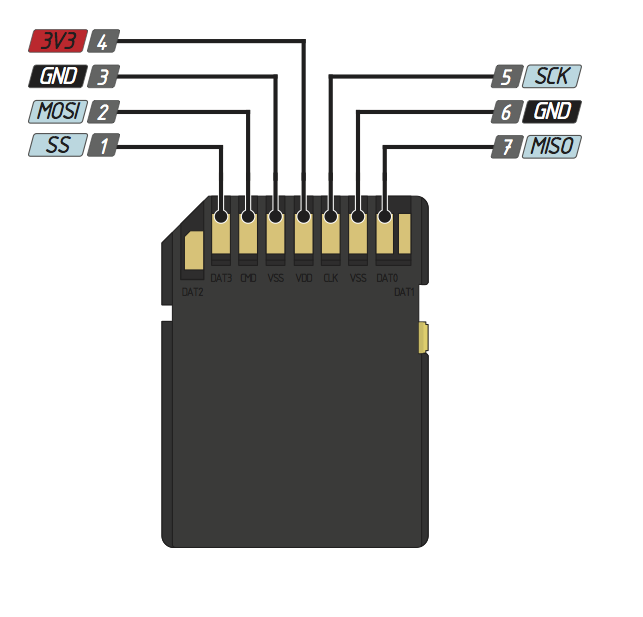
Вместо «SD MicroSD Adapter» Который указан слева на схеме-рисунке, будем использовать провода и разъемы BLD.
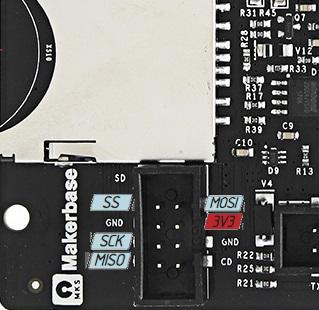
Они будут подключаться на плату в разъем внешней SD карты.
Именно они подключаются через резисторы.
Для вашего удобства отметил выводы.
Остальная обвязка уже присутствует на плате MKS Wi-Fi и она нам не нужна.
Я рекомендую не обязательно пробросить на разъём внешней SD только ПЯТЬ проводов
Без земли с обязательным пробросом 3.3В
Схема площадок на плате MKS Wi-Fi :
Немножко потребуется аккуратного вандализма.
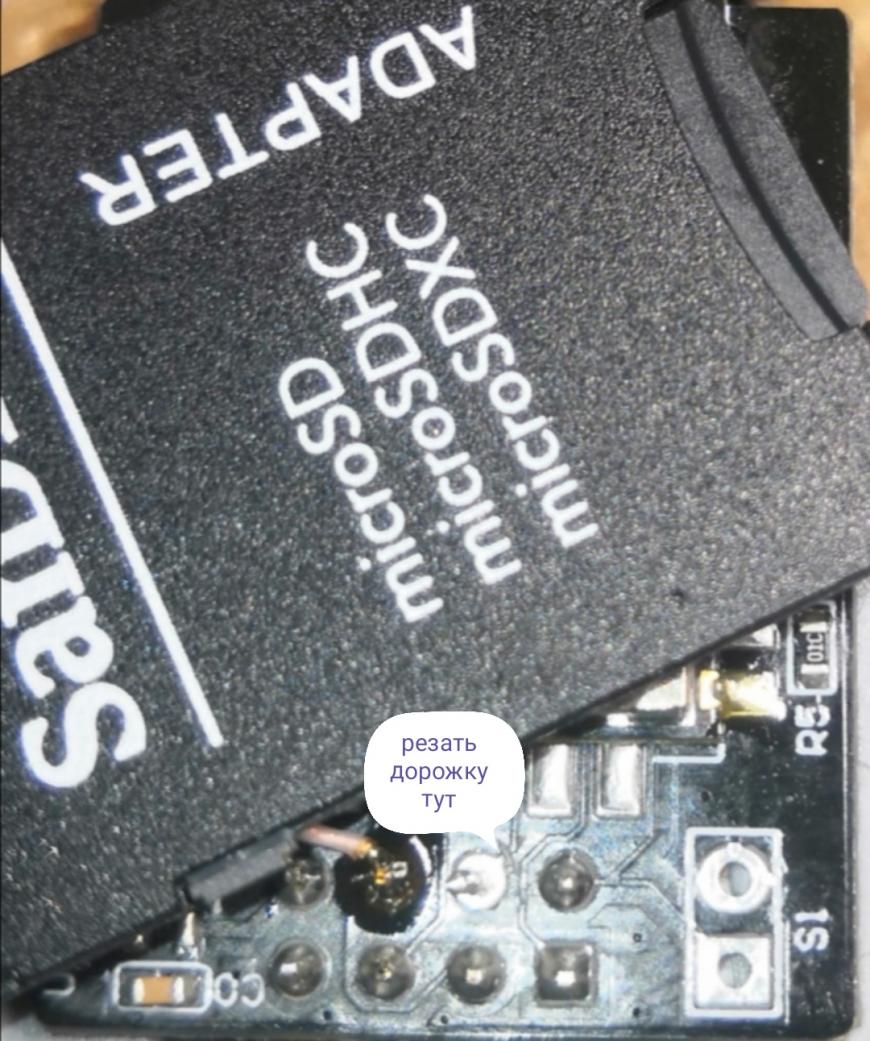
На KMS Wi-Fi плате надо перерезать одну дорожку.
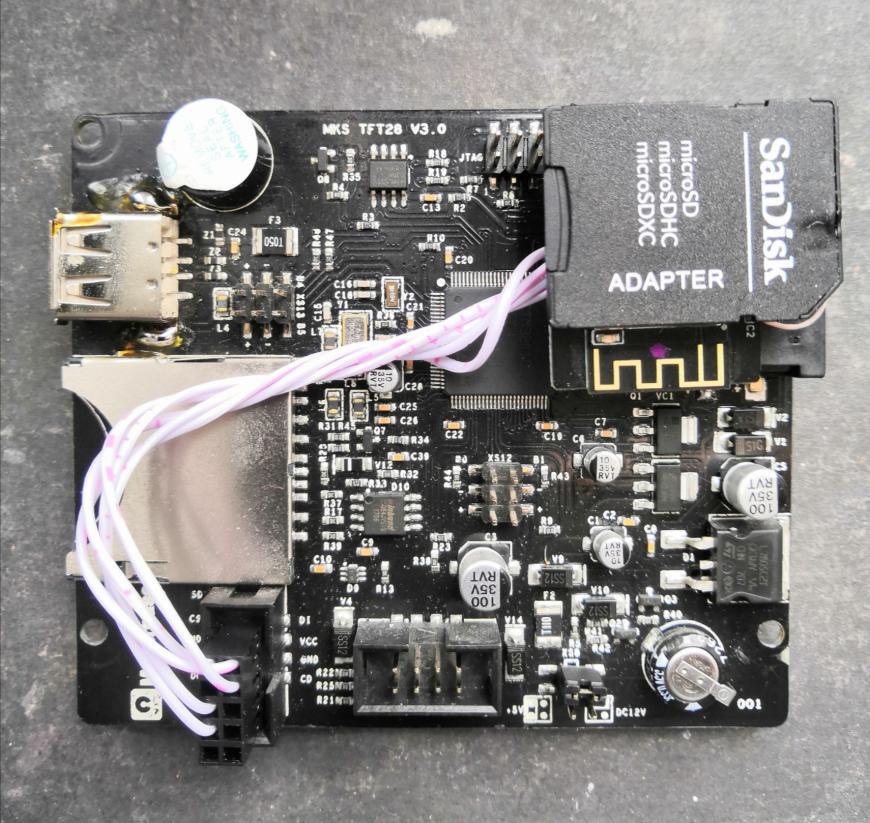
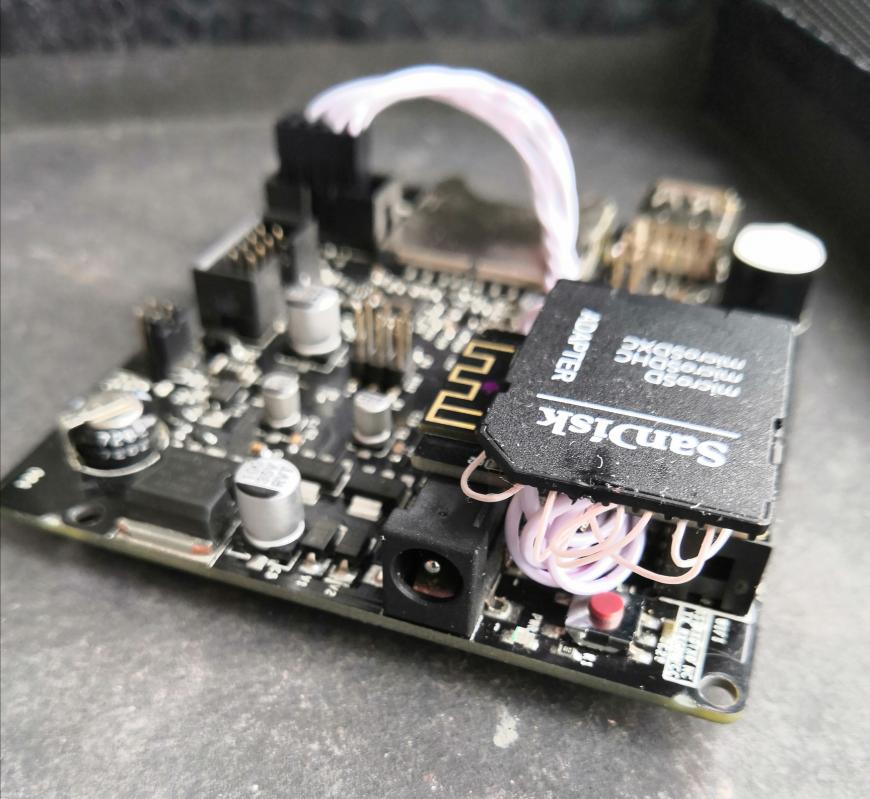
Потом приклеиваем переходник SD карты на сам модуль двухсторонним скотчем, не накрывая антенну.
Конечный результат у меня выглядит так:
 _______________________________________________________________
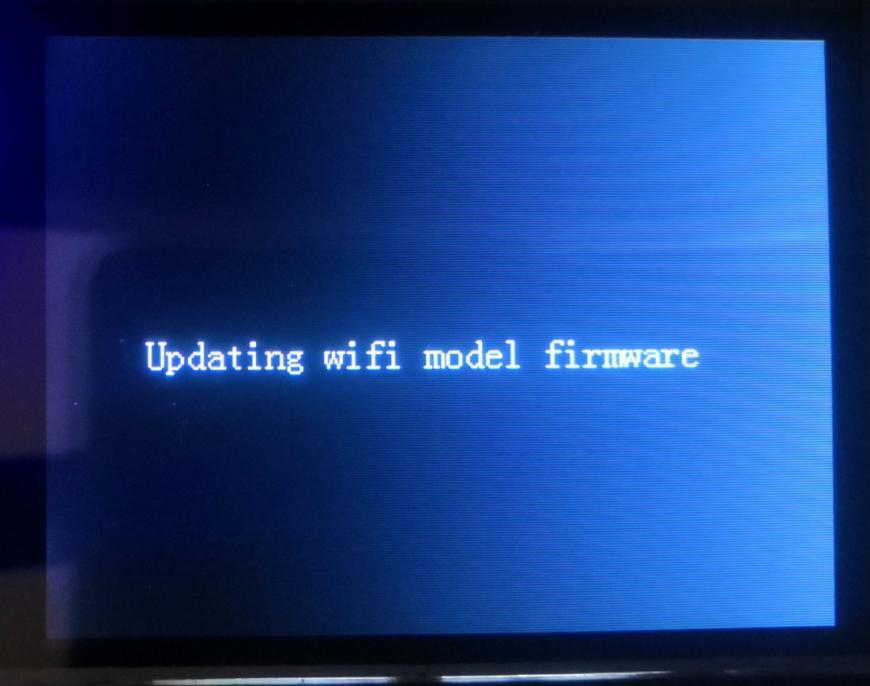
Прошивка зашивается средствами самого экрана MKS TFT
В корневую папку SD карты бросаете файл прошивки и во время включения экрана он прошивает модуль.
Далее вставляем в наш «новый» модуль microSD карту.
На карте должен быть файл setup.ini
Он есть в архиве. В нём надо указать имя вашей сети и пароль.
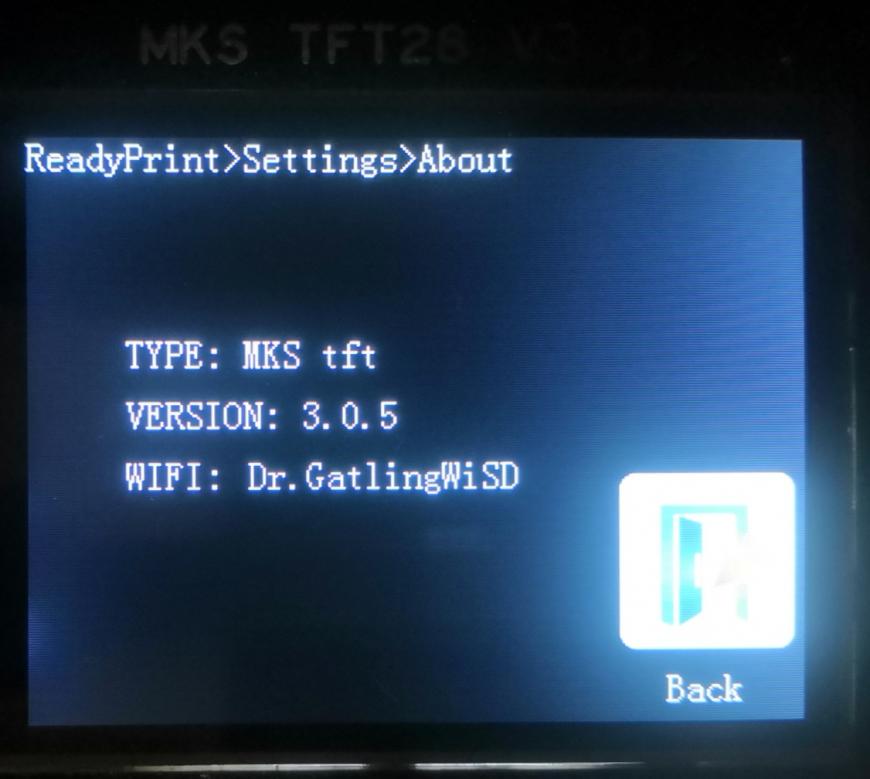
Запуск сервера происходит около 40 сек.
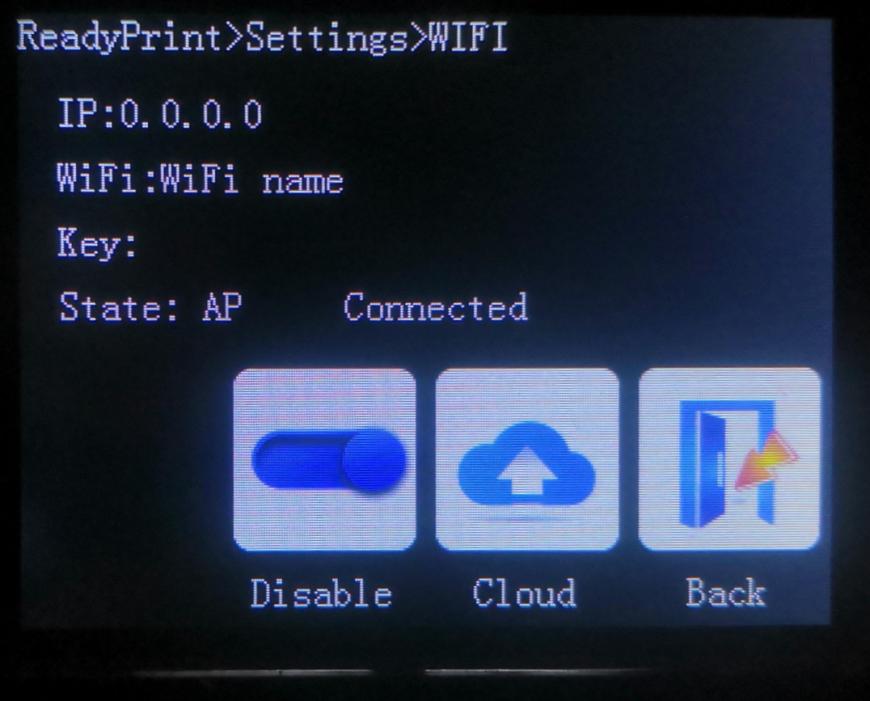
И после успешного пуска нам доступны данные подключения:
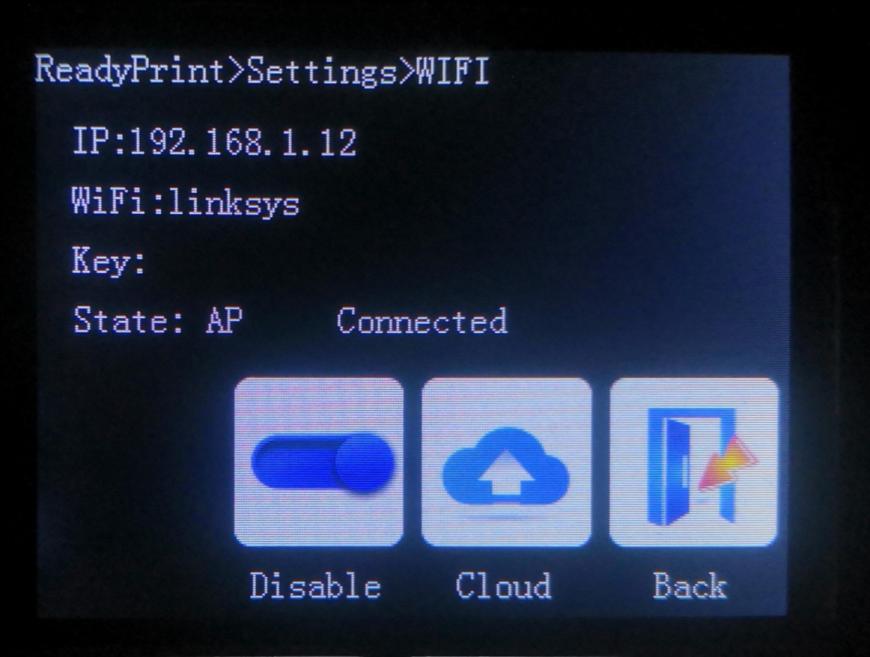
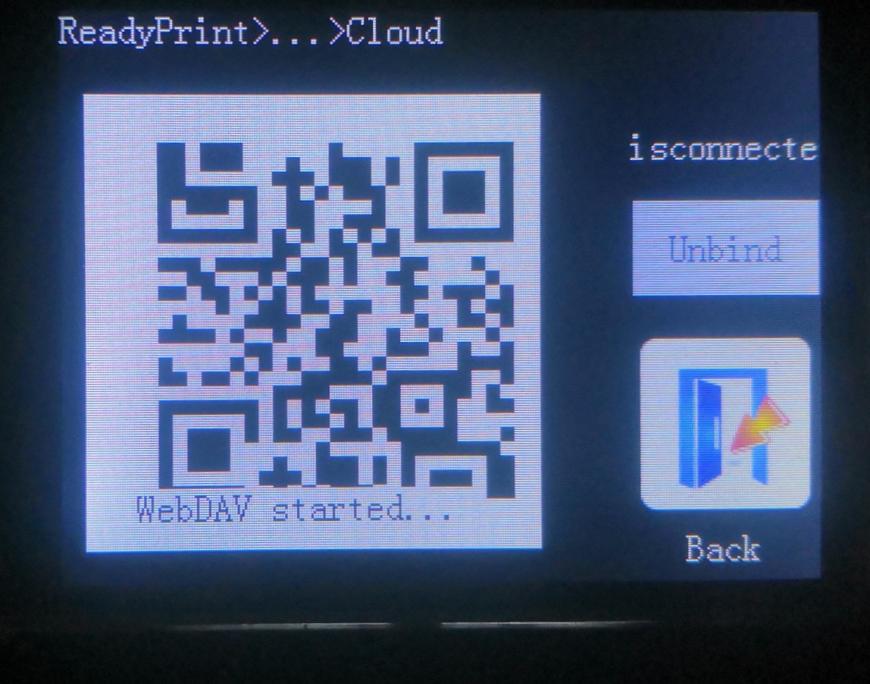
если что то пошло не так- нажимаем кнопку Cloud.
И смотрим диагностику под большим трихлоридом:
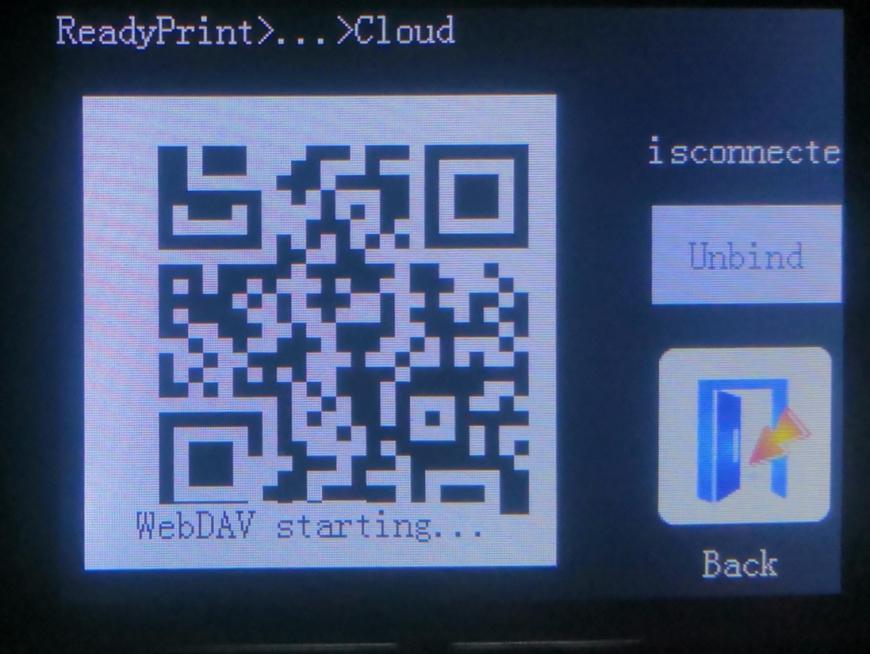
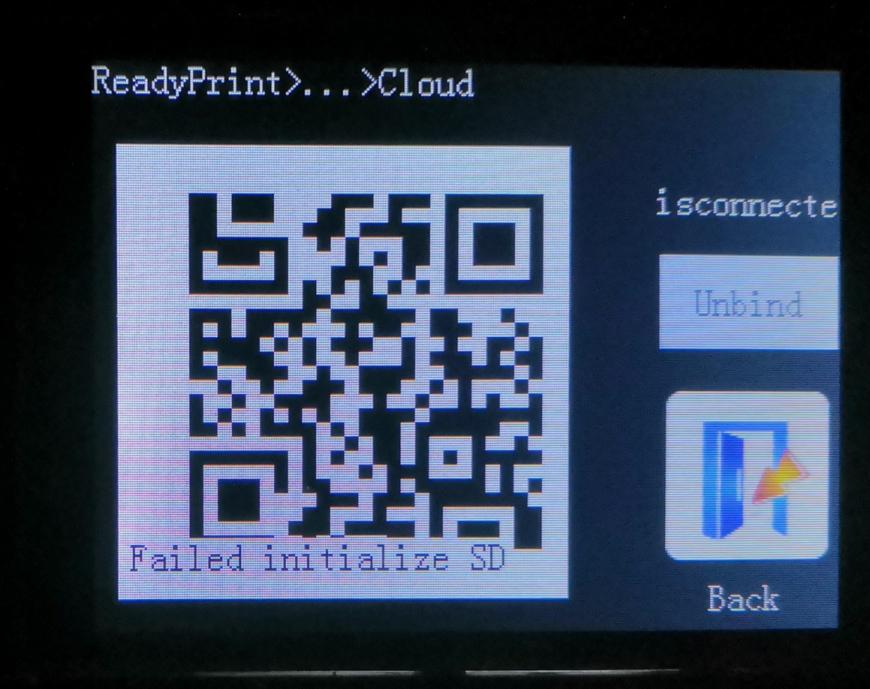
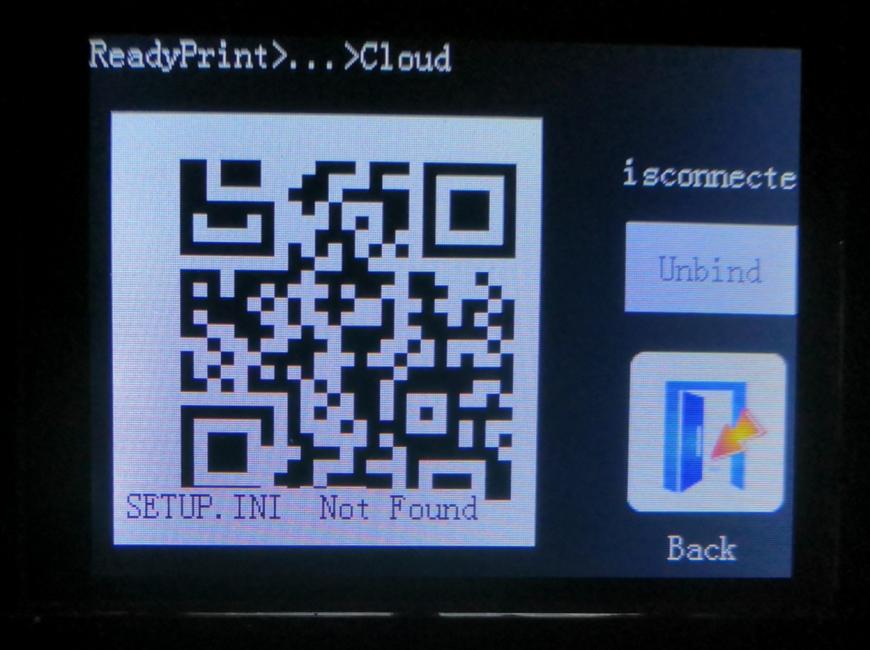
Там ещё есть одно сообщение об ошибке синтаксиса файла setup.ini. Лень моделировать и фото делать.
После подключения к сети, нам доступен сетевой диск по адресу
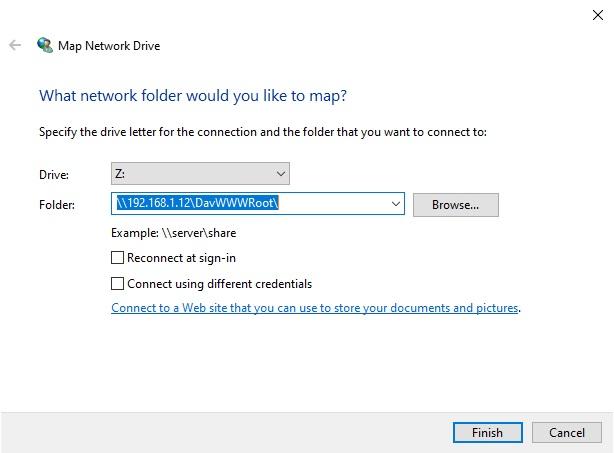
На диск пишет «частями» с паузами.
Зато без зависаний принтера.
Всем творческого настроения, пока.
Подпишитесь на автора
Подпишитесь на автора, если вам нравятся его публикации. Тогда вы будете получать уведомления о его новых статьях.
Отписаться от уведомлений вы всегда сможете в профиле автора.