- How to Mount Ext4 in Windows 10/11
- Mounting Ext4 in Windows Tutorial
- 1. Ext2fsd Driver
- 2. Linux Filesystems for Windows by Paragon
- Extract files from Ext4 partitions in Windows
- 1. Diskinternals Linux Reader
- 2. DiskGenius
- Wrapping Up
- Access Linux filesystems in Windows and WSL 2
- Getting started
- Accessing these files with File Explorer
- Limitations
- Give us your feedback!
- How to Mount and Access Linux Partitions (Ext4/Ext3/Ext2) in Windows Explorer Easily
- Mount Linux Ext4/3/2 Partitions in Windows Explorer using Ext2Fsd
- Author: Jaber Al Nahian
How to Mount Ext4 in Windows 10/11
If you want to use Windows in dual booting with Linux, sometimes you will need to copy files from one operating system to another. There are no problems with opening Windows partitions on Linux because it has excellent support for the NTFS file system. But you can’t open Ext4 or other Linux filesystems in Windows by default.
In this article, I will show a few ways to mount ext4 in Windows 10 or 11. You can add an Ext4 driver to the Windows or just extract required files using special applications.
Mounting Ext4 in Windows Tutorial
1. Ext2fsd Driver
First of all, you can use an open-source Ext* filesystems driver for Windows that is called ex2fsd. It hasn’t been updated since 2017, but still works. I was able to start and successfully use this driver in Windows 10 but not in Windows 11.
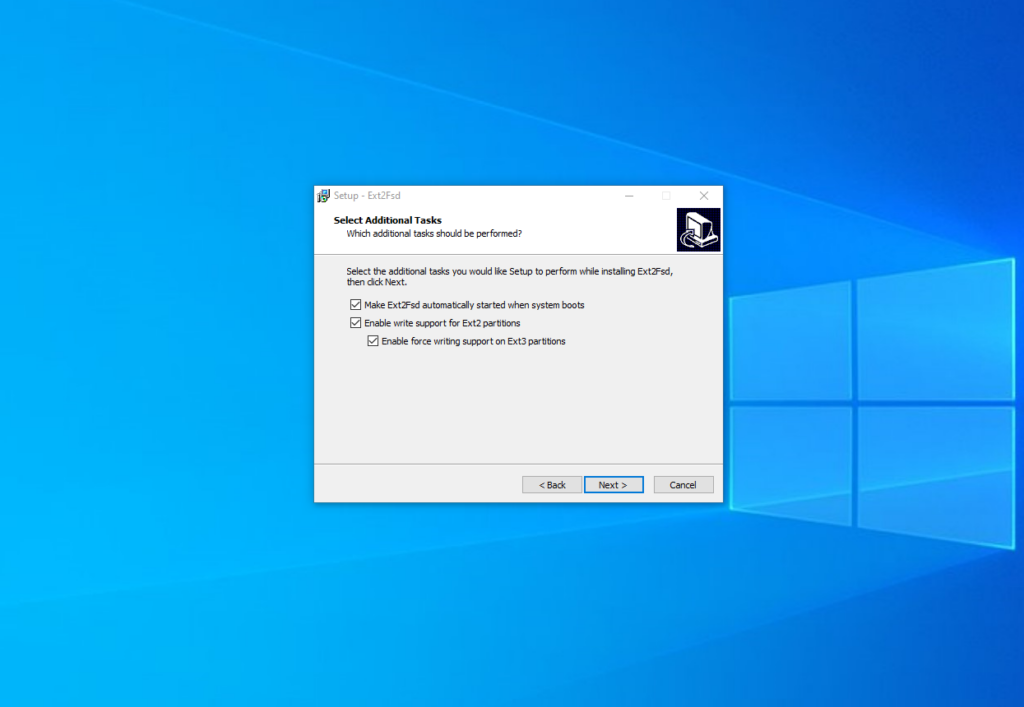
You can download an installer for your version of Windows on the releases page of the project on GitHub. The installation process is easy, just press the Next button in each installation wizard window. Only the following step is interesting:
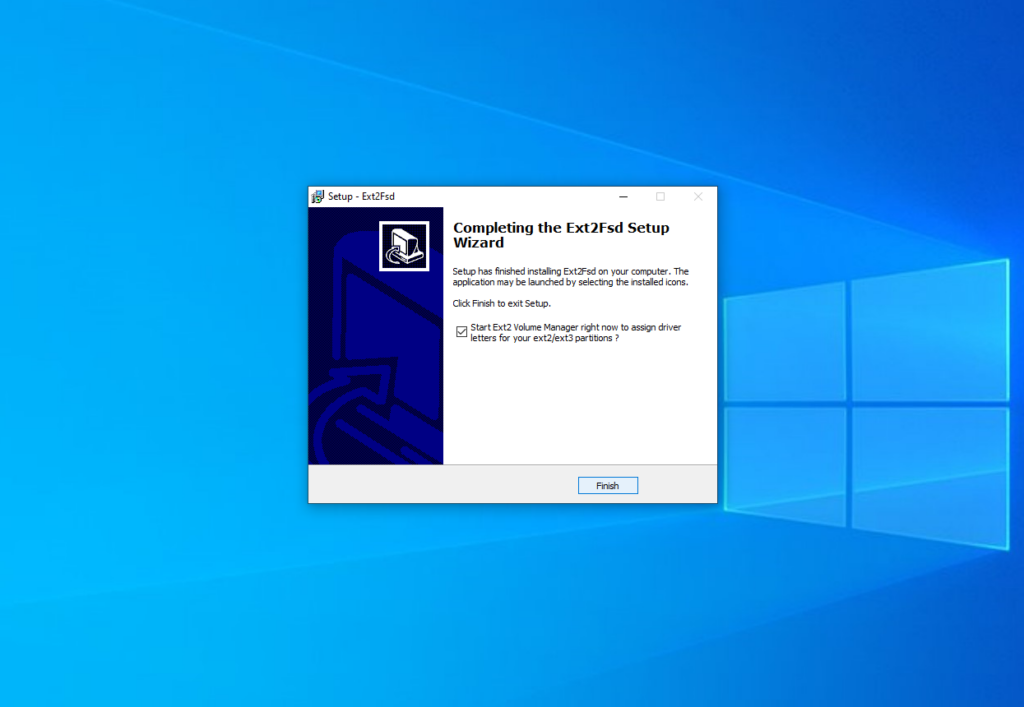
Here you can configure whether the driver should be loaded automatically on the system startup and whether it has writing support for Ext2 and Ext4 filesystems. Check the checkboxes which you want and press Next. In the next window check the Start Ext2 Volume Manager right now to assign drive letters for your ext2/ext3 partitions checkbox to start the mounting manager now:
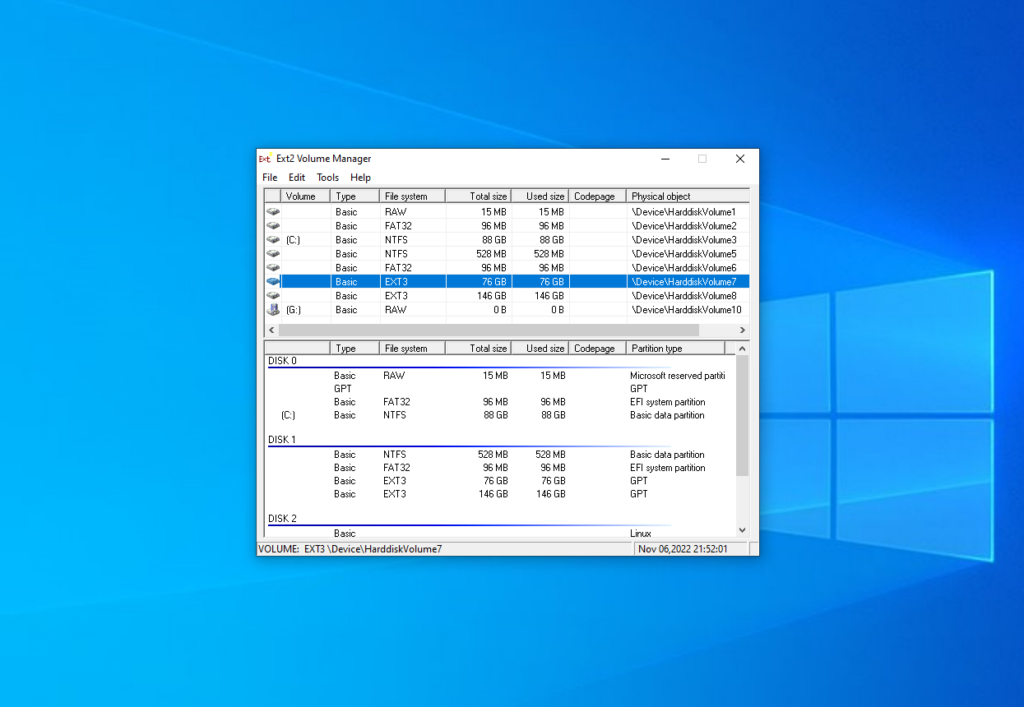
Here is the main application window:
Here you can see all available partitions, their size, and their filesystem. Double-click on any of them to mount it.
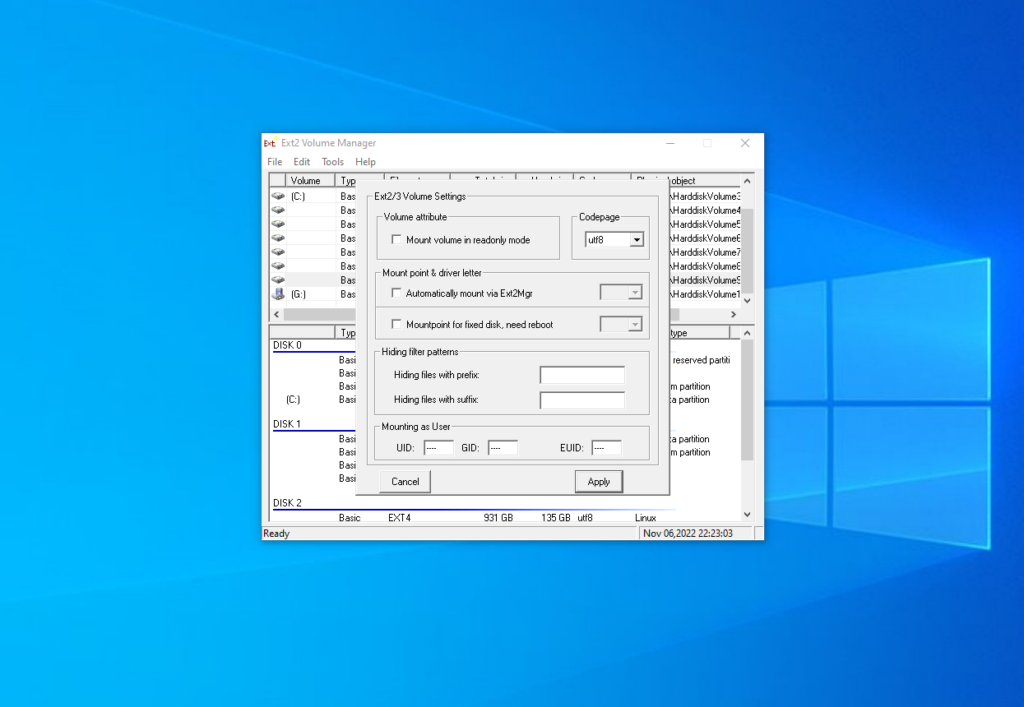
Here are two mounting options:
- Automatically mount via Ext2Mgr — the partition will be mounted for the current session, the application will not mount it after reboot automatically.
- Mountpoint for fixed disk — the partition will be permanently mounted with the same name on the system startup.
Select the drive letter for the partition near the chosen mount type. Also, you can specify in the Hiding files with prefix field which prefixes are used for hidden files. By default, all files which start from a dot are hidden in Linux. After this press the Apply button.
Pay attention that the window with mounting settings should look as well as the window on the screenshot above. If it looks different, something went wrong. If the application does not work, ensure that there are no other applications for mounting Ext4 running or installed. Try to reinstall the application.
If everything is good, open This Computer and you will see your Ext4 drive mounted. The Ext2fsd driver allows you to work with Ext4 partitions as well as you work with regular NTFS or FAT partitions.
2. Linux Filesystems for Windows by Paragon
Paragon Software is the same company that added a new NTFS driver to the Linux kernel in 2021. Also, they developed an application for mounting Ext4 in Windows. It is a filesystem driver as well as Ext2fsd. Its main advantage is that it is actively maintained and developed. Also, it has a modern and pleasing user interface and pretty same functionality. You can mount and unmount Ext4 partitions for reading and writing. In addition, you can mount XFS and Btrfs but only for reading.
The application is paid, but it has a trial version that can be used for 10 days for free. Its price at the moment of writing is almost 20 euros.
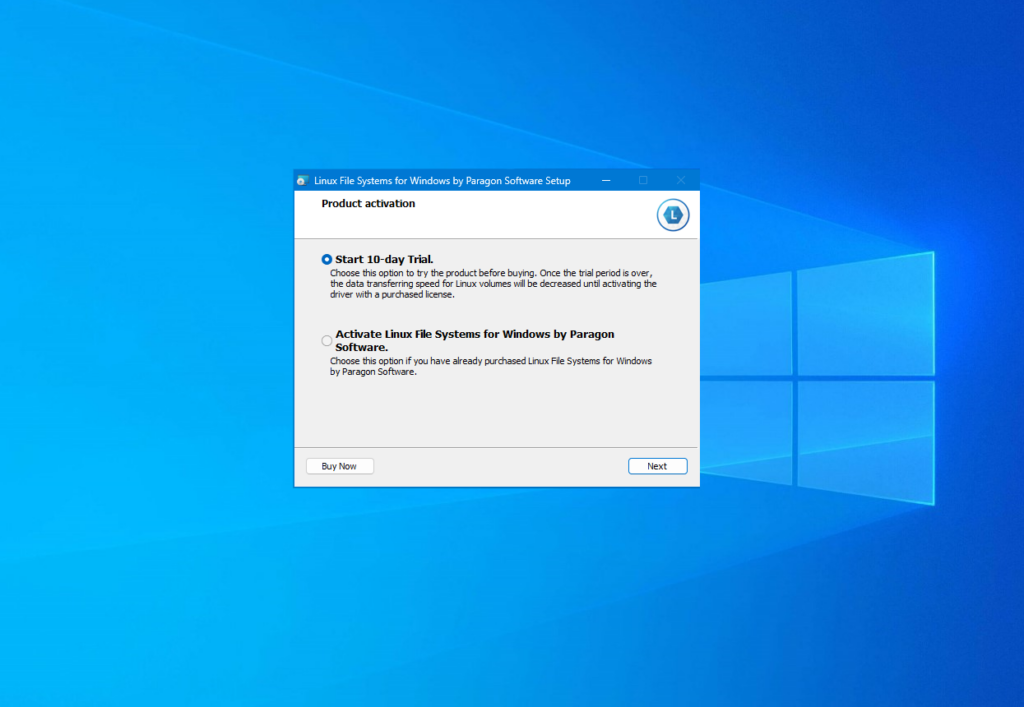
You can download a trial version from the official site. The installation process has nothing unusual, just press the Next button for each step as well as in the previous section. On the activation step, you should start your trial period or activate a license:
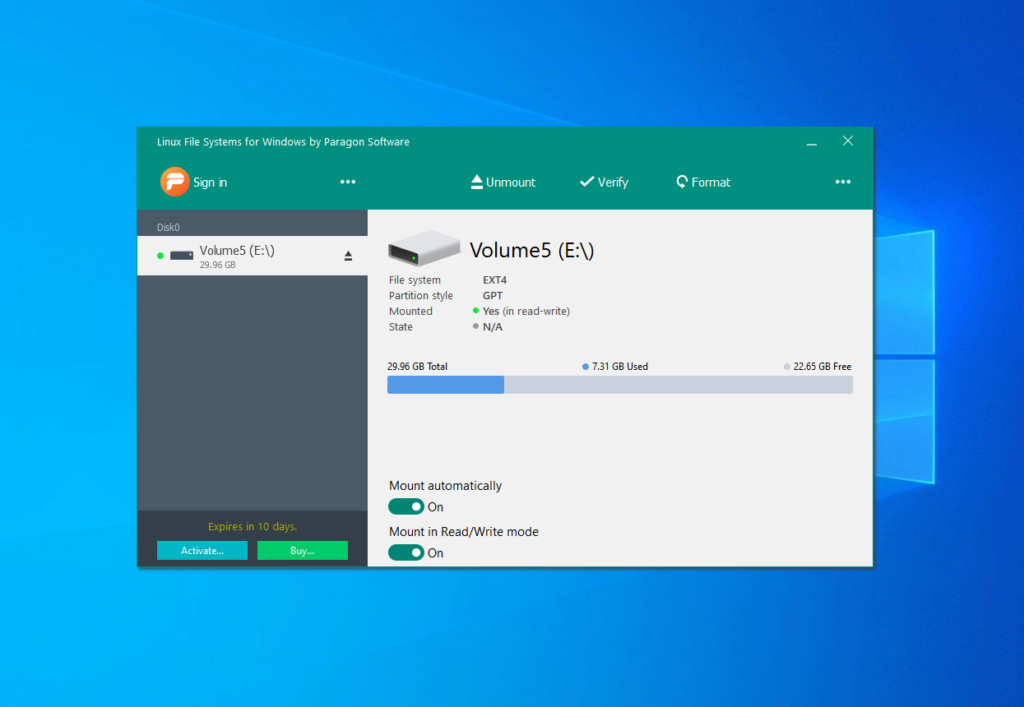
When the installation is complete, the main application window will be opened. The application will mount all available partitions with Linux filesystems:
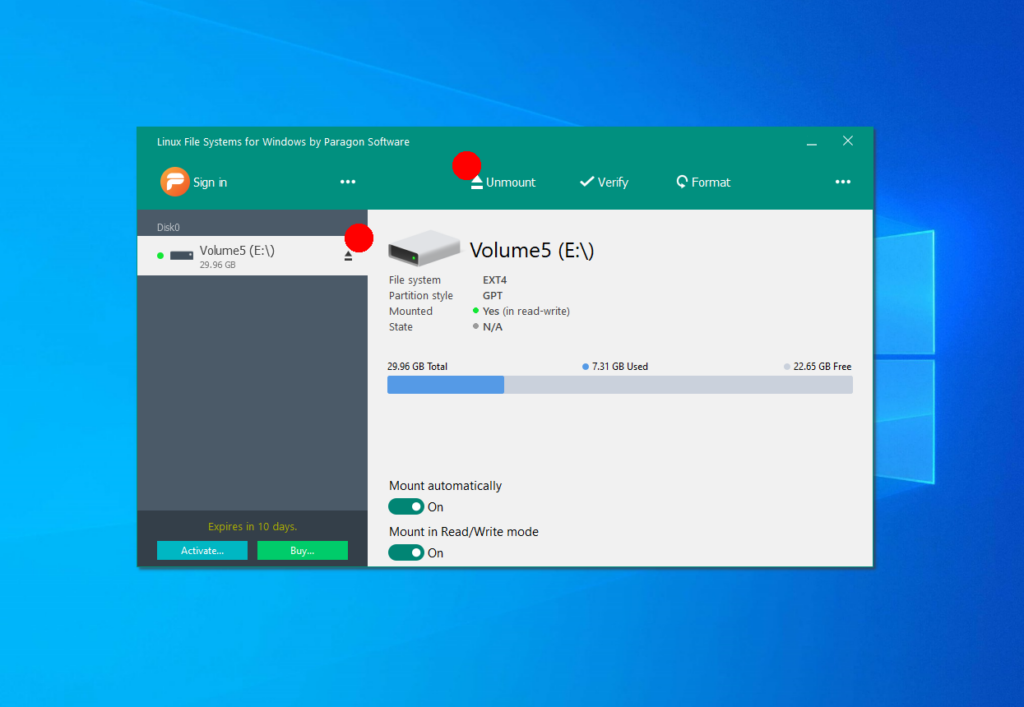
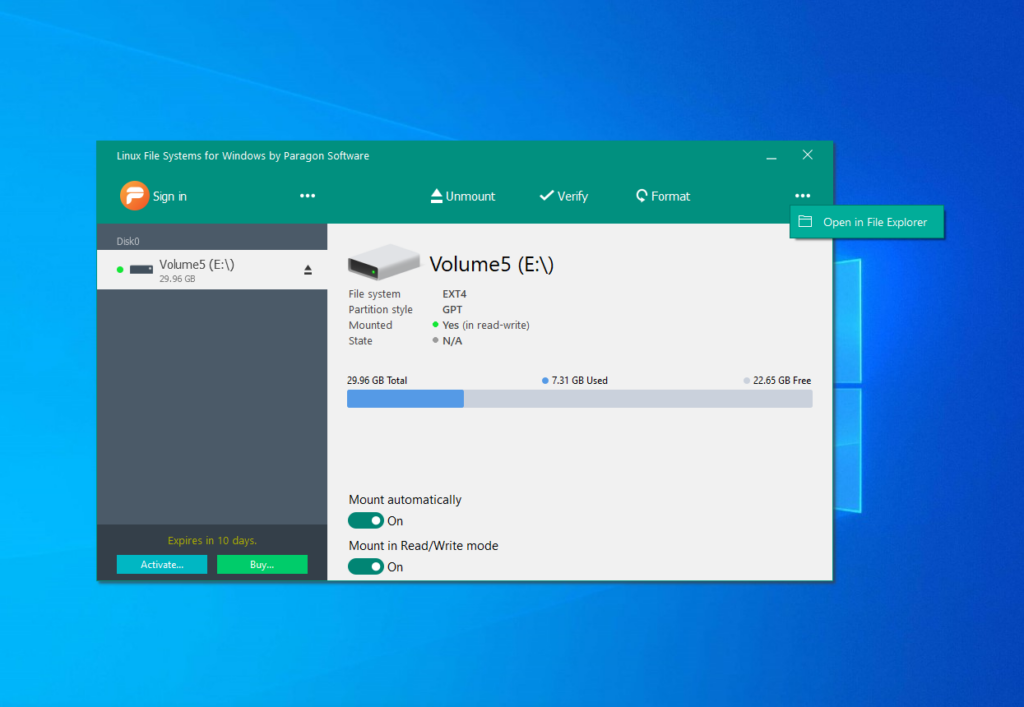
On the left side of the window, you can find the list of available partitions, and on the right — detailed information about each of them. You can unmount the partition by pressing the Unmount button or the button with an arrow near its name:
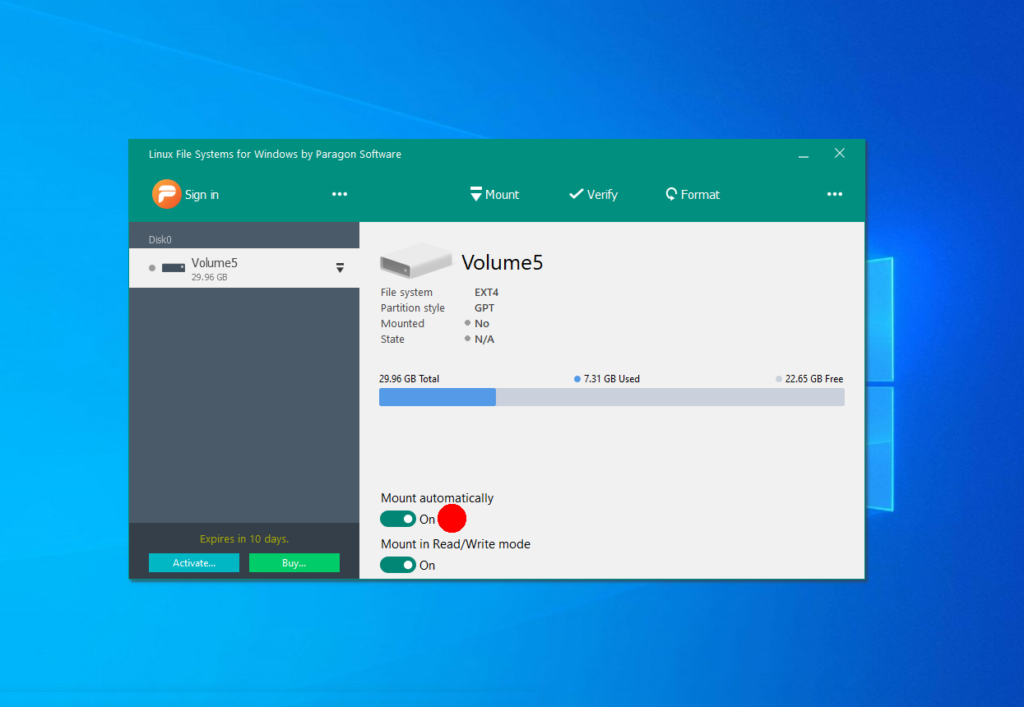
Also, you can check the partitions for errors using the Verify button or format it using the Format button. If you don’t want to mount this partition automatically in the future, disable this feature at the bottom of the window:
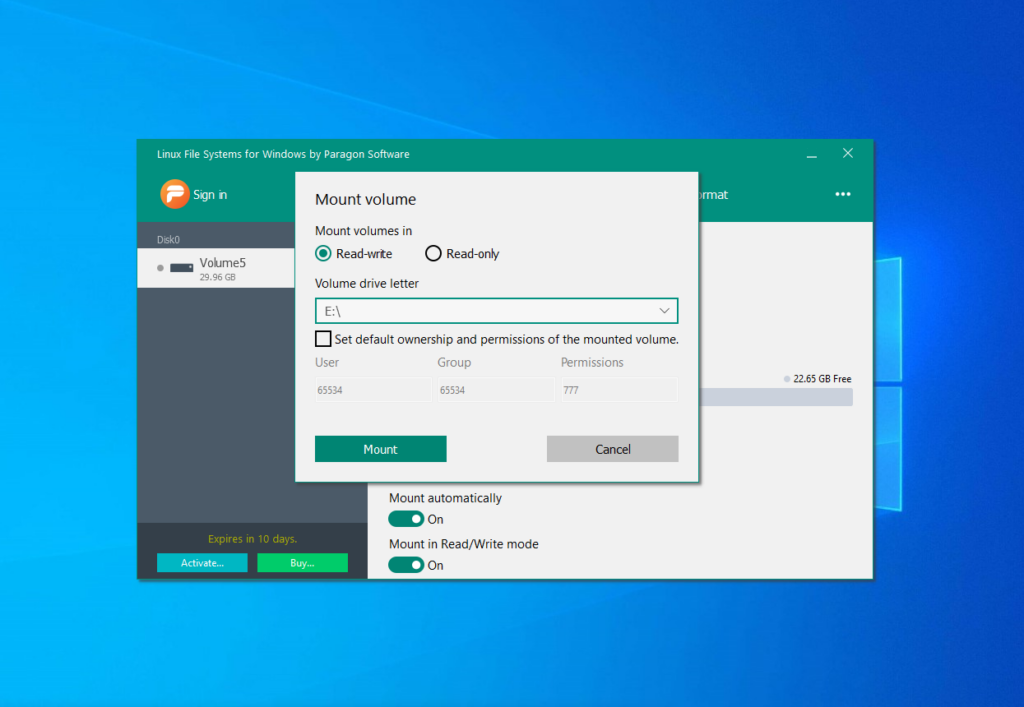
When a partition is unmounted you can mount it by clicking the Mount button. The application will open a new window when you can choose a mounting mode and a volume drive letter:
Then, just open This computer and choose the mounted disk to get access to your files. Now, all Linux partitions are available in Windows. Also, you can use the Open in Explorer button in the application:
Extract files from Ext4 partitions in Windows
1. Diskinternals Linux Reader
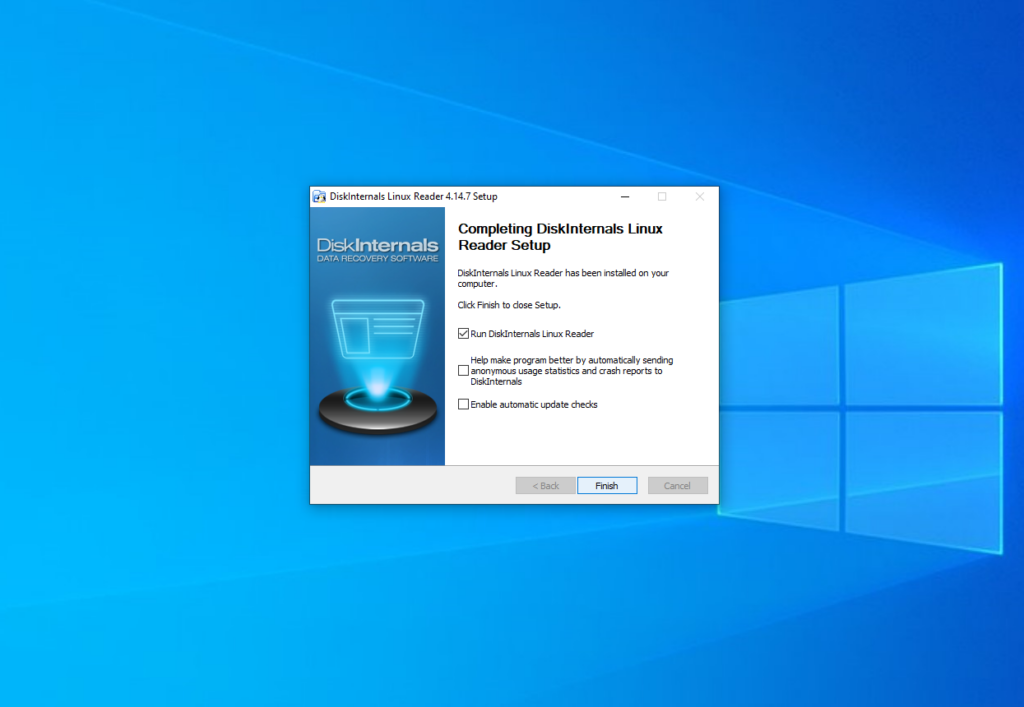
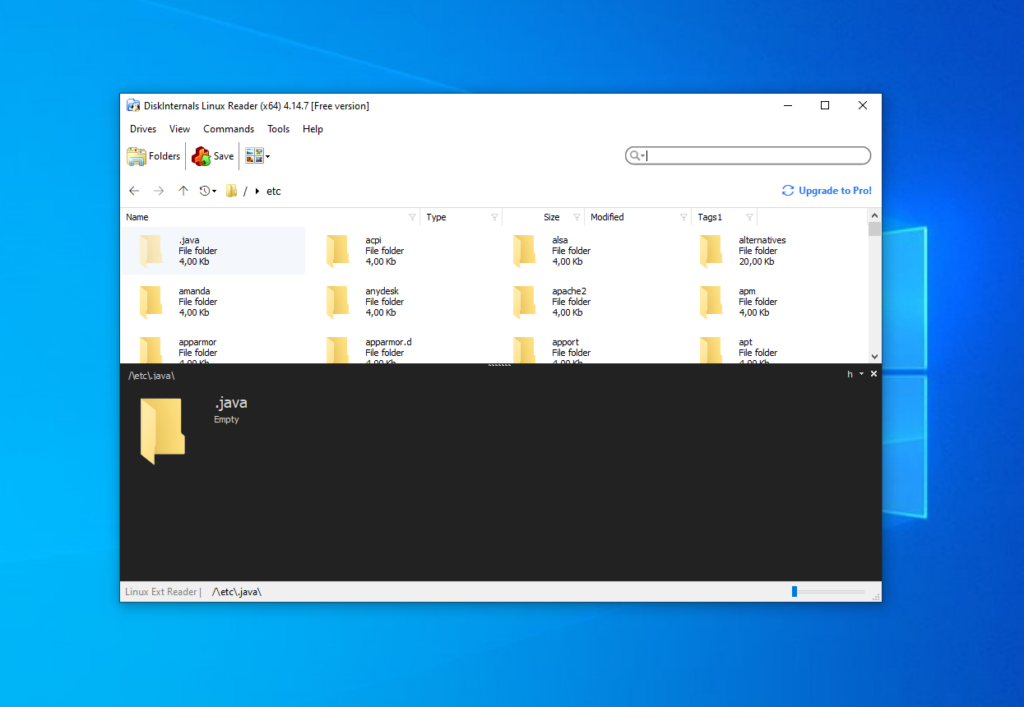
It is the simplest way to open Ext4 in Windows 10 or 11. This application can help you to extract required files from Linux partitions without adding support for this filesystem to Windows. You can download the application from the official site. Then run the installer and just continue pressing the Next button as well as for other applications.
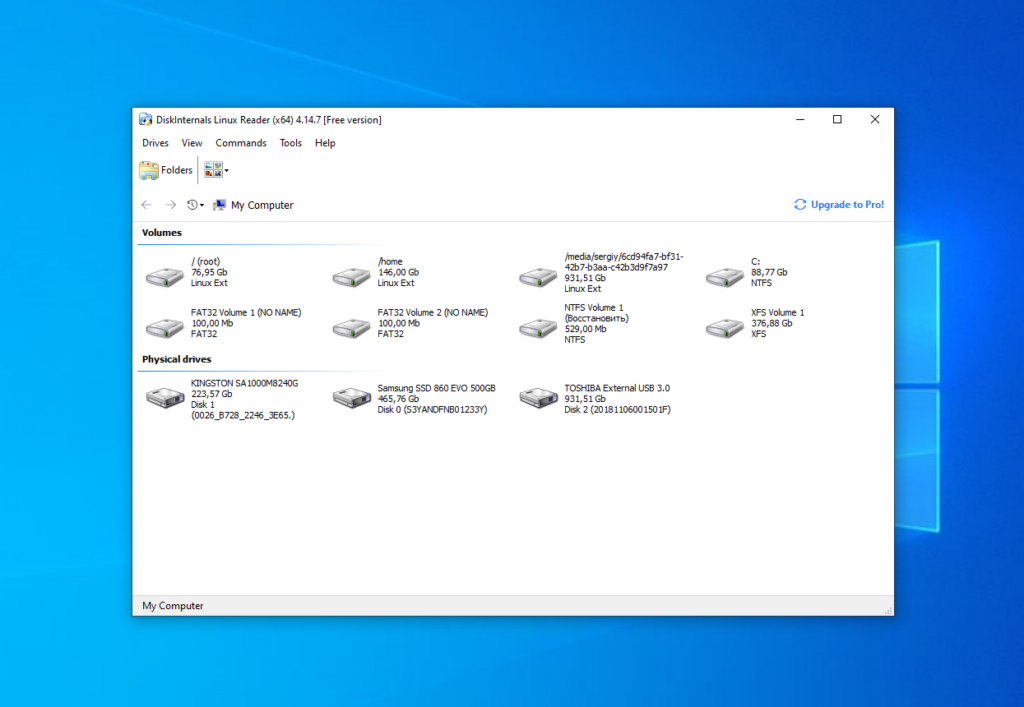
The main application window looks like this:
Here you can choose the required partition with the Ext4 filesystem and view all files which are located there:
The application supports searching too. Just enter the file name, which you want to find and the application will highlight it in the list.
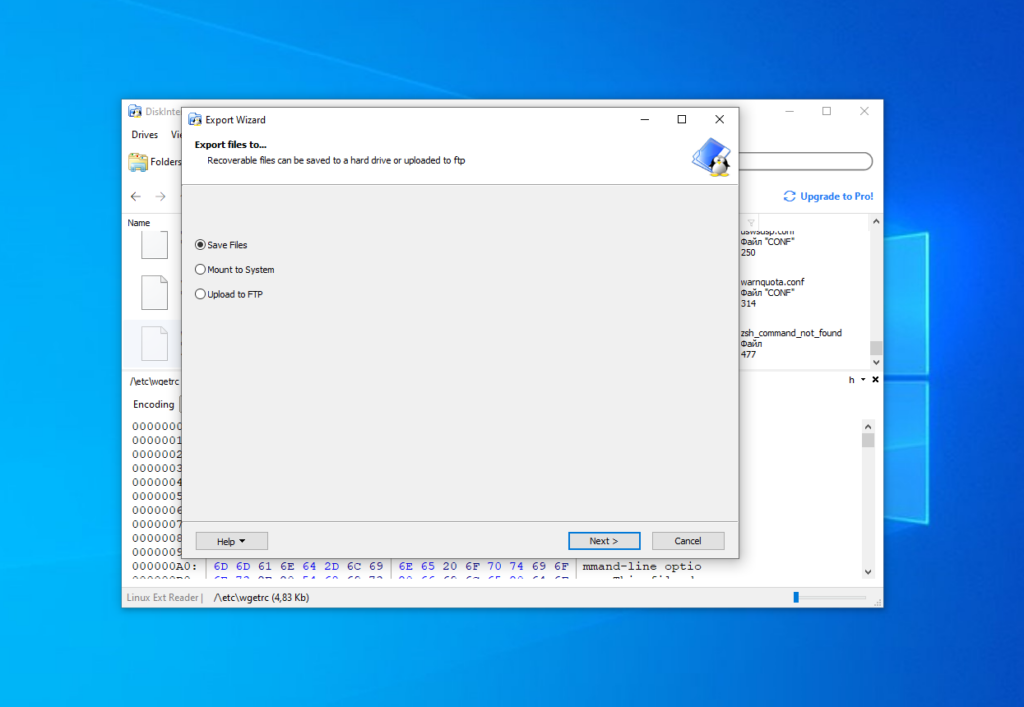
To extract any of the files or folders, right-click on it and choose Save in the contextual menu. Then choose Save files:
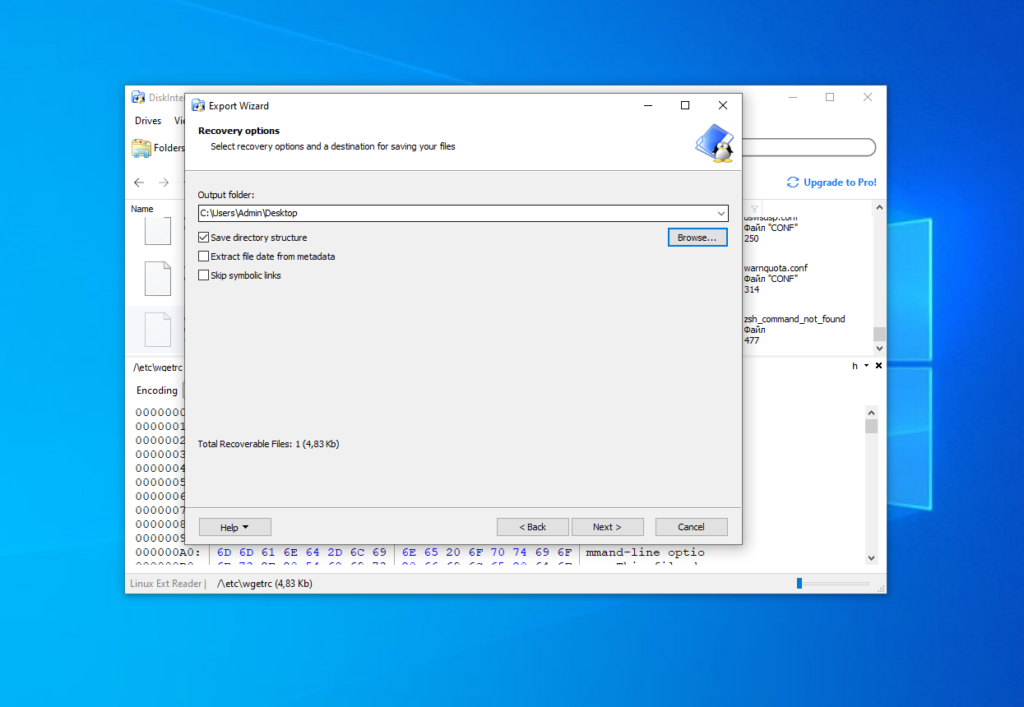
Then, choose the destination folder which will be used for saving the file:
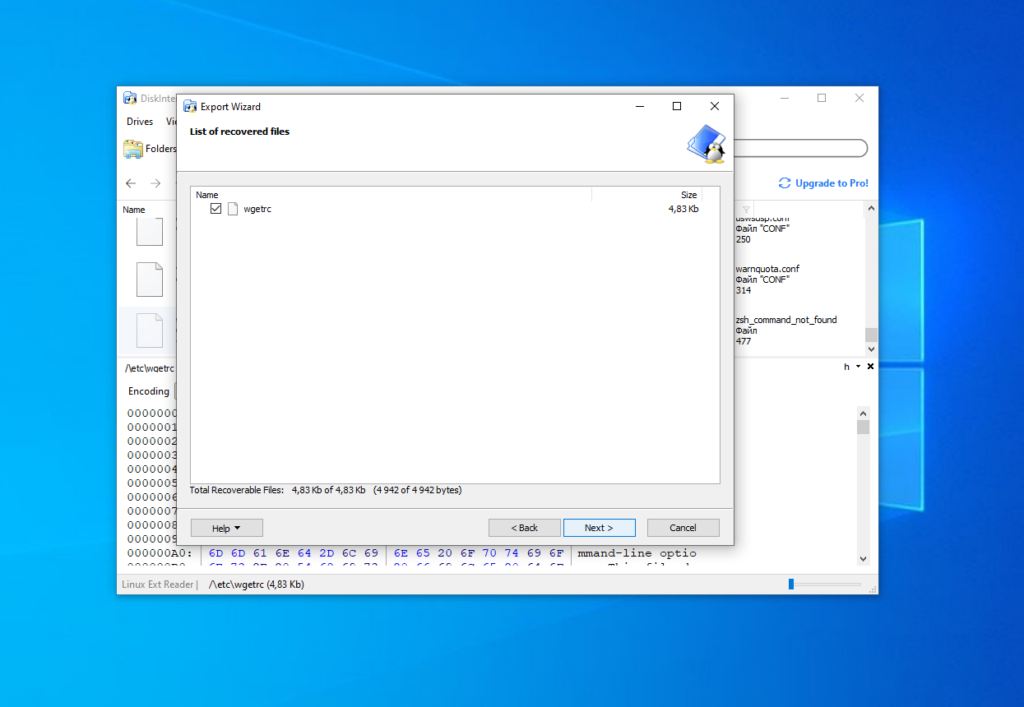
Check the Save directory structure flag if you want. On the next step ensure that all files which you want to extract are in the list and press the Next button:
Finally, wait until the extracting process is complete and do what you want with the files in Windows Explorer.
2. DiskGenius
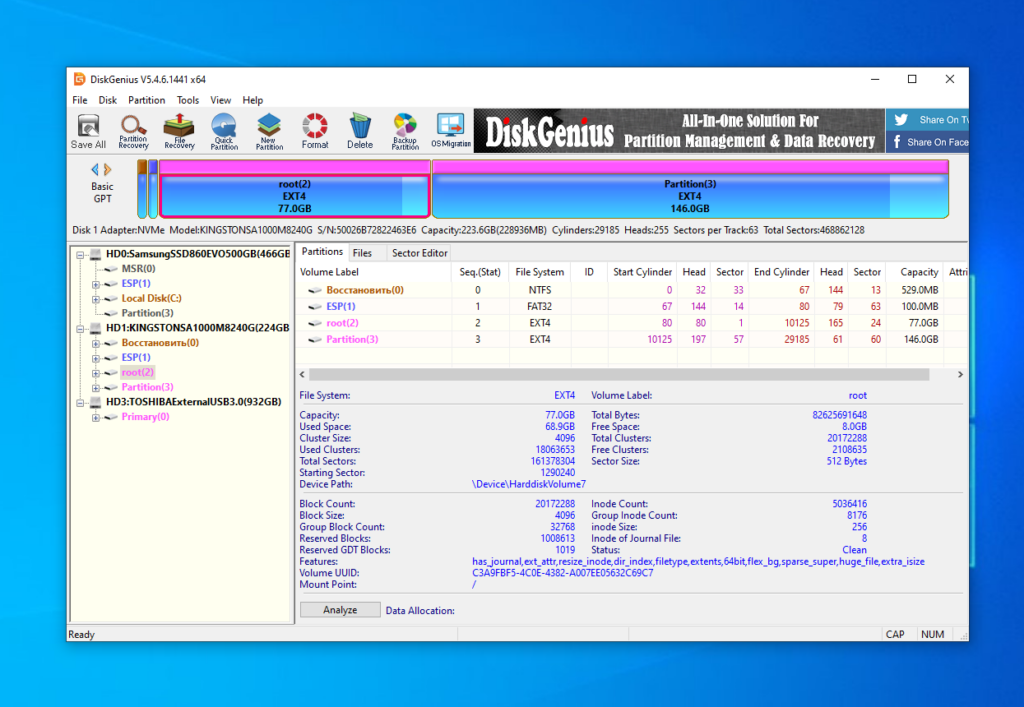
DiskGenius — is a utility for data recovery. It can recover deleted files, deleted partitions, or partition tables. The application supports Ext2/3/4 filesystems and can work not only with deleted files but with regular files too. The utility is paid, but it has a free version that is pretty enough for working with Ext4 partitions. You can download it from the official site. There is nothing remarkable in the installation process of DiskDenius, like other programs. DiskGenius main window looks like this:
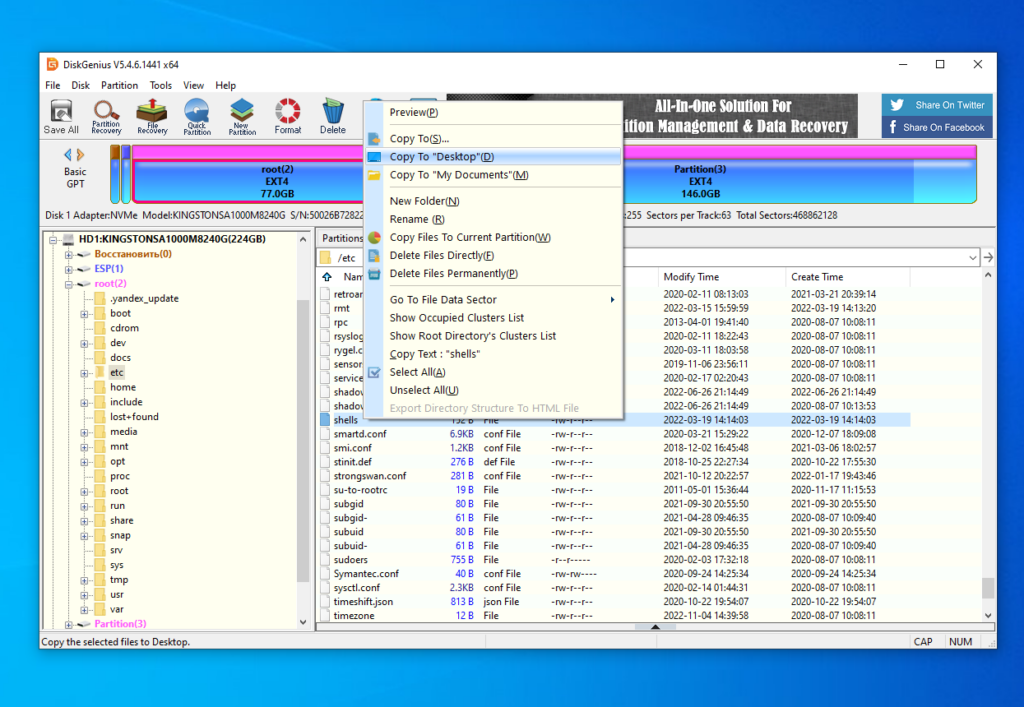
You can find a list of available disks and partitions on the left side of the window. Detailed information about each of them is available on the right panel. You can open each partition and view the list of its directories. Make a double click on any directory to view its contents. It will be displayed on the right side of the window. If you want to extract a file to the desktop, open the contextual menu and click on Copy To «Desktop»:
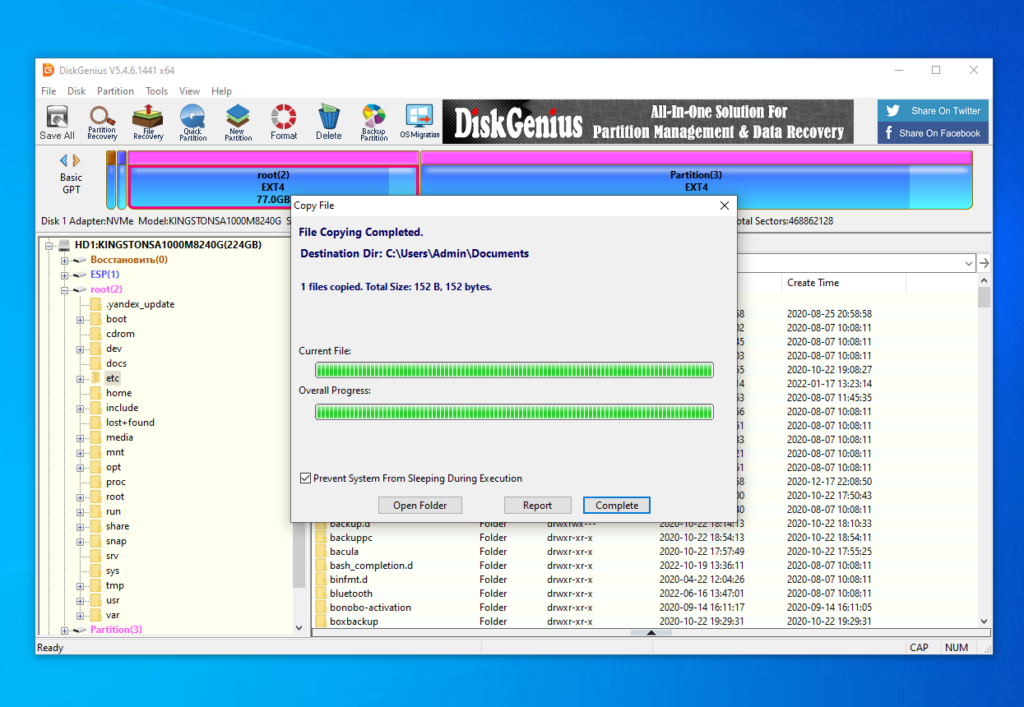
Also, you can click on Copy To or Copy To «My Documents». After this the window with the copying state will be opened:
Then, you will see the file on your desktop or another destination folder which you selected.
Wrapping Up
Now, you have learned how to open Ext4 in Windows 10 and 11. The open-source driver Ext2fsd still works despite not being updated for a long time. If it does not work in your system, you can use Diskinternals or a propertiary driver from Paragon.
There also exist other tools which not described in this article. For example, e2explore. It was discontinued in 2012 and I was unable to launch it. Also, you can find information about utilities which can convert Ext4 into NTFS. But be careful with them. Don’t convert the root or home partition, because this will break your Linux system.
Which tools do you use to access Linux partitions on Windows? What do you prefer more? Tell using the comments section below.
Found a mistake in the text? Let me know about that. Highlight the text with the mistake and press Ctrl+Enter.
Access Linux filesystems in Windows and WSL 2
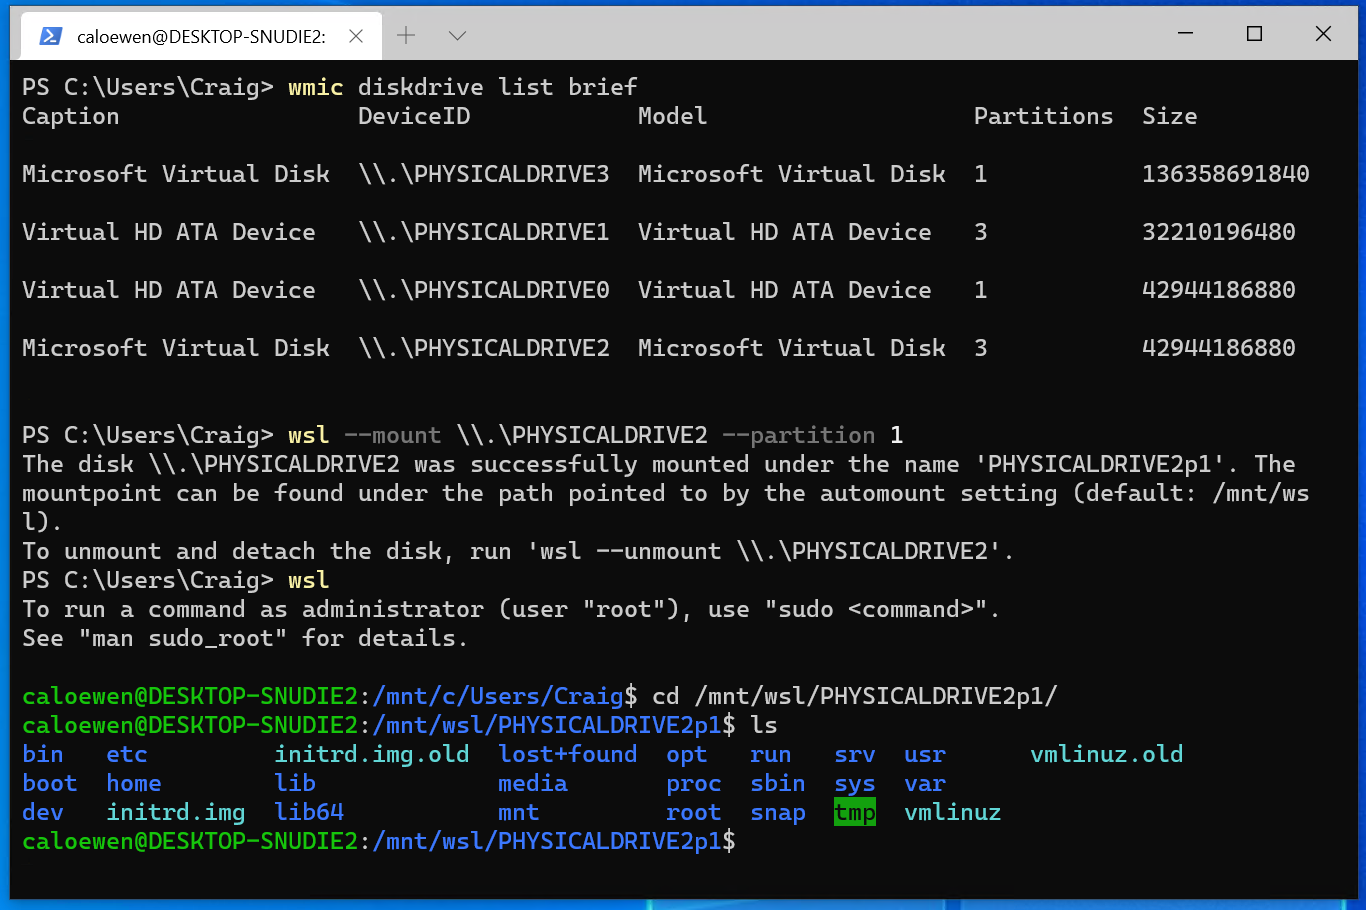
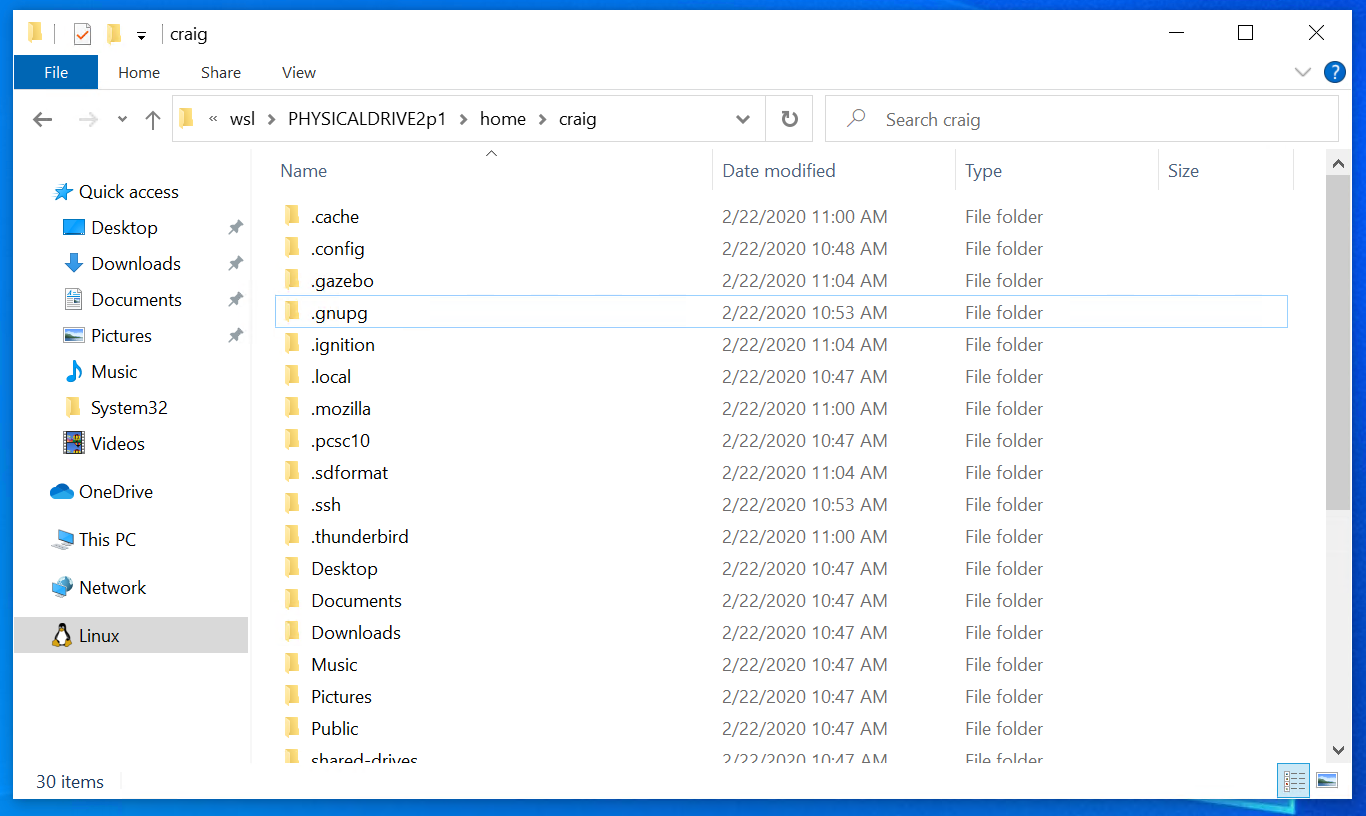
Starting with Windows Insiders preview build 20211, WSL 2 will be offering a new feature: wsl —mount . This new parameter allows a physical disk to be attached and mounted inside WSL 2, which enables you to access filesystems that aren’t natively supported by Windows (such as ext4). So, if you’re dual booting with Windows & Linux using different disks, you can now access your Linux files from Windows!
Getting started
wmic diskdrive list brief The disks paths are available under the ‘DeviceID’ columns. Usually under the \\.\\\.\PHYSICALDRIVE* format. Below is an example of mounting a specific partition of a given hard disk into WSL and browsing its files.
Accessing these files with File Explorer
Once mounted, it’s also possible to access these disks through the Windows explorer by navigating to \wsl$ and then to the mount folder.
Limitations
By default, wsl —mount attempts to mount the disk as ext4. To specify a filesystem, or for more advanced scenarios, check out Mount a disk in WSL 2. Also please note that this feature comes with the limitation that only physical disks can be attached to WSL 2. At this time, it’s not possible to attach a single partition. More details on the limitations here.
Give us your feedback!
If you run into any issues, or have feedback for our team please file an issue on our Github , and if you have general questions about WSL you can find all of our team members that are on Twitter on this twitter list.
How to Mount and Access Linux Partitions (Ext4/Ext3/Ext2) in Windows Explorer Easily
This article guides you on how you can access Linux File-system Ext2, Ext3 and Ext4 partitions in Windows 10 and automatically keep them mounted in Explorer like other NTFS or FAT32 partitions. You can even read or write to those partitions.
While Windows uses NTFS and FAT32 file-system, Linux (such as Ubuntu) uses extended file-system architectures Ext 3, Ext4, etc. Though Linux can access, read and write to Windows file-systems, Windows can’t access Linux file-systems. I mean, Windows has no support to read or access Ext3 or Ext4 partitions.
Thus, if you have a dual-boot or multi-boot system where you can switch between Windows and Linux from boot menu, you may sometimes need access to Linux drives/partitions. Or suppose, you are on Windows and you have an HDD or removable drive which is formatted in Ext3 and now you need to read files inside it. Or your Linux system is crashed and you need to recover your important files using Windows. In such cases your need to read those file-systems without switching from Windows.
Though Windows had never interest on Linux file-systems, fortunately there are third-party drives and tools to open and read Linux partitions from Windows. We will review multiple tools in a future article. However, here we will use an opensource Linux file-system driver called Ext2Fsd which is solely made to bring Ext2/3/4 support in Microsoft Windows. With this you can automatically mount Ext partitions on boot or mount just when you need.
Mount Linux Ext4/3/2 Partitions in Windows Explorer using Ext2Fsd
- Download Ex2Fsd from sourceforge.net/projects/ext2fsd/.
- While installing, mark “Make Ext2Fsd automatically started when system boots” and hit Next and finish the setup. It will auto-start Ex2Fsd driver with Windows from next reboot.
- Start Ext2Fsd Volume Manager. With this, you can set mount point and settings.
- To assign a volume latter, double-click on the partition (or choose the partition and select Tools >Ex2 Volume Management), enable “Mountpoint for fixed disk” and assign a drive letter. Hit Apply then.
- On next reboot of Windows, you will see your desired Linux partition is mounted in Explorer as other standard partitions.
- You can also set your custom name by renaming the default name “Local Disk”. That’s it.
Note 1: Keeping your Linux partitions read-only is recommended so that you or your system cannot introduce any harm to the Linux system.
Note 2: If you don’t want Ext2Fsd automatically mount a disk in Explorer on boot, you can mark “Automatically mount via Ex2Mgr”. With this, your partition will only mount when you open Ex2Fsd Volume Manager as below:
Note 3: At the installation time of Ext2Fsd, if you didn’t set Ex2Fsd service to automatically start with windows, you need to manually start the service from Tools > Service Management > Start as below:
Recovering Personal Files
If you are looking for accessing your personal files that your stored when you were on Linux, head to home\name\ as below:
Though this guide is made on Windows 7, I have tested it on Windows 10 and should also work on Windows 8.x according to its authors. Being able to view and read all partitions from both OS is obviously a cool feature for those who use both Linux and Windows on same machine.
Author: Jaber Al Nahian
Jaber is a Programmer and Tech Enthusiast Geek from Dhaka, Bangladesh. He is the founder and Chief-Editor of TechGainer. While he is away from his keyboard, either he’s fishing or messing with wildlife. In case, you can contact him at rijans[at]techgainer[dot]com.
