- How to Mount an NFS Share in Linux
- Installing NFS Client Packages #
- Manually Mounting an NFS File Systems #
- Automatically Mounting NFS File Systems with /etc/fstab #
- Unmounting NFS File Systems #
- Conclusion #
- Create an NFS server on Oracle Linux
- Objectives
- What Do You Need?
- Install the NFS Utilities Package on the Server Instance
- Create an NFS Share
- Start the NFS Server
- Add Another Share
- Install the NFS Utilities Package on the Client Instance
- Mount the NFS Share
- Root Squashing
- Mount Share Using fstab
- More Learning Resources
How to Mount an NFS Share in Linux
Network File System (NFS) is a distributed file system protocol that allows you to share remote directories over a network. With NFS, you can mount remote directories on your system and work with the remote files as if they were local files.
On Linux and UNIX operating systems, you can use the mount command to mount a shared NFS directory on a particular mount point in the local directory tree.
In this tutorial, we will show you how to manually and automatically mount an NFS share on Linux machines.
Installing NFS Client Packages #
To mount an NFS share on a Linux system first you’ll need to install the NFS client package. The package name differs between Linux distributions.
- Installing NFS client on Ubuntu and Debian:
sudo apt updatesudo apt install nfs-common
sudo yum install nfs-utilsManually Mounting an NFS File Systems #
Mounting a remote NFS share is the same as mounting regular file systems.
To mount an NFS file system on a given mount point, use the mount command in the following form:
mount [OPTION. ] NFS_SERVER:EXPORTED_DIRECTORY MOUNT_POINT Use the steps below to manually mount a remote NFS share on your Linux system:
- First, create a directory to serve as the mount point for the remote NFS share:
sudo mount -t nfs 10.10.0.10:/backups /var/backupsOnce the share is mounted, the mount point becomes the root directory of the mounted file system.
When you are manually mounting the share, the NFS share mount does not persist after a reboot.
Automatically Mounting NFS File Systems with /etc/fstab #
Generally, you will want to mount the remote NFS directory automatically when the system boots.
The /etc/fstab file contains a list of entries that define where how and what filesystem will be mounted on system startup.
To automatically mount an NFS share when your Linux system starts up add a line to the /etc/fstab file. The line must include the hostname or the IP address of the NFS server, the exported directory, and the mount point on the local machine.
Use the following procedure to automatically mount an NFS share on Linux systems:
- Set up a mount point for the remote NFS share:
# 10.10.0.10:/backups /var/backups nfs defaults 0 0mount /var/backups mount 10.10.0.10:/backupsUnmounting NFS File Systems #
The umount command detaches (unmounts) the mounted file system from the directory tree.
To detach a mounted NFS share, use the umount command followed by either the directory where it has been mounted or remote share:
umount 10.10.0.10:/backupsumount /var/backups
If the NFS mount have an entry in the fstab file, remove it.
The umount command will fail to detach the share when the mounted volume is in use. To find out which processes are accessing the NFS share, use the fuser command:
Once you find the processes you can stop them with the kill command and unmount the NFS share.
If you still have problems unmounting the share use the -l ( —lazy ) option which allows you to unmount a busy file system as soon as it is not busy anymore.
If the remote NFS system is unreachable, use the -f ( —force ) option to force an unmount.
Generally not a good idea to use the force option as it may corrupt the data on the file system.
Conclusion #
We have shown you how to mount and unmount a remote NFS share. The same commands apply for any Linux distribution, including Ubuntu, CentOS, RHEL, Debian and Linux Mint.
Feel free to leave a comment if you have any questions.
Create an NFS server on Oracle Linux
The following tutorial provides step-by-step procedures to install and configure an NFS Server and mount the NFS shares. This tutorial is targeted at users of Oracle Linux 8 or later.
Objectives
What Do You Need?
Install the NFS Utilities Package on the Server Instance
Note: When using the free lab environment, see Oracle Linux Lab Basics for connection and other usage instructions.
- Open a terminal and connect to your server instance.
- Install the NFS utilities package.
sudo dnf install -y nfs-utils 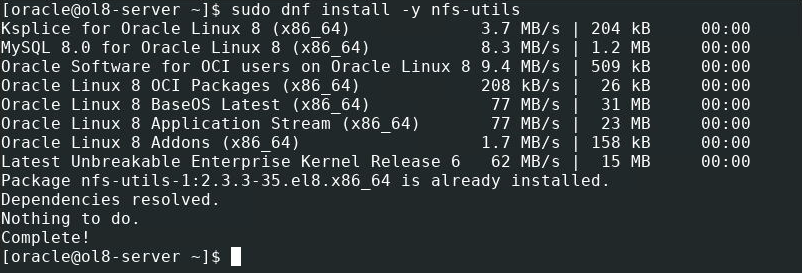
This command will install the daemon and tools associated with the kernel NFS server.
Create an NFS Share
sudo fallocate -l 10MB /nfs-share/file1 sudo fallocate -l 10MB /nfs-share/file2 echo "This is a shared text file." | sudo tee /nfs-share/shared-text.txt > /dev/null 
Change permissions on the files.
sudo chmod -R 777 /nfs-share echo "/nfs-share (rw)" | sudo tee -a /etc/exports > /dev/null Start the NFS Server
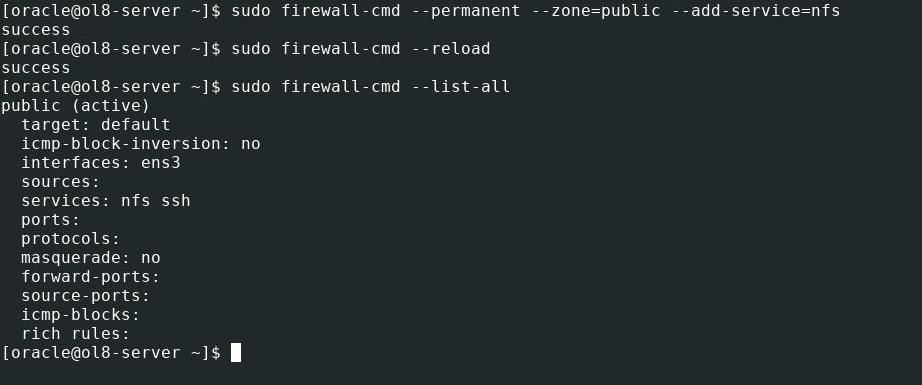
sudo firewall-cmd --permanent --zone=public --add-service=nfs sudo firewall-cmd --reload sudo firewall-cmd --list-all - —permanent ensures the setting persists a system reboot.
- —list-all will display the firewall settings and show that NFS traffic is allowed.
sudo systemctl enable --now nfs-server showmount -e The showmount command displays the shares available using the NFS server. 

Add Another Share
sudo exportfs -i -o rw *:/nfs-share2 showmount -e - -i causes the new share to ignore any values set in /etc/exports
- -o passes the share options
- * makes the share available to all clients

sudo systemctl restart nfs-server showmount -e 
Add the new share to /etc/exports to persist system restarts.
echo "/nfs-share2 *(rw)" | sudo tee -a /etc/exports > /dev/null sudo exportfs -r showmount -e - -r in exportfs refreshes the export list with any changes made to /etc/exports .

Install the NFS Utilities Package on the Client Instance
- Open a terminal and connect to your client instance.
- Install the NFS utilities package.
sudo dnf install -y nfs-utils 
This command will install the daemon and tools associated with the kernel NFS server.
Mount the NFS Share
- Create a directory for the mount point. shell (client) sudo mkdir /nfs-mount
- Mount the share and get a directory listing.
sudo mount :/nfs-share /nfs-mount ls -lh /nfs-mount Where 

Root Squashing
Enabled by default in Oracle Linux 8, “root squashing” is a share-level configuration option that prevents a remote root user from having root access to the network file system. It is recommended to leave “root squashing” enabled for proper security, but the following steps will show available access when disabled.
- Try changing permissions on a file in the NFS share from the client instance.
sudo chmod 766 /nfs-mount/shared-text.txt 
The output shows permission denied even though the command uses sudo .
Disable root_squash on the share using the server instance.
echo "/nfs-share (rw,no_root_squash)" | sudo tee /etc/exports > /dev/null sudo systemctl restart nfs-server sudo chmod 766 /nfs-mount/shared-text.txt ls -lh /nfs-mount 
The output shows the execute permissions removed from the group and other columns.
Mount Share Using fstab
To have the mounted share available after a reboot of the client instance, add an entry to the fstab file.
sudo umount /nfs-mount ls -lh /nfs-mount 
The ls -lh shows the directory is empty and therefore not mounted.
Update the fstab file.
echo ":/nfs-share /nfs-mount nfs rw 0 0" | sudo tee -a /etc/fstab > /dev/null tail -n5 /etc/fstab 
Replace
Mount and verify the share is accessible.
sudo mount -a ls -lh /nfs-mount 
More Learning Resources
Explore other labs on docs.oracle.com/learn or access more free learning content on the Oracle Learning YouTube channel. Additionally, visit education.oracle.com/learning-explorer to become an Oracle Learning Explorer.
For product documentation, visit Oracle Help Center.
Create an NFS server on Oracle Linux
Copyright © 2021, Oracle and/or its affiliates.