- Подключение и настройка SSHFS в Linux
- Подключение SSHFS в Linux
- Автоматическое монтирование SSHFS
- Выводы
- SSHFS
- Installation
- Mounting
- Unmounting
- Options
- Chrooting
- Automounting
- On demand
- On boot
- Secure user access
- Troubleshooting
- Checklist
- Connection reset by peer
- Remote host has disconnected
- fstab mounting issues
- Some directories are empty
- Files not refreshed
- Limited transfer on fast network
- See also
Подключение и настройка SSHFS в Linux
Файловая система SSHFS (Secure Shell FileSystem) позволяет монтировать файловую систему удалённого сервера с помощью протокола SSH. Это может быть очень удобно, если вам надо передать на удалённый сервер много данных или скачать эти данные оттуда. Конечно, существует утилита scp, но иногда просматривать файловую систему в файловом менеджере намного удобнее.
В этой небольшой статье мы рассмотрим как выполняется подключение SSHFS в Linux, а также как настроить автоматическое монтирование этой файловой системы при загрузке.
Подключение SSHFS в Linux
Для работы файловой системы достаточно SSH доступа к удалённому серверу. На клиентской машине надо установить пакет sshfs. Если он не установлен, команда установки в Ubuntu будет выглядеть следующим образом:
Монтирование SSHFS выполняется с помощью одноимённой команды. Её синтаксис такой:
$ sshfs опции имя_пользователя @ адрес : /путь /точка/монтирования
Например, чтобы примонтировать удалённую файловую систему по адресу 192.168.56.103 от имени пользователя root достаточно выполнить:
sudo sshfs root@192.168.56.103:/ /mnt
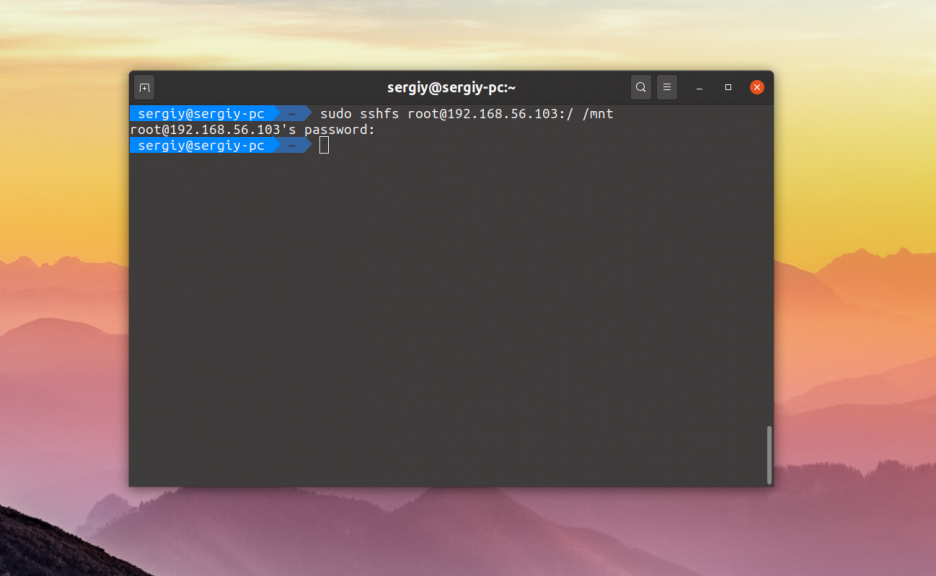
Теперь вы сможете просмотреть содержимое файловой системы. Но здесь есть одно несколько минусов, во первых — не всегда удобно монтировать файловую систему от имени суперпользователя, а во вторых примонтированная файловая система будет доступна для чтения и записи только суперпользовтелю.
Чтобы получить возможность монтировать от имени обычного пользователя необходимо создать группу fuse:
Затем добавить текущего пользователя в эту группу:
sudo usermod -aG fuse $USER
После этого перелогиньтесь в системе, чтобы изменения применились. От имени обычного пользователя вы не сможете примонтировать sshfs в /mnt потому что у вас нет права записи в эту папку, создайте папку для монтирования в домашней папке:
Далее можно пытаться монтировать:
sshfs root@192.168.56.103:/ ~/mnt
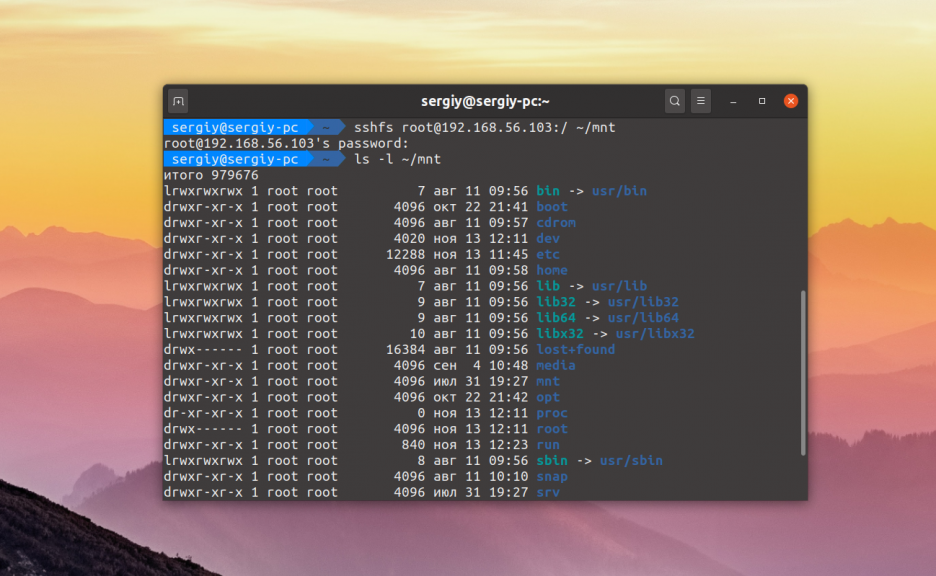
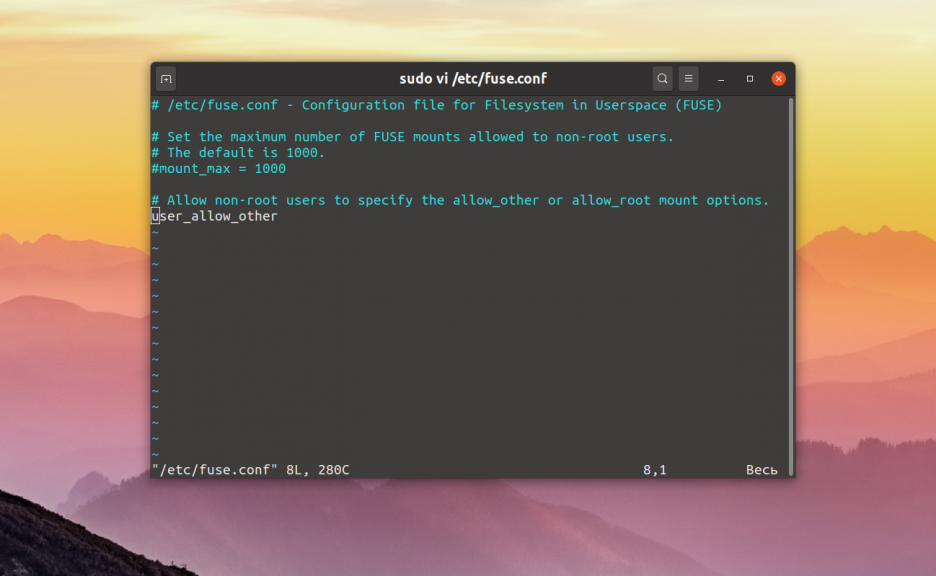
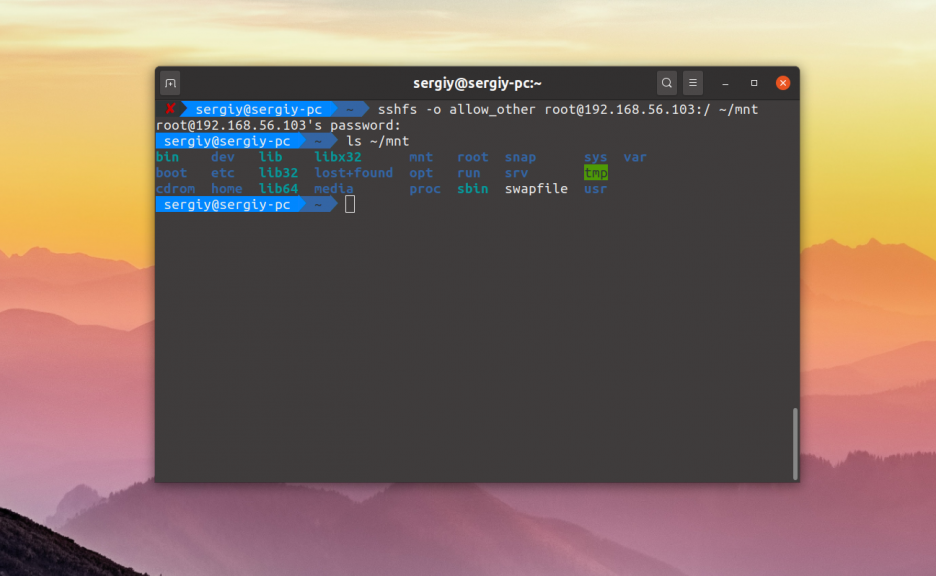
Теперь вы можете использовать эту папку для того чтобы обмениваться файлами с сервером. Если надо чтобы и другие пользователи могли получать доступ к этой папке, надо использовать опцию allow_other. Она будет работать только если в файле /etc/fuse.conf присутствует опция user_allow_other. Добавьте её:
sshfs -o allow_other root@192.168.56.103:/ ~/mnt
Для того чтобы отмонтировать файловую систему используйте привычную команду umount:
Автоматическое монтирование SSHFS
Вы можете настроить автоматическое монтирование SSHFS в файле /etc/fstab. Для этого сначала вам придется создать SSH ключ и отправить его на удалённый сервер. Создайте новый ключ:
Затем передайте его на сервер:
ssh-copy-id -i ~/.ssh/id_dsa.pub root@192.168.56.103
Когда ключ будет загружен, будет достаточно передать утилите в опциях монтирования путь к ключу. Чтобы убедится, что всё работает выполните:
sshfs -o identityfile=~/.ssh/id_dsa.pub root@192.168.56.103:/ ~/mnt
Если всё работает, можно составить сточку конфигурации для /etc/fstab:
root@192.168.56.103:/ /mnt fuse.sshfs noauto,x-systemd.automount,_netdev,follow_symlinks,identityfile=/home/sergiy/.ssh/id_dsa,allow_other,default_permissions,reconnect 0 0

Путь к файлу ключа должен быть полным, поэтому замените имя пользователя на своё. Для того, чтобы не получать ошибок доступа при записи желательно чтобы имя пользователя на локальной машине и на удалённой совпадали. Или же, можно указать ID пользователя и группы владельца во время монтирования. Сначала посмотрите UID и GID текущего пользователя:
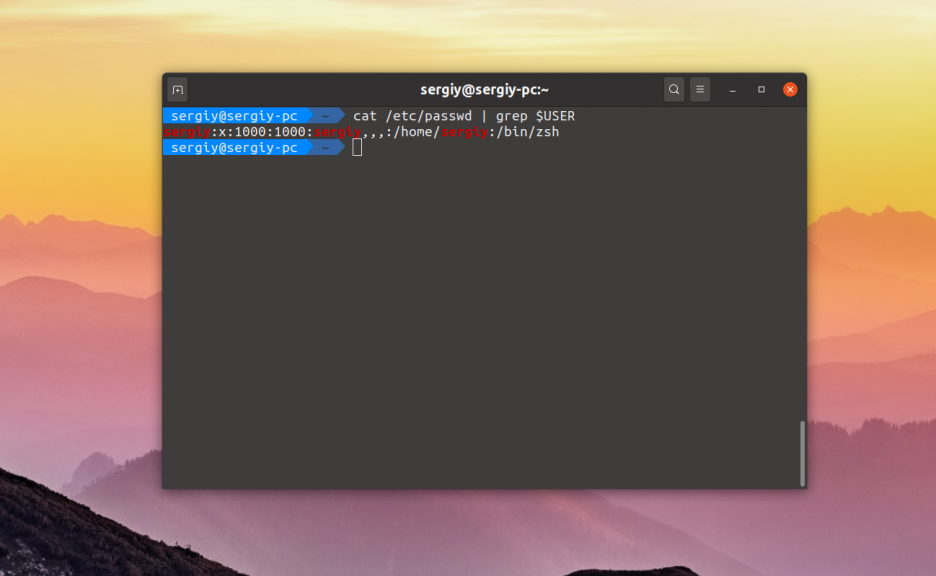
В данном случае, это 1000. Первая цифра — это UID, вторая — GID. Затем передайте их в опциях монтирования uid и gid:
root@192.168.56.103:/ /mnt fuse.sshfs uid=1000,gid=1000,noauto,x-systemd.automount,_netdev,follow_symlinks,identityfile=/home/sergiy/.ssh/id_dsa,allow_other,default_permissions,reconnect 0 0
Теперь всё должно работать.
Выводы
Теперь вы знаете как выполняется подключение и настройка SSHFS Linux. Как видите, это не очень сложно, но в то же время удобно для передачи большого количества файлов.
Обнаружили ошибку в тексте? Сообщите мне об этом. Выделите текст с ошибкой и нажмите Ctrl+Enter.
SSHFS
SSHFS is a FUSE-based filesystem client for mounting remote directories over a Secure Shell connection.
Note: This project has been archived by its developers and is no longer developed. Alternatives include the mount feature of rclone .
Installation
- If you often need to mount sshfs filesystems you may be interested in using an sshfs helper, such as qsshfsAUR , sftpman, sshmntAUR or fmount.py.
- You may want to use Google Authenticator or Fido Tokens providing additional security as in two-step authentication.
- SSH keys may be used over traditional password authentication.
Mounting
In order to be able to mount a directory the SSH user needs to be able to access it. Invoke sshfs to mount a remote directory:
$ sshfs [user@]host:[dir] mountpoint [options]
$ sshfs myuser@mycomputer:/remote/path /local/path -C -p 9876
Here -p 9876 specifies the port number and -C enables compression. For more options see the #Options section.
When not specified, the remote path defaults to the remote user home directory. Default user names and options can be predefined on a host-by-host basis in ~/.ssh/config to simplify the sshfs usage. For more information see OpenSSH#Client usage.
SSH will ask for the password, if needed. If you do not want to type in the password multiple times a day, see SSH keys.
Unmounting
To unmount the remote system:
$ fusermount3 -u mountpoint
Options
sshfs can automatically convert between local and remote user IDs. Use the idmap=user option to translate the UID of the connecting user to the remote user myuser (GID remains unchanged):
$ sshfs myuser@mycomputer:/remote/path /local/path -o idmap=user
If you need more control over UID and GID translation, look at the options idmap=file , uidfile and gidfile .
A complete list of options can be found in sshfs(1) .
Chrooting
You may want to restrict a specific user to a specific directory on the remote system. This can be done by editing /etc/ssh/sshd_config :
. Match User someuser ChrootDirectory /chroot/%u ForceCommand internal-sftp AllowTcpForwarding no X11Forwarding no .
Note: The chroot directory must be owned by root, otherwise you will not be able to connect.
See also SFTP chroot. For more information check the sshd_config(5) man page for Match , ChrootDirectory and ForceCommand .
Automounting
Automounting can happen on boot, or on demand (when accessing the directory). For both, the setup happens in the fstab.
Note: Keep in mind that automounting is done through the root user, therefore you cannot use hosts configured in .ssh/config of your normal user.
To let the root user use an SSH key of a normal user, specify its full path in the IdentityFile option.
And most importantly, use each sshfs mount at least once manually while root on the client machine so the host’s signature is added to the client’s /root/.ssh/known_hosts file. This can also be done manually by appending one or more of the the SSH server’s public host keys (the /etc/ssh/ssh_host_*key.pub files) to /root/.ssh/known_hosts .
On demand
This article or section needs expansion.
Reason: Is there a way to make this work with a passphrase-protected private key? E.g. it prompts for the passphrase at first access. Alternatively, clearly state that it is not possible and why. (Discuss in Talk:SSHFS)
With systemd on-demand mounting is possible using /etc/fstab entries.
user@host:/remote/path /local/path fuse.sshfs noauto,x-systemd.automount,_netdev,users,idmap=user,IdentityFile=/home/user/.ssh/id_rsa,allow_other,reconnect 0 0
The important mount options here are noauto,x-systemd.automount,_netdev.
- noauto tells it not to mount at boot
- x-systemd.automount does the on-demand magic
- _netdev tells it that it is a network device, not a block device (without it «No such device» errors might happen)
Note: After editing /etc/fstab , reload the systemd configuration and the required services, which can be found by running systemctl list-unit-files —type automount .
On boot
An example on how to use sshfs to mount a remote filesystem through /etc/fstab
user@host:/remote/path /local/path fuse.sshfs _netdev 0 0
Take for example the fstab line
llib@192.168.1.200:/home/llib/FAH /media/FAH2 fuse.sshfs _netdev 0 0
The above will work automatically if you are using an SSH key for the user. See Using SSH Keys.
If you want to use sshfs with multiple users, add the following option:
user@domain.org:/home/user /media/user fuse.sshfs allow_other,_netdev 0 0
In order to ensure the network is available before trying to mount, it is not only important to set the _netdev mount option, but also to add either —any or a specific —interface to the appropriate wait-online service for your network manager.
Secure user access
When automounting via fstab, the filesystem will generally be mounted by root. By default, this produces undesireable results if you wish access as an ordinary user and limit access to other users.
An example mountpoint configuration:
user@host:/remote/path /local/path fuse.sshfs noauto,x-systemd.automount,_netdev,user,idmap=user,follow_symlinks,identityfile=/home/user/.ssh/id_rsa,allow_other,default_permissions,uid=USER_ID_N,gid=USER_GID_N 0 0
Summary of the relevant options:
- allow_other — Allow other users than the mounter (i.e. root) to access the share.
- default_permissions — Allow kernel to check permissions, i.e. use the actual permissions on the remote filesystem. This allows prohibiting access to everybody otherwise granted by allow_other.
- uid, gid — set reported ownership of files to given values; uid is the numeric user ID of your user, gid is the numeric group ID of your user.
Troubleshooting
Checklist
Read OpenSSH#Checklist first. Further issues to check are:
- Is your SSH login sending additional information from server’s /etc/issue file e.g.? This might confuse SSHFS. You should temporarily deactivate server’s /etc/issue file:
sshfs#user@host:/mnt/server/directory . fuse .
user@host:/mnt/server/directory . fuse.sshfs . x-systemd, .
$ chown -R user_s: /mnt/servers/directory
uid=USER_C_ID,gid=GROUP_C_ID
$ chown -R user_c: /mnt/client/directory
Connection reset by peer
- If you are trying to access the remote system with a hostname, try using its IP address, as it can be a domain name resolving issue. Make sure you edit /etc/hosts with the server details.
- Make sure your user can log into the server (especially when using AllowUsers ).
- Make sure Subsystem sftp /usr/lib/ssh/sftp-server is enabled in /etc/ssh/sshd_config on the remote system.
- If you are using a non-default key name and passing it as -i .ssh/my_key , this will not work. You have to use -o IdentityFile=/home/user/.ssh/my_key , with the full path to the key.
- If your /root/.ssh/config/ is a symlink, you will be getting this error as well. See this serverfault topic
- Adding the option sshfs_debug (as in sshfs -o sshfs_debug user@server . ) can help in resolving the issue.
- If that does not reveal anything useful, you might also try adding the option debug .
- If you are trying to sshfs into a router running DD-WRT or the like, there is a solution here. (Note that the -osftp_server=/opt/libexec/sftp-server option can be used to the sshfs command instead of patching dropbear).
- If you see this only on boot, it may be that systemd is attempting to mount prior to a network connection being available. Enabling the appropriate wait-online service for your network manager fixes this.
- Old Forum thread: sshfs: Connection reset by peer.
Note: When providing more than one option for sshfs, they must be comma separated. Like so: sshfs -o sshfs_debug,IdentityFile=/path/to/key user@server . ).
Remote host has disconnected
If you receive this message directly after attempting to use sshfs:
- First make sure that the remote machine has sftp installed! It will not work, if not.
- Then, check that the path of the Subsystem sftp in /etc/ssh/sshd_config on the remote machine is valid.
fstab mounting issues
To get verbose debugging output, add the following to the mount options:
ssh_command=ssh\040-vv,sshfs_debug,debug
To be able to run mount -av and see the debug output, remove the following:
Some directories are empty
sshfs by default does not support symlinks. If those directories happened to be symlinks, use:
$ sshfs user@host:/remote/path /local/path -o follow_symlinks
Files not refreshed
If you see old content on remote, consider using option dir_cache=no :
$ sshfs user@host:/remote/path /local/path -o dir_cache=no
Limited transfer on fast network
If you observe transfer than is lower than your network capabilities and high CPU usage on the party where files are copied from, disable compression (remove -C option or set -o compression=no ).