How do I mount .vhd file?
I’m using 13.04 Raring amd64 and I need to mount a .vhd file on my ubuntu. I’ve googled about it and found that virtualbox-fuse package is the answer. But the package was deleted from apt repository. Is there any way to install the package w/ 13.04? or is there any alternative to virtualbox-fuse?
I just did this same thing, and my search results ended in that you could convert the vdi to a raw image
boo. that is not a good solution when a vhd or vdi file can be way too large to make a duplicate of as a raw image
7 Answers 7
sudo apt-get install virtualbox-fuse sudo mkdir /mnt/vhd-disk/ sudo vdfuse -f disk.vhd /mnt/vhd-disk/ sudo mount -o loop /mnt/vhd-disk/Partition1 /mnt/partition1 Note that you may need additional options to mount to set permissions to your liking.
It works, you can download vdfuse from vdfuse.sourceforge.net for example in my case the last line was: sudo mount -o -loop /tmp/win/Partition1 /mnt/Windows
Using Ubuntu 15.10 (works also on Ubuntu 16.04), you can install vhdimount and tsk (The Sleuth Kit) via:
sudo apt-get install libvhdi-utils sleuthkit Then you can proceed as follows:
sudo mkdir -v /mnt/vhd sudo vhdimount -X allow_root /path/to/file.vhd /mnt/vhd/ sudo mmls -aB /mnt/vhd/vhdi1 Next, you’ll have to calculate the offset from the output of mmls like this:
sudo mkdir -v /media/$/your/folder sudo mount -vt ntfs-3g -o ro,noload,offset=offset-found /mnt/vhd/vhdi1 /media/$/your/folder Replace offset-found by your offset. You may also have to change the fs-type according to the fs-type included in your vhd file.
I’ve made a script so I don’t have to type this every time 😉
This mounts it as read only. What can I do to mount it with write permissions? Omitting the ro for mount still results in read only.
Change ro by rw and that should run in read/write instead of read/only. vhdimount maps to /mnt/vhd/vhdi1 in read/write mode but the next command using mount is in read/only if you don’t specify rw as an option
In Ubuntu 16.04: Instead of using mmls or fdisk to find out about the starting sector of the partition, you can also use kpartx to create a virtual device file that you can mount without an offset option: sudo kpartx -av /mnt/vhd/vhdi1; sudo mount -vt ntfs-3g -o ro,noload /dev/mapper/loop0p1 /media/$
Searching Ubuntu’s Launchpad space, the following comes up:
virtualbox (The binary ‘virtualbox-fuse’ is part of the virtualbox package)
This means that they merged virtualbox-fuse into the main package and you just need to install virtualbox from the repository (This is what used to be called virtualbox-ose , so if you need the PUEL licensed «full» version, this won’t help you.)
I’d prefer not to rely on a VM to access data on a vhd image. Since virtualbox-fuse and vdfuse is no longer available in Ubuntu (not since precise (12.04)) and Debian (not since Wheezy (7)). I was able to mount the NTFS partition of a personal VHD using blk-tap .
Insert the apropriate pid from tap-ctl spawn , of course. Your partitioning scheme may be different from mine, so adjust accordingly.
# apt-get install blktap-utils # modprobe blktap # tap-ctl allocate /dev/xen/blktap-2/tapdev0 # tap-ctl spawn tapdisk spawned with pid 1234 # tap-ctl attach -m 0 -p 1234 # tap-ctl open -m 0 -p 1234 -a vhd:/full/path/to/image.vhd # mount /dev/disk/by-id/dm-name-tapdev0p1 # ls -lh do/your/thing with/all/your/files.txt # tap-ctl close -m 0 -p 1234 # tap-ctl detach -m 0 -p 1234 # tap-ctl free -m 0 These steps came from the xen project’s wiki.
My block device was created at /dev/xen/blktap-2/blktap0 . For some reason, kpartx -a would not map partitions (I was looking for /dev/xen/blktap-2/tapdev0p1), but I found that /dev/disk/by-id/dm-name-tapdev0p1 had been linked to the block device for the partition.
Mounting vhd on linux
For Debian and Ubuntu this is pretty easy
sudo apt-get install libguestfs-tools For Red Hat, Centos, Fedora
sudo yum install libguestfs-tools For Arch Linux (my distro of choice) you need to install 3 packages from the AUR
git clone https://aur.archlinux.org/hivex.git git clone https://aur.archlinux.org/perl-sys-virt.git git clone https://aur.archlinux.org/libguestfs.git cd hivex makepkg -si cd ../perl-sys-virt makepkg -si cd ../libguestfs makepkg -si Once you have libguestfs as a normal user (not root / sudo) run guestmount
guestmount --add old_server_backup.vhd --ro /mnt/vhd/ -m /dev/sda1 - —add option is for the image you want to access
- —ro sets to read only, alternatively you could use —rw for read / write
- /mnt/vhd the path where you want to mount the drive
- -m /dev/sda1 specify which partition within the .vhd file you want to mount.
My Rant
So I recently had to mount a backup of an old VM that was saved as a .vhd file and so I googled «How to mount a VHD on Linux» and the first result that came up was a Ubuntu forumns post where someone had asked the question and the top reply was someone else telling that person to go off and use a search engine. Followed by a link to Stack Overflow which didn’t actually answer the question.
Some support forums and Stack Overflow in particular can be quite toxic to new comers (and even toxic to experienced veterans) and it’s very infuriating when the top result on google is someone being told to just search google for the answer.
I know it can be annoying when simple questions come up over an over again but at the very least try to link to a useful article and if possible quote the relevant bit.
Anyway I hope my instructions saved someone the frustration that I went through.
Posted on: Thu 15 November 2018
Content on this site is licensed under a Creative Commons Attribution 4.0 International License.
Built using Pelican. Based on a theme by Giulio Fidente on github.
How to mount Virtual Hard disk (VHD) file in Ubuntu Linux?
Virtual Hard Disk- VHD is a common virtual drive format used on Windows systems. Generally, we use them to install Virtual Machine operating systems such as in VirtualBox or Hyper-V. However, we can also create and use VHDs just like a native drive partition on Windows 10 or 7 systems.
Furthermore, backup images also save in the.VHD format, thus to access them is really a need of the hours, in case you want some file resides in them. So, what would happen, if you need to extract some files from VHD on Linux; resides on the local or remote machine. And you don’t have a Windows system. Don’t worry we can mount them on Linux as well.
For carrying out the tutorial, we are using Ubuntu 20.04 LTS focal fossa, however, the steps given here are also applicable for Ubuntu 18.04/19.04/16.04; Linux Mint, Elementary OS, ZorinOS, Kali Linux, and other similar ones.
Here we are going to mount a VHD image on Ubuntu or Debian-based systems that have some information we need to extract; using a tool called guestmounts. Let’s see how to use it.
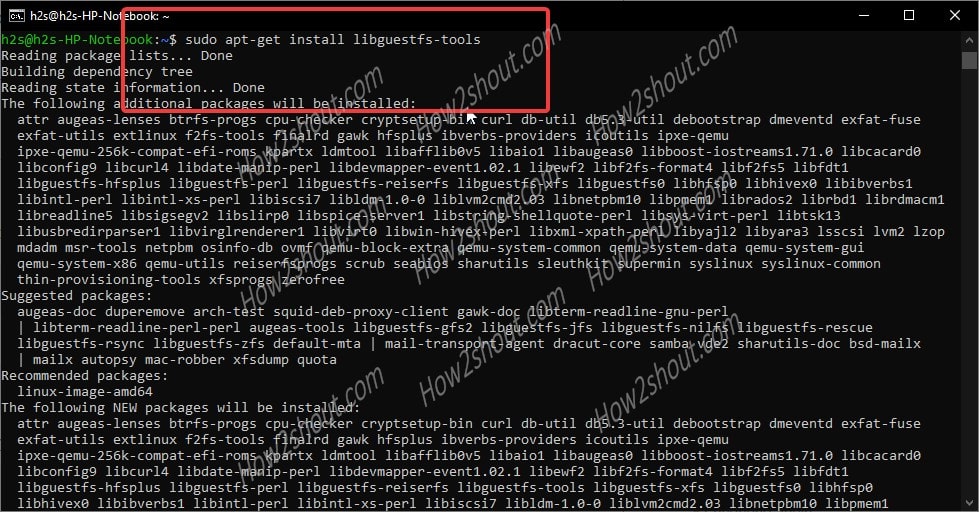
Step 1: The guestmounts tool comes in libguestfs package along with other tools, thus first we need to install the same. Here is the command to do that.
sudo apt-get install libguestfs-tools

If you get any dependencies error then simply run:
After that again run the above installation command to get “guestmount” tool on your Ubuntu or Debian system.
Step 2: If the Virtual Hard disk.VHD is on your local system then we can mount it directly. However, on remote storage with SAMA/CISF shared protocol, we need to add its support to Ubuntu Linux first.
sudo apt-get install cifs-utils
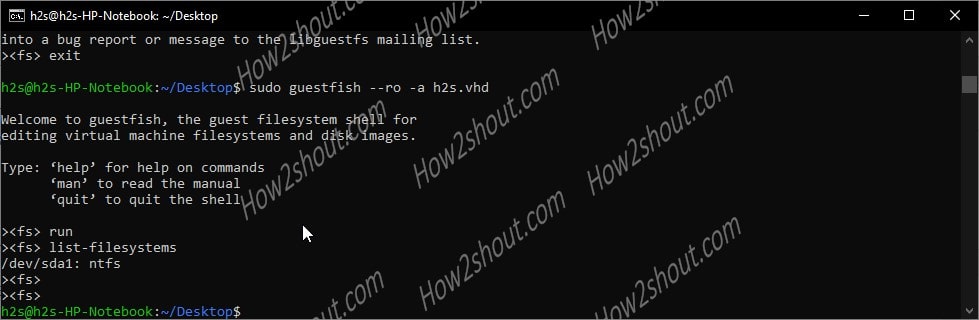
Step 3: Check the filesystem and available partitions on the Virtual Hard Disk image on Linux using “guestfish” command:
The guestfish is also a tool that comes along with the libguestfs-tools package.
sudo guestfish --ro -a VHD-file-path
Note: replace the VHD-file-path with the actual path where your VHD image located. For example: Here we have h2s.vhd located on the Desktop of Ubuntu, thus the command is:
sudo guestfish – -ro -a h2s.vhd
Once you dropped in the GuestFish Shell, type:
This will give you the partition details of the VHD image and the file system in which it has been formatted. Note down that.
As you can see that in the following image, our Virtual Disk image is in NTFS format.
Step 4: Switch to the root user. It is because we tried but couldn’t use the “guestmount” without sudo access. Thus, once you mount the VHD using under sudo rights, the mounted file image will only be accessible by the user root or the one that has the same access.
Read more: If you haven’t set the root password yet then please do that, here is the enable ubuntu root password tutorial.
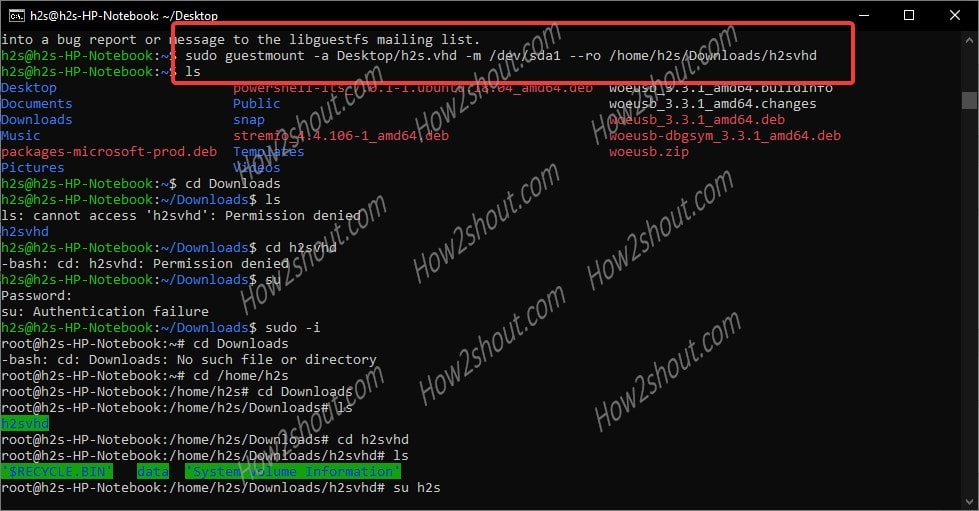
Step 5: Run the guestmount command to mount the remotely or locally available.VHD image files.
sudo guestmount -a /path-to-demo.vhd -m /dev/sda1 --ro /path-of-the-directory-to-mount-VHD-image
*Replace: /path-to-demo.vhd with your VHD file image name and location path.
/dev/sda1: It is a device or partition of the Virtual Hard disk file system which we found with the help of guestfish command above. Replace it with yours.
–ro – It means read-only.
/path-of-the-directory-to-mount-VHD-image: Path where you want to mount your VHD image file on the system
You can see the below image for an idea:
Step 6: Now, as we have mounted the VHD under sudo rights, thus only the root user can access the same. So, without exit the root shell environment, navigate to the directory where you have mounted the Virtual Hard disk file image. Afterward, you can easily access all this file inside that particular image.
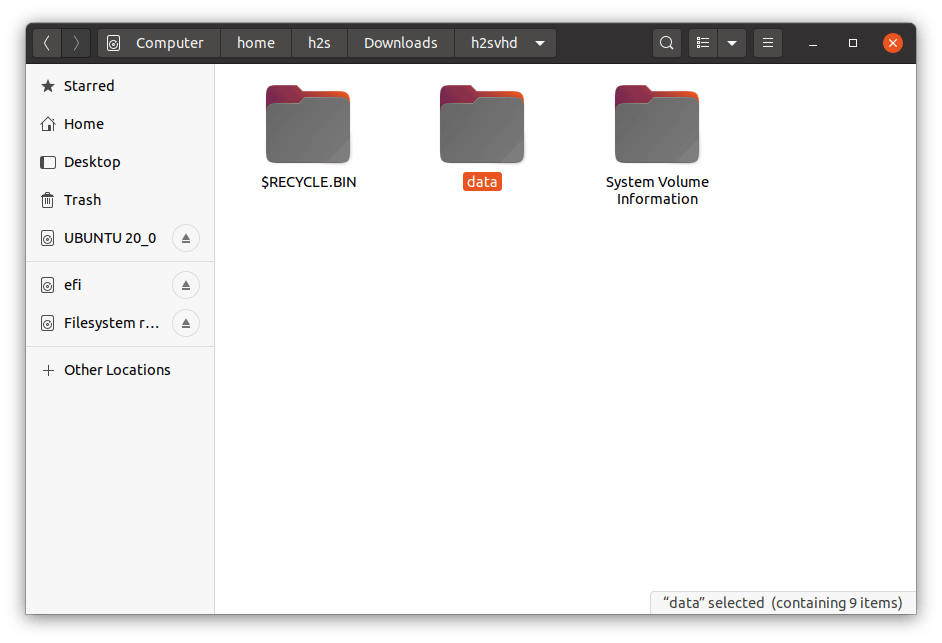
Step 7: Those who want to access the VHD images using the Graphical File manager of Ubuntu. They need to first access it under administrative rights. So, run nautilus as root:
This will ask for the root password.
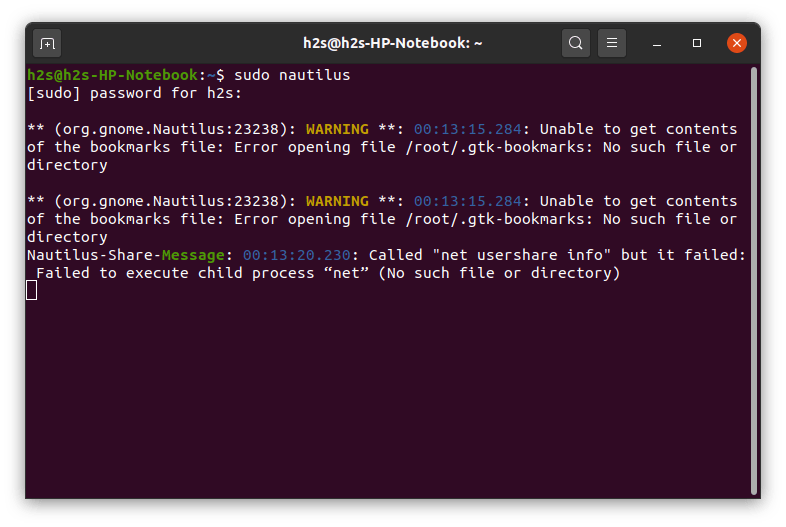
Now, the Ubuntu file manager will open under user root rights, navigate to the directory where VHD has been mounted by you. Click to open it.
Optional step:
In cases later, you want to unmount the VHD image from Ubuntu, then use the below command:
sudo guestunmount /mounted-directory-path
Replace: /mounted-directory-path with the path of the folder where you have actually mounted the image file.
How to mount a virtual hard disk?
Have you searched Google? It abounds with guides on mounting VMDK, VDI, VHD, and raw disk image files on Ubuntu.
4 Answers 4
Linux and other Unix-like hosts can mount images created with the raw format type using a loopback device. From a root login (or using sudo), mount a loopback with an offset of 32,256.
mount -o loop,offset=32256 /path/to/image.img /mnt/mountpoint For other types of qemu images, you can use qemu-nbd
modprobe nbd max_part=16 qemu-nbd -c /dev/nbd0 image.qcow2 partprobe /dev/nbd0 mount /dev/nbd0p1 /mnt/image Plus, usually, you can convert image from one format to another.
raw - (default) the raw format is a plain binary image of the disc image, and is very portable. On filesystems that support sparse files, images in this format only use the space actually used by the data recorded in them. cloop - Compressed Loop format, mainly used for reading Knoppix and similar live CD image formats cow - copy-on-write format, supported for historical reasons only and not available to QEMU on Windows qcow - the old QEMU copy-on-write format, supported for historical reasons and superseded by qcow2 qcow2 - QEMU copy-on-write format with a range of special features, including the ability to take multiple snapshots, smaller images on filesystems that don't support sparse files, optional AES encryption, and optional zlib compression vmdk - VMware 3 & 4, or 6 image format, for exchanging images with that product vdi - VirtualBox 1.1 compatible image format, for exchanging images with VirtualBox. I found this solution for (VirtualBox) .VDI when I searched, on this website:
modprobe nbd max_part=16 qemu-nbd -c /dev/nbd0 /path/to/some.vdi mount -o loop /dev/nbd0p1 /mnt # do stuff umount /mnt qemu-nbd -d /dev/nbd0 rmmod nbd The same as «Qemu’s way» commands. No borders!