- Базовая настройка маршрутизатора для CCNA и ICND. Назначение IP-адресов на интерфейсы маршрутизатора.
- Скачать выполненное задание настройки роутера
- Настройка роутера копированием конфигурации
- Support
- Interface Port Labels
- Viewing the Default Configuration
- Information Needed for Configuration
- Configuring Basic Parameters
- Configure Global Parameters
- Configure Fast Ethernet LAN Interfaces
- Configure WAN Interfaces
- Configure the Fast Ethernet WAN Interface
Базовая настройка маршрутизатора для CCNA и ICND. Назначение IP-адресов на интерфейсы маршрутизатора.
После того как мы научились делить сеть тремя способами («Первый способ деления сети на подсети», Деление сети на подсети методом квадратов, ON-LINE VLSM Калькулятор), логичное продолжение, это настройка роутера. Давайте выполним базовую настройку роутера (которую Вам придется выполнять ооочень часто) и назначим IP-адреса интерфейсам маршрутизатора.
Предположим, что после деления сети 192.168.0.0/24 на 3 подсети A, B и C (по 100, 50, 2 хоста соответственно) мы получили такие подсети: A — 192.168.0.0/25, B — 192.168.0.128/26, C — 192.168.0.192/30.
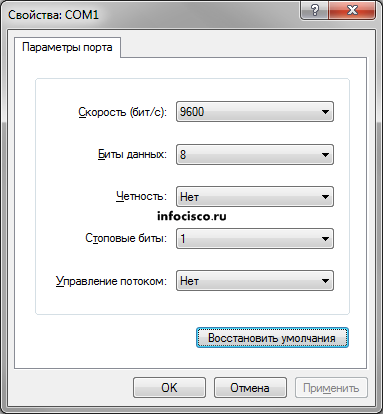
Первый адрес подсети C надо назначить на интерфейс маршрутизатора serial 0/0/0. Причем на один конец кабеля (DCE) для интерфейса serial необходимо назначить clock rate (задать время для синхронизации сигнала), а для другого (DTE) этого делать не надо.
Скачать выполненное задание настройки роутера
Предлагаю скачать файл с выполненным заданием для программы эмулятора PacketTracer, открыть его и посмотреть на реализацию (пароль на консольный вход — cisco, на привилегированный режим — class).
Заметьте, что компьютер PC1 может нормально пинговать компьютер PC2, но не может пинговать PC3. Это происходит из-за не настроенной маршрутизации. А настроим мы её в следующей шпаргалке 😉
Настройка роутера копированием конфигурации
- Для автоматической базовой настройки (всё, что выше) маршрутизатора выполните следующие действия:
- 1. Скопируйте текст ниже в буфер обмена: выделите всё, кликните правой кнопкой по выделенному и выберите «Копировать».
- 2. При необходимости очистите роутер от всех настроек и перезагрузите его.
- 3. Войдите в режим глобальной конфигурации и вызовите меню Гипер Терминала «Правка», а в нём «Передать главному компьютеру».
- 4. Обязательно проверьте настройки с помощью команды show running-config
- 5. При необходимости включите интерфейсы командой no shutdown из режима каждого интерфейса
Support
This chapter provides procedures for configuring the basic parameters of your Cisco router, including global parameter settings, routing protocols, interfaces, and command-line access. It also describes the default configuration on startup.
Note Individual router models may not support every feature described throughout this guide. Features not supported by a particular router are indicated whenever possible.
This chapter contains the following sections:
•Interface Port Labels
•Viewing the Default Configuration
•Information Needed for Configuration
•Configuring Basic Parameters
•Configuring Static Routes
•Configuring Dynamic Routes
•Configuring Enhanced IGRP
Each section includes a configuration example and verification steps, as available.
For complete information on how to access global configuration mode, see the «Entering Global Configuration Mode» section in Appendix A, «Cisco IOS Basic Skills.» For more information on the commands used in the following tables, see the Cisco IOS Release 12.3 documentation set.
Interface Port Labels
Table 1-1 lists the interfaces supported for each router and their associated port labels on the equipment.
Viewing the Default Configuration
When you first boot up your Cisco router, some basic configuration has already been performed. All of the LAN and WAN interfaces have been created, console and VTY ports are configured, and the inside interface for Network Address Translation has been assigned. Use the show running-config command to view the initial configuration, as shown in Example 1-1.
Example 1-1 Cisco 851 Default Configuration on Startup
Router# show running-config Current configuration : 1090 bytes
service timestamps debug datetime msec
service timestamps log datetime msec
no service password-encryption
speed basic-1.0 basic-2.0 basic-5.5 6.0 9.0 basic-11.0 12.0 18.0 24.0 36.0 48.0
Information Needed for Configuration
You need to gather some or all of the following information, depending on your planned network scenario, prior to configuring your network
•If you are setting up an Internet connection, gather the following information:
– Point-to-Point Protocol (PPP) client name that is assigned as your login name
–PPP authentication type: Challenge Handshake Authentication Protocol (CHAP) or Password Authentication Protocol (PAP)
–PPP password to access your Internet service provider (ISP) account
–DNS server IP address and default gateways
•If you are setting up a connection to a corporate network, you and the network administrator must generate and share the following information for the WAN interfaces of the routers:
–PPP authentication type: CHAP or PAP
–PPP client name to access the router
–PPP password to access the router
•If you are setting up IP routing:
–Generate the addressing scheme for your IP network.
–Determine the IP routing parameter information, including IP address, and ATM permanent virtual circuits (PVCs). These PVC parameters are typically virtual path identifier (VPI), virtual circuit identifier (VCI), and traffic shaping parameters.
–Determine the number of PVCs that your service provider has given you, along with their VPIs and VCIs.
–For each PVC determine the type of AAL5 encapsulation supported. It can be one of the following:
AAL5SNAP—This can be either routed RFC 1483 or bridged RFC 1483. For routed RFC 1483, the service provider must provide you with a static IP address. For bridged RFC 1483, you may use DHCP to obtain your IP address, or you may obtain a static IP address from your service provider.
AAL5MUX PPP—With this type of encapsulation, you need to determine the PPP-related configuration items.
•If you plan to connect over an ADSL or G.SHDSL line:
–Order the appropriate line from your public telephone service provider.
For ADSL lines—Ensure that the ADSL signaling type is DMT (also called ANSI T1.413) or DMT Issue 2.
For G.SHDSL lines—Verify that the G.SHDSL line conforms to the ITU G.991.2 standard and supports Annex A (North America) or Annex B (Europe).
Once you have collected the appropriate information, you can perform a full configuration on your router, beginning with the tasks in the «Configuring Basic Parameters» section.
Configuring Basic Parameters
To configure the router, perform one or more of these tasks:
•Configure Global Parameters
•Configure Fast Ethernet LAN Interfaces
•Configure WAN Interfaces
•Configuring a Loopback Interface
•Configuring Command-Line Access to the Router
A configuration example is presented with each task to show the network configuration following completion of that task.
Configure Global Parameters
Perform these steps to configure selected global parameters for your router:
For complete information on the global parameter commands, see the Cisco IOS Release 12.3 documentation set.
Configure Fast Ethernet LAN Interfaces
The Fast Ethernet LAN interfaces on your router are automatically configured as part of the default VLAN and as such, they are not configured with individual addresses. Access is afforded through the VLAN. You may assign the interfaces to other VLANs if desired. For more information about creating VLANs, see Chapter 5 «Configuring a LAN with DHCP and VLANs.»
Configure WAN Interfaces
The Cisco 851 and Cisco 871 routers each have one Fast Ethernet interface for WAN connection. The Cisco 857, Cisco 877, and Cisco 878 routers each have one ATM interface for WAN connection.
Based on the router model you have, configure the WAN interface(s) using one of the following procedures:
•Configure the Fast Ethernet WAN Interface
•Configure the ATM WAN Interface
Configure the Fast Ethernet WAN Interface
This procedure applies only to the Cisco 851 and Cisco 871 router models. Perform these steps to configure the Fast Ethernet interface, beginning in global configuration mode:
Router(config)# interface fastethernet 4