- Configuring NTP
- Table Of Contents
- Configuring NTP
- Understanding How NTP Works
- Default NTP Configuration
- Configuring NTP on the Switch
- Enabling NTP in Broadcast-Client Mode
- Configuring NTP in Client Mode
- Configuring Authentication in Client Mode
- Настройка времени на Cisco: NTP и руками
- Ручная настройка
- Лучший путь: настройка NTP
Configuring NTP
The documentation set for this product strives to use bias-free language. For the purposes of this documentation set, bias-free is defined as language that does not imply discrimination based on age, disability, gender, racial identity, ethnic identity, sexual orientation, socioeconomic status, and intersectionality. Exceptions may be present in the documentation due to language that is hardcoded in the user interfaces of the product software, language used based on RFP documentation, or language that is used by a referenced third-party product. Learn more about how Cisco is using Inclusive Language.
Table Of Contents
Configuring NTP
This chapter describes how to configure the Network Time Protocol (NTP) on the Catalyst enterprise LAN switches.
Note For complete syntax and usage information for the commands that are used in this chapter, refer to the Catalyst 4500 Series, Catalyst 2948G, Catalyst 2948G-GE-TX, and Catalyst 2980G Switches Command Reference.
This chapter consists of these sections:
•Understanding How NTP Works
•Default NTP Configuration
•Configuring NTP on the Switch
Understanding How NTP Works
NTP synchronizes timekeeping among a set of distributed time servers and clients. With this synchronization, you can correlate events to the time that system logs were created and the time that other time-specific events occur. An NTP server must be accessible by the client switch.
NTP uses the User Datagram Protocol (UDP) as its transport protocol. All NTP communication uses Coordinated Universal Time (UTC), which is the same as Greenwich Mean Time. An NTP network usually gets its time from an authoritative time source, such as a radio clock or an atomic clock that is attached to a time server. NTP distributes this time across the network. NTP is extremely efficient; no more than one packet per minute is necessary to synchronize two machines to within a millisecond of one another.
NTP uses a stratum to describe how many NTP hops away a machine is from an authoritative time source. A stratum 1 time server has a radio or atomic clock that is directly attached, a stratum 2 time server receives its time from a stratum 1 time server, and so on. A machine running NTP automatically chooses as its time source the machine with the lowest stratum number that it is configured to communicate with through NTP. This strategy effectively builds a self-organizing tree of NTP speakers.
NTP has two ways to avoid synchronizing to a machine whose time might be ambiguous:
•NTP never synchronizes to a machine that is not synchronized itself.
•NTP compares the time that is reported by several machines and does not synchronize to a machine whose time is significantly different from the others, even if its stratum is lower.
The communications between machines running NTP, known as associations, are usually statically configured; each machine is given the IP addresses of all machines with which it should form associations. An associated pair of machines can keep accurate timekeeping by exchanging NTP messages between each other. However, in a LAN environment, you can configure NTP to use IP broadcast messages. With this alternative, you can configure the machine to send or receive broadcast messages, but the accuracy of timekeeping is marginally reduced because the information flow is one-way only.
Cisco’s implementation of NTP does not support stratum 1 service; it is not possible to connect to a radio or atomic clock. We recommend that you obtain the time service for your network from the public NTP servers available on the IP Internet.
If the network is isolated from the Internet, Cisco’s NTP implementation allows a machine to be configured so that it acts as though it is synchronized using NTP, when it actually has determined the time using other methods. Other machines synchronize to that machine using NTP.
Default NTP Configuration
Table 39-1 shows the default NTP configuration.
Configuring NTP on the Switch
The following sections describe how to configure NTP.
Enabling NTP in Broadcast-Client Mode
Enable the switch in NTP broadcast-client mode if an NTP broadcast server, such as a router, regularly broadcasts time-of-day information on the network. To compensate for any server-to-client packet latency, you can specify an NTP broadcast delay (a time adjustment factor for the receiving of broadcast packets by the switch).
To enable NTP broadcast-client mode on the switch, perform this task in privileged mode:
This example shows how to enable NTP broadcast-client mode on the switch, set a broadcast delay of 4000 microseconds, and verify the configuration:
Console> (enable) set ntp broadcastclient enable
NTP Broadcast Client mode enabled
Console> (enable) set ntp broadcastdelay 4000
NTP Broadcast delay set to 4000 microseconds
Console> (enable) show ntp
Current time: Tue Jun 23 1998, 20:25:43
Timezone: '', offset from UTC is 0 hours
Broadcast client mode: enabled
Broadcast delay: 4000 microseconds
Configuring NTP in Client Mode
Configure the switch in NTP client mode if you want the client switch to regularly send time-of day requests to an NTP server. You can configure up to ten server addresses per client.
To configure the switch in NTP client mode, perform this task in privileged mode:
This example shows how to configure the NTP server address, enable NTP client mode on the switch, and verify the configuration:
Console> (enable) set ntp server 172.20.52.65
NTP server 172.20.52.65 added.
Console> (enable) set ntp client enable
Console> (enable) show ntp
Current time: Tue Jun 23 1998, 20:29:25
Timezone: '', offset from UTC is 0 hours
Last NTP update: Tue Jun 23 1998, 20:29:07
Broadcast client mode: disabled
Broadcast delay: 3000 microseconds
Configuring Authentication in Client Mode
Authentication can enhance the security of a system running NTP. When you enable the authentication feature, the client switch sends time-of-day requests only to trusted NTP servers. The authentication feature is documented in RFC 1305.
You can configure up to ten authentication keys per client. Each authentication key is actually a pair of two keys:
•A public key number—A 32-bit integer that can range from 1-4,294,967,295
•A secret key string—An arbitrary string of 32 characters, including all printable characters and spaces
To authenticate the message, the client authentication key must match the key on the server. Therefore, the authentication key must be securely distributed in advance (the client administrator must get the key pair from the server administrator and configure it on the client).
To configure authentication, perform this task in privileged mode:
This example shows how to configure the NTP server address, enable NTP client and authentication modes on the switch, and verify the configuration:
Console> (enable) set ntp server 172.20.52.65 key 879
NTP server 172.20.52.65 with key 879 added.
Console> (enable) set ntp client enable
Console> (enable) set ntp authentication enable
NTP authentication feature enabled
Console> (enable) show ntp
Current time: Tue Jun 23 1998, 20:29:25
Timezone: '', offset from UTC is 0 hours
Last NTP update: Tue Jun 23 1998, 20:29:07
Broadcast client mode: disabled
Broadcast delay: 3000 microseconds
Настройка времени на Cisco: NTP и руками
![]()
Если вы забудете корректно настроить системное время на маршрутизаторах или коммутаторах Cisco, это может сыграть злую шутку. Просмотр лог – файлов или аудит в рамках безопасности может быть не реализуем, по причине невозможности установить точную дату события. В статье расскажем, как настроить корректную дату и время вручную, а также, как подключить NTP сервер к L2/L3 устройствам Cisco.
Ручная настройка
Устройства на базе Cisco IOS имеют два источника времени – железное/хардварное (hardware) и софтовое (программное) время. Первое, зачастую, в документации вендора именуется как «calendar time». Программное время, при загрузке девайса (по питанию) тянет время из железного, ставя его важнее в приоритете. Давайте проверим этот момент с помощью Cisco Packet Tracer:
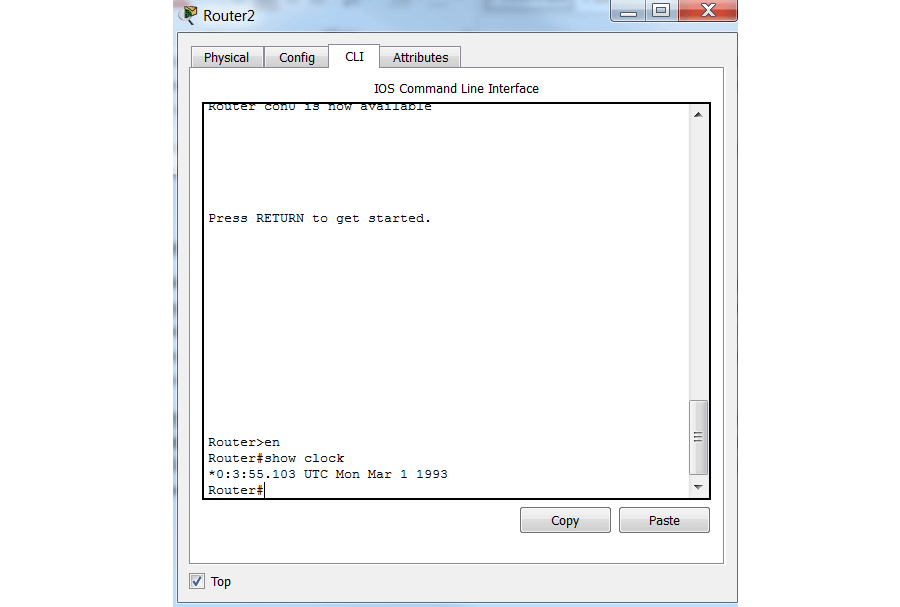
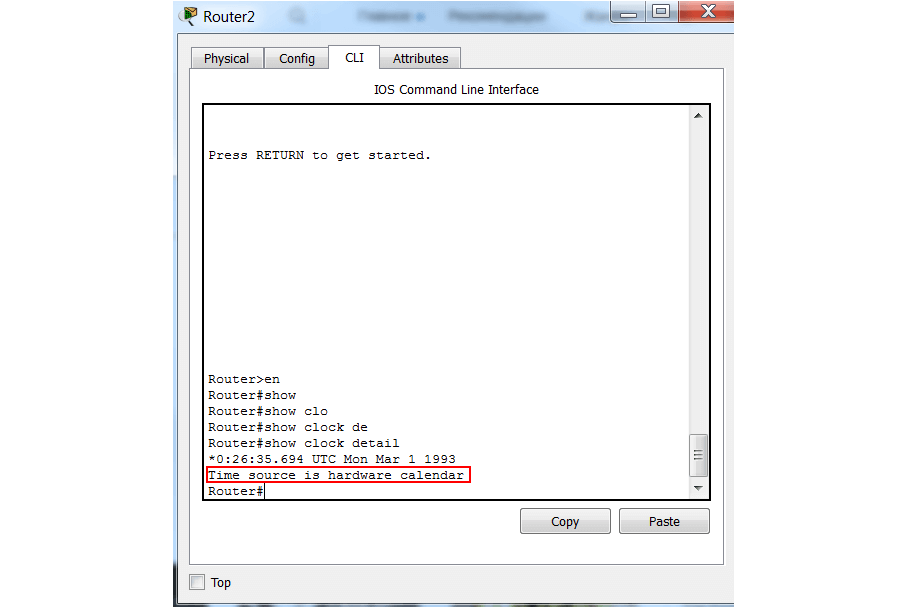
Обратите внимание, в нашем выводе, *0:3:55.103 UTC Mon Mar 1 1993 помечена звездочкой сначала. Она говорит о том, что это время не вызывает доверия. Причина этого проста – оно синхронизировано с хардварного времени, это можно проверить командой show clock detail :
С помощью команды clock set (в привилегированном режиме, не в режиме глобальной конфигурации) мы можем в ручном режиме модифицировать время и дату:
en conf t clock set 13:12:00 23 august 2018
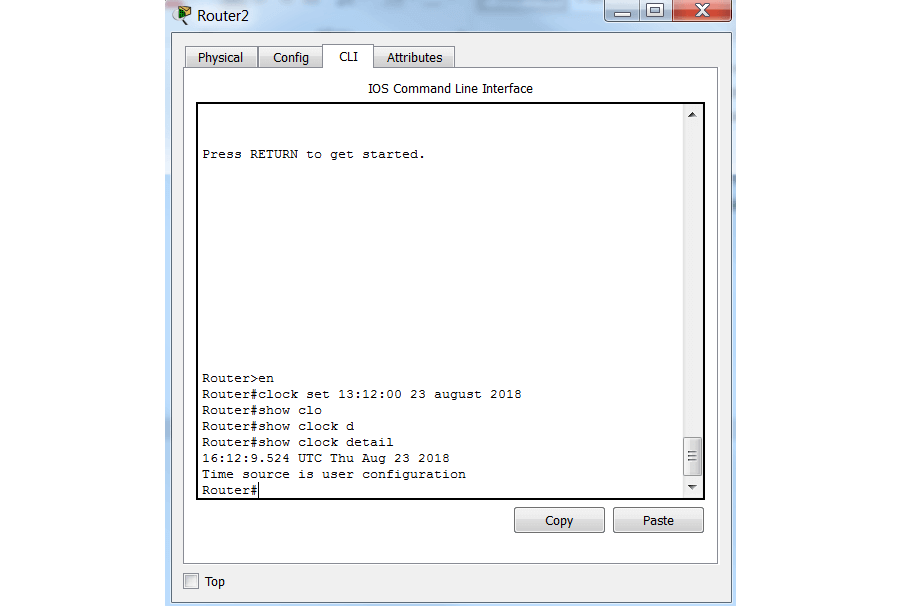
Обратите внимание, что источник времени сменился на «user configuration». Дело в том, что если мы перезагрузим наш девайс, время снова подтянется из хардварного источника (его можно проверить командой show calendar ). Исправить это можно одной командой:
Лучший путь: настройка NTP
Дело в том, что бывают задачи, точность которых зависит от синхронизации сотых долей секунд на каждом из устройств в сети. В таком случае нам поможет синхронизация времени от единой точки по протоколу NTP (Network Time Protocol), а время они будут брать с NTP – сервера.
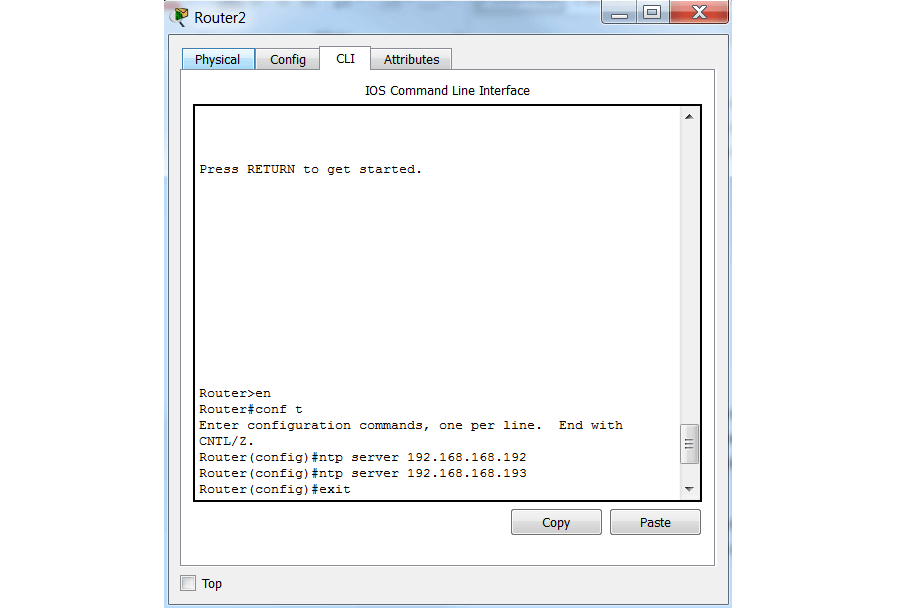
Перед настройкой, важно понять – откуда вы будете брать время. Есть некоторые публичные NTP, но конечно, гораздо безопаснее использовать сервер в собственном сетевом контуре. После того, как определитесь, приступаем к настройке NTP серверов:
en conf t ntp server 192.168.168.192 ntp server 192.168.168.193
Далее, мы уходим из среды Cisco Packet Tracer на железный маршрутизатор Cisco 2911, так как программный эмулятор ограничен в командах 🙂
Ждем, пока время не будет синхронизировано и проверяем:
Вы можете отслеживать этапы синхронизации командой show ntp associations — команда будет полезна для траблшутинга NTP;

У нас статус Clock is synchronized, stratum 2, reference is A.B.C.D. Значит все работает хорошо. Важно — настройка NTP, которую мы описали в статье, касается только софтового (программного) времени. Для того, чтобы синхронизировать хардварное (железное) время даем команду: