- Setup WiFi on the Dlink DSL-2730U
- Other Dlink DSL-2730U Guides
- WiFi Terms
- Wireless Name
- Wireless Password
- Wireless Channel
- Encryption
- Login To The Dlink DSL-2730U
- Find the WiFi Settings on the Dlink DSL-2730U
- Change the WiFi Settings on the Dlink DSL-2730U
- Possible Problems when Changing your WiFi Settings
- Other Dlink DSL-2730U Info
- Configuration guide of ADSL WiFi Modem D Link DSL 2730 U for BSNL and MTNL
- Features and Specifications of D Link DSL-2730 U Wireless N 150 Modem
- Modem Configuration
- Dlink DSL-2730U User Manual
- Other Dlink DSL-2730U Guides
- Download the Dlink DSL-2730U User Manual
- All User Manuals for Dlink DSL-2730U
- Other Dlink DSL-2730U Info
Setup WiFi on the Dlink DSL-2730U
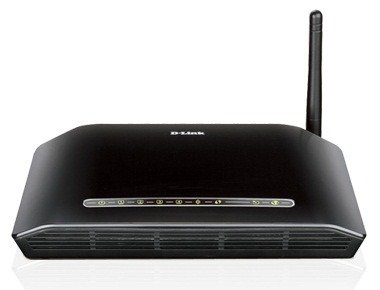
The Dlink DSL-2730U router is considered a wireless router because it offers WiFi connectivity. WiFi, or simply wireless, allows you to connect various devices to your router, such as wireless printers, smart televisions, and WiFi enabled smartphones.
Other Dlink DSL-2730U Guides
- Dlink DSL-2730U — How to change the IP Address on a Dlink DSL-2730U router
- Dlink DSL-2730U — Dlink DSL-2730U Login Instructions
- Dlink DSL-2730U — Dlink DSL-2730U User Manual
- Dlink DSL-2730U — Dlink DSL-2730U Port Forwarding Instructions
- Dlink DSL-2730U — How to Reset the Dlink DSL-2730U
- Dlink DSL-2730U — Information About the Dlink DSL-2730U Router
- Dlink DSL-2730U — Dlink DSL-2730U Screenshots
- Dlink DSL-2730U IN_R_01.00.01 — Information About the Dlink DSL-2730U Router
- Dlink DSL-2730U IN_R_01.00.01 — Login to the Dlink DSL-2730U
- Dlink DSL-2730U IN_R_01.00.01 — Reset the Dlink DSL-2730U
- Dlink DSL-2730U IN_R_01.00.01 — Dlink DSL-2730U Screenshots
WiFi Terms
Before we get started there is a little bit of background info that you should be familiar with.
Wireless Name
Your wireless network needs to have a name to uniquely identify it from other wireless networks. If you are not sure what this means we have a guide explaining what a wireless name is that you can read for more information.
Wireless Password
An important part of securing your wireless network is choosing a strong password.
Wireless Channel
Picking a WiFi channel is not always a simple task. Be sure to read about WiFi channels before making the choice.
Encryption
You should almost definitely pick WPA2 for your networks encryption. If you are unsure, be sure to read our WEP vs WPA guide first.
Login To The Dlink DSL-2730U
To get started configuring the Dlink DSL-2730U WiFi settings you need to login to your router. If you are already logged in you can skip this step.
To login to the Dlink DSL-2730U, follow our Dlink DSL-2730U Login Guide.
Find the WiFi Settings on the Dlink DSL-2730U
If you followed our login guide above then you should see this screen.
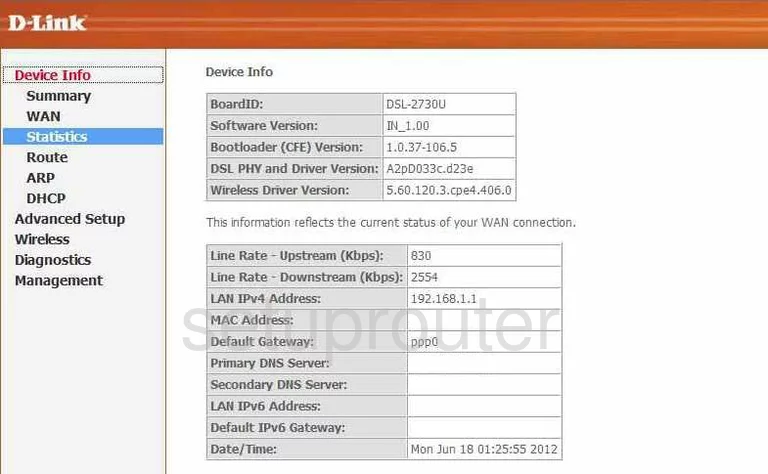
Starting on the Device Info page of the Dlink DSL-2730U router, click the choice in the left sidebar labeled Wireless. Then, if it does not take you to the Basic page, click the option of Basic.
Change the WiFi Settings on the Dlink DSL-2730U
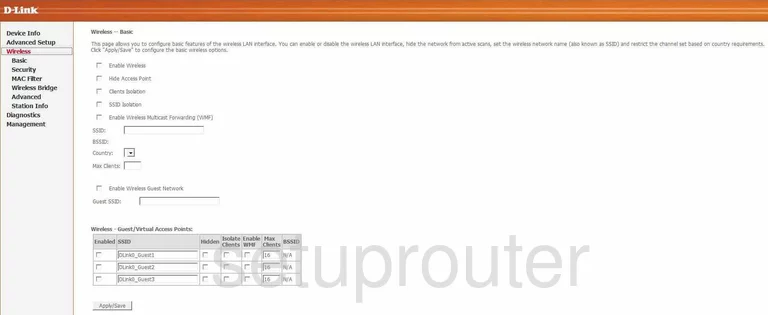
First, find the box titled SSID. This is your network name so you can distinguish between yours and the others around you. Create a new name here, just don’t use personal information. To learn more about the SSID, read our guide titled Wireless Names.
Click the button near the bottom of the page labeled Apply/Save.
Click the Advanced choice beneath Wireless in the left sidebar.
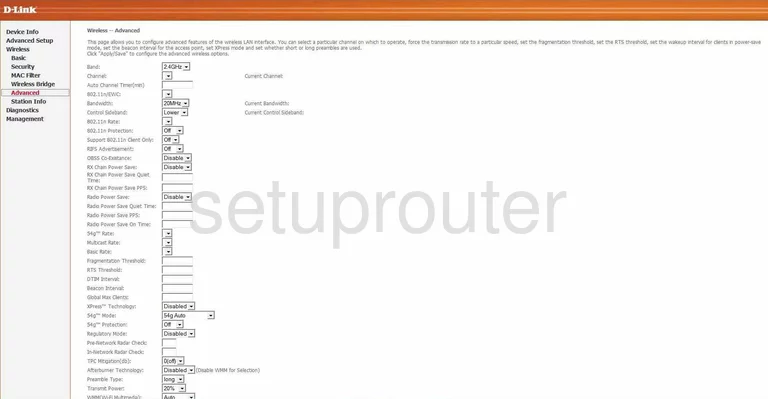
On this page, you can change the channel if you want to. Be sure to use only channels 1,6, or 11. To learn why you should only be using these three channels, read our guide titled WiFi Channels.
Click the Apply/Save button at the bottom of the page.
To setup the security section of your wireless network, click the option in the left sidebar labeled Security.
This takes you to a page that unfortunately we do not have the screenshot for.
On this page, there is a section titled WPS Setup. We strongly advise you to avoid using this form of wireless connection. WPS is extremely easy to crack. To learn more about this, read our guide titled What is WPS.
Find the section titled Manual Setup AP. In this section the first thing you are asked is to Select SSID. Just choose the SSID or wireless name you created on the first page.
Next is the Network Authentication. Use the drop down menu to choose the option of WPA2.
You should then be asked for a Pre-Shared Key. This is the password you use to access your network. We recommend using at least 14-20 characters and a mix of letters, symbols, and numbers in your password. To learn how to create a strong password that is memorable, read our guide titled Choosing a Strong Password.
That’s it, just click the Apply/Save button in order to save your changes.
Possible Problems when Changing your WiFi Settings
After making these changes to your router you will almost definitely have to reconnect any previously connected devices. This is usually done at the device itself and not at your computer.
Other Dlink DSL-2730U Info
Don’t forget about our other Dlink DSL-2730U info that you might be interested in.
- Dlink DSL-2730U — How to change the IP Address on a Dlink DSL-2730U router
- Dlink DSL-2730U — Dlink DSL-2730U Login Instructions
- Dlink DSL-2730U — Dlink DSL-2730U User Manual
- Dlink DSL-2730U — Dlink DSL-2730U Port Forwarding Instructions
- Dlink DSL-2730U — How to Reset the Dlink DSL-2730U
- Dlink DSL-2730U — Information About the Dlink DSL-2730U Router
- Dlink DSL-2730U — Dlink DSL-2730U Screenshots
- Dlink DSL-2730U IN_R_01.00.01 — Information About the Dlink DSL-2730U Router
- Dlink DSL-2730U IN_R_01.00.01 — Login to the Dlink DSL-2730U
- Dlink DSL-2730U IN_R_01.00.01 — Reset the Dlink DSL-2730U
- Dlink DSL-2730U IN_R_01.00.01 — Dlink DSL-2730U Screenshots
Configuration guide of ADSL WiFi Modem D Link DSL 2730 U for BSNL and MTNL
D Link DSL 2730 is a reasonably good ADSL WiFi Modem prized around Rs 2100/-. Apart from WiFi Four Ethernet ports are also available. This Modem can be configured very easily through a user friendly web interface.
Features and Specifications of D Link DSL-2730 U Wireless N 150 Modem
- Latest ADSL /ADSL 2 standard Speed up to 24mbps Downstream and 1Mbps upstream
- Wireless N 150 Technology supports 802.11n/g/b standards
- Advanced Security options like Firewall, User access control, WPA/WPA2 etc.
- Four Ethernet Ports
- Factory reset button, WPS button and Wireless On/Off switch.
Modem Configuration
Now let us configure the Modem for broadband connection. Here we are basically discussing about the configuration part for BSNL and MTNL connection.
Connect the Modem to the Ethernet port of your PC/Laptop with the supplied Ethernet cable. Power on the Modem and follow the steps .
- Open your web browser and type http://192.168.1.1 in the address bar of browser. Then enter the user name “admin” and password “ admin” in the popup box. Now the first page of Modem Configuration page will be displayed. See the screenshot


2. Click the Advance setup menu on the left sidebar. Now the following page will be displayed.
3. In that page click the add button as shown in the screenshot. Now in the next page we have to enter the VPI/VCI values of ISP. Here the VPI value of BSNL and MTNL is “0” and VCI of BSNL is 35 and MTNL is 32.

- Select the DSL Latency: Path 0
- Select the DSL Link Type: EoA
- Select Connection mode: Default
- Encapsulation Mode: LLC/SNAP –BRIDGING
- Service category : UBR Without PCR
- Select the IP QoS Scheduler Algorithm to Strict Priority
4. After the above settings click the “Apply/Save” Button. Now the following page will be displayed.

5. Now click the WAN service Submenu under the Advance Setup.

6. In the above shown Wide Area Network (WAN) Service Setup page click the Add button. Now the following page will be displayed.

7. Click the Next Button for next page.

8. Here you can decide which configuration mode of your Internet connection. That is PPPoE mode or Bridge Mode. In PPPoE mode the user id and password supplied by your internet service provider is stored inside the Modem itself. Here internet connection will be made through as soon as you switched ON your Modem. PPPoE mode is essential to share the internet connection with multiple PCs, Laptops, Smart phones etc.
In Bridge mode Modem will work as a bridge and you have to setup a dialer in your PC. In this modem internet connection sharing is not possible through Modem. To configure the Modem in Bridge mode just select the Wan Service type to “Bridging” and keep rest all settings default, then go to the final steps through clicking the “Next” button.
9. Now let’s configure the Modem in PPPoE Mode
Select the “WAN Service Type” – PPP over Ethernet (PPPoE) then keep the rest settings default and click the Next button. See the screenshot of next page.

This is the important step where you have to enter the broadband userid and password supplied by your ISP (BSNL/MTNL etc).
- PPP Username – Username supplied by ISP
- PPP Password – Password supplied by ISP
- PPPoE Service Name – You can type anything for reference ..Say BSNL
- Authentication Method – Auto
- Enable Firewall
- Now Keep all the other settings Default. You need not to set anything
Click the Next Button

In this page Select the option “ Select DNS Server Interface from available WAN Interfaces” and click the Next button

Click the Apply/Save Button.

Now you have completed all the configuration steps. Just reboot the Modem by Switch OFF/ON. Open the browser and start browsing .
Dlink DSL-2730U User Manual
This page contains the user manual in PDF form for the Dlink DSL-2730U router.
Other Dlink DSL-2730U Guides
- Dlink DSL-2730U — How to change the IP Address on a Dlink DSL-2730U router
- Dlink DSL-2730U — Dlink DSL-2730U Login Instructions
- Dlink DSL-2730U — Dlink DSL-2730U Port Forwarding Instructions
- Dlink DSL-2730U — Setup WiFi on the Dlink DSL-2730U
- Dlink DSL-2730U — How to Reset the Dlink DSL-2730U
- Dlink DSL-2730U — Information About the Dlink DSL-2730U Router
- Dlink DSL-2730U — Dlink DSL-2730U Screenshots
- Dlink DSL-2730U IN_R_01.00.01 — Information About the Dlink DSL-2730U Router
- Dlink DSL-2730U IN_R_01.00.01 — Login to the Dlink DSL-2730U
- Dlink DSL-2730U IN_R_01.00.01 — Reset the Dlink DSL-2730U
- Dlink DSL-2730U IN_R_01.00.01 — Dlink DSL-2730U Screenshots
Download the Dlink DSL-2730U User Manual
The link below should start your download.
All User Manuals for Dlink DSL-2730U
Other Dlink DSL-2730U Info
Don’t forget about our other Dlink DSL-2730U info that you might find interesting.
- Dlink DSL-2730U — How to change the IP Address on a Dlink DSL-2730U router
- Dlink DSL-2730U — Dlink DSL-2730U Login Instructions
- Dlink DSL-2730U — Dlink DSL-2730U Port Forwarding Instructions
- Dlink DSL-2730U — Setup WiFi on the Dlink DSL-2730U
- Dlink DSL-2730U — How to Reset the Dlink DSL-2730U
- Dlink DSL-2730U — Information About the Dlink DSL-2730U Router
- Dlink DSL-2730U — Dlink DSL-2730U Screenshots
- Dlink DSL-2730U IN_R_01.00.01 — Information About the Dlink DSL-2730U Router
- Dlink DSL-2730U IN_R_01.00.01 — Login to the Dlink DSL-2730U
- Dlink DSL-2730U IN_R_01.00.01 — Reset the Dlink DSL-2730U
- Dlink DSL-2730U IN_R_01.00.01 — Dlink DSL-2730U Screenshots