Archer AX50 V1 User Guide
This chapter introduces how to connect your router to the internet. The router is equipped with a web-based Quick Setup wizard. It has necessary ISP information built in, automates many of the steps and verifies that those steps have been successfully completed. Furthermore, you can also set up an IPv6 connection if your ISP provides IPv6 service.
It contains the following sections:
The Quick Setup Wizard will guide you to set up your router.
If you need the IPv6 internet connection, please refer to the section of Set Up an IPv6 Internet Connection .
Follow the steps below to set up your router.
1. Visit http://tplinkwifi.net , and log in with the password you set for the router.
2. Click Quick Setup on the top of the page. Then follow the step-by-step instructions to connect your router to the internet.
3. To enjoy a more complete service from TP-Link (remote management, TP-Link DDNS, and more), log in with your TP-Link ID or click Register Now to get one. Then follow the instructions to bind the cloud router to your TP-Link ID.
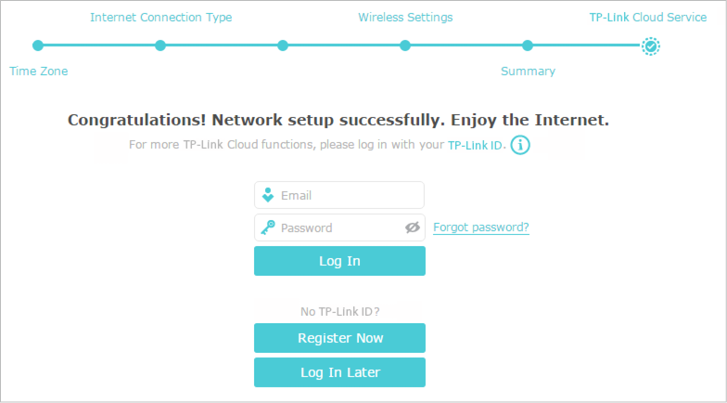
• To learn more about the TP-Link Cloud service, please refer to the TP-Link Cloud Service section.
• If you do not want to register a TP-Link ID now, you may click Log In Later to proceed.
• If you have changed the preset wireless network name (SSID) and wireless password during the Quick Setup process, all your wireless devices must use the new SSID and password to connect to the router.
2. Quick Setup Via TP-Link Tether App
The Tether app runs on iOS and Android devices, such as smartphones and tablets.
1. Launch the Apple App Store or Google Play store and search “ TP-Link Tether ” or simply scan the QR code to download and install the app.

2. Open the Tether app and log in with your TP-Link ID.
If you don’t have an account, create one first.
3. Tap the + button in the Tether app and select Router > Wireless Router . Follow the steps to complete the setup and connect to the internet.
4. Connect your devices to the newly configured wireless networks of the router and enjoy the internet!
To enjoy a more complete service from TP-Link, register and bind your TP-Link ID to the router.
3. Manually Set Up Your Internet Connection
In this part, you can check your current internet connection settings. You can also modify the settings according to the service information provided by your ISP.
Follow the steps below to check or modify your internet connection settings.
1. Visit http://tplinkwifi.net , and log in with your TP-Link ID or the password you set for the router.
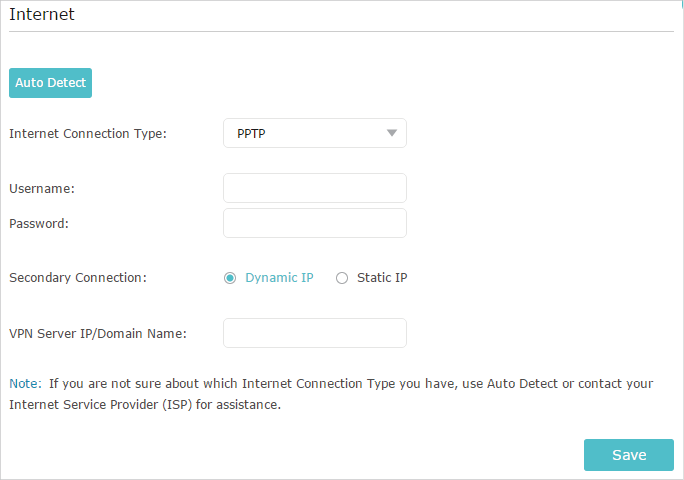
3. Select your internet connection type from the drop-down list.
If you are unsure of what your connection type is, click Auto Detect . Since different connection types require different cables and connection information, you can also refer to the demonstrations in Step 4 to determine your connection type.
4. Follow the instructions on the page to continue the configuration. Parameters on the figures are just used for demonstration.
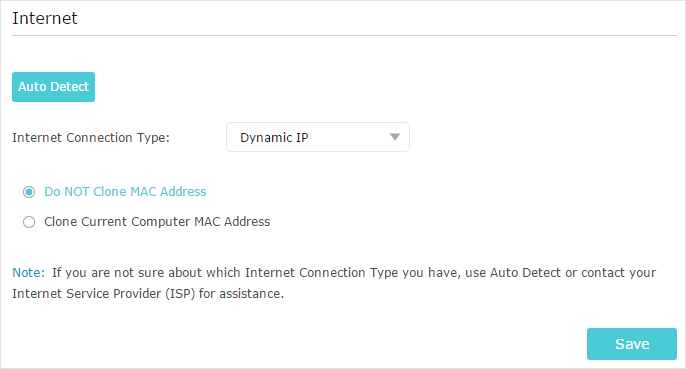
1 ) If you choose Dynamic IP , you need to select whether to clone the MAC address. Dynamic IP users are usually equipped with a cable TV or fiber cable.
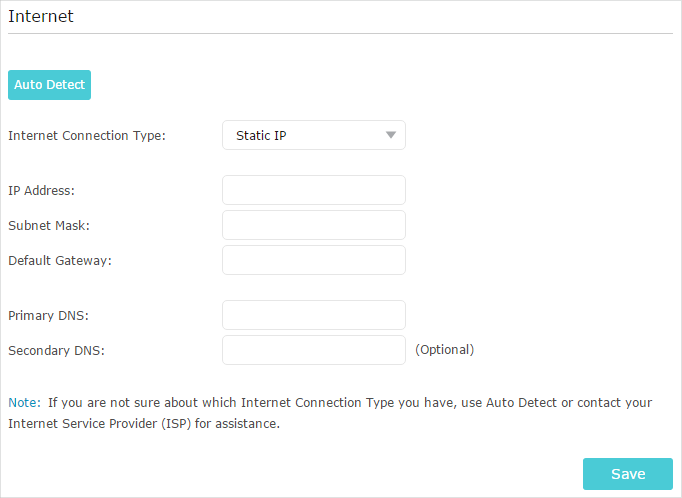
2 ) If you choose Static IP , enter the information provided by your ISP in the corresponding fields.
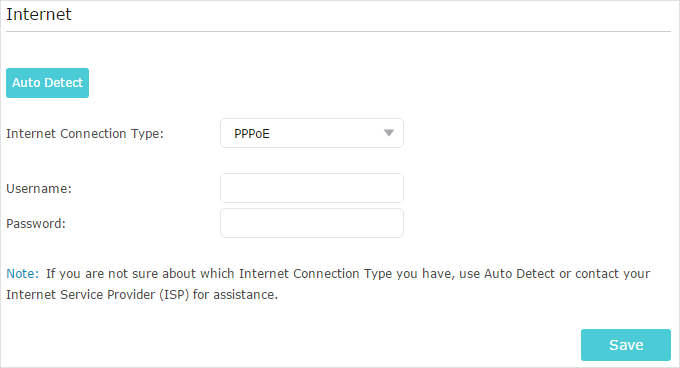
3 ) If you choose PPPoE , enter the username and password provided by your ISP. PPPoE users usually have DSL cable modems.
4 ) If you choose L2TP , enter the username and password and choose the Secondary Connection provided by your ISP. Different parameters are needed according to the Secondary Connection you have chosen.

5 ) If you choose PPTP , enter the username and password , and choose the Secondary Connection provided by your ISP. Different parameters are needed according to the Secondary Connection you have chosen.
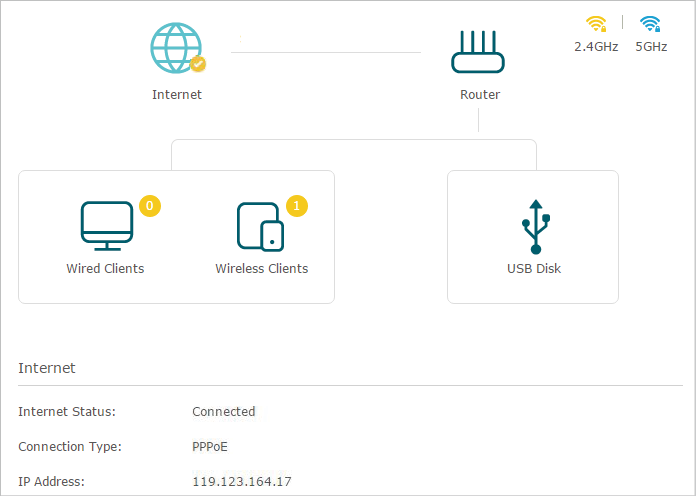
6. To check your internet connection, click Network Map on the left of the page. After the connection succeeds, the screen will display as follows. Here we take PPPoE as an example.
It may take 1-2 minutes to make the settings valid.
• If your internet connection type is BigPond Cable , please go to Advanced > Network > Internet to set your router.
• If you use Dynamic IP and PPPoE and you are provided with any other parameters that are not required on the page, please go to Advanced > Network > Internet to complete the configuration.
• If you still cannot access the internet, refer to the FAQ section for further instructions.
4. Set Up the Router as an Access Point
The router can work as an access point, transforming your existing wired network to a wireless one.
1. Visit http://tplinkwifi.net , and log in with your TP-Link ID or the password you set for the router.
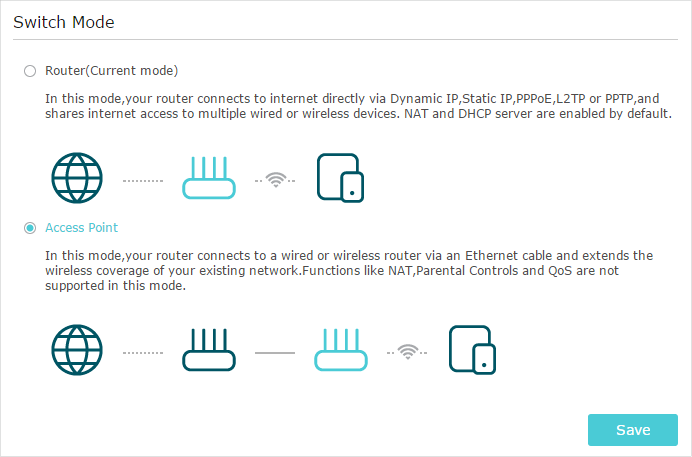
2. Go to Advanced > Operation Mode , select Access Point and click Save . The router will reboot and switch to Access Point mode.
3. After rebooting, connect the router to your existing wired router via an Ethernet cable.
4. Log in again to the web management page http://tplinkwifi.net , and click Quick Setup .
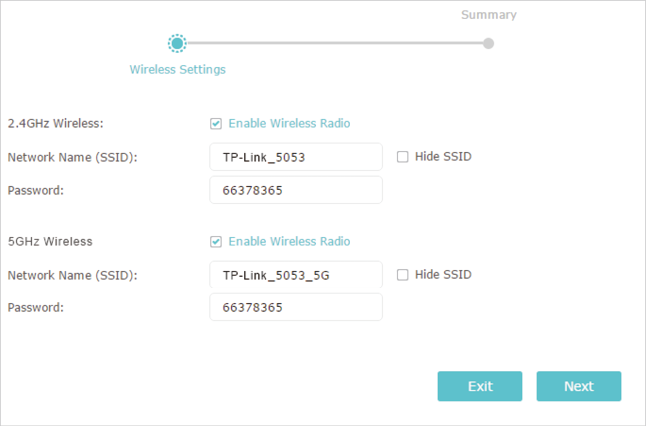
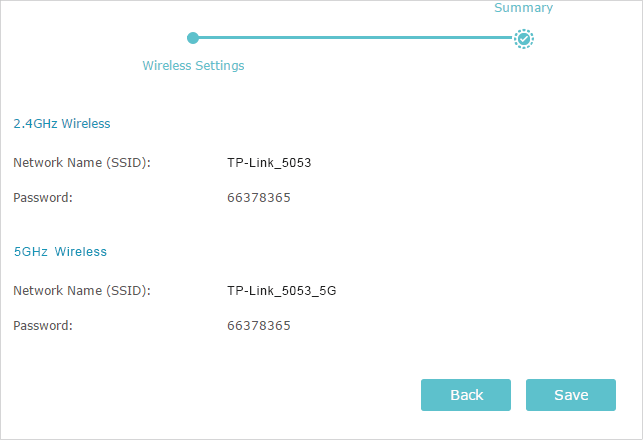
5. Configure your wireless settings and click Next .
6. Confirm the information and click Save . Now, you can enjoy Wi-Fi.
• Functions, such as NAT Forwarding, are not supported in the Access Point mode.
• Functions, such as Guest Network, are the same as those in the Router mode.
5. Set Up an IPv6 Internet Connection
Your ISP provides information about one of the following IPv6 internet connection types: PPPoE, Dynamic IP(SLAAC/DHCPv6), Static IP, 6to4 tunnel, Pass-Through (Bridge).
1. Visit http://tplinkwifi.net , and log in with your TP-Link ID or the password you set for the router.
3. Enable IPv6 and select the internet connection type provided by your ISP.
If you do not know what your internet connection type is, contact your ISP or judge according to the already known information provided by your ISP.
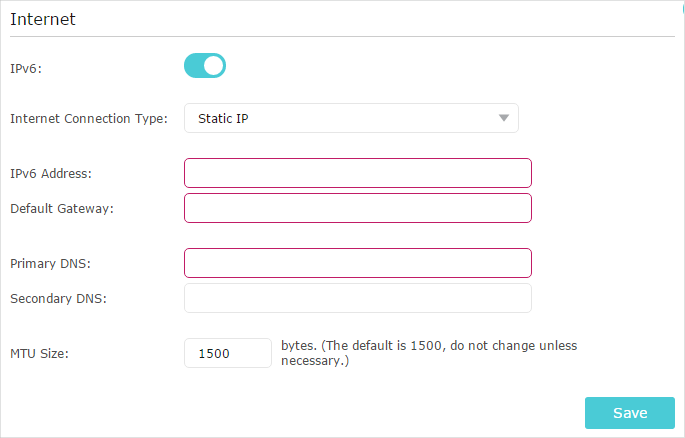
4. Fill in information as required by different connection types. Red blanks must be filled in.
1 ) Static IP: Fill in blanks and click Save .
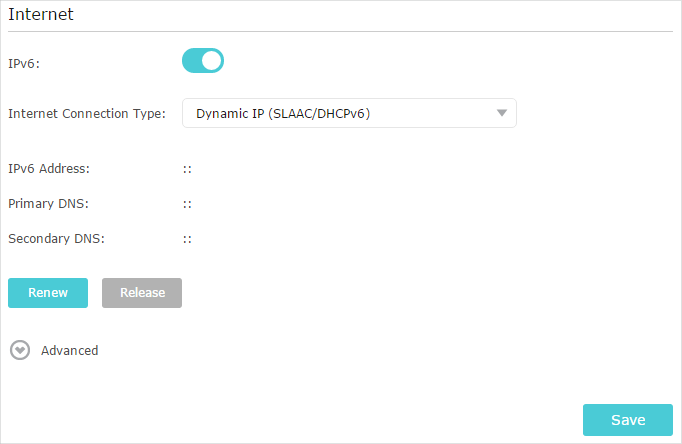
2 ) Dynamic IP(SLAAC/DHCPv6): Click Advanced to input further information if your ISP requires. Click Save and then click Renew .
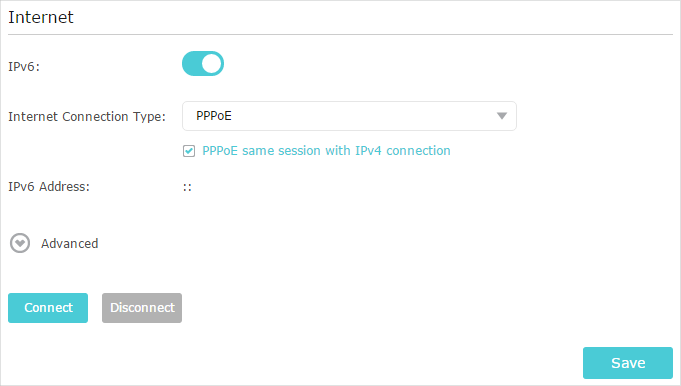
3 ) PPPoE: By default, the router uses the IPv4 account to connect to the IPv6 server. Click Advanced to input further information if your ISP requires. Click Save and then click Connect .
If your ISP provides two separate accounts for the IPv4 and IPv6 connections, please untick the PPPoE same session with IPv4 connection checkbox and manually enter the username and password for the IPv6 connection.
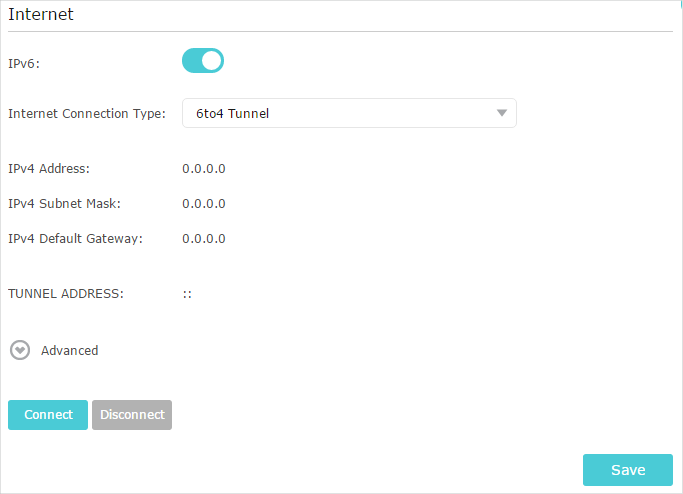
4 ) 6to4 Tunnel: An IPv4 internet connection type is a prerequisite for this connection type ( Manually Set Up Your Internet Connection ). Click Advanced to input further information if your ISP requires. Click Save and then click Connect .
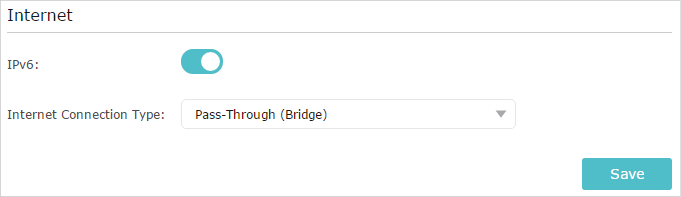
5 ) Pass-Through (Bridge): Click Save and skip to Step 6.
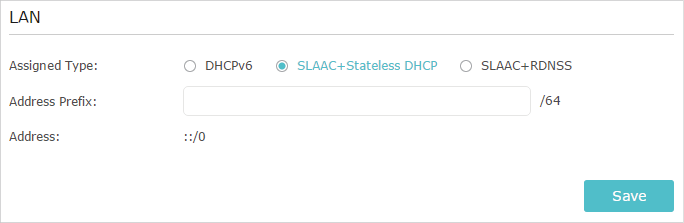
5. Configure LAN ports. Windows users are recommended to choose from the first two types. Fill in Address Prefix provided by your ISP, and click Save .
Find Help on the web management page to know more about items.
6. Click Status to check whether you have successfully set up an IPv6 connection. The following figure is an example of a successful PPPoE configuration.
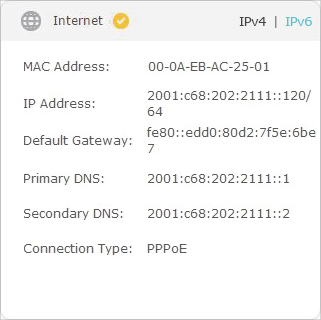
Visit the FAQ section if there is no internet connection.
Настройка Wi-Fi 6 роутера TP-Link Archer AX50

В нашей сегодняшней статье мы рассмотрим пошаговую инструкцию по подключению и настройке гигабитного роутера TP-Link Archer AX50. Это одна из самых новых моделей в линейке маршрутизаторов от TP-Link. AX50 может работать одновременно на двух частотах — 2.4 ГГц и 5 ГГц. Оснащен пятью гигабитными портами. Ключевой особенностью Archer AX50 является поддержка стандарта Wi-Fi 6 — новейшего поколения Wi-Fi, способного обеспечить максимальную суммарную скорость передачи данных до 3000 Мбит/с. Кроме того, стандарт Wi-Fi 6 позволяет подключить к роутеру в 4 раза больше устройств, чем стандарт Wi-Fi 5. Здесь следует отметить, что для достижения таких результатов все подключаемые к роутеру устройства также должны поддерживать стандарт Wi-Fi 6.
Приступим к подключению и настройке Archer AX50.
Подключите Ваш роутер TP-Link Archer AX50 к электросети. Интернет-кабель провайдера, приходящий из подъезда в квартиру, вставьте в порт WAN (порт синего цвета).

Если Ваш интернет-провайдер использует фиксацию по mac-адресу, то Вам следует обратиться в службу техподдержки для привязки mac-адреса роутера. Без этого действия интернет работать не будет.
Теперь нужно подключиться к сети Wi-Fi. Данные для подключения указаны на нижней стороне роутера. SSID — это название сети Wi-Fi, Wireless Password/PIN — это пароль для входа в сеть.

Находим в списке доступных сетей Wi-Fi нужную нам сеть. Вводим пароль для подключения к сети.

Далее рассмотрим пошаговые действия по настройке беспроводной сети.
Шаг 1. Заходим в веб-интерфейс роутера. Для этого в браузере в верхней строке вводим: 192.168.0.1. или tplinkwifi.net.

Шаг 2. В открывшемся окне меняем язык, а также создаем пароль для входа в веб-интерфейс роутера.

Шаг 3. Проходим на вкладку «Быстрая настройка». Выбираем из списка свой часовой пояс (Москва). Нажимаем «Далее».

Шаг 4. Тип подключения к Интернет выбираем — «Динамический IP-адрес». Нажимаем «Далее».

Шаг 5. MAC-адрес — ставим галочку на пункт «Не клонировать MAC-адрес». Нажимаем «Далее».

Шаг 6. Настройки беспроводного режима. В данном разделе указаны SSID (название) и пароль сетей Wi-Fi для каждой из двух частот.

Мы можем задать свои значения для каждой сети или оставить параметры по умолчанию.

Шаг 7. Обзор настроек. Проверяем все наши введенные параметры.


Шаг 8. Для того, чтобы измененные параметры вступили с силу, нам нужно переподключиться к новой беспроводной сети. Находим в списке доступных Wi-Fi сетей нашу новую сеть. Подключаемся к ней.

Шаг 9. Быстрая настройка роутера Archer AX50 успешно завершена.

Шаг 10. Далее рассмотрим дополнительные настройки роутера. Проходим на вкладку «Дополнительные настройки».
Состояние. В данном разделе мы можем посмотреть состояние беспроводной сети, основной режим работы и параметры.

Беспроводные клиенты. Данная вкладка показывает, сколько и каких беспроводных устройств подключено к роутеру.

Сеть. Пройдя на данную вкладку, мы можем посмотреть и, при необходимости, изменить основные параметры беспроводной сети. Рассмотрим каждый из пунктов вкладки «Сеть» подробнее.
- Интернет. Указаны параметры подключения к Интернету — тип подключения, IP-адрес, маска подсети, шлюз и DNS-сервер. Если тип подключения к Интернету — динамический IP, то все эти параметры роутер получает автоматически от провайдера.


Рабочий режим. Данная вкладка показывает, в каком режиме работает роутер. Здесь же настраивается подключение роутера как точки доступа.

Беспроводной режим. Пройдя на данную вкладку, мы можем изменить параметры беспроводного подключения.
- Настройки беспроводного режима. Проверяем, включена ли функция OFDMA. OFDMA — технология является ключевой для всех роутеров стандарта Wi-Fi 6.

Параметры шифрования, рабочий режим, характеристики канала — данные значения оставляем по умолчанию.