Взаимодействие сканеров уязвимостей с Metasploit. Часть 2
Требуемое программное обеспечение: Kali Linux.
Необходимые знания: опыт работы с консолью Linux-систем (в частности, дистрибутивом Kali Linux) и консолью Метасплойта.
В первой части мы познакомились с модулями для обнаружения уязвимостей при аутентификации (SMB Login Check, VNC Authentication None Detection) и плагином для поиска уязвимостей в веб-приложениях (WMAP). Во второй части займемся установкой сканера уязвимостей Nessus на 32-битную версию системы Kali Linux для последующего его взаимодействия с Метасплойтом (установка на 64-битную версию происходит аналогичным образом).
Metasploit – излюбленный инструмент хакеров и специалистов по информационной безопасности, включающий в себя множество модулей для создания и использования эксплойтов. Но для эксплуатации уязвимостей, их необходимо сначала выявить. Функционала фреймворка для этих целей не достаточно, зато с этой задачей легко справляются сканеры уязвимостей. Взаимодействие сканеров уязвимостей с модулями Metasploit можно осуществить с помощью поддерживаемых плагинов. В результате такой интеграции мы сможем находить уязвимые места и тут же их эксплуатировать.
Установка Nessus Home
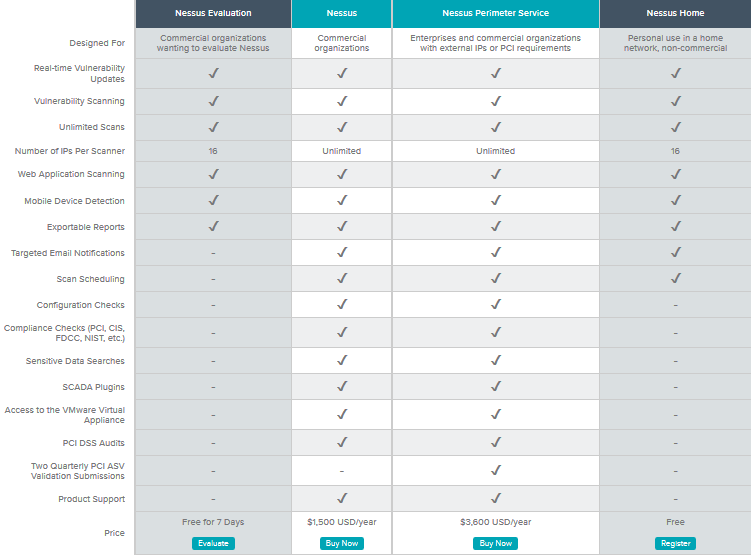
Nessus — один из самых популярных сканеров уязвимостей, разработанный компанией Tenable Network Security. До 2005 года это было свободное программное обеспечение с открытым исходным кодом, а в 2008 году вышла платная версия продукта. Также существует и бесплатная «домашняя» версия, ограничивается использованием в домашней сети. Её мы и будем использовать в наших целях.

Итак, приступим к установке.
Для начала скачаем с сайта производителя последнюю версию программы для системы Debian (на момент написания статьи актуальным был Nessus v5.2.5).
Запустим установку программы
dpkg -i Nessus-5.2.5-debian6_i386.deb
после чего активируем службу Nessus
/ etc/init.d/nessusd start
Управление сканером осуществляется через веб-интерфейс. Чтобы туда попасть, введите в адресной строке браузера https://127.0.0.1:8834. Здесь потребуется создать аккаунт администратора, указав логин и пароль.
На следующем шаге необходимо ввести код активации, который придет на вашу электронную почту, указанную на сайте производителя при регистрации.
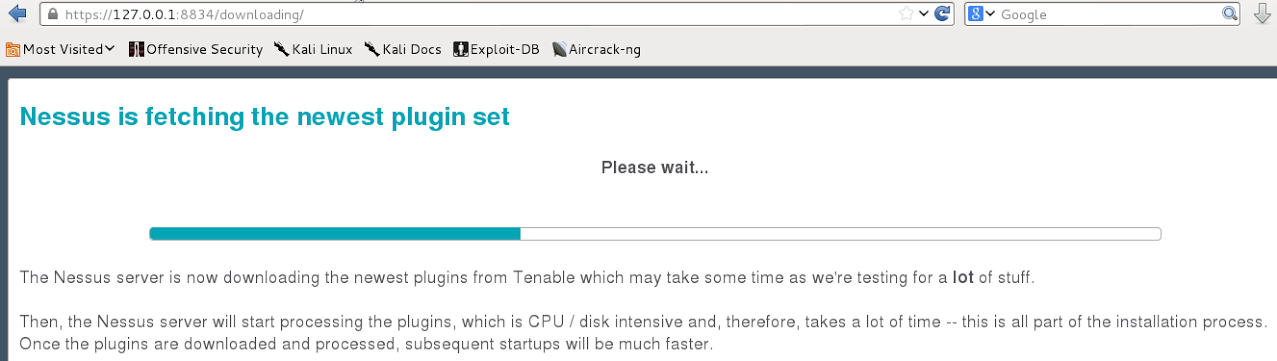
Завершающей стадией установки является загрузка плагинов.

Для сохранения результатов сканирования в базе данных Метасплойта, необходимо к ней подключиться
db_connect @/
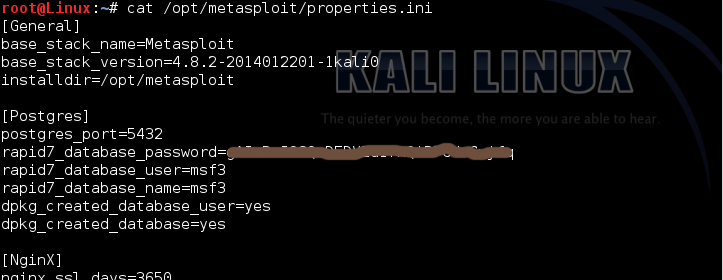
Вся необходимая для подключения информация содержится в файле properties.ini
cat /opt/metasploit/properties.ini
, где
user = rapid7_database_user
pass = rapid7_database_password
host = 127.0.0.1 (в случае, если серверная часть Nessus установлена в вашей системе)
port = postgres_port
database = rapid7_database_name

Теперь нам нужно подгрузить плагин nessus
load nessus
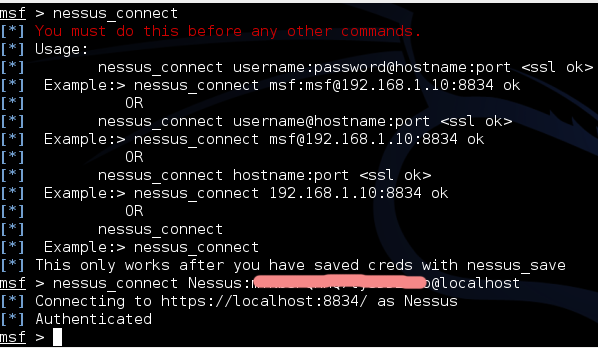
и подключиться к серверу Nessus
nessus_connect username:password@hostname:port
, где
username – логин администратора Nessus
password — пароль администратора Nessus
К сожалению, управление через консоль Метасплойта не позволяет воспользоваться всеми возможностями Nessus. Так, например, для создания задачи сканирования необходимо наличие политики сканирования (параметров для проведения определенного типа сканирования), которую можно создать только через веб-интерфейс Нессуса. В связи с этим будет рассмотрена как работа с консолью, так и работа с веб-интерфейсом.
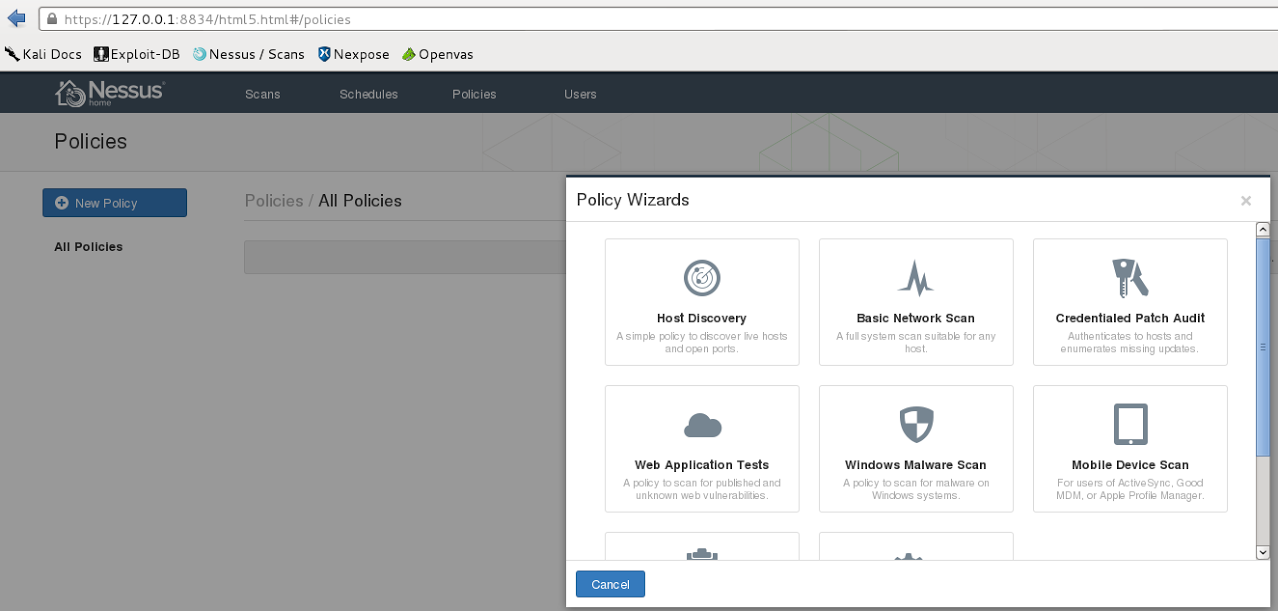
Создадим две часто используемые политики: Web Application Tests Policy – политика сканирования веб-приложений на наличие уязвимостей, Basic Network Scan Policy – сканирование внешних или внутренних хостов на наличие уязвимостей.
Web Application Tests Policy
127.0.0.1:8834 > Policy > New Policy > Web Application Tests Policy
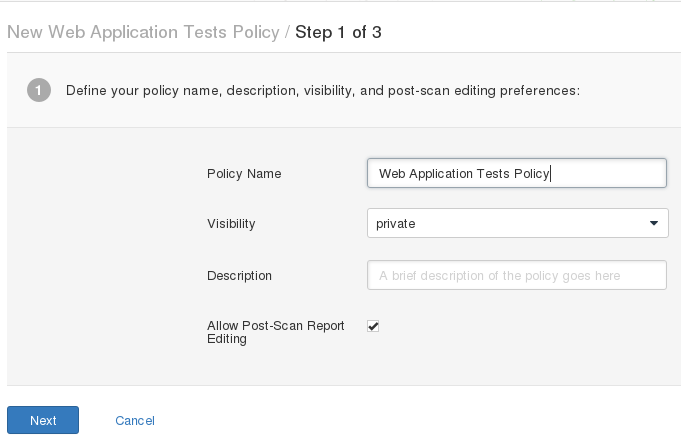
На первом шаге зададим политике имя и доступность просмотра результатов
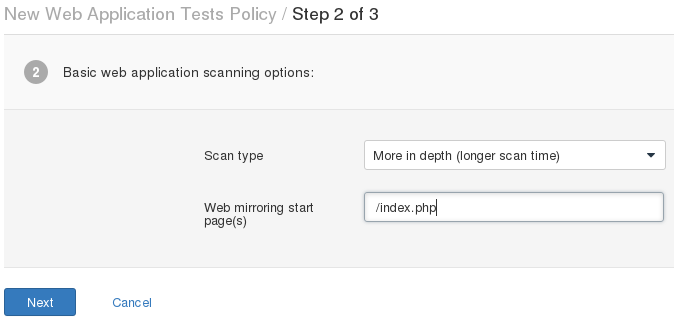
На втором шаге укажем тип сканирования (поверхностный или глубокий) и стартовую страницу.
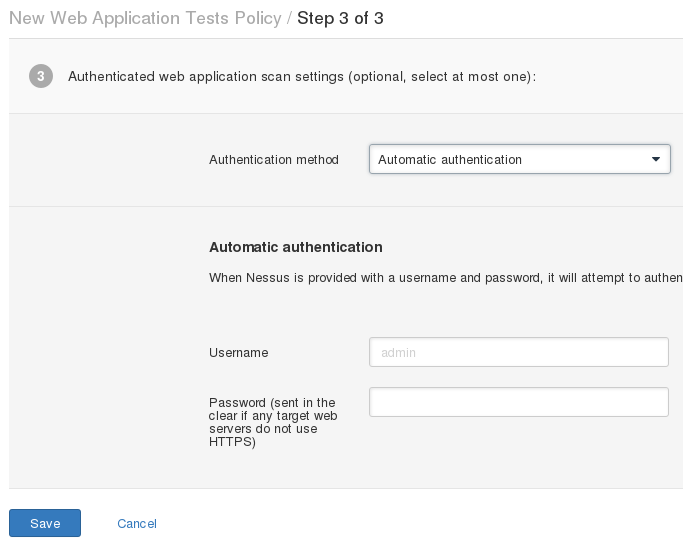
На третьем шаге нужно будет выбрать метод аутентификации
Теперь создадим задачу для сканирования цели
127.0.0.1:8834 > Scans > New Scan

Здесь нам потребуется присвоить имя нашей задаче, выбрать тип политики, задать цели для сканирования и указать периодичность запуска (по умолчанию сканирование начнется сразу после создания задачи).
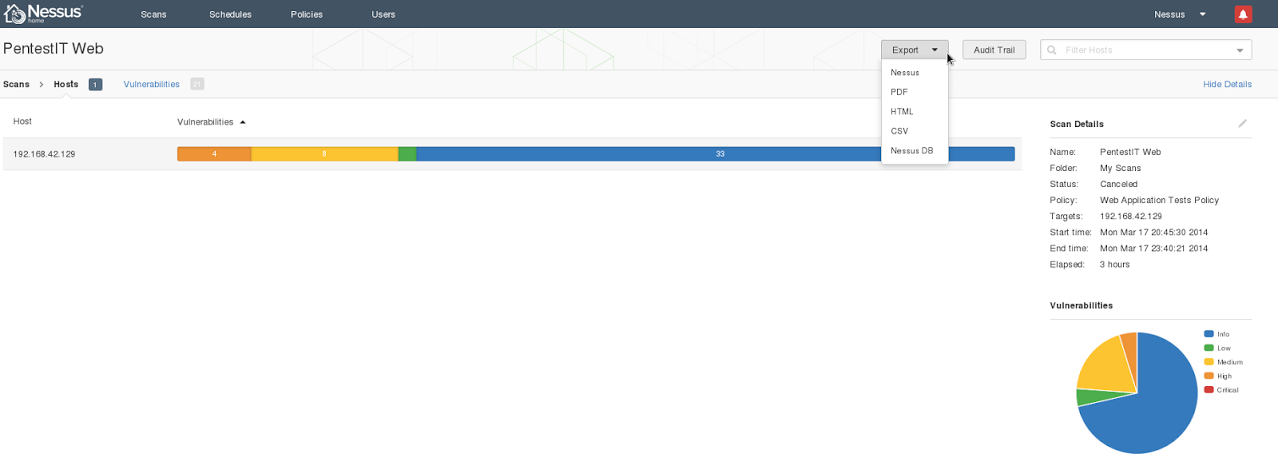
По завершению сканирования щелкните дважды на задачу и экспортируйте результаты в формате Nessus

Завершающим этапом является импорт сохраненных результатов сканирования в базу данных Metasploit
db_import ‘/root/Desktop/nessus_report_PentestIT_Web.nessus’
Basic Network Scan Policy
В этом примере разберем процесс управления через msfconsole
Как уже отмечалось, политику можно создать только через веб-интерфейс
127.0.0.1:8834 > Policy > New Policy > Basic Network Scan Policy
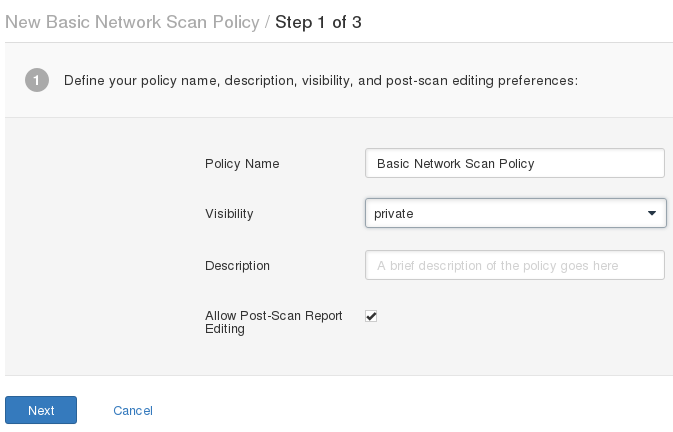
Что делать на первом шаге, вам уже известно
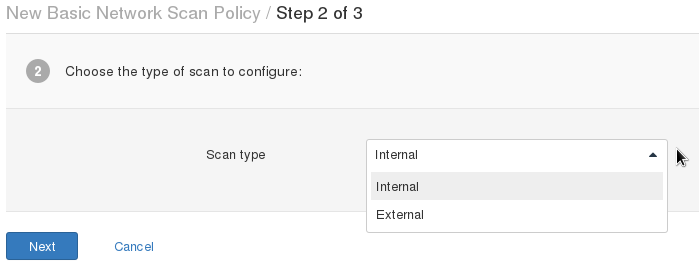
На втором шаге, если сканируете внутреннюю сеть организации, указываете “Internal”, внешнюю – ‘External’

На третьем шаге я оставил всё без изменений
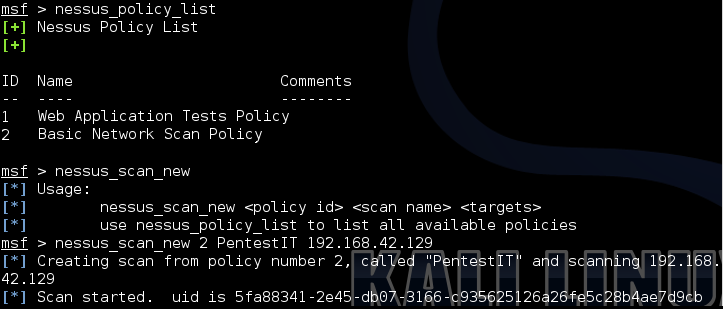
С созданием политики закончили. Теперь вернемся в msfconsole, и с помощью команды nessus_policy_list узнаем id нашей политики на сервере Nessus, а затем создадим задачу для сканирования
nessus_scan_new 2 PentestIT 192.168.42.129

Интересует статус сканирования? Пожалуйста
nessus_scan_status

Для того чтобы просмотреть отчет о выявленных уязвимостях или импортировать его с сервера Nessus, нам понадобится id
nessus_report_list
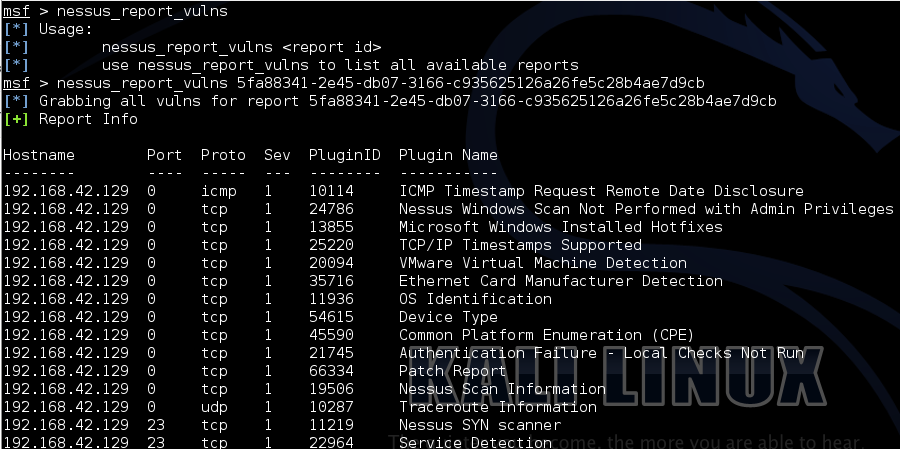
По итогам проверки будет составлен список выявленных уязвимостей, ознакомиться с которым можно по команде nessus_report_vulns
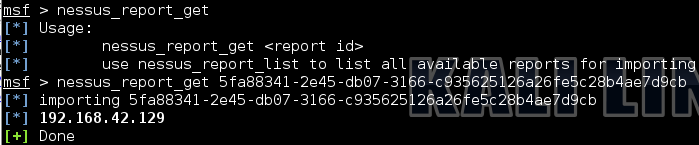
И, наконец, производим сам импорт
nessus_report_get 5fa88341-2e45-db07-3166-c935625126a26fe5c28b4ae7d9cb
Как вы видите, в данном случае работать с msfconsole не совсем удобно из-за ряда ограничений, поэтому для работы с Nessus рекомендую использовать веб-интерфейс с последующим импортом результатов в Metasploit.
Installing Nessus on the Kali Linux
![]()
What is Nessus? Nessus is a tool for vulnerability assessment, and it is a paid tool. In this article, we will discuss the free version of Nessus known as Nessus Essentials, which is also called Nessus Home. It has limited features and quite handy to carry out the vulnerability scanning automatically.
Nessus has a lot of interesting features. Some of them are listed below:
- It has a nice GUI, which is easy for use.
- The scan can be done easily and more quickly. Also, it is easy to set up the scan.
- It will generate a report that is formatted nicely, and the resulting output will be organized and neat.
In this article, we will see how to execute a simple windows vulnerability scan and to set up the Nessus essentials. For this purpose, we will use the 32-bit Kali Linux on VM.
Instructions to install
The following steps are to be followed to install the Nessus on the kali Linux for a 32-bit operating system. For a different operating system, similar steps should be followed.
1. For registration, click on the link below:
Once the link is open, enter your first and last name with an email address. This is done to get an activation code after registration.
2. Choosing the Right Version: In the next step, select the appropriate version for the operating system and press the download button.
3. License Agreement: Now, agree with the terms of condition and the license agreement to save it on your system.
4. Unpacking Nessus: Now unpack the Nessus by going to the download directory through terminal.
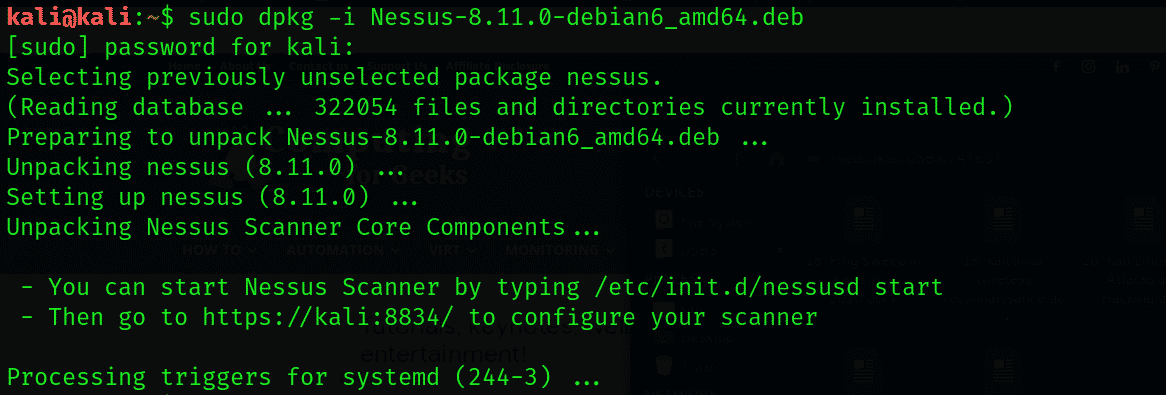
5. Begin the Nessus daemon with the help of the following command:

It can also be done during the boot time by the command:

6. Security error and allow Nessus: A security error will have occurred when we browse the GUI Nessus using this link.
To allow Nessus, click on Advanced, then on Add Exception, and finally on Confirm Security.
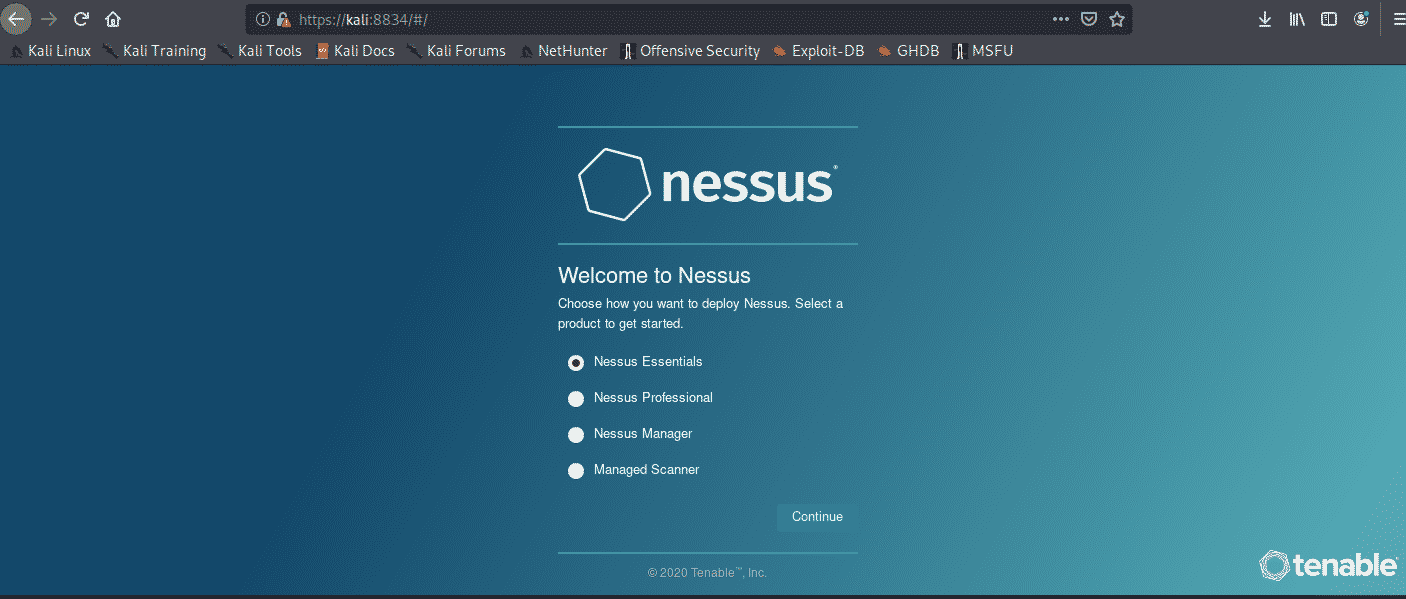
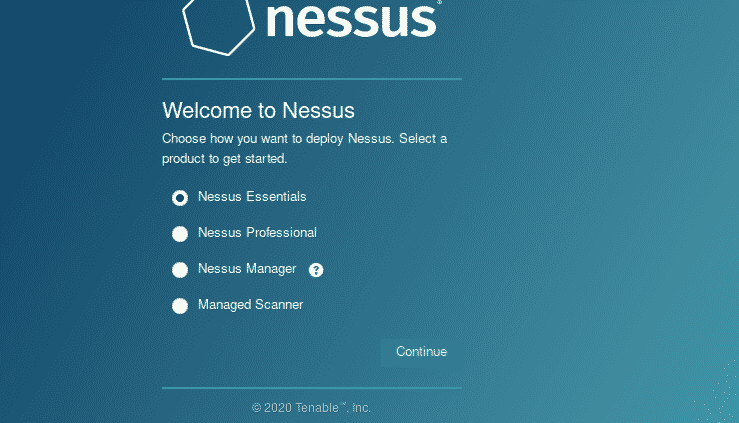
7. Selecting Nessus Essentials: Select it and press Continue.
8. Skipping the Activation Code Registration
9. Entering the Activation Code: An email will be received. Go to your inbox and copy the activation code to paste it in Nessus. Then press continue.
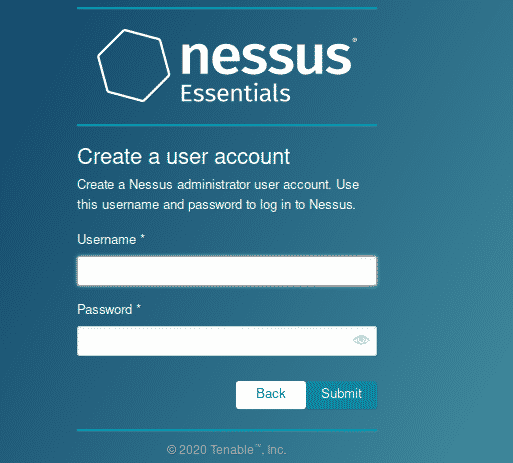
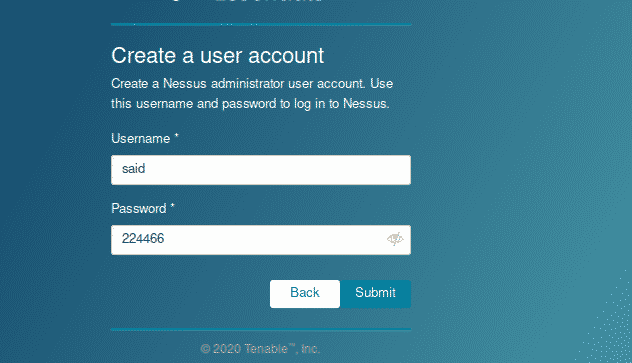
10. Creating a User Account; Now create the user account by giving the details and submit it. This account is used to login to the Nessus.
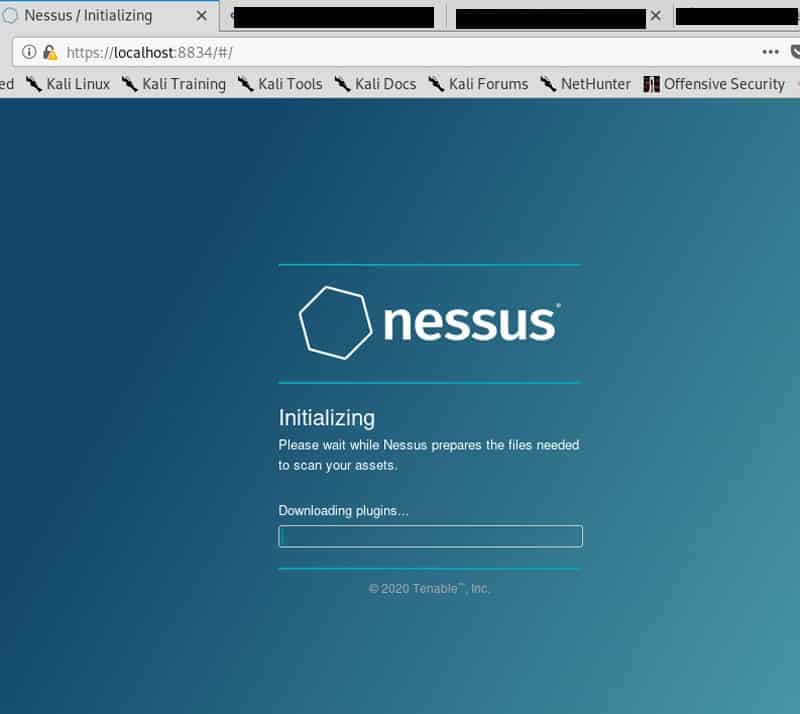
11. Patience: Here, wait for 45-60 minutes until the Nessus finish its installation. Some times it will take a longer time to install.
Create a new custom policy
By performing a simple Windows Vulnerability Scan, we will try out some features after installing the Nessus. It is based on scan policies that include what to look for or not.
First of all, change the policies from the sidebar. Then press on New policy. The Nessus show a lot of predefined policies. We can also create policy according to the user with the help of scratch, which can be customized according to the need of the user. Then click on the Advanced Scan. Now give the name to policy and a short description.
Different drop-down menus are shown on the left side. Click on the discovery; we see different options of setting in the host discovery. To scan arrange of hosts or network, uncheck the option Test the local Nessus host. This option will not allow Nessus to scan, and only the host with single windows will be scanned. Now keep the default settings and leave as it is.
In the next step, we will go to the section of port scanning. Here we see that the SYN option is active by default while the TCP option is not active. This is because the Nessus will use the quick SYN scan then the normal TCP scan. Furthermore, the UDP option can be enabled, but it takes a longer time, and it is not effective.
We will also see more setting options for vulnerability scanning. There is also the tab of credentials where we enter the login details to allow the various protocols such as SSH and SNMP to carry out the authenticate scan.
Now, go to the Plugin tab. They are like separate modules to carry out the vulnerability assessment of various components.
Plugins are also available for different types of Linux, web servers, DNS, firewalls, and FTP, etc. To make vulnerability assessment more accurate and perfect, mix the variety of plugins. It is necessary to select the right plugins to avoid the scanning of irrelevant vulnerabilities like cisco vulnerabilities on a Linux target.
As here, we are scanning the normal host of windows 7. To do this, click the option disable all and go with the Windows: Microsoft Bulletins option. For exploring more about plugins. Now go on a specific plugin by clicking on it. After doing that, a popup will appear that contains the descriptions, solutions, and risk ratings. After configuring the settings, click to save it.
Conclusion:
In this article, I have shown you how to install Nessus software tool in Kali Linux. I have also explained how this tool works and its usage.