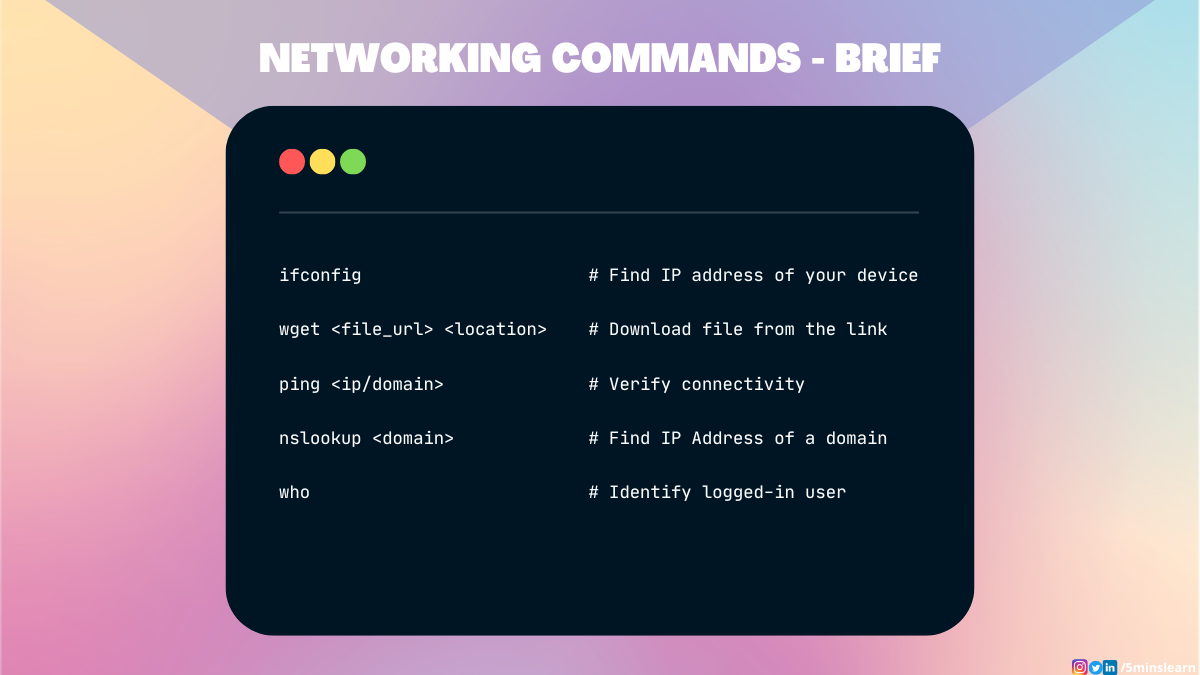
- Linux Networking Commands You Should Know as a Beginner
- Prerequisites
- How to Find the IP Address of Your Machine
- What’s an IP Address?
- Characteristics of Network Interface
- What is MTU?
- inet row in ifconfig
- RX and Tx
- How to Download a File Using the Linux Terminal
- How to Know Which User is Logged-In
- Conclusion
Linux Networking Commands You Should Know as a Beginner

Arunachalam B
Can you imagine what it would be like to have a laptop but not to be able to access the internet?
If you’re a developer (or an aspiring one), you’ll likely use the internet every day. So you should learn a few useful networking commands.
To learn networking in Linux, you should also know how to use the Terminal. Because using terminal commands is way more powerful than using the UI. It’ll also be faster and more efficient.
Prerequisites
A basic understanding of the Linux terminal is enough to learn networking in Linux.
How to Find the IP Address of Your Machine
This is the most basic question in networking and it’s the starting point of learning networking.
What’s an IP Address?
IP stands for «Internet Protocol,» which is the protocol (set of rules) governing how data are sent via the internet or a local network.
An IP address is basically a unique address to identify a device on the internet or on a local network.
Ok, now that we know what an IP address is, let’s continue.
Being a professional web developer, I work on developing websites along with their backend services.
One day an intern asked me some questions about an interesting project he was working on. He wanted his site to be responsive on desktop, mobile, and tablet.
Though the site looked responsive, once I adjusted the browser window and switched to the mobile view on his laptop, the outcome on the phone after deployment was not so impressive.
«I wanted to check the site’s responsiveness with my mobile in development mode. Is it possible?» he asked.
«Yes, it is. Connect your laptop and mobile on the same network. Find your laptop IP, and navigate to ip: on your mobile browser», I replied.
So he opened a new tab in the browser and started typing «https://whatismy. «, I stopped him and asked what he was searching for.
He told me he was finding his IP address.
«Use ifconfig command to find the IP address of your machine», I replied.
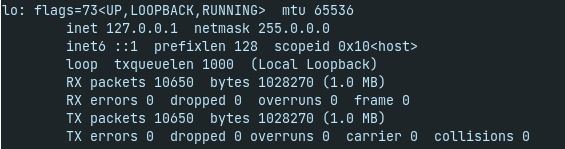
He opened up the terminal and tried out the command, like this:

«Oh, Man! I’m confused now. Which is my IP here?», was his next question.
So I explained to him about each block in the above output:
Before walking into each block, you can find that few items are common for all blocks. Let’s learn about them.
Characteristics of Network Interface
The first line shows UP, LOOPBACK, RUNNING, NOARP, MULTICAST, etc. These are the characteristics of the network interface. For example, able to do BROADCAST, able to do MULTICAST. By default, the ifconfig command lists only the UP devices. The interface can also made down.
What is MTU?
MTU stands for Maximum Transmission Unit. It determines the maximum payload size of a packet that is sent. The default standard value is 1500 bytes. However, you can increase the payload size of the packet, which allows you to send more data and increase the data transfer rates.
inet row in ifconfig
inet is the internet(IPv4) address assigned to that particular interface. It will be set by DHCP client.
A Netmask is a 32-bit «mask» used to divide an IP address into subnets and specify the network’s available hosts.
Broadcast address refers to all hosts on the specified network simultaneously.
Destination adress is the address of the remote host at the other end of the point-to-point link.
inet6 is the IPv6 address assigned to that particular interface.
prefixlen is called Prefix length which specifies the number of bits in the IP address that are to be used as the subnet mask.
scopeid is a id assigned for a zone. A scope is a topological area within which the IPv6 address can be used as a unique identifier for an interface or a set of interfaces.
RX and Tx
Rx / Tx packets – displays the number of received / transmitted packets
Rx / Tx bytes – displays the packets size in buckets
Rx / Tx errors – displays the amount of error packets
Rx / Tx drop – displays the amount of dropped packets
Rx / Tx overrun – displays the amount of overrun packets
All the items mentioned above are self-explanatory except overrun. Here’s a quick definition of overrun.
An overrun is a packet that does not get sent out during a specific polling cycle. This is due to scheduling. It does not indicate a failure of the packet, merely that it was not sent. Overrun packets are re-scheduled for the next cycle, but it is possible that the same packet may be overrun once more.
Let’s explore what’s each block for.
The first block starting with enx. (previously called eth0 ) is for Ethernet connection. Since, I have not connected an ethernet cable, it does not show any data.

The block starting with lo is called LoopBack Interface. This is a special interface that the system uses to communicate with itself.
The block starting with tun0 is called Tunneling Interface. It contains information about the VPN you are connected to.

The block starting with wlp2s0 is called Wireless on PCI. This is the main interface that is connected to the WIFI of your Local network.

If you’re connected to your Wifi, you have to use the last one.
How to Download a File Using the Linux Terminal
One fine day my boss sent a bunch of downloadable links to me and asked me to download and wrap them in a Zip file and send it back to him.
I thought it would be easy work, but then I realized that it had 100+ downloadable links 🥲.
Activating Zen mode, I started searching for a way to automate this. This is when I found out about the wget command. You can use this terminal command to download a resource from a link.
The wget command is highly flexible and you can use it in scripts and cron jobs. As wget is non-interactive, it can independently download resources in the background and does not require a user to be active or logged in.
The following command will download an image from the w3schools website, as an example, in your current folder:

You can pass another argument to specify the destination folder where the file should be downloaded, like this:

You can use the ping command to check your network connectivity. This command takes the URL or IP address as an argument and sends data packets to that specified address. Then it prints the response from the server with the transition time. It will print the response continuously until you cancel that process (with CTRL + C). Finally it will return the following details:
- Minimum Time taken to receive a response
- Average Time taken to receive a response
- Maximum Time taken to receive a response
We can specify the number of packets to send using the -c flag, like this:

How to Know Which User is Logged-In
Linux supports multiple users and lets you manage those users. Each time you can log in as a different user. And you can use the who command to know which user you have been logged in as.

Conclusion
In this article, you have learned some basic networking commands in Linux.
You can subscribe to my newsletter on my personal site to receive more such insightful articles straight to your inbox. You’ll also find a consolidated list of all my blogs.