- Arch Linux Install Network Printer
- Prerequisite
- Assumptions
- CUPS Installation
- CUPS Configuration
- Log files
- Permissions
- Virtual PDF Printer
- Printer Driver Installation
- Epson Printers
- Samsung Printers
- Add A Printer Using CUPS Web Interface
- Add A Printer Using Printer Settings
- External Links
- Installing network printers under Linux
- Joining the network:
- Installing a printer on Debian/Ubuntu Linux based distributions (graphical way):
- Installing a printer on Debian/Ubuntu Linux based distributions (cups):
- About the author
- David Adams
- Add a network printer in GNU / Linux
- Method 1 (Ubuntu Configuration Tool):
- Method 2 (CUPS):
Arch Linux Install Network Printer
These instructions will provided the ability to print using the CUPS (open source printing system) to a selected network printer or virtual PDF printer.
Prerequisite
Assumptions
- Instructions use Arch Linux operating system
- Instructions done via the command line interface (CLI) (terminal/console)
- A printer is already powered on and directly connected to the local area network (LAN)
- Steps prefixed with a «$» (dollar sign) represents the CLI prompt; The text after the «$» is to be entered at the CLI
- Steps prefixed with a «#» (number sign) represents the CLI prompt with elevated user permissions (e.g. root); The text after the «#» is to be entered at the CLI
CUPS Installation
systemctl start cups.service CUPS Configuration
There are three configurations files located at /etc/cups/cupsd.conf , /etc/cups/cups-files.conf and /etc/cups/cups-pdf.conf .
Refer to the man pages for further details, cupsd.conf(5) and cups-files.conf(5).
After editing any of the configuration file(s), restart cups.service to apply changes (e.g. systemctl reload-or-restart cups.service).
Log files
By default, all logs are stored at «/var/log/cups/».
Permissions
By default printer administrative privileges are granted to users that are associated to the user groups, sys , root and wheel . Refer to SystemGroup within the configuration file /etc/cups/cups-files.conf to alter the default behaviour.
Virtual PDF Printer
By default the Virtual PDF printer stores the PDF files at «/var/spool/cups-pdf/$USER». Alter the configuration file /etc/cups/cups-pdf.conf to change the default directory.
Printer Driver Installation
A printer driver maybe required in order to use the printer with CUPS. Here are just a few brief examples of how that is done on each computer requiring print capability.
An AUR Helper may also be required in order to install desired printer driver.
Epson Printers
ME Office 82WD, 85ND, 900WD, 960FWD / Stylus NX620, SX525WD, SX620FW, TX560WD / Stylus Office B42WD, BX525WD, BX625FWD, TX620FWD / WorkForce T42WD, 60, 620, 630 pikaur -Syy epson-inkjet-printer-workforce-635-nx625-series Samsung Printers
pikaur -Syy samsung-unified-driver Add A Printer Using CUPS Web Interface
- Open «Manage Printing» or browse to http://localhost:631/.
- Click on “Administration” at the top of the web page.
- Click on “Add Printers”.
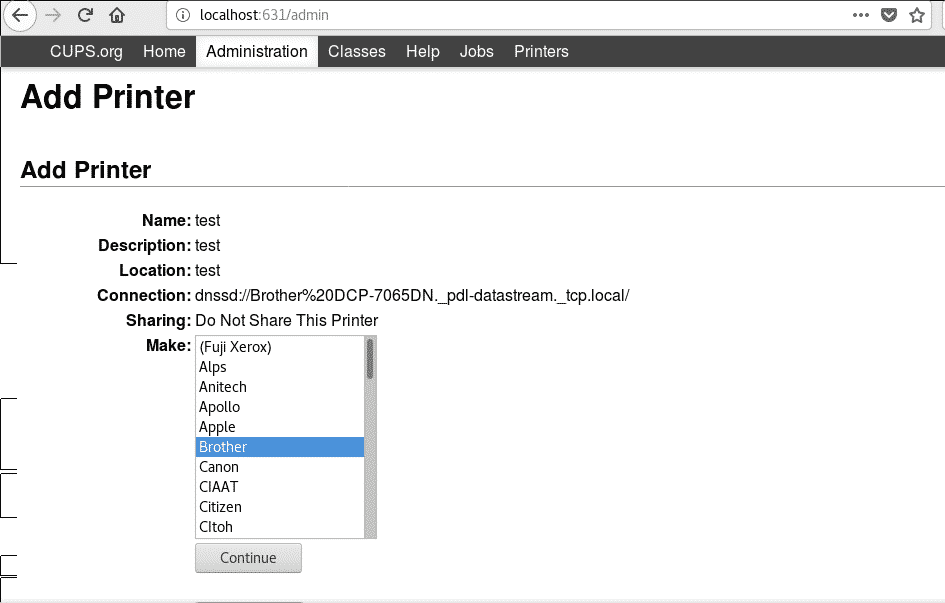
- Select the desired printer under «Discovered Network Printers» and click the «Continue» button.
- Set the «Name», «Description» and «Location» and then clock on the «Continue» button.
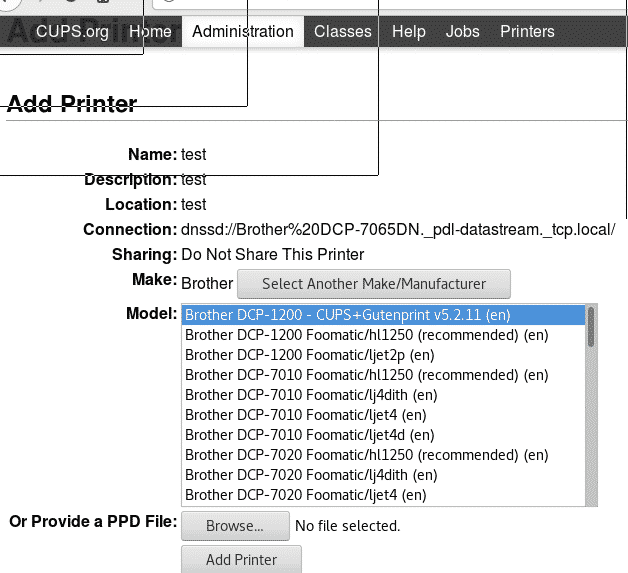
- Select the «Model» of printer and click the «Add Printer» button.
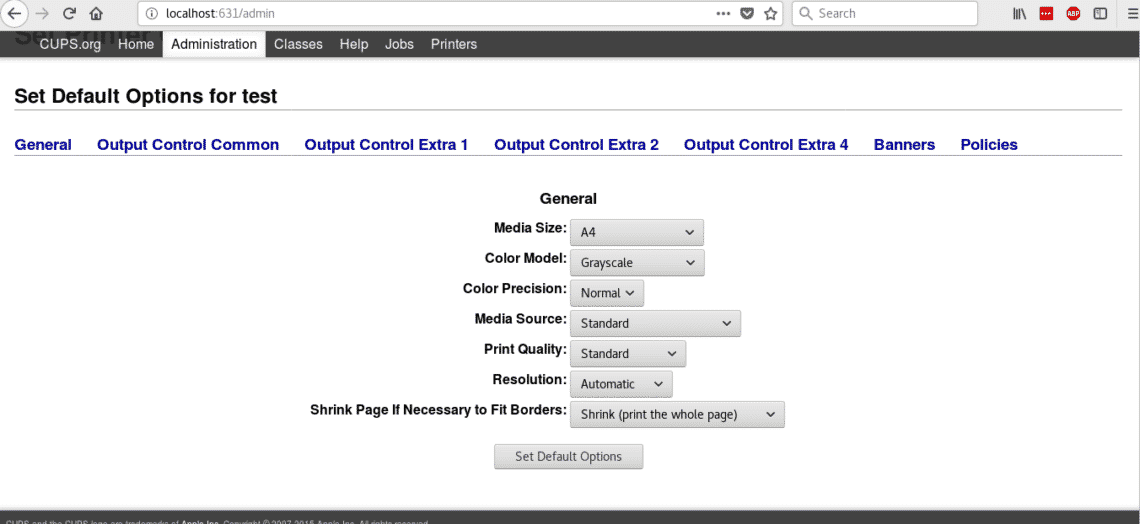
- Select default options and click the «Set Default Options» button.
Add A Printer Using Printer Settings
This utilizes «Printer Settings» (system-config-printer package) a native GUI application.
- Open «Printer Settings».
- Click on the «Unlock» button.
- Click on the «Add» button.
- Select the desired printer and click the «Forward» button.
- Set the desired «Printer Name», «Description» and «Location».
- Click the «Apply» button.
External Links
Installing network printers under Linux
![]()
In a previous tutorial we published on LinuxHint how to join a Windows network with your Debian/Ubuntu based linux device. This tutorial will explain how to add printers from the network on Debian/Ubuntu based Linux Distributions only since we’ll use the system settings and cups (apt). This article can be considered as the continuation of the mentioned above since we’ll use Samba, below i’ll briefly repeat the steps to join a Windows network, for explanation on each step please check the previous article.
Joining the network:
Step 1. Check for the IP range and Gateway from a Windows device by running “ipconfig” (the DOS command equivalent to ifconfig)
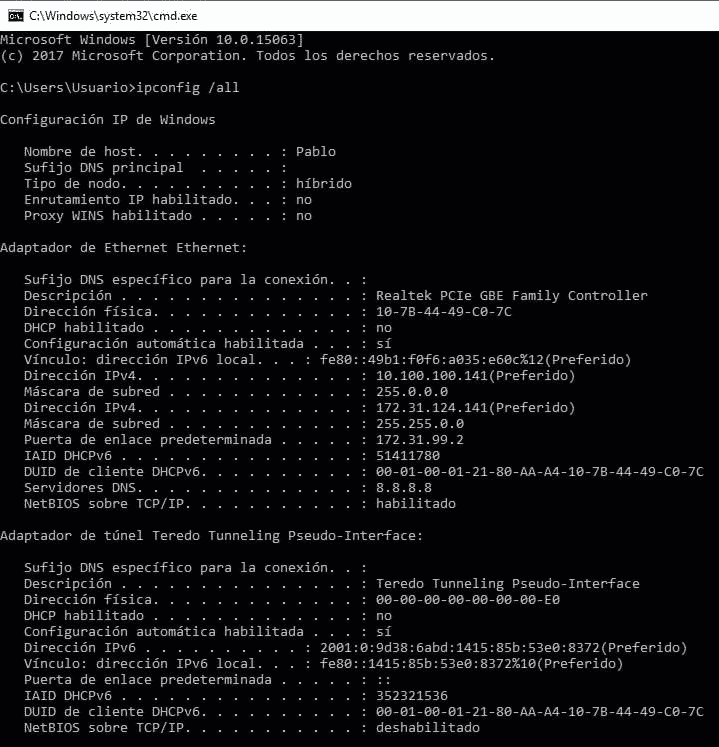
I apologize but the network belongs to a Latin American company and all workstation are in Spanish. Where “Direcciòn” means “address” and “Puerta de enlace determinada” means “gateway”.
Step 2.
Then we assign an ip address and the gateway (ping IP addresses to find a free one). Run:

Replace enp2s0 for your network device and write the proper IP addresses instead.
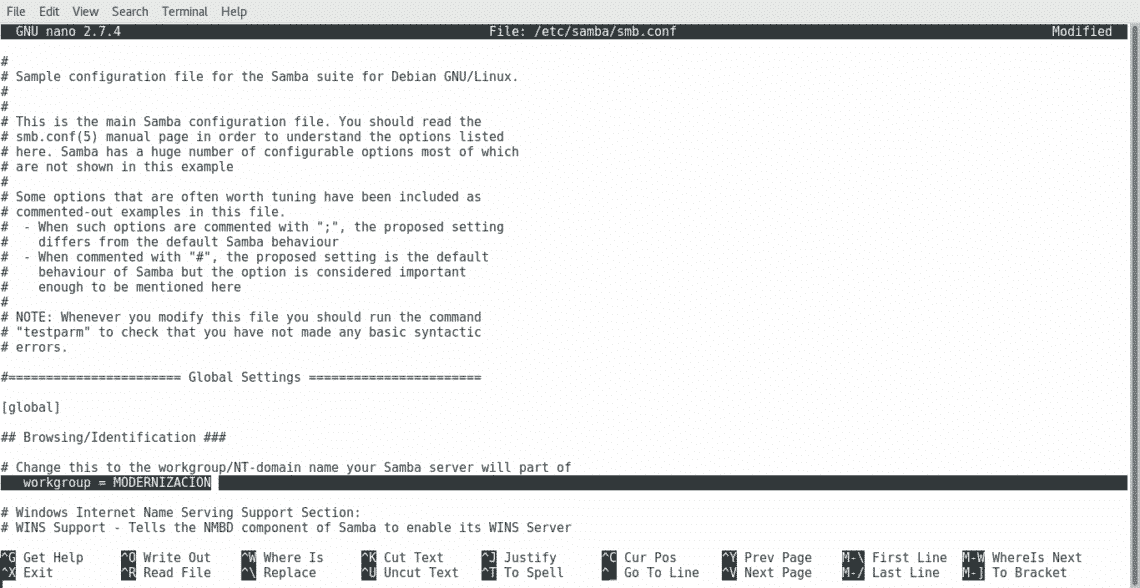
Edit the file nano /etc/samba/smb.conf adding the correct Workgroup. Run:
Installing a printer on Debian/Ubuntu Linux based distributions (graphical way):
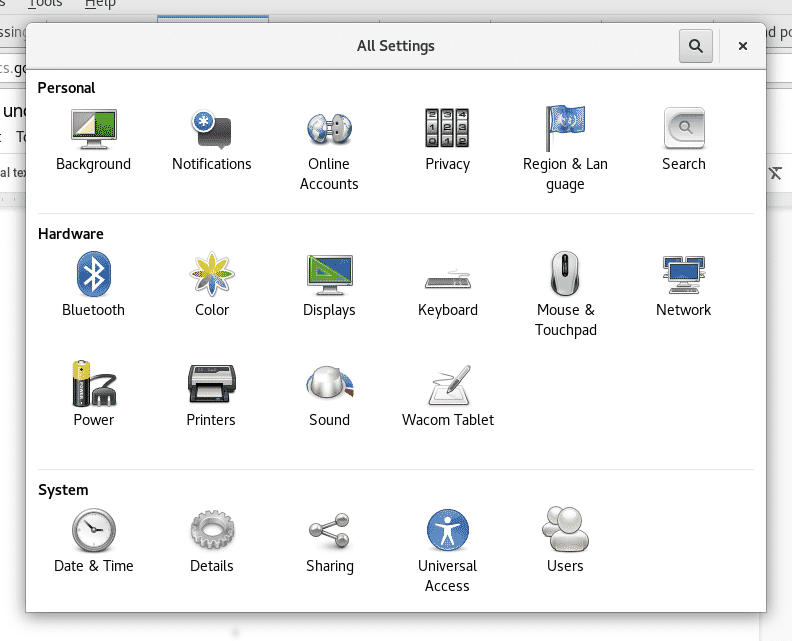
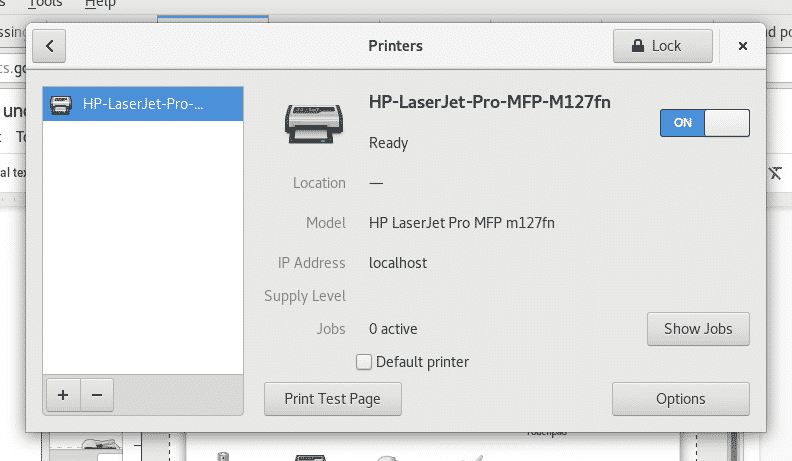
On Debian/Ubuntu Linux based distribution click on Settings>Printers
On the emerging window click on Add Printer (probably you’ll need to click the Unlock button and complete your root credentials before).
Note: On some Debian/Ubuntu versions the icon may be called “Network Printers”
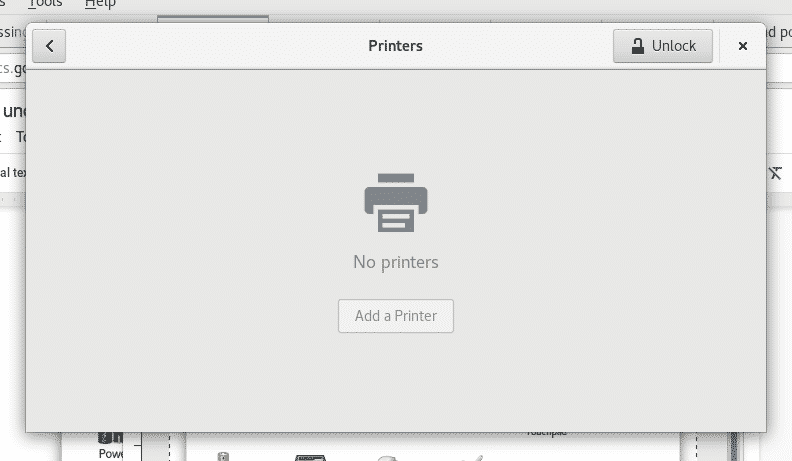
Your device will scan for available printers and will list them
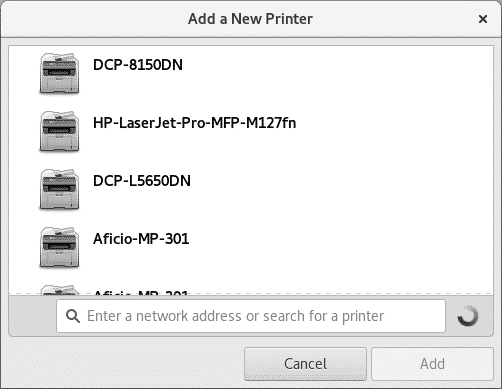
Select your printing device and click on “Add”, your printer will be listed and ready to print
Installing a printer on Debian/Ubuntu Linux based distributions (cups):
Run as root or using sudo
And press Y when asked.

Start the cups service by running “service cups start” or “/etc/init.d/cups start”
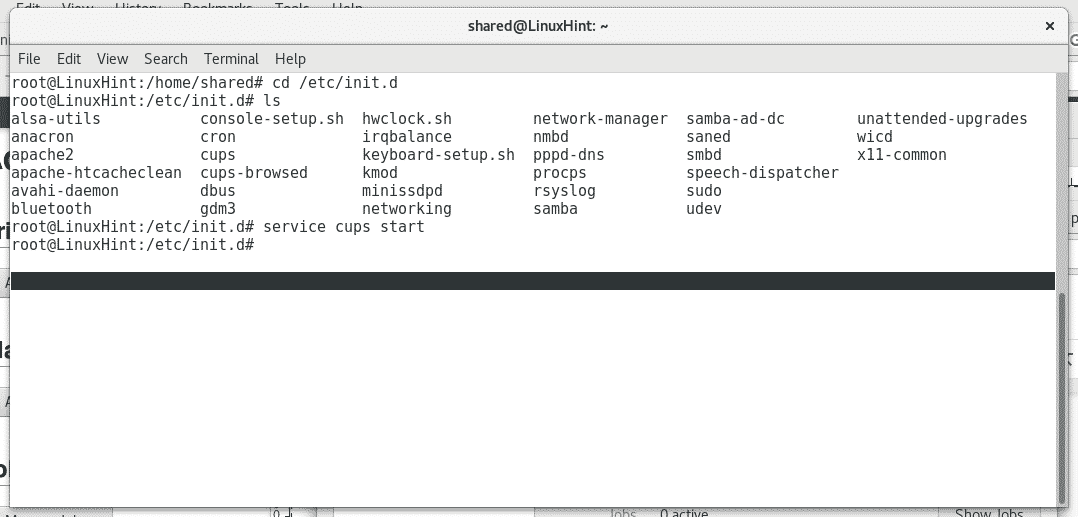
Cups has an intuitive and user friendly web interface to manage printers, open in your browser http://localhost:631/admin
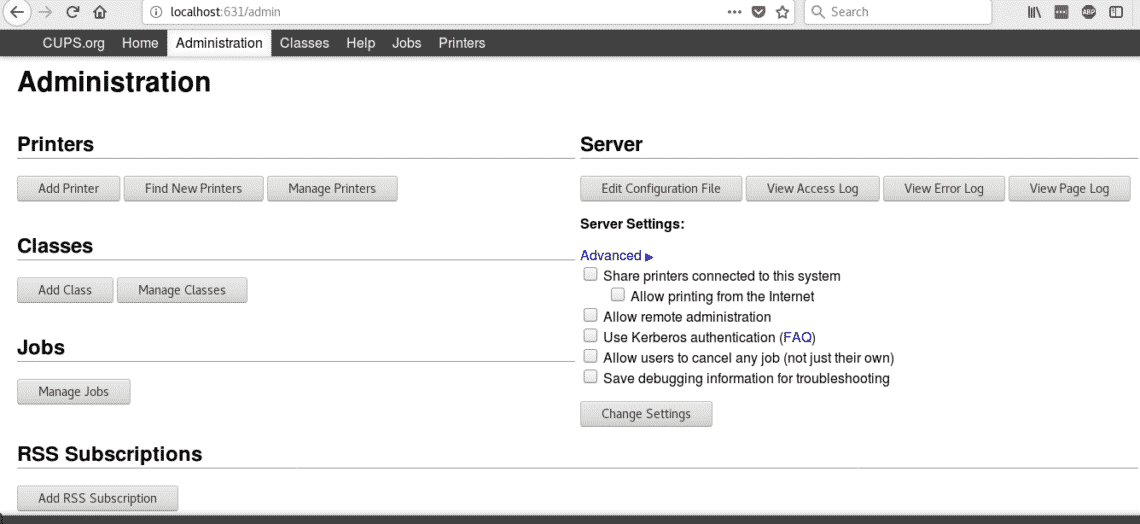
Click on “Add Printer” , it will ask for your root credentials, fill it and cups will list the available printers

Select your devices and press “Continue”, as you see cups allows to install both local and network printers. Next fill the requested information (descriptive information) and press Continue.

Next, select your printer type and press “Continue”
Select your printer model and press on Add Printer.
Now your printer is added, and you can determine the default settings for printing.
Now if you open your Open office and click on File>Print you’ll see the printers you just installed.
I hope this tutorial helped you to deal with printers under Linux, keep following LinuxHInt for more tips and resources on Linux.
About the author
David Adams
David Adams is a System Admin and writer that is focused on open source technologies, security software, and computer systems.
Add a network printer in GNU / Linux
In this little tutorial, we are going to explain step by step to add a new network printer to our GNU / Linux distribution. The configuration of these types of printers may seem somewhat complicated for some, but as you will see, it is not that complicated in most cases, especially if they are printers of popular brands and models, with official drivers for Linux, etc.
Well, if you are thinking of adding a new printer that you have in your home or in your office and that it is shared as one more network resource, you will only have to follow the following steps to leave it fully functional and configured to start using it. For the description, we are going to use two different methods based on an Ubuntu distribution, although in others it may be a similar procedure .
Method 1 (Ubuntu Configuration Tool):
If you use your own configuration tool of printers from the Ubuntu control panel, you just have to follow the steps:
- Launch the printer tool from the Ubuntu configuration panel.
- Click the «Add» button.
- Click on «Network printers» or network printers in the device panel.
- Then «Find Network Printer» or search for network printer.
- If the printer is already connected and connected to your network, type the URL of your network printer in the «Host» text box and click next. Usually the URL is the IP of your printer on your network. For example, if the printer’s IP is 192.168.1.11, then the URL will be http://192.168.1.11
- Then select the manufacturer of your printer from those that you have available and click next.
- Next step of the wizard will be to add the model of your printer and we continue .
- Now we are going to introduce the name that we want to give to the network printer, location and description when asked.
- We continue and when applying the data, everything should be OK. You can print a test page as instructed in the wizard by clicking the button for it. If the process went well, the test page should be printing .
But this procedure will not be the same in all distros .
Method 2 (CUPS):
If you are looking for something more generic for other distros, we are going to give you the steps of the configuration procedure using CUPS:
- First of all, make sure your printer is connected and properly configured on the network where you will use it. You may be interested in installing packages like Samba to share resources on heterogeneous networks if you have Windows computers as well. If not, go to the next step .
- Now open the browser you use frequently, it doesn’t matter which one.
- In the address bar, type: «localhost: 631» without quotes and press ENTER to go to that address, which will be your own IP through port 631.
- Now you will see a CUPS configuration web interface and click on the Administration tab.
- Then go to Add Printer to add the new printer.
- Now you must enter your administrator username and password and press ENTER.
- Select if you want the printer in the Discovered Network Printers section or select Internet Printing Protocol and click to continue.
- Now it will be time to enter the address of the network printer in the text box that is shown for it. The URL as I explained before will be the IP of the printer type «http://192.168.1.11» and press Connection and Continue.
- Now put the proper printer name, description and location in the appropriate boxes. Finally «Add Printer» and «Continue».
- It is time to choose the manufacturer of the printer in Makes and Continue.
- Then the model of our printer to select the drivers from the list and «Add Printer».
After that, you are done . Try printing a test page.
The content of the article adheres to our principles of editorial ethics. To report an error click here.
Full path to article: Linux Addicts » GNU / Linux » System Administration » Add a network printer in GNU / Linux