How to Set Up NFS Server and Client on CentOS 8
Network File System (NFS) also known as client/server file system is a popular, cross-platform and distributed file system protocol used to export local file systems over the network so that clients can share directories and files with others over a network and interact with them as though they are mounted locally.
In CentOS/RHEL 8, the supported NFS version are NFSv3 and NFSv4 and the default NFS version is 4.2 which features support for Access Control Lists (ACLs), server-side copy, sparse files, space reservation, labeled NFS, layout enhancements, and much more.
In this article, you will learn how to install and configure the NFS server and NFS client on CentOS/RHEL 8 Linux distributions.
Prerequisites:
Our Testing Environment:
NFS Server IP: 10.20.20.8 NFS Client IP: 10.20.20.9
Setting Up NFS Server on CentOS 8
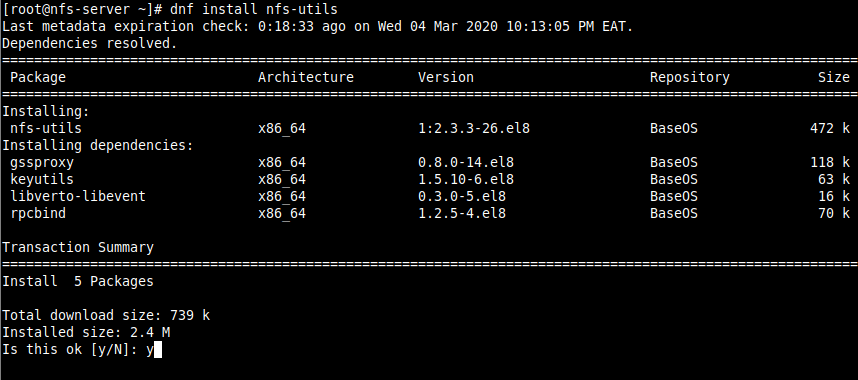
1. First, start by installing the required packages on the NFS server. The packages are nfs-utils which provides a daemon for the kernel NFS server and related tools such as the contains the showmount program.
Run the following command to install the package on the NFS server (use sudo if you are administering the system as a non-root user).
2. Once the installation is complete, start the nfs-server service, enable it to automatically start at system boot, and then verify its status using the systemctl commands.
# systemctl start nfs-server.service # systemctl enable nfs-server.service # systemctl status nfs-server.service
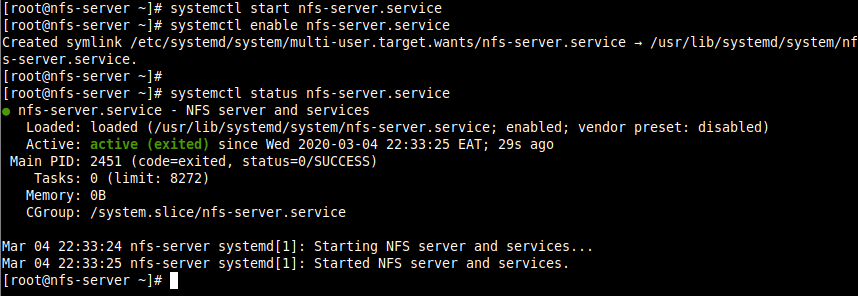
Note that the other services that are required for running an NFS server or mounting NFS shares such as nfsd, nfs-idmapd, rpcbind, rpc.mountd, lockd, rpc.statd, rpc.rquotad, and rpc.idmapd will be automatically started.
The configuration files for the NFS server are:
- /etc/nfs.conf – main configuration file for the NFS daemons and tools.
- /etc/nfsmount.conf – an NFS mount configuration file.
3. Next, create the file systems to export or share on the NFS server. For this guide, we will create four file systems, three of which are used by staff from three departments: human resource, finance and marketing to share files and one is for root user backups.
# mkdir -p /mnt/nfs_shares/ # mkdir -p /mnt/backups # ls -l /mnt/nfs_shares/
4. Then export the above file systems in the NFS server /etc/exports configuration file to determine local physical file systems that are accessible to NFS clients.
/mnt/nfs_shares/Human_Resource 10.20.20.0/24(rw,sync) /mnt/nfs_shares/Finance 10.20.10.0/24(rw,sync) /mnt/nfs_shares/Marketing 10.20.30.0/24(rw,sync) /mnt/backups 10.20.20.9/24(rw,sync,no_all_squash,root_squash)
Here are some of the exports options (read man exports for more information and export options):
- rw – allows both read and write access on the file system.
- sync – tells the NFS server to write operations (writing information to the disk) when requested (applies by default).
- all_squash – maps all UIDs and GIDs from client requests to the anonymous user.
- no_all_squash – used to map all UIDs and GIDs from client requests to identical UIDs and GIDs on the NFS server.
- root_squash – maps requests from root user or UID/GID 0 from the client to the anonymous UID/GID.
5. To export the above file system, run the exportfs command with the -a flag means export or unexport all directories, -r means reexport all directories, synchronizing /var/lib/nfs/etab with /etc/exports and files under /etc/exports.d, and -v enables verbose output.

6. To display the current export list, run the following command. Note that the exports table also applies some of the default exports options that are not explicitly defined as shown in the following screenshot.

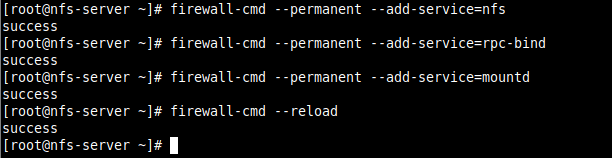
7. Next, if you have the firewalld service running, you need to allow traffic to the necessary NFS services (mountd, nfs, rpc-bind) via the firewall, then reload the firewall rules to apply the changes, as follows.
# firewall-cmd --permanent --add-service=nfs # firewall-cmd --permanent --add-service=rpc-bind # firewall-cmd --permanent --add-service=mountd # firewall-cmd --reload
Setting Up NFS Client on Client Systems
8. Now on the client node(s), install the necessary packages to access NFS shares on the client systems. Run the appropriate command for your distribution:
# dnf install nfs-utils nfs4-acl-tools [On CentOS/RHEL] $ sudo apt install nfs-common nfs4-acl-tools [On Debian/Ubuntu]
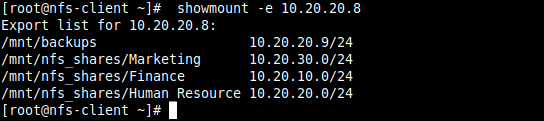
9. Then run the showmount command to show mount information for the NFS server. The command should output the exported file system on the client as shown in the screenshot.
9. Next, create a local file system/directory for mounting the remote NFS file system and mount it as an ntf file system.
# mkdir -p /mnt/backups # mount -t nfs 10.20.20.8:/mnt/backups /mnt/backups
10. Then confirm that the remote file system has been mounted by running the mount command and filter nfs mounts.

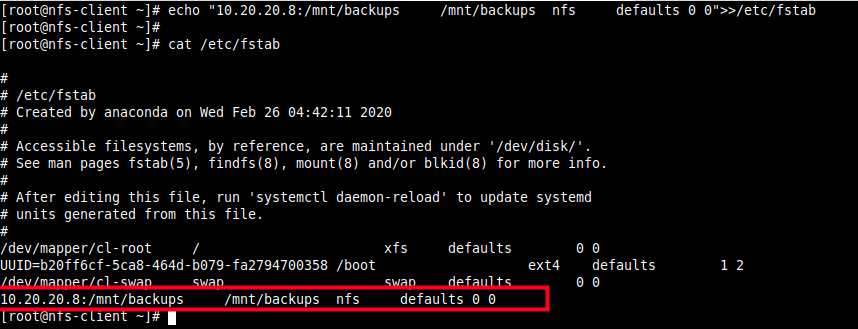
11. To enable the mount to persistent even after a system reboot, run the following command to enter the appropriate entry in the /etc/fstab.
# echo "10.20.20.8:/mnt/backups /mnt/backups nfs defaults 0 0">>/etc/fstab # cat /etc/fstab
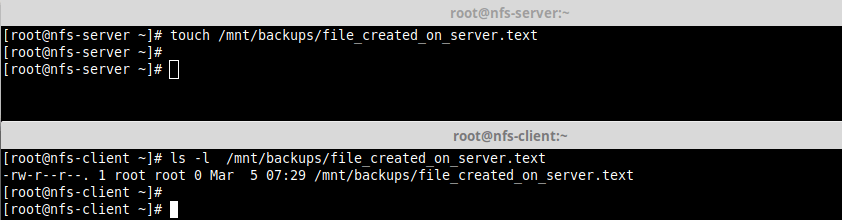
12. Lastly, test if NFS setup is working fine by creating a file on the server and check if the file can be seen in the client.
# touch /mnt/backups/file_created_on_server.text [On NFS Server] # ls -l /mnt/backups/file_created_on_server.text [On NFS client]
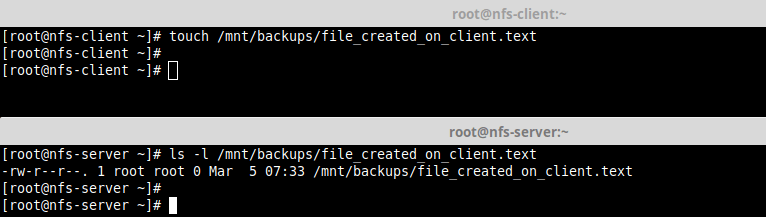
# touch /mnt/backups/file_created_on_client.text [On NFS Client] # ls -l /mnt/backups/file_created_on_client.text [On NFS Server]
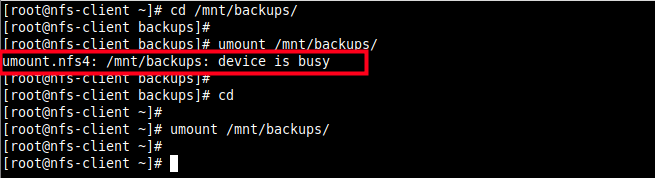
13. To unmount the remote file system on the client-side.
Note that you can not unmount the remote file system if you are operating within it as shown in the following screenshot.
That’s it! In this guide, we showed how to install and configure an NFS server and client in CentOS/RHEL 8. If you have any thoughts to share or questions, use the comment form below to get back to us.
Установка NFS сервера на CentOS 7
В рамках данной заметки рассмотрим процесс установки NFS сервера в локальной сети на базе Linux CentOS 7. Данная файловая шара мне потребовалась для работы с XenServer 6.5 (установка ОС на виртуальные машины с ISO NFS library).
Выполняем к командной строке (нужны привилегии супер пользователя) следующие операции. Сначала устанавливает требуемые пакеты:
sudo yum install nfs-utils nfs-utils-lib
Затем включаем установленную службу:
sudo systemctl enable rpcbind
sudo systemctl enable nfs-server
sudo systemctl enable nfs-lock
sudo systemctl enable nfs-idmap
sudo systemctl start rpcbind
sudo systemctl start nfs-server
sudo systemctl start nfs-lock
sudo systemctl start nfs-idmap
После этого переходим к настройке каталога, которые будет использоваться для раздачи контента нашим NFS сервером. Рекомендуется делать NFS шару в «/var/nfs_name», чтобы не иметь проблем с записью файлов и назначением прав доступа. В моей ситуации по определенным причинам используется каталог «/home/nfs». Итак, создаем папку и назначаем права доступа:
sudo mkdir -p /home/nfs
sudo chmod -R 777 /home/nfs
После этого необходимо добавить в файл «/etc/exports’ информацию о предоставляемой шаре через NFS:
/home/nfs – расшариваемая директория
192.168.10.0/24 – IP адрес клиента (или, как в моем случае, возможность подключения для всей подсети)
sync – синхронизация указанной директории
no_root_squash – включение root привилегий
no_all_squash — включение пользовательской авторизации
Выполняем в командной строке exportfs -a ,чтобы подключить этот каталог в список экспортируемых. В завершение настройки NFS сервера перезапускаем его:
sudo systemctl restart nfs-server
Теперь добавляем (открываем) порты NFS сервера в брандмауэре (firewalld) для корректной работы в сети:
firewall-cmd —permanent —add-port=111/tcp
firewall-cmd —permanent —add-port=54302/tcp
firewall-cmd —permanent —add-port=20048/tcp
firewall-cmd —permanent —add-port=2049/tcp
firewall-cmd —permanent —add-port=46666/tcp
firewall-cmd —permanent —add-port=42955/tcp
firewall-cmd —permanent —add-port=875/tcp
firewall-cmd —permanent —zone=public —add-service=nfs
firewall-cmd —permanent —zone=public —add-service=mountd
firewall-cmd —permanent —zone=public —add-service=rpc-bind
firewall-cmd —reload
Готово! Установка и настройка NFS сервера на CentOS 7 завершена.
Установка и настройка клиента NFS
В завершении данной заметки рассмотрим процесс настройки клиента для подключения (работы) с развернутым ранее NFS сервером. В моем случае, чаще всего клиентом будет какой-либо хост виртуализации (например, VMware ESXi или Xen Server) и его установка и настройка не требуется. Только необходимо запустить мастер подключения и указать параметры подключения. Для других сервисов или серверов выполняем следующие команды:
sudo yum install nfs-utils nfs-utils-lib
Включаем сервис и активируем автозагрузку:
systemctl enable rpcbind
systemctl enable nfs-server
systemctl enable nfs-lock
systemctl enable nfs-idmap
systemctl start rpcbind
systemctl start nfs-server
systemctl start nfs-lock
systemctl start nfs-idmap
Создаем каталог, куда будем монтировать шару:
sudo mkdir /media/nfs_share
mount -t nfs 192.168.10.101:/home/nfs/ /media/nfs_share/
Добавление автомонтирования при включение системы:
# # /etc/fstab # Created by anaconda on Tue Aug 19 12:15:24 2014 # # Accessible filesystems, by reference, are maintained under '/dev/disk' # See man pages fstab(5), findfs(8), mount(8) and/or blkid(8) for more info # /dev/mapper/centos-root / xfs defaults 1 1 UUID=2ba8d78a-c420-4792-b381-5405d755e544 /boot xfs defaults 1 2 /dev/mapper/centos-swap swap swap defaults 0 0 192.168.1.101:/home/nfs/ /media/nfs_share/ nfs rw,sync,hard,intr 0 0
Проверяем, что все примонтировалось правильно:
Занимаюсь IT с 2007 года. Всё началось с увлечения — разгона компьютерного оборудования. Много воды и азота утекло с тех пор. Сейчас уже более 3х лет со своей командой оказываю комплексную поддержку и продвижение бизнеса: SEO, Яндекс.Директ, рассылки и удалённое обслуживание серверов. Буду рад помочь, обращайтесь!
firewall-cmd —permanent —add-port=111/tcp firewall-cmd —permanent —add-port=54302/tcp firewall-cmd —permanent —add-port=20048/tcp firewall-cmd —permanent —add-port=2049/tcp firewall-cmd —permanent —add-port=46666/tcp firewall-cmd —permanent —add-port=42955/tcp firewall-cmd —permanent —add-port=875/tcp для чего нужно открывать эти порты если и без них работает нормально?
В статье напроч отсутствует описание контекста безопасности и случаев использования сервиса в публичной сети интернет, в корпоративной сети или указания версии протокола. Так что набор команд для обертки firewalld имеет косметический смысл в данном случае.Более важным является момент привязки сервисов к IP адресу или работе через туннели.
Рубрики
- 1C
- Active Directory
- Careers in IT
- CentOS
- Cloud Computing
- CTO & CIO Service
- Data Center Management
- Debian
- Enterprise Messaging
- Events
- Fedora
- FreeBSD
- Hardware
- IT Certifications
- Networking
- Overclocking
- PowerShell
- Security Solution
- SEO
- Server & Desktop Virtualization
- Software
- Storage & Backup Solutions
- Support
- Tips and Tricks
- VMware vSphere ESXi
- VoIP
- VPN Networking
- WEB Development
- Web/Mail Hosting Services
- Windows 10
- Windows 8 / 8.1
- Windows Server
- О проекте