- Create an NFS server on Oracle Linux
- Objectives
- What Do You Need?
- Install the NFS Utilities Package on the Server Instance
- Create an NFS Share
- Start the NFS Server
- Add Another Share
- Install the NFS Utilities Package on the Client Instance
- Mount the NFS Share
- Root Squashing
- Mount Share Using fstab
- More Learning Resources
- Настройка сервера NFS на Linux Ubuntu
- Настройка сервера
- Настройка клиента
Create an NFS server on Oracle Linux
The following tutorial provides step-by-step procedures to install and configure an NFS Server and mount the NFS shares. This tutorial is targeted at users of Oracle Linux 8 or later.
Objectives
What Do You Need?
Install the NFS Utilities Package on the Server Instance
Note: When using the free lab environment, see Oracle Linux Lab Basics for connection and other usage instructions.
- Open a terminal and connect to your server instance.
- Install the NFS utilities package.
sudo dnf install -y nfs-utils 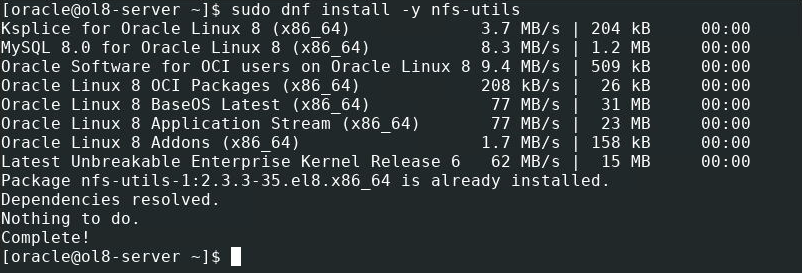
This command will install the daemon and tools associated with the kernel NFS server.
Create an NFS Share
sudo fallocate -l 10MB /nfs-share/file1 sudo fallocate -l 10MB /nfs-share/file2 echo "This is a shared text file." | sudo tee /nfs-share/shared-text.txt > /dev/null 
Change permissions on the files.
sudo chmod -R 777 /nfs-share echo "/nfs-share (rw)" | sudo tee -a /etc/exports > /dev/null Start the NFS Server
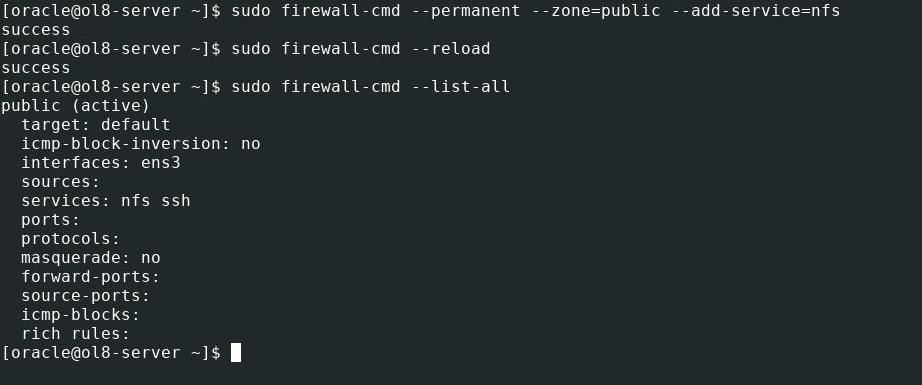
sudo firewall-cmd --permanent --zone=public --add-service=nfs sudo firewall-cmd --reload sudo firewall-cmd --list-all - —permanent ensures the setting persists a system reboot.
- —list-all will display the firewall settings and show that NFS traffic is allowed.
sudo systemctl enable --now nfs-server showmount -e The showmount command displays the shares available using the NFS server. 

Add Another Share
sudo exportfs -i -o rw *:/nfs-share2 showmount -e - -i causes the new share to ignore any values set in /etc/exports
- -o passes the share options
- * makes the share available to all clients

sudo systemctl restart nfs-server showmount -e 
Add the new share to /etc/exports to persist system restarts.
echo "/nfs-share2 *(rw)" | sudo tee -a /etc/exports > /dev/null sudo exportfs -r showmount -e - -r in exportfs refreshes the export list with any changes made to /etc/exports .

Install the NFS Utilities Package on the Client Instance
- Open a terminal and connect to your client instance.
- Install the NFS utilities package.
sudo dnf install -y nfs-utils 
This command will install the daemon and tools associated with the kernel NFS server.
Mount the NFS Share
- Create a directory for the mount point. shell (client) sudo mkdir /nfs-mount
- Mount the share and get a directory listing.
sudo mount :/nfs-share /nfs-mount ls -lh /nfs-mount Where 

Root Squashing
Enabled by default in Oracle Linux 8, “root squashing” is a share-level configuration option that prevents a remote root user from having root access to the network file system. It is recommended to leave “root squashing” enabled for proper security, but the following steps will show available access when disabled.
- Try changing permissions on a file in the NFS share from the client instance.
sudo chmod 766 /nfs-mount/shared-text.txt 
The output shows permission denied even though the command uses sudo .
Disable root_squash on the share using the server instance.
echo "/nfs-share (rw,no_root_squash)" | sudo tee /etc/exports > /dev/null sudo systemctl restart nfs-server sudo chmod 766 /nfs-mount/shared-text.txt ls -lh /nfs-mount 
The output shows the execute permissions removed from the group and other columns.
Mount Share Using fstab
To have the mounted share available after a reboot of the client instance, add an entry to the fstab file.
sudo umount /nfs-mount ls -lh /nfs-mount 
The ls -lh shows the directory is empty and therefore not mounted.
Update the fstab file.
echo ":/nfs-share /nfs-mount nfs rw 0 0" | sudo tee -a /etc/fstab > /dev/null tail -n5 /etc/fstab 
Replace
Mount and verify the share is accessible.
sudo mount -a ls -lh /nfs-mount 
More Learning Resources
Explore other labs on docs.oracle.com/learn or access more free learning content on the Oracle Learning YouTube channel. Additionally, visit education.oracle.com/learning-explorer to become an Oracle Learning Explorer.
For product documentation, visit Oracle Help Center.
Create an NFS server on Oracle Linux
Copyright © 2021, Oracle and/or its affiliates.
Настройка сервера NFS на Linux Ubuntu

Опубликовано: 28.08.2022
Используемые термины: NFS, Ubuntu. В инструкции мы кратко пробежим по процессу установки и настройки сервера NFS на Ubuntu Server. Также мы рассмотрим пример подключения клиентом к шаре сервера.
Настройка сервера
- rw / ro — разрешить чтение и запись или только чтение.
- sync / async — отвечать на запросы только когда данные будут сохранены на диск или не блокировать подключения пока данные записываются на диск.
- secure / insecure — использовать для соединения только порты ниже 1024 или любые порты.
- root_squash / no_root_squash — подменять запросы от root на анонимные или не делать этого.
- subtree_check / no_subtree_check — проверять попытки пользователя выйти за пределы экспортированной папки или отключить данную проверку.
- nohide — не скрывать поддиректории, если открыт доступ к нескольким каталогам.
- crossmnt — эта опция аналогична nohide, но позволяет клиентам перемещаться с файловой системы, помеченной crossmnt, на смонтированные на ней экспортированные файловые системы. Таким образом, когда дочерняя файловая система «B» монтируется в родительской «A», установка crossmnt для «A» имеет тот же эффект, что и установка «nohide» для B.
- all_squash — делать все запросы анонимными.
- anonuid — указывает uid анонимного пользователя.
- anongid — указывает gid анонимного пользователя.
Создадим каталог на сервере для нашей шары:
Выполним экспорт данных (перечитаем наш конфигурационный файл /etc/exports, чтобы сервер начал отдавать настроенные шары):
Сервер готов к работе. Состояние службы можно посмотреть командой:
systemctl status nfs-server
Если в нашей системе на сервере используется брандмауэр, нам нужно добавить порты 111 (udp, tcp) и 2049 (udp,tcp):
iptables -I INPUT -p udp —dport 111 -j ACCEPT
iptables -I INPUT -p tcp —dport 111 -j ACCEPT
iptables -I INPUT -p tcp —dport 2049 -j ACCEPT
iptables -I INPUT -p udp —dport 2049 -j ACCEPT
Для сохранения правил используем утилиту netfilter-persistent:
apt install netfilter-persistent
Настройка клиента
На стороне клиента может понадобиться поставить или обновить клиента NFS. В зависимости от используемого дистририбутива Linux, действия будут немного отличаться:
а) для систем на базе Deb (Ubuntu, Debian, Mint):
б) для систем на базе RPM (Rocky Linux, CentOS):
Клиент будет установлен или обновлен.
Теперь можно попробовать примонтировать нашу шару:
mount -t nfs 192.168.0.15:/data/nfs /mnt
* в нашем примере мы подключимся к серверу с IP-адресом 192.168.0.15; каталог, который мы монтируем /data/nfs (тот, который настроили в файле exports; монтирование будет выполнено в каталог /mnt.
Для того, чтобы монтирование осталось после перезагрузки, открываем файл fstab:
192.168.0.15:/data/nfs /mnt nfs auto 0 0
* где 192.168.0.15 — адрес сервера NFS; /mnt — каталог, куда будет примонтирована шара.